
photoshop利用通道将偏暗多斑的人物去斑及美白
米葶
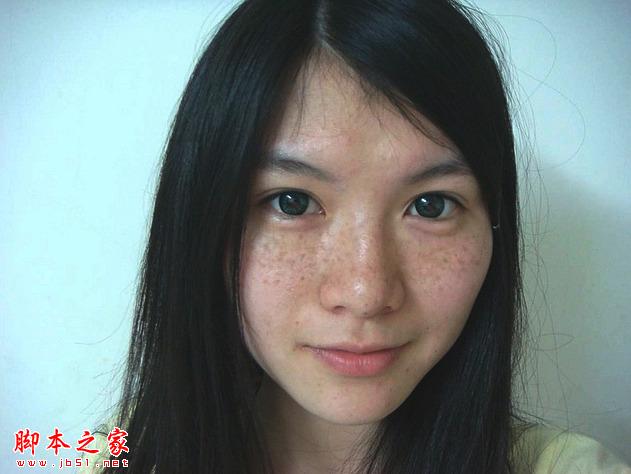
原图
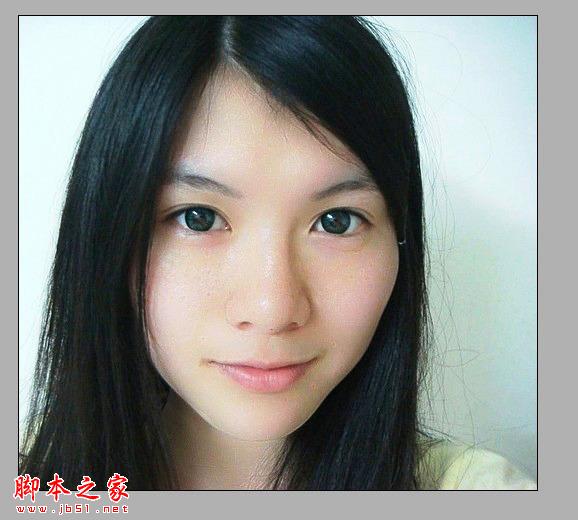
最终效果
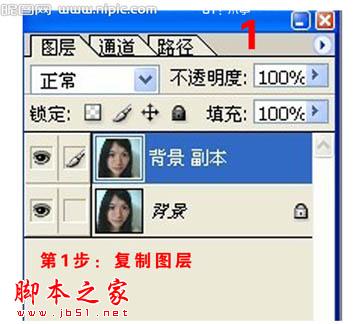
1、打开素材图片,把背景图层复制一层。
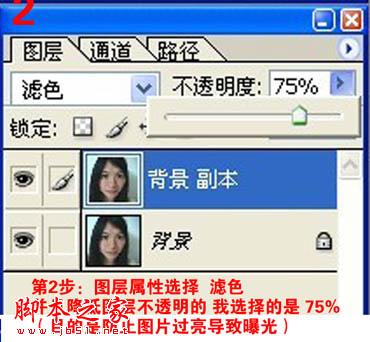
2、图层混合模式改为“滤色”,不透明度改为:75%,如下图。
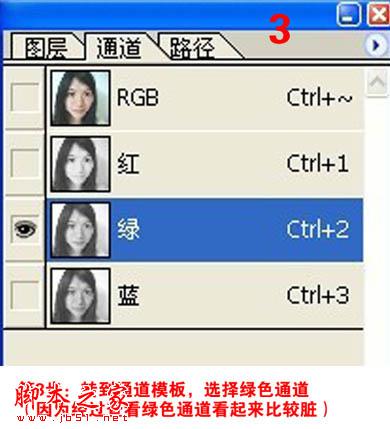
3、转到通道面板,选择绿色通道。
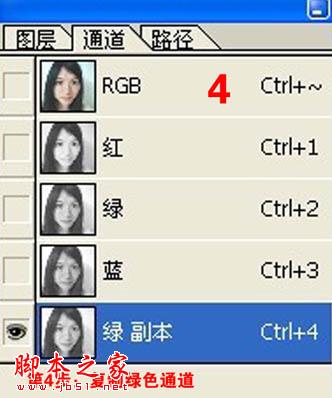
4、复制绿色通道。
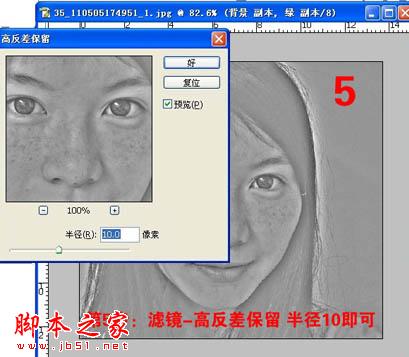
5、对绿副本通道执行:滤镜 > 其它 > 高反差保留,半径为10。
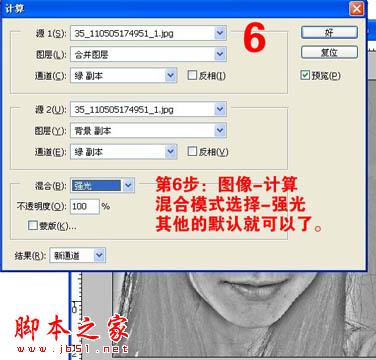
6、执行:图像 > 计算,混合模式选择“强光”,其它的参数默认。
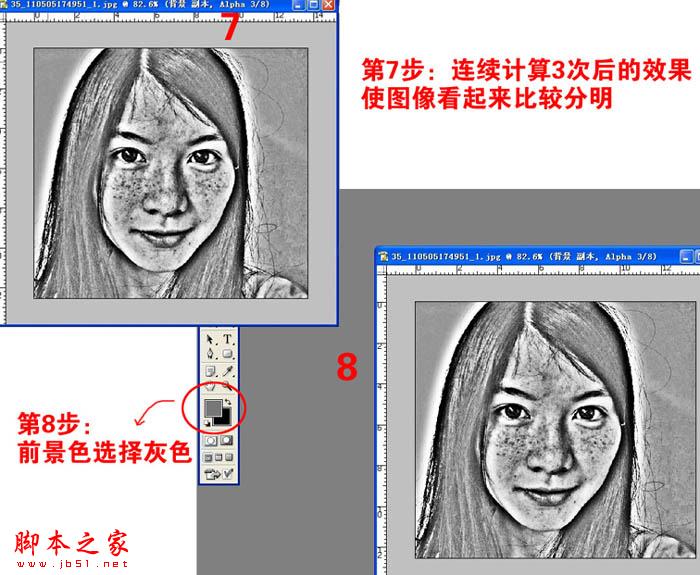
7、连续计算三次后的效果如下图,图像看起来比较分明。
8、把前景颜色设置为灰色。
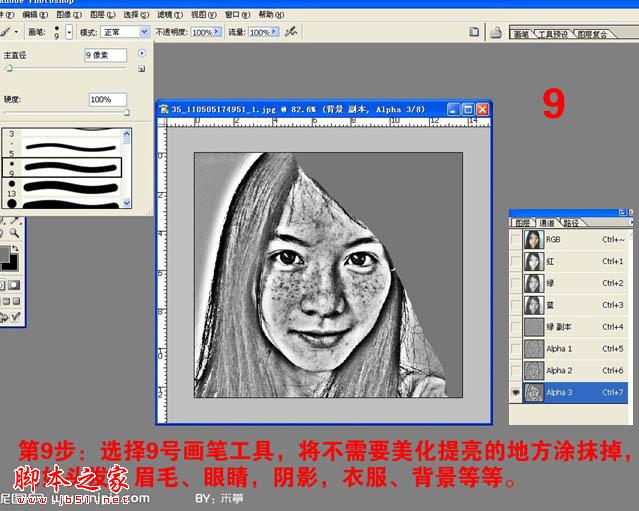
9、选择9号画笔,将不需要的部分涂掉,如头发、眉毛、眼睛、背景等。
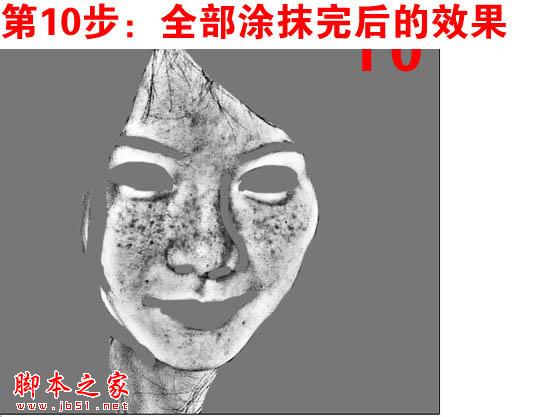
10、全部涂抹完后的效果如下图。
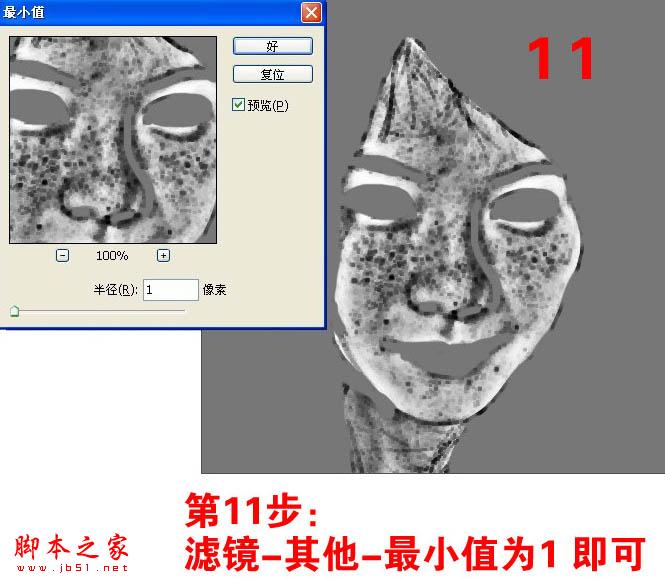
11、执行:滤镜 > 其它 > 最小值,数值为1。
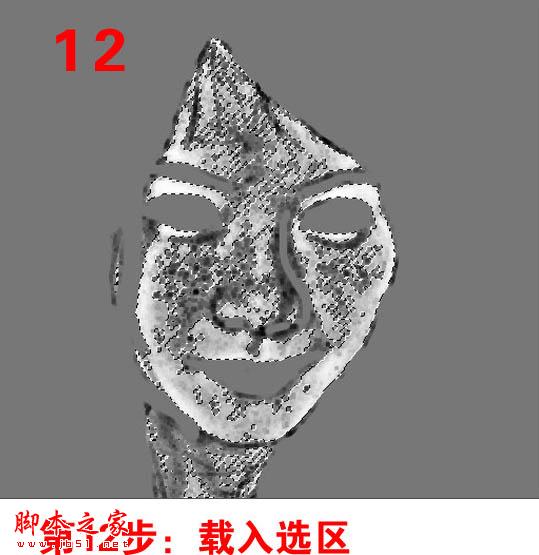
12、载入选区。
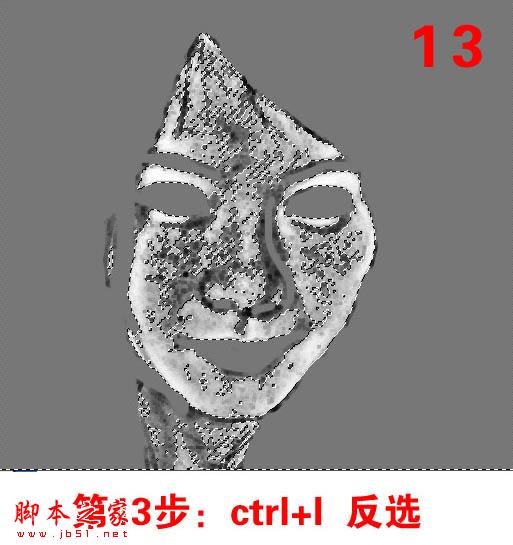
13、按Ctrl + Shift + I 反选。
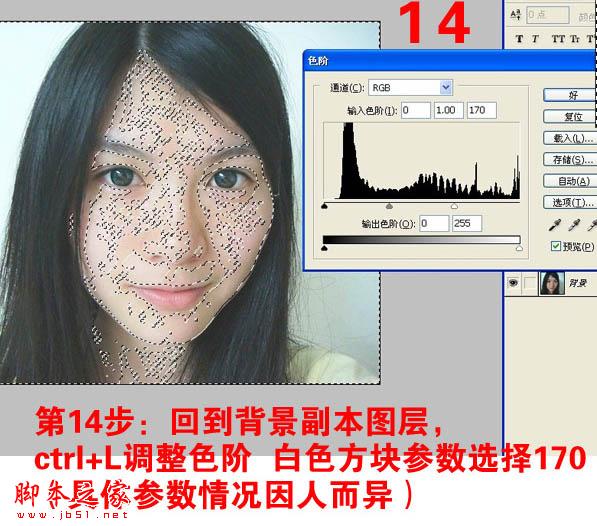
14、回到图层面板,按Ctrl + L 调整色阶,参数设置如下图。
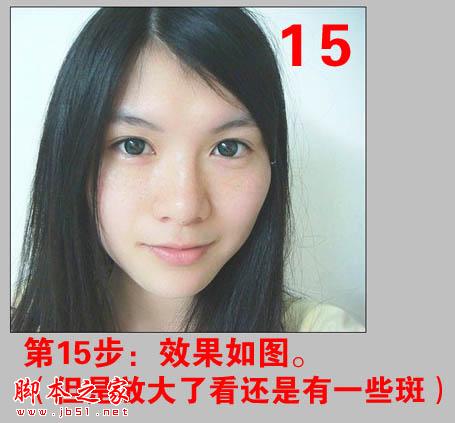
15、调亮后的效果如下图。
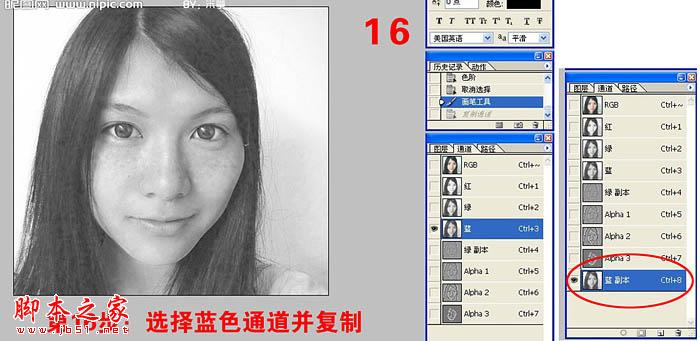
16、选择蓝色通道,复制一份,得到蓝副本通道。
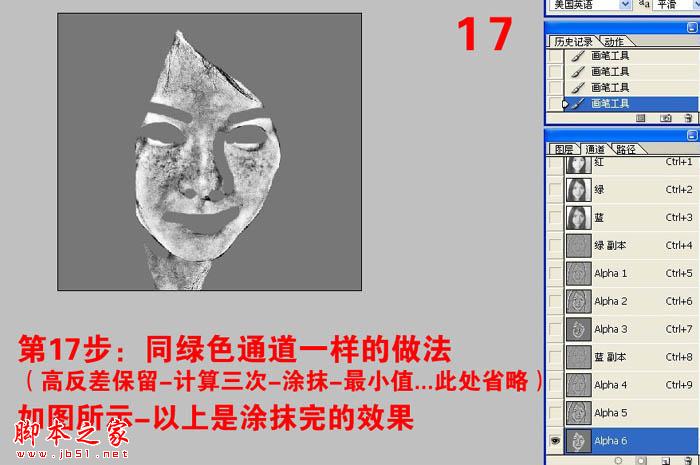
17、同绿色通道一样的做法:高反差保留 > 计算三次 > 涂抹 > 最小值。
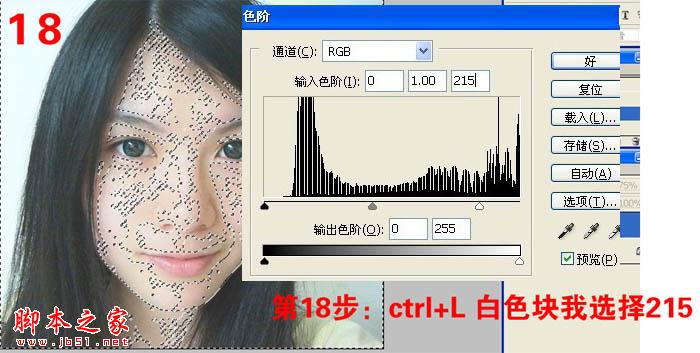
18、载入选区后按Ctrl + L 调白参数设置如下图。
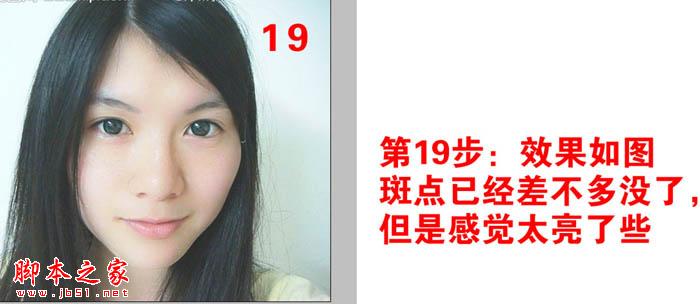
19、调亮后的效果如下图。
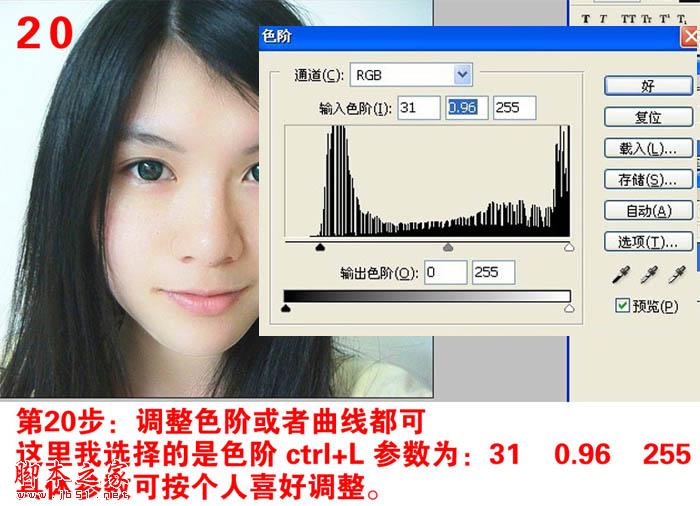
20、调整色阶或曲线,稍微调暗一点。
最终效果:

最终效果

1、打开素材图片,把背景图层复制一层。

2、图层混合模式改为“滤色”,不透明度改为:75%,如下图。

3、转到通道面板,选择绿色通道。

4、复制绿色通道。

5、对绿副本通道执行:滤镜 > 其它 > 高反差保留,半径为10。

6、执行:图像 > 计算,混合模式选择“强光”,其它的参数默认。

7、连续计算三次后的效果如下图,图像看起来比较分明。
8、把前景颜色设置为灰色。

9、选择9号画笔,将不需要的部分涂掉,如头发、眉毛、眼睛、背景等。

10、全部涂抹完后的效果如下图。

11、执行:滤镜 > 其它 > 最小值,数值为1。

12、载入选区。

13、按Ctrl + Shift + I 反选。

14、回到图层面板,按Ctrl + L 调整色阶,参数设置如下图。

15、调亮后的效果如下图。

16、选择蓝色通道,复制一份,得到蓝副本通道。

17、同绿色通道一样的做法:高反差保留 > 计算三次 > 涂抹 > 最小值。

18、载入选区后按Ctrl + L 调白参数设置如下图。

19、调亮后的效果如下图。

20、调整色阶或曲线,稍微调暗一点。

最终效果: