CSS实现鼠标悬浮动画特效
脚本之家
最近发现css动画真是只有你想不到,没有她做不到,有些效果调好了做出来是真的好看。
1.第一个动画:

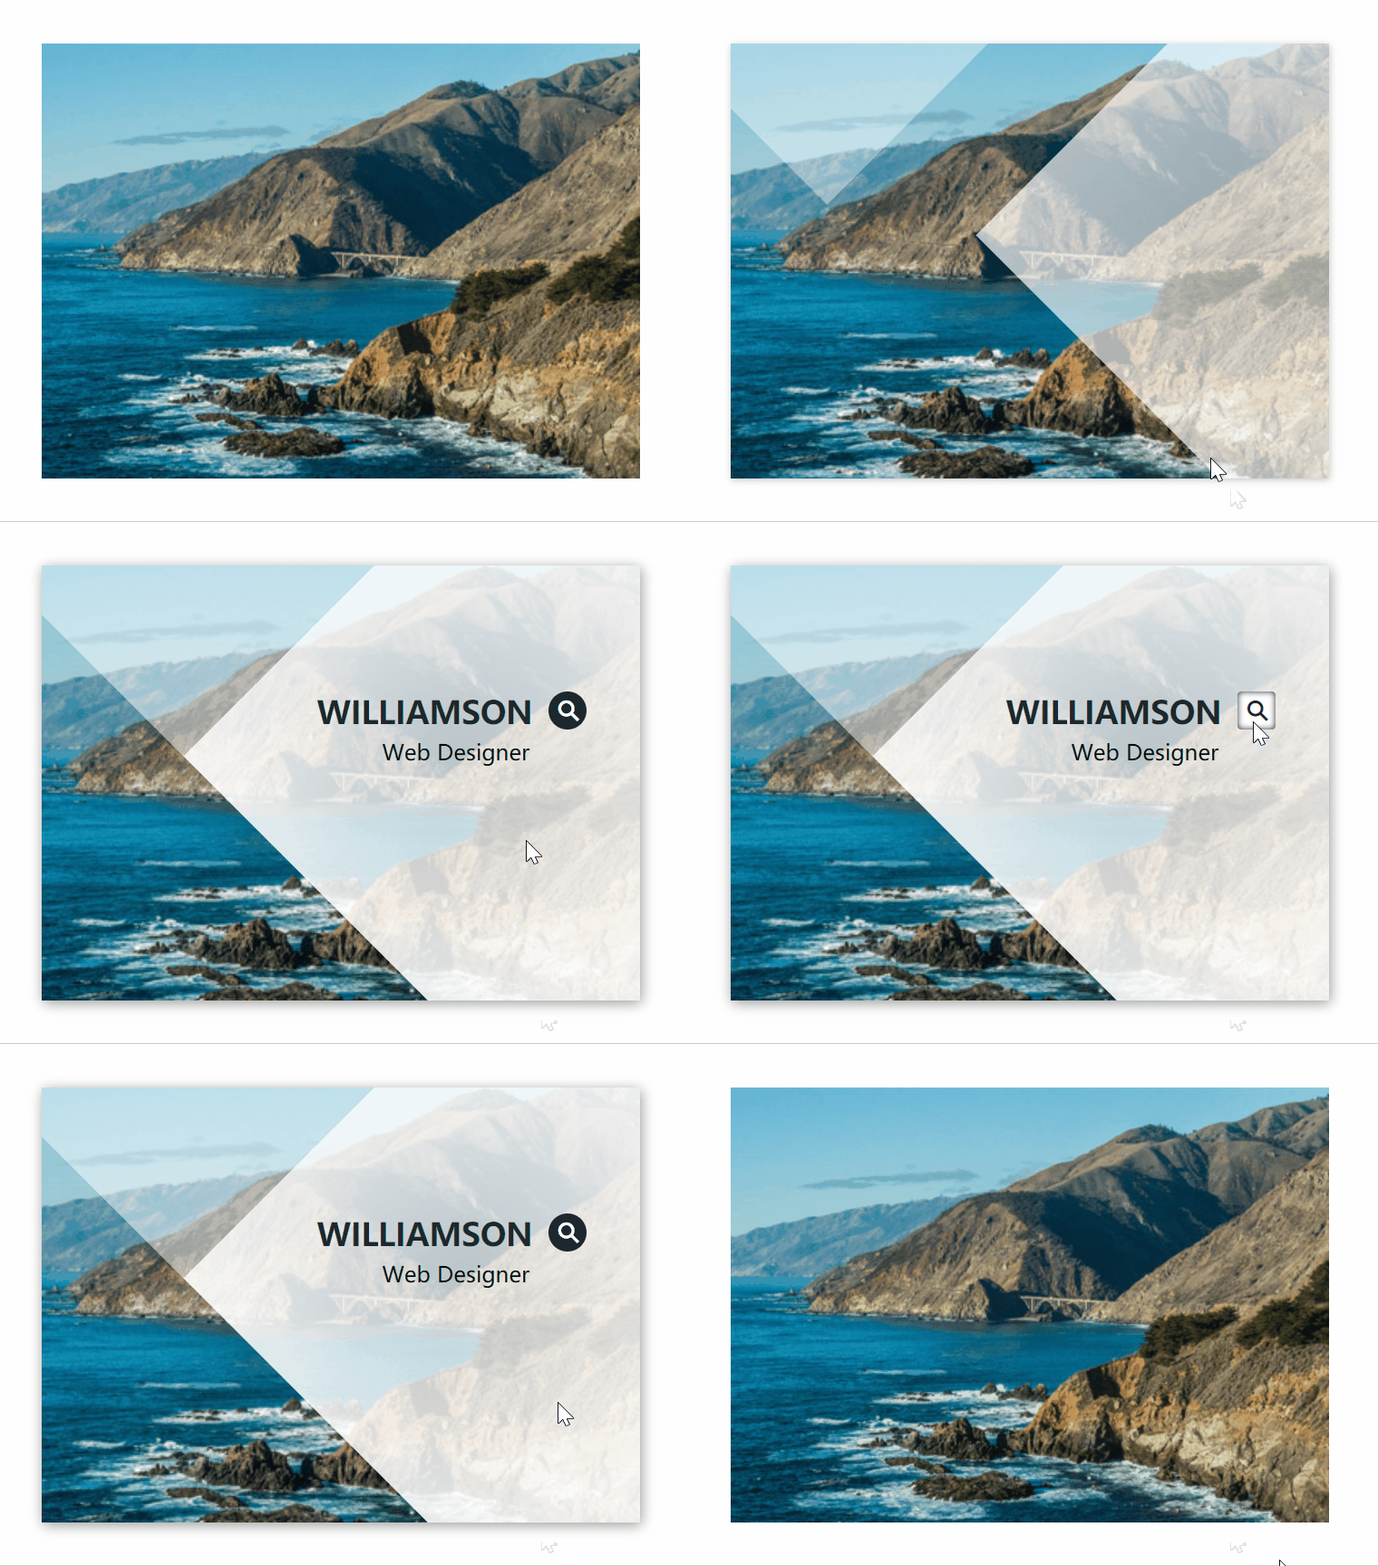
这个动画看起来还是很舒适的。 下面是这个的dom结构以及样式
<template>
    <div class="middle">
        <div class="box">
            <img src="../../assets/img/img-2.jpg">
            <div class="box-content">
                <h3 class="title">Williamson</h3>
                <span class="post">Web designer</span>
                <div class="icon">
                    <i class="iconfont iconfangdajing"></i>
                </div>
            </div>
        </div>
    </div>
</template>
<style scoped lang='scss' src="./index.scss"></style>
.box{
    height: 320px;
    width: 440px;
    overflow: hidden;
    position: relative;
    z-index:1;
    transition: all .5s;
    img{
        transition: all .5s ease;
    }
    .title{
        color: #1e272e;
        font-size: 23px;
        font-weight: 700;
        text-transform: uppercase;
        margin: 0 0 3px 0;
    }
    .post{
        font-size: 16px;
        text-transform: capitalize;
        display: block;
        float: right;
        margin-top: 8px;
        margin-right: 2px;
    }
    .box-content{
        height: 100px;
        width: auto;
        position: absolute;
        z-index: 999;
        top: 30%;
        right: -150%;
        transition: all 0.5s;
        .icon{
            display: inline-block;
            width: 28px;
            height: 28px;
            border-radius: 50%;
            background-color: #1e272e;
            position:absolute;
            top:-3px;
            right: -40px;
            transition: all .3s;
            i{
                position: absolute;
                top: 7px;
                left: 7px;
                clear: both;
                font-size: 15px;
                color: #fff;
            }
            &:hover{
                background-color: #fff;
                border-radius: 10%;
                box-shadow: 0 0 5px #1e272e inset;
                i{
                    color: #1e272e;
                }
            }
        }
    }
    &:hover{
        box-shadow: 1px 2px 10px #999;
        img{
            transform: scale(1.2)
        }
        .box-content{ right:18% }
    }
}
.box:before,.box:after{
    content:"";
    background:radial-gradient(circle at 23% 70%,rgba(255,255,255,0.8),#fff 30%);
    width: 150%;
    height: 150%;
    opacity: 0;
    transform: rotate(45deg);
    position: absolute;
    top: -10.5%;
    right: -168%;
    z-index: 1;
    transition: all 0.35s;
}
.box:before{
    top: -188%;
    left: -100%;
}
.box:hover:before{
    background-color: rgba(255,255,255,0.5);
    width: 65%;
    height: 65%;
    right: auto;
    left: -15%;
    top: -43%;
    opacity: 0.5;
}
.box:hover:after{
    top: -11.2%;
    right: -90.3%;
    opacity: 0.9;
}
这个就是类似于两个长方形在外面等着,等鼠标hover到图片上以后再进来。就像:

两个长方形合并起来,配合overflow:hidden就可以实现啦,是不是很简单
2. 第二个动画:

是不是感觉很高大上! 其实就是rotate外面边框而已啦! 当边框设置了border-radius: 50%;以后,没有边框的一边就会变成虚线哦~不要以为是canvas啦,这样也可以简单实现! 下面是代码部分~
<div class="items animated  fadeInUpBig">
	<div class="item"  @mouseenter="hoverWord(1)" @mouseleave="hoverWordLeave(1)">
		<div class="item-content">
			<img src="../../assets/img/img-2.jpg" alt="" >
			<div class="word">{{word.word1}}</div>
		</div>
	 </div>
</div>
	.items {
            display: flex;
            width: 80vw;
            margin-left: 10vw;
            .item{
                width: 210px;
                height: 210px;
                border-radius: 50%;
                margin-top: 20vh;
                margin: 0 auto;
                .out-circle{
                    width: 210px;
                    height: 210px;
                    border: 1px solid #fff;
                    border-left: 0;
                    border-radius: 50%;
                    position: relative;
                    transition: all .45s linear;
                    &:hover{
                        transform: rotate(180deg);
                    }
                }
                .out-circle:before{
                    content: "";
                    width: 6.5px;
                    height: 6.5px;
                    border-radius: 50%;
                    position: absolute;
                    top: 27px;
                    left: 27px;
                    background-color: #fff;
                }
                &:hover{
                    .out-circle{
                        transform: rotate(180deg);
                    }
                    .item-content {
                        img{
                            transform: scale(1.2);
                        }
                        .word{
                            font-size: 14px;
                        }
                    }
                }
                .item-content{
                    width: 162px;
                    height: 162px;
                    border-radius: 50%;
                    overflow: hidden;
                    position: relative;
                    top: -186px;
                    left: 24px;
                    img{
                        width: 100%;
                        height: 100%;
                        border-radius: 50%;
                        position: relative;
                        //filter:blur(1px);
                        filter: brightness(50%);
                        transition: all .35s ease-in-out;
                    }
                    .word{
                        height: 40px;
                        width: 145px;
                        font-size: 22px;
                        line-height: 38px;
                        font-weight: 700;
                        color: #fff;
                        text-align: center;
                        position: relative;
                        top: -100px;
                        left: 8px;
                        border-top: 1px solid #fff;;
                        border-bottom: 1px solid #fff;
                        cursor: pointer;
                    }

                }

            }
改字的地方用到了js,可以自己添加。
到此这篇关于CSS实现鼠标悬浮动画特效的文章就介绍到这了,更多相关CSS鼠标悬浮动画内容请搜索脚本之家以前的文章或继续浏览下面的相关文章,希望大家以后多多支持脚本之家!
