Android程序开发之Fragment实现底部导航栏实例代码
作者:mduanfire
流行的应用的导航一般分为两种,一种是底部导航,一种是侧边栏。
说明
IDE:AS,Android studio;
模拟器:genymotion;
实现的效果,见下图。
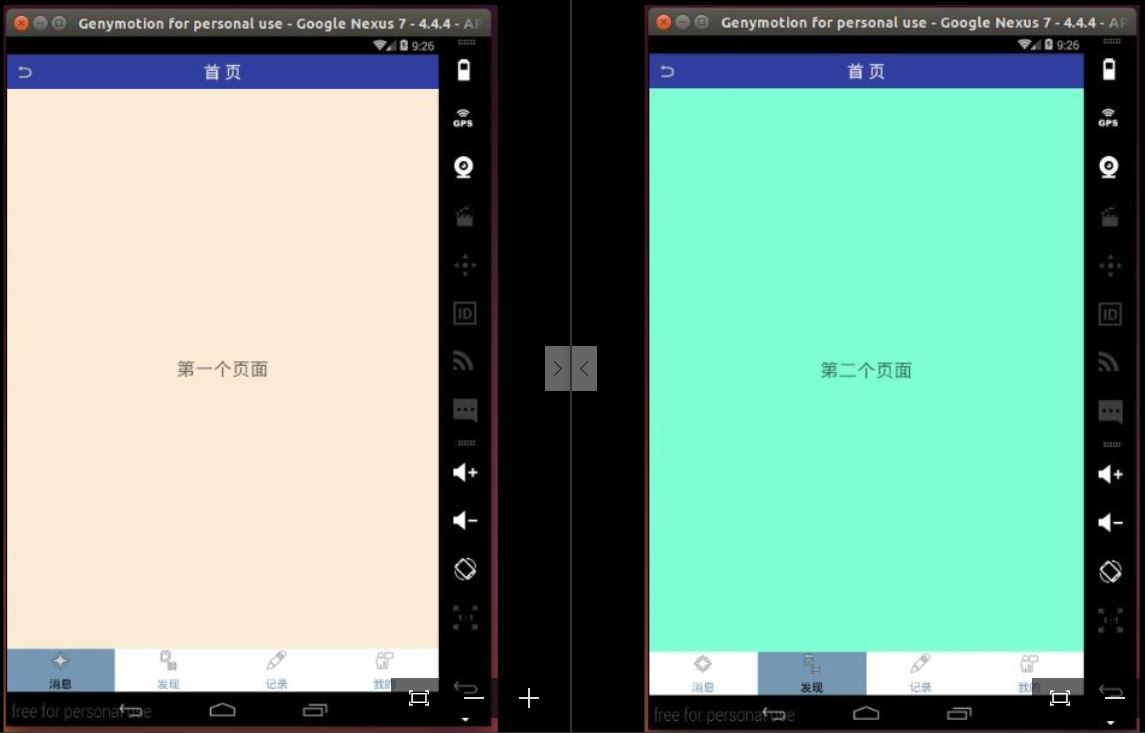
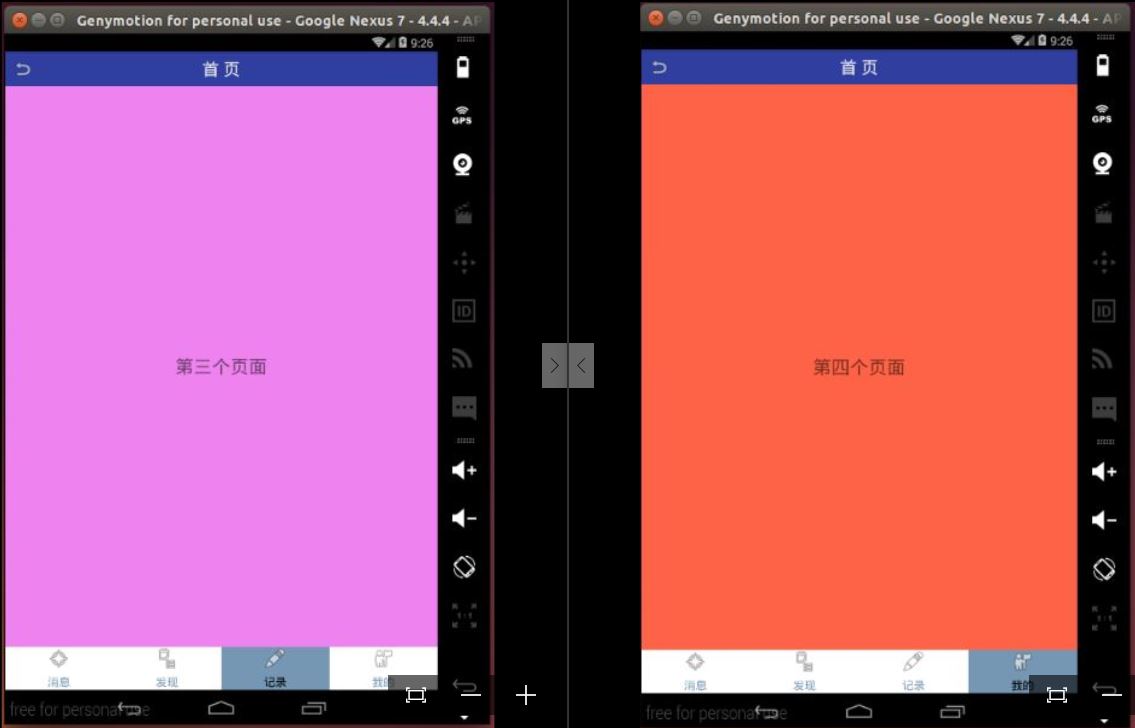
具体实现
为了讲明白这个实现过程,我们贴出来的代码多一写,这样更方便理解 [最后还会放出完整的代码实现] 。看上图的界面做的比较粗糙,但实现过程的骨架都具有了,想要更完美的设计,之后自行完善吧 ^0^。
布局
通过观察上述效果图,发现任意一个选项页面都有三部分组成:
顶部去除ActionBar后的标题栏;
中间一个FragmentLayout用来放相应的Fragment;
底部一个大的LinearLayout放着四个样式一样的(ImagView + TextView)的小Item。
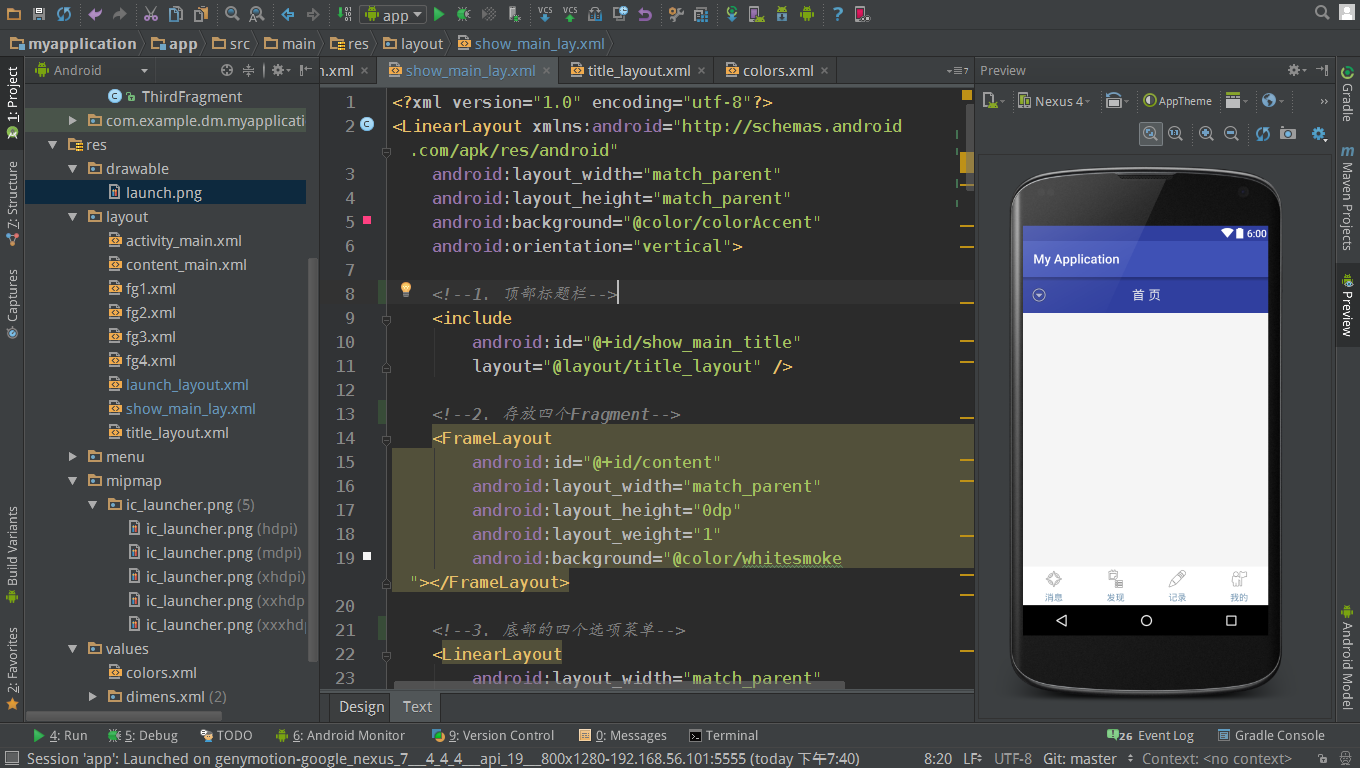
(1) 完整具体的代码,详见:show_main_lay.xml,通过注释可以看到该布局的三部分组成。
<?xml version="1.0" encoding="utf-8"?>
<LinearLayout xmlns:android="http://schemas.android.com/apk/res/android"
android:layout_width="match_parent"
android:layout_height="match_parent"
android:background="@color/colorAccent"
android:orientation="vertical">
<!--1. 顶部标题栏-->
<include
android:id="@+id/show_main_title"
layout="@layout/title_layout" />
<!--2. 存放四个Fragment-->
<FrameLayout
android:id="@+id/content"
android:layout_width="match_parent"
android:layout_height="0dp"
android:layout_weight="1"
android:background="@color/whitesmoke"></FrameLayout>
<!--3. 底部的四个选项菜单-->
<LinearLayout
android:layout_width="match_parent"
android:layout_height="60dp"
android:background="#FFFFFF">
<!--四个部分都一样:ImageView + TextView-->
<RelativeLayout
android:id="@+id/first_layout"
android:layout_width="0dp"
android:layout_height="match_parent"
android:layout_weight="1">
<LinearLayout
android:layout_width="match_parent"
android:layout_height="wrap_content"
android:layout_centerVertical="true"
android:orientation="vertical">
<ImageView
android:id="@+id/first_image"
android:layout_width="wrap_content"
android:layout_height="wrap_content"
android:layout_gravity="center_horizontal"
android:src="@android:drawable/ic_menu_compass" />
<TextView
android:id="@+id/first_text"
android:layout_width="wrap_content"
android:layout_height="wrap_content"
android:layout_gravity="center_horizontal"
android:layout_marginTop="5dp"
android:text="消息"
android:textColor="#7597B3" />
</LinearLayout>
</RelativeLayout>
<RelativeLayout
android:id="@+id/second_layout"
android:layout_width="0dp"
android:layout_height="match_parent"
android:layout_weight="1">
<LinearLayout
android:layout_width="match_parent"
android:layout_height="wrap_content"
android:layout_centerVertical="true"
android:orientation="vertical">
<ImageView
android:id="@+id/second_image"
android:layout_width="wrap_content"
android:layout_height="wrap_content"
android:layout_gravity="center_horizontal"
android:src="@android:drawable/ic_menu_agenda" />
<TextView
android:id="@+id/second_text"
android:layout_width="wrap_content"
android:layout_height="wrap_content"
android:layout_gravity="center_horizontal"
android:layout_marginTop="5dp"
android:text="发现"
android:textColor="#7597B3" />
</LinearLayout>
</RelativeLayout>
<RelativeLayout
android:id="@+id/third_layout"
android:layout_width="0dp"
android:layout_height="match_parent"
android:layout_weight="1">
<LinearLayout
android:layout_width="match_parent"
android:layout_height="wrap_content"
android:layout_centerVertical="true"
android:orientation="vertical">
<ImageView
android:id="@+id/third_image"
android:layout_width="wrap_content"
android:layout_height="wrap_content"
android:layout_gravity="center_horizontal"
android:src="@android:drawable/ic_menu_edit" />
<TextView
android:id="@+id/third_text"
android:layout_width="wrap_content"
android:layout_height="wrap_content"
android:layout_gravity="center_horizontal"
android:layout_marginTop="5dp"
android:text="记录"
android:textColor="#7597B3" />
</LinearLayout>
</RelativeLayout>
<RelativeLayout
android:id="@+id/fourth_layout"
android:layout_width="0dp"
android:layout_height="match_parent"
android:layout_weight="1">
<LinearLayout
android:layout_width="match_parent"
android:layout_height="wrap_content"
android:layout_centerVertical="true"
android:orientation="vertical">
<ImageView
android:id="@+id/fourth_image"
android:layout_width="wrap_content"
android:layout_height="wrap_content"
android:layout_gravity="center_horizontal"
android:src="@android:drawable/ic_menu_myplaces" />
<TextView
android:id="@+id/fourth_text"
android:layout_width="wrap_content"
android:layout_height="wrap_content"
android:layout_gravity="center_horizontal"
android:layout_marginTop="5dp"
android:text="我的"
android:textColor="#7597B3" />
</LinearLayout>
</RelativeLayout>
</LinearLayout>
</LinearLayout>
附上源码截图吧:
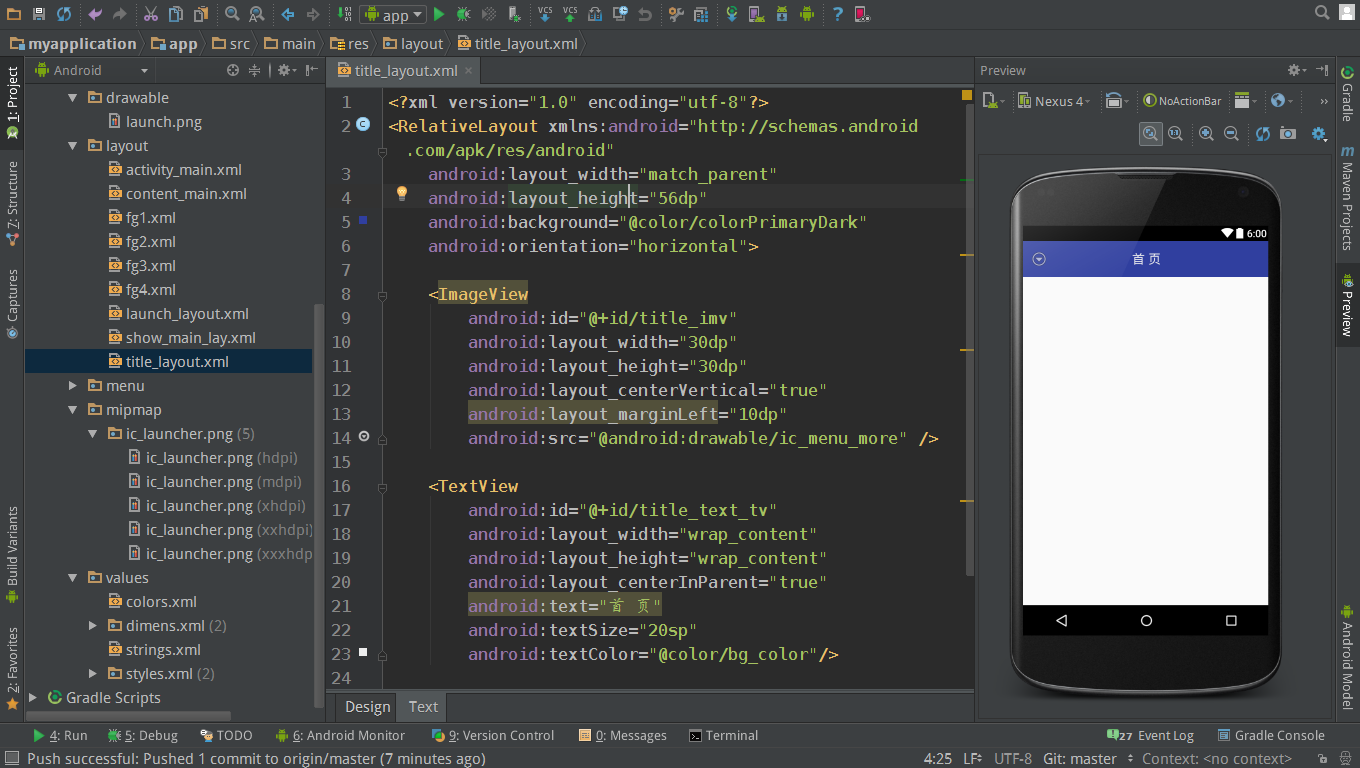
(2) 对于布局的第一部分的顶部标题栏,代码请见:title_layout.xml:
<?xml version="1.0" encoding="utf-8"?>
<RelativeLayout xmlns:android="http://schemas.android.com/apk/res/android"
android:layout_width="match_parent"
android:layout_height="56dp"
android:background="@color/colorPrimaryDark"
android:orientation="horizontal">
<ImageView
android:id="@+id/title_imv"
android:layout_width="30dp"
android:layout_height="30dp"
android:layout_centerVertical="true"
android:layout_marginLeft="10dp"
android:src="@android:drawable/ic_menu_more" />
<TextView
android:id="@+id/title_text_tv"
android:layout_width="wrap_content"
android:layout_height="wrap_content"
android:layout_centerInParent="true"
android:text="首 页"
android:textSize="20sp"
android:textColor="@color/bg_color"/>
</RelativeLayout>
见下截图:
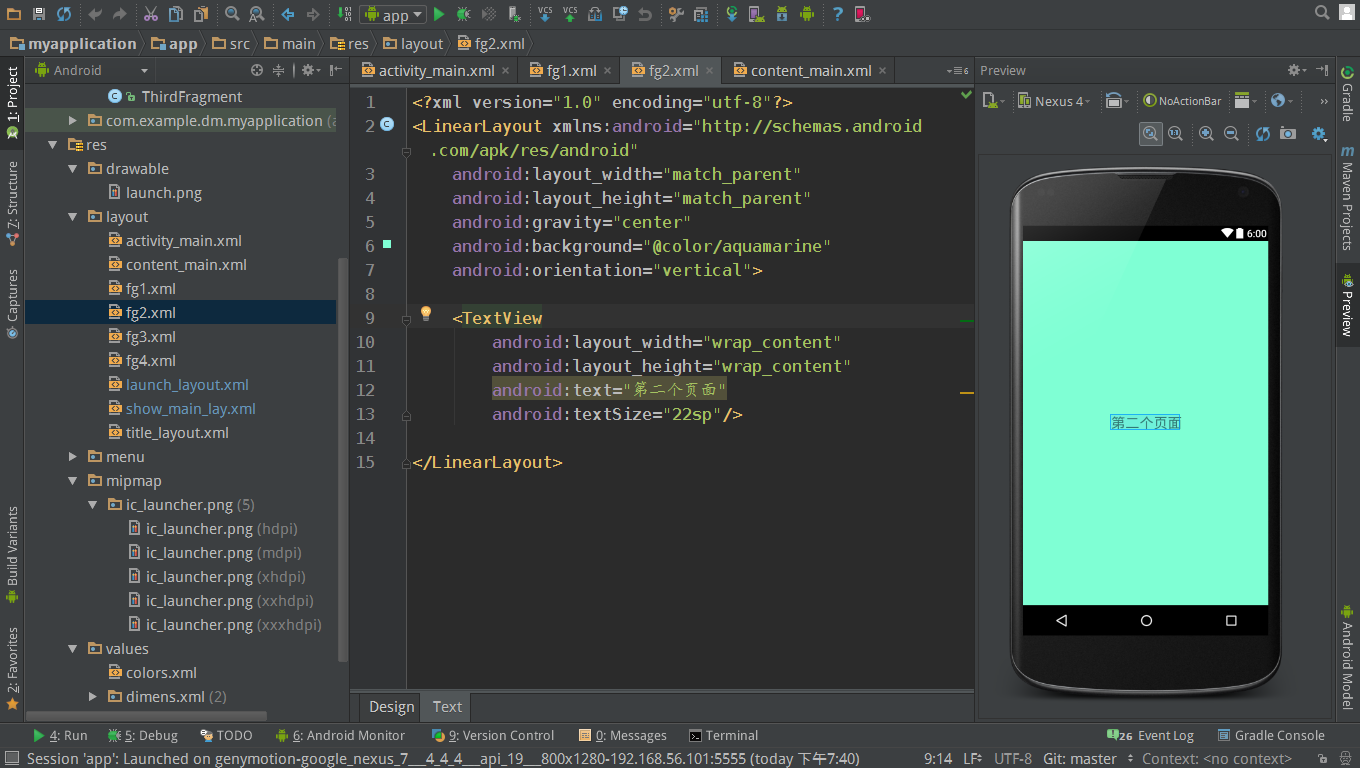
(3) 布局中间的第二部分我们再分别建立4个.xml布局文件,分别命名为:fg1.xml、fg2.xml、fg3.xml、fg4.xml,内容上只更改一下TextView中的文字说明,如第一个页面,改为第二个页面。下面只给出其中一个fg1.xml:
<?xml version="1.0" encoding="utf-8"?>
<LinearLayout xmlns:android="http://schemas.android.com/apk/res/android"
android:layout_width="match_parent"
android:layout_height="match_parent"
android:gravity="center"
android:background="@color/aquamarine"
android:orientation="vertical">
<TextView
android:layout_width="wrap_content"
android:layout_height="wrap_content"
android:text="第二个页面"
android:textSize="22sp"/>
</LinearLayout>
如图:

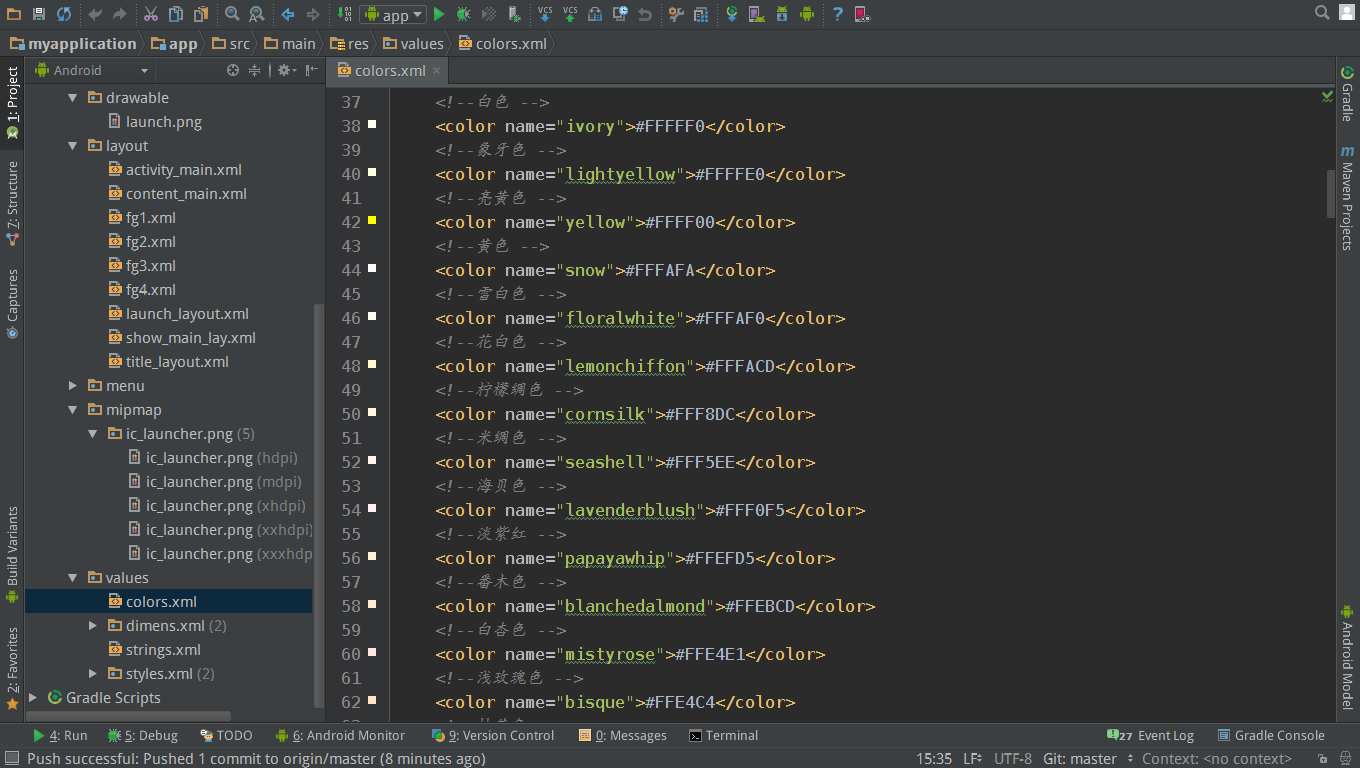
(4) 这里也给出Values目录下的colors.xml内容吧,颜色还是比较完整的但是名字不好记:
<?xml version="1.0" encoding="utf-8"?>
<resources>
<color name="colorPrimary">#3F51B5</color>
<color name="colorPrimaryDark">#303F9F</color>
<color name="colorAccent">#FF4081</color>
<color name="bg_color">#EDEDED</color>
<color name="contents_text">#ff000000</color>
<color name="encode_view">#ffffffff</color>
<color name="help_button_view">#ffcccccc</color>
<color name="help_view">#ff404040</color>
<color name="possible_result_points">#c0ffff00</color>
<color name="result_image_border">#ffffffff</color>
<color name="result_minor_text">#ffc0c0c0</color>
<color name="result_points">#c000ff00</color>
<color name="result_text">#ffffffff</color>
<color name="result_view">#b0000000</color>
<color name="sbc_header_text">#ff808080</color>
<color name="sbc_header_view">#ffffffff</color>
<color name="sbc_list_item">#fffff0e0</color>
<color name="sbc_layout_view">#ffffffff</color>
<color name="sbc_page_number_text">#ff000000</color>
<color name="sbc_snippet_text">#ff4b4b4b</color>
<color name="share_text">#ff000000</color>
<color name="share_view">#ffffffff</color>
<color name="status_view">#50000000</color>
<color name="status_text">#ffffffff</color>
<color name="transparent">#00000000</color>
<color name="viewfinder_frame">#ffffffff</color>
<color name="viewfinder_laser">#ffff0000</color>
<color name="viewfinder_mask">#60000000</color>
<color name="header">#58567D</color>
<color name="grgray">#686868</color>
<color name="white">#FFFFFF</color>
<!--白色 -->
<color name="ivory">#FFFFF0</color>
<!--象牙色 -->
<color name="lightyellow">#FFFFE0</color>
<!--亮黄色 -->
<color name="yellow">#FFFF00</color>
<!--黄色 -->
<color name="snow">#FFFAFA</color>
<!--雪白色 -->
<color name="floralwhite">#FFFAF0</color>
<!--花白色 -->
<color name="lemonchiffon">#FFFACD</color>
<!--柠檬绸色 -->
<color name="cornsilk">#FFF8DC</color>
<!--米绸色 -->
<color name="seashell">#FFF5EE</color>
<!--海贝色 -->
<color name="lavenderblush">#FFF0F5</color>
<!--淡紫红 -->
<color name="papayawhip">#FFEFD5</color>
<!--番木色 -->
<color name="blanchedalmond">#FFEBCD</color>
<!--白杏色 -->
<color name="mistyrose">#FFE4E1</color>
<!--浅玫瑰色 -->
<color name="bisque">#FFE4C4</color>
<!--桔黄色 -->
<color name="moccasin">#FFE4B5</color>
<!--鹿皮色 -->
<color name="navajowhite">#FFDEAD</color>
<!--纳瓦白 -->
<color name="peachpuff">#FFDAB9</color>
<!--桃色 -->
<color name="gold">#FFD700</color>
<!--金色 -->
<color name="pink">#FFC0CB</color>
<!--粉红色 -->
<color name="lightpink">#FFB6C1</color>
<!--亮粉红色 -->
<color name="orange">#FFA500</color>
<!--橙色 -->
<color name="lightsalmon">#FFA07A</color>
<!--亮肉色 -->
<color name="darkorange">#FF8C00</color>
<!--暗桔黄色 -->
<color name="coral">#FF7F50</color>
<!--珊瑚色 -->
<color name="hotpink">#FF69B4</color>
<!--热粉红色 -->
<color name="tomato">#FF6347</color>
<!--西红柿色 -->
<color name="orangered">#FF4500</color>
<!--红橙色 -->
<color name="deeppink">#FF1493</color>
<!--深粉红色 -->
<color name="fuchsia">#FF00FF</color>
<!--紫红色 -->
<color name="magenta">#FF00FF</color>
<!--红紫色 -->
<color name="red">#FF0000</color>
<!--红色 -->
<color name="oldlace">#FDF5E6</color>
<!--老花色 -->
<color name="lightgoldenyellow">#FAFAD2</color>
<!--亮金黄色 -->
<color name="linen">#FAF0E6</color>
<!--亚麻色 -->
<color name="antiquewhite">#FAEBD7</color>
<!--古董白 -->
<color name="salmon">#FA8072</color>
<!--鲜肉色 -->
<color name="ghostwhite">#F8F8FF</color>
<!--幽灵白 -->
<color name="mintcream">#F5FFFA</color>
<!--薄荷色 -->
<color name="whitesmoke">#F5F5F5</color>
<!--烟白色 -->
<color name="beige">#F5F5DC</color>
<!--米色 -->
<color name="wheat">#F5DEB3</color>
<!--浅黄色 -->
<color name="sandybrown">#F4A460</color>
<!--沙褐色 -->
<color name="azure">#F0FFFF</color>
<!--天蓝色 -->
<color name="honeydew">#F0FFF0</color>
<!--蜜色 -->
<color name="aliceblue">#F0F8FF</color>
<!--艾利斯兰 -->
<color name="khaki">#F0E68C</color>
<!--黄褐色 -->
<color name="lightcoral">#F08080</color>
<!--亮珊瑚色 -->
<color name="palegoldenrod">#EEE8AA</color>
<!--苍麒麟色 -->
<color name="violet">#EE82EE</color>
<!--紫罗兰色 -->
<color name="darksalmon">#E9967A</color>
<!--暗肉色 -->
<color name="lavender">#E6E6FA</color>
<!--淡紫色 -->
<color name="lightcyan">#E0FFFF</color>
<!--亮青色 -->
<color name="burlywood">#DEB887</color>
<!--实木色 -->
<color name="plum">#DDA0DD</color>
<!--洋李色 -->
<color name="gainsboro">#DCDCDC</color>
<!--淡灰色 -->
<color name="crimson">#DC143C</color>
<!--暗深红色 -->
<color name="palevioletred">#DB7093</color>
<!--苍紫罗兰色-->
<color name="goldenrod">#DAA520</color>
<!--金麒麟色 -->
<color name="orchid">#DA70D6</color>
<!--淡紫色 -->
<color name="thistle">#D8BFD8</color>
<!--蓟色 -->
<color name="lightgray">#D3D3D3</color>
<!--亮灰色 -->
<color name="lightgrey">#D3D3D3</color>
<!--亮灰色 -->
<color name="tan">#D2B48C</color>
<!--茶色 -->
<color name="chocolate">#D2691E</color>
<!--巧可力色 -->
<color name="peru">#CD853F</color>
<!--秘鲁色 -->
<color name="indianred">#CD5C5C</color>
<!--印第安红 -->
<color name="mediumvioletred">#C71585</color>
<!--中紫罗兰色 -->
<color name="silver">#C0C0C0</color>
<!--银色 -->
<color name="darkkhaki">#BDB76B</color>
<!-- 暗黄褐色 -->
<color name="rosybrown">#BC8F8F</color>
<!--褐玫瑰红-->
<color name="mediumorchid">#BA55D3</color>
<!--中粉紫色 -->
<color name="darkgoldenrod">#B8860B</color>
<!--暗金黄色 -->
<color name="firebrick">#B22222</color>
<!--火砖色 -->
<color name="powderblue">#B0E0E6</color>
<!--粉蓝色 -->
<color name="lightsteelblue">#B0C4DE</color>
<!--亮钢兰色 -->
<color name="paleturquoise">#AFEEEE</color>
<!--苍宝石绿 -->
<color name="greenyellow">#ADFF2F</color>
<!--黄绿色 -->
<color name="lightblue">#ADD8E6</color>
<!--亮蓝色 -->
<color name="darkgray">#A9A9A9</color>
<!--暗灰色 -->
<color name="darkgrey">#A9A9A9</color>
<!--暗灰色 -->
<color name="brown">#A52A2A</color>
<!--褐色 -->
<color name="sienna">#A0522D</color>
<!--赭色 -->
<color name="darkorchid">#9932CC</color>
<!--暗紫色 -->
<color name="palegreen">#98FB98</color>
<!--苍绿色 -->
<color name="darkviolet">#9400D3</color>
<!--暗紫罗兰色 -->
<color name="mediumpurple">#9370DB</color>
<!--中紫色 -->
<color name="lightgreen">#90EE90</color>
<!--亮绿色 -->
<color name="darkseagreen">#8FBC8F</color>
<!--暗海兰色 -->
<color name="saddlebrown">#8B4513</color>
<!--重褐色 -->
<color name="darkmagenta">#8B008B</color>
<!--暗洋红 -->
<color name="darkred">#8B0000</color>
<!--暗红色 -->
<color name="blueviolet">#8A2BE2</color>
<!--紫罗兰蓝色-->
<color name="lightskyblue">#87CEFA</color>
<!--亮天蓝色-->
<color name="skyblue">#87CEEB</color>
<!--天蓝色 -->
<color name="gray">#808080</color>
<!--灰色 -->
<color name="grey">#808080</color>
<!--灰色 -->
<color name="olive">#808000</color>
<!--橄榄色 -->
<color name="purple">#800080</color>
<!--紫色 -->
<color name="maroon">#800000</color>
<!--粟色 -->
<color name="aquamarine">#7FFFD4</color>
<!--碧绿色 -->
<color name="chartreuse">#7FFF00</color>
<!--黄绿色 -->
<color name="lawngreen">#7CFC00</color>
<!--草绿色 -->
<color name="mediumslateblue">#7B68EE</color>
<!--中暗蓝色 -->
<color name="lightslategray">#778899</color>
<!--亮蓝灰 -->
<color name="lightslategrey">#778899</color>
<!--亮蓝灰 -->
<color name="slategray">#708090</color>
<!--灰石色 -->
<color name="slategrey">#708090</color>
<!--灰石色 -->
<color name="olivedrab">#6B8E23</color>
<!--深绿褐色 -->
<color name="slateblue">#6A5ACD</color>
<!--石蓝色 -->
<color name="dimgray">#696969</color>
<!--暗灰色 -->
<color name="dimgrey">#696969</color>
<!--暗灰色 -->
<color name="mediumaquamarine">#66CDAA</color>
<!--中绿色-->
<color name="cornflowerblue">#6495ED</color>
<!--菊兰色 -->
<color name="cadetblue">#5F9EA0</color>
<!--军兰色 -->
<color name="darkolivegreen">#556B2F</color>
<!--暗橄榄绿 -->
<color name="indigo">#4B0082</color>
<!--靛青色 -->
<color name="mediumturquoise">#48D1CC</color>
<!--中绿宝石-->
<color name="darkslateblue">#483D8B</color>
<!--暗灰蓝色 -->
<color name="steelblue">#4682B4</color>
<!--钢兰色 -->
<color name="royalblue">#4169E1</color>
<!--皇家蓝 -->
<color name="turquoise">#40E0D0</color>
<!--青绿色 -->
<color name="mediumseagreen">#3CB371</color>
<!--中海蓝 -->
<color name="limegreen">#32CD32</color>
<!--橙绿色 -->
<color name="darkslategray">#2F4F4F</color>
<!--暗瓦灰色 -->
<color name="darkslategrey">#2F4F4F</color>
<!--暗瓦灰色 -->
<color name="seagreen">#2E8B57</color>
<!--海绿色 -->
<color name="forestgreen">#228B22</color>
<!--森林绿 -->
<color name="lightseagreen">#20B2AA</color>
<!--亮海蓝色 -->
<color name="dodgerblue">#1E90FF</color>
<!--闪兰色 -->
<color name="midnightblue">#191970</color>
<!--中灰兰色 -->
<color name="aqua">#00FFFF</color>
<!--浅绿色 -->
<color name="cyan">#00FFFF</color>
<!--青色 -->
<color name="springgreen">#00FF7F</color>
<!--春绿色 -->
<color name="lime">#00FF00</color>
<!--酸橙色 -->
<color name="mediumspringgreen">#00FA9A</color>
<!--中春绿色 -->
<color name="darkturquoise">#00CED1</color>
<!--暗宝石绿 -->
<color name="deepskyblue">#00BFFF</color>
<!--深天蓝色 -->
<color name="darkcyan">#008B8B</color>
<!--暗青色 -->
<color name="teal">#008080</color>
<!--水鸭色 -->
<color name="green">#008000</color>
<!--绿色 -->
<color name="darkgreen">#006400</color>
<!--暗绿色 -->
<color name="blue">#0000FF</color>
<!--蓝色 -->
<color name="mediumblue">#0000CD</color>
<!--中兰色 -->
<color name="darkblue">#00008B</color>
<!--暗蓝色 -->
<color name="navy">#000080</color>
<!--海军色 -->
<color name="black">#000000</color>
<!--黑色 -->
</resources>
如图:
那么到这里我们的界面布局就基本完成了!
相应Fragment的实现类
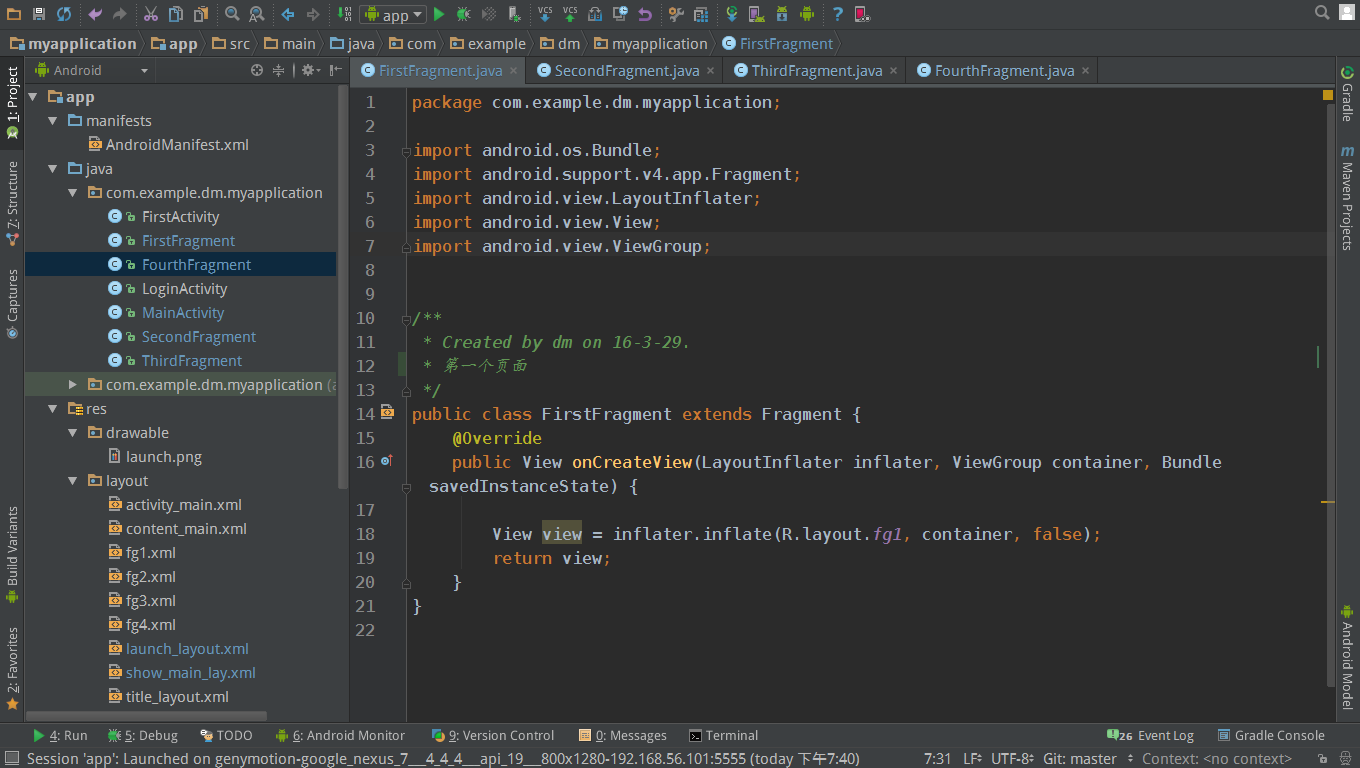
接下来我们需要写四个相应的Fragment的实现类,同样拷贝4份,改用inflate加载Fragment即可。即,包含四个差不多一样的Fragment,分别起名为:FirstFragment.java、SecondFragment.java、ThirdFragment.java、FourthFragment.java。下面主要展示一下FirstFragment.java的具体代码:
package com.example.dm.myapplication;
import android.os.Bundle;
import android.support.v4.app.Fragment;
import android.view.LayoutInflater;
import android.view.View;
import android.view.ViewGroup;
/**
* Created by dm on 16-3-29.
* 第一个页面
*/
public class FirstFragment extends Fragment {
@Override
public View onCreateView(LayoutInflater inflater, ViewGroup container, Bundle savedInstanceState) {
View view = inflater.inflate(R.layout.fg1, container, false);
return view;
}
}
如图:
最重要的MainActivity
各个七零八落的小部件都已经准备到序了,现在只剩下这个主界面实现类把他们融合在一起,实现相应的效果了。
MainActivity.java 的编写也很简单,直接看代码和注释就可以了,不多解释额:主要包含几个初始化方法、选中处理、隐藏所有Fragment的方法。详见MainActivity.java:
package com.example.dm.myapplication;
import android.content.Intent;
import android.os.Bundle;
import android.support.v4.app.FragmentActivity; // 注意这里我们导入的V4的包,不要导成app的包了
import android.support.v4.app.FragmentManager;
import android.support.v4.app.FragmentTransaction;
import android.view.View;
import android.widget.FrameLayout;
import android.widget.ImageView;
import android.widget.RelativeLayout;
import android.widget.TextView;
/**
* 主页面内容
* Created by dm on 16-1-19.
*/
public class MainActivity extends FragmentActivity implements View.OnClickListener {
// 初始化顶部栏显示
private ImageView titleLeftImv;
private TextView titleTv;
// 定义4个Fragment对象
private FirstFragment fg1;
private SecondFragment fg2;
private ThirdFragment fg3;
private FourthFragment fg4;
// 帧布局对象,用来存放Fragment对象
private FrameLayout frameLayout;
// 定义每个选项中的相关控件
private RelativeLayout firstLayout;
private RelativeLayout secondLayout;
private RelativeLayout thirdLayout;
private RelativeLayout fourthLayout;
private ImageView firstImage;
private ImageView secondImage;
private ImageView thirdImage;
private ImageView fourthImage;
private TextView firstText;
private TextView secondText;
private TextView thirdText;
private TextView fourthText;
// 定义几个颜色
private int whirt = 0xFFFFFFFF;
private int gray = 0xFF7597B3;
private int dark = 0xff000000;
// 定义FragmentManager对象管理器
private FragmentManager fragmentManager;
@Override
protected void onCreate(Bundle savedInstanceState) {
super.onCreate(savedInstanceState);
setContentView(R.layout.show_main_lay);
fragmentManager = getSupportFragmentManager();
initView(); // 初始化界面控件
setChioceItem(0); // 初始化页面加载时显示第一个选项卡
}
/**
* 初始化页面
*/
private void initView() {
// 初始化页面标题栏
titleLeftImv = (ImageView) findViewById(R.id.title_imv);
titleLeftImv.setOnClickListener(new View.OnClickListener() {
@Override
public void onClick(View v) {
startActivity(new Intent(MainActivity.this, LoginActivity.class));
}
});
titleTv = (TextView) findViewById(R.id.title_text_tv);
titleTv.setText("首 页");
// 初始化底部导航栏的控件
firstImage = (ImageView) findViewById(R.id.first_image);
secondImage = (ImageView) findViewById(R.id.second_image);
thirdImage = (ImageView) findViewById(R.id.third_image);
fourthImage = (ImageView) findViewById(R.id.fourth_image);
firstText = (TextView) findViewById(R.id.first_text);
secondText = (TextView) findViewById(R.id.second_text);
thirdText = (TextView) findViewById(R.id.third_text);
fourthText = (TextView) findViewById(R.id.fourth_text);
firstLayout = (RelativeLayout) findViewById(R.id.first_layout);
secondLayout = (RelativeLayout) findViewById(R.id.second_layout);
thirdLayout = (RelativeLayout) findViewById(R.id.third_layout);
fourthLayout = (RelativeLayout) findViewById(R.id.fourth_layout);
firstLayout.setOnClickListener(MainActivity.this);
secondLayout.setOnClickListener(MainActivity.this);
thirdLayout.setOnClickListener(MainActivity.this);
fourthLayout.setOnClickListener(MainActivity.this);
}
@Override
public void onClick(View v) {
switch (v.getId()) {
case R.id.first_layout:
setChioceItem(0);
break;
case R.id.second_layout:
setChioceItem(1);
break;
case R.id.third_layout:
setChioceItem(2);
break;
case R.id.fourth_layout:
setChioceItem(3);
break;
default:
break;
}
}
/**
* 设置点击选项卡的事件处理
*
* @param index 选项卡的标号:0, 1, 2, 3
*/
private void setChioceItem(int index) {
FragmentTransaction fragmentTransaction = fragmentManager.beginTransaction();
clearChioce(); // 清空, 重置选项, 隐藏所有Fragment
hideFragments(fragmentTransaction);
switch (index) {
case 0:
// firstImage.setImageResource(R.drawable.XXXX); 需要的话自行修改
firstText.setTextColor(dark);
firstLayout.setBackgroundColor(gray);
// 如果fg1为空,则创建一个并添加到界面上
if (fg1 == null) {
fg1 = new FirstFragment();
fragmentTransaction.add(R.id.content, fg1);
} else {
// 如果不为空,则直接将它显示出来
fragmentTransaction.show(fg1);
}
break;
case 1:
// secondImage.setImageResource(R.drawable.XXXX);
secondText.setTextColor(dark);
secondLayout.setBackgroundColor(gray);
if (fg2 == null) {
fg2 = new SecondFragment();
fragmentTransaction.add(R.id.content, fg2);
} else {
fragmentTransaction.show(fg2);
}
break;
case 2:
// thirdImage.setImageResource(R.drawable.XXXX);
thirdText.setTextColor(dark);
thirdLayout.setBackgroundColor(gray);
if (fg3 == null) {
fg3 = new ThirdFragment();
fragmentTransaction.add(R.id.content, fg3);
} else {
fragmentTransaction.show(fg3);
}
break;
case 3:
// fourthImage.setImageResource(R.drawable.XXXX);
fourthText.setTextColor(dark);
fourthLayout.setBackgroundColor(gray);
if (fg4 == null) {
fg4 = new FourthFragment();
fragmentTransaction.add(R.id.content, fg4);
} else {
fragmentTransaction.show(fg4);
}
break;
}
fragmentTransaction.commit(); // 提交
}
/**
* 当选中其中一个选项卡时,其他选项卡重置为默认
*/
private void clearChioce() {
// firstImage.setImageResource(R.drawable.XXX);
firstText.setTextColor(gray);
firstLayout.setBackgroundColor(whirt);
// secondImage.setImageResource(R.drawable.XXX);
secondText.setTextColor(gray);
secondLayout.setBackgroundColor(whirt);
// thirdImage.setImageResource(R.drawable.XXX);
thirdText.setTextColor(gray);
thirdLayout.setBackgroundColor(whirt);
// fourthImage.setImageResource(R.drawable.XXX);
fourthText.setTextColor(gray);
fourthLayout.setBackgroundColor(whirt);
}
/**
* 隐藏Fragment
*
* @param fragmentTransaction
*/
private void hideFragments(FragmentTransaction fragmentTransaction) {
if (fg1 != null) {
fragmentTransaction.hide(fg1);
}
if (fg2 != null) {
fragmentTransaction.hide(fg2);
}
if (fg3 != null) {
fragmentTransaction.hide(fg3);
}
if (fg4 != null) {
fragmentTransaction.hide(fg4);
}
}
}
见图:

到这里我们的功能就基本实现了,是不是还挺简单的。
注意
Fragment相关类导入的时候是v4包还是app包!我们这里导入的是V4的包,在代码的注释部分,已经给出说明;
在完整的代码包中,我们还添加了App启动界面及动画、登录界面,这两部分的内容,这里不做具体的说明,之后继续完善。
以上内容是小编给大家分享的Android程序开发之Fragment实现底部导航栏实例代码,希望对大家有所帮助!
您可能感兴趣的文章:
- Android 中使用RadioGroup和Fragment实现底部导航栏的功能
- 性能分析:指如何快速定位SQL问题
- android中Fragment+RadioButton实现底部导航栏
- Android自定义ViewPagerIndicator实现炫酷导航栏指示器(ViewPager+Fragment)
- Android实现沉浸式通知栏通知栏背景颜色跟随app导航栏背景颜色而改变
- Android实现底部导航栏功能(选项卡)
- 超简单的几行代码搞定Android底部导航栏功能
- Android 弹出Dialog时隐藏状态栏和底部导航栏的方法
- Android 沉浸式状态栏与隐藏导航栏实例详解
- android 全屏去掉底部虚拟导航栏的方法
- 解决android 显示内容被底部导航栏遮挡的问题
- Android仿今日头条顶部导航栏效果的实例代码
- Android仿网易客户端顶部导航栏效果
- Android Fragment实现顶部、底部导航栏
