Vue + Element 自定义上传封面组件功能
作者:尚尚是高尚的尚
这篇文章主要介绍了Vue + Element 自定义上传封面组件,本文通过示例代码给大家介绍的非常详细,对大家的学习或工作具有一定的参考借鉴价值,需要的朋友可以参考下
前一段时间做项目,频繁使用到上传图片组件,而且只上传一个封面,于是想着自定义一个图片封面上传组件。先来看一下效果:


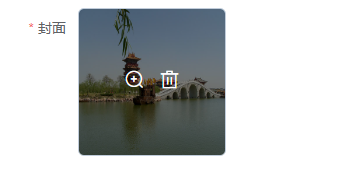
第一张图片是上传之前,第二张图片是上传成功后,第3张图片是鼠标放上去之后的效果!首先整理需求,图片上传我们使用照片墙的方式,只能上传一张图片,图片上传成功后不能继续上传,如果想要更换图片,则需要将图片删除后重新上传。点击图片上面的放大镜可以查看大图。需要限制图片上传的格式,图片的大小。组件代码:
<template>
  <div class="upload">
    <el-upload
      :class="{'hidden':mFileList.length > 0}"
      list-type="picture-card"
      :on-remove="handleRemove"
      :action="action"
      :before-upload="beforeUploadHandle"
      :on-success="successHandle"
      :on-change="changeHandle"
      :limit="1"
      :accept="accept"
      :on-exceed="handleExceed"
      :file-list="fileList"
      :on-preview="handlePictureCardPreview"
    >
      <i class="el-icon-plus"></i>
    </el-upload>
    <el-dialog :visible.sync="dialogVisible">
      <img width="100%" :src="dialogImageUrl" alt="" />
    </el-dialog>
  </div>
</template>

<script>
export default {
  props: {
    action: {
      type: String,
      default: "",
    },
    accept: {
      type: String,
      default: "",
    },
    fileList:{
      type: Array,
      default: () => [],
    },
  },
  watch: {
    fileList(newValue, oldValue) {
      this.mFileList = newValue
    }
  },
  data() {
    return {
      dialogVisible: false, //图片放大
      fileImg: "", //上传图片
      dialogImageUrl: "", //图片地址
      mFileList:this.fileList,
    };
  },
  methods: {
    handleRemove(file, fileList) {
      this.$emit("upload-remove", file);
    },
    handlePictureCardPreview(file) {
      this.dialogImageUrl = file.url;
      this.dialogVisible = true;
    },
    // 上传之前
    beforeUploadHandle(file) {
      if (file.type !== "image/jpeg" && file.type !== "image/png") {
        this.$message({
          message: "只支持jpg、png格式的图片!",
          type: "warning",
        });
        return false;
      }
      const isLt2M = file.size / 1024 / 1024 < 2;
      if (!isLt2M) {
        this.$message({
          message: "上传文件大小不能超过 2MB!",
          type: "warning",
        });
        return false;
      }
    },
    // 上传成功
    successHandle(response, file, fileList) {
      this.mFileList = fileList;
      if (response && response.code === 200) {
        this.$message.success("图片上传成功!");
        this.$emit("upload-success", response, file);
      } else {
        this.$message.error(response.msg);
      }
    },
    changeHandle(file, fileList) {
      if(file.response && file.response.code == 500) {
         this.$emit("upload-error",file);
      }
    },
    handleExceed(files, fileList) {
        this.$message.warning("只能上传1张图片!");
      },
  },
};
</script>
<style lang="scss">
.upload .hidden .el-upload--picture-card {
  display: none;
}
</style>
调用组件代码:
<template>
    <div>
        <el-form ref="dataForm"    label-width="80px">
            <el-form-item label="封面" prop="cover" class="is-required">
                <upload list-type="picture-card" :action="url" :accept="'.jpg,.png,.JPG,.PNG'" :fileList="fileList"
                    :limit="1" @upload-success="uploadFile" @upload-remove="removeFile" @upload-error="uploadError">
                </upload>
            </el-form-item>
        </el-form>
    </div>
</template>

<script>
    import Upload from '../components/cover-upload/index.vue'
    export default {
        components: {
            Upload
        },
        data() {
            return {
                url: "",
                fileList: [],
            }
        },
        methods: {
            uploadUrl() {
                this.url = "http://xxx.xxx.xxx.xxx:xxx/yyxt/admin/course/courseInfo/upload?token=075de0303b15a38833a30a7a3b494794"//上传图片的后台接口
            },
            uploadError(file) {
                this.fileList = [];
            },
            uploadFile(response, file) {
                this.fileList = [{
                    url: response.data,
                }, ];
            },
            removeFile(file) {
                this.fileList = [];
            },
        },
        mounted() {
            this.uploadUrl();
        }
    }
</script>
点击上传后的图片上的放大镜,显示图片大图

到此这篇关于Vue + Element 自定义上传封面组件的文章就介绍到这了,更多相关Vue + Element 自定义上传内容请搜索脚本之家以前的文章或继续浏览下面的相关文章希望大家以后多多支持脚本之家!
