element tab标签管理路由页面的项目实践
作者:潇蓝诺依
本文主要介绍了element tab标签管理路由页面的项目实践,文中通过示例代码介绍的非常详细,对大家的学习或者工作具有一定的参考学习价值,需要的朋友们下面随着小编来一起学习学习吧
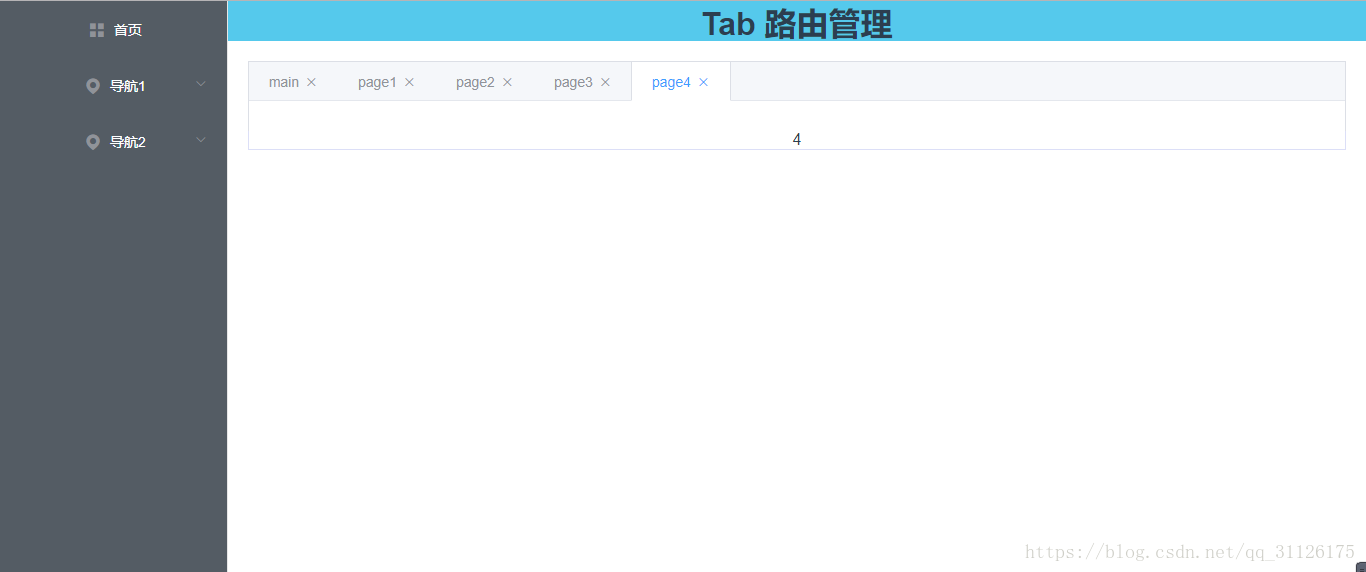
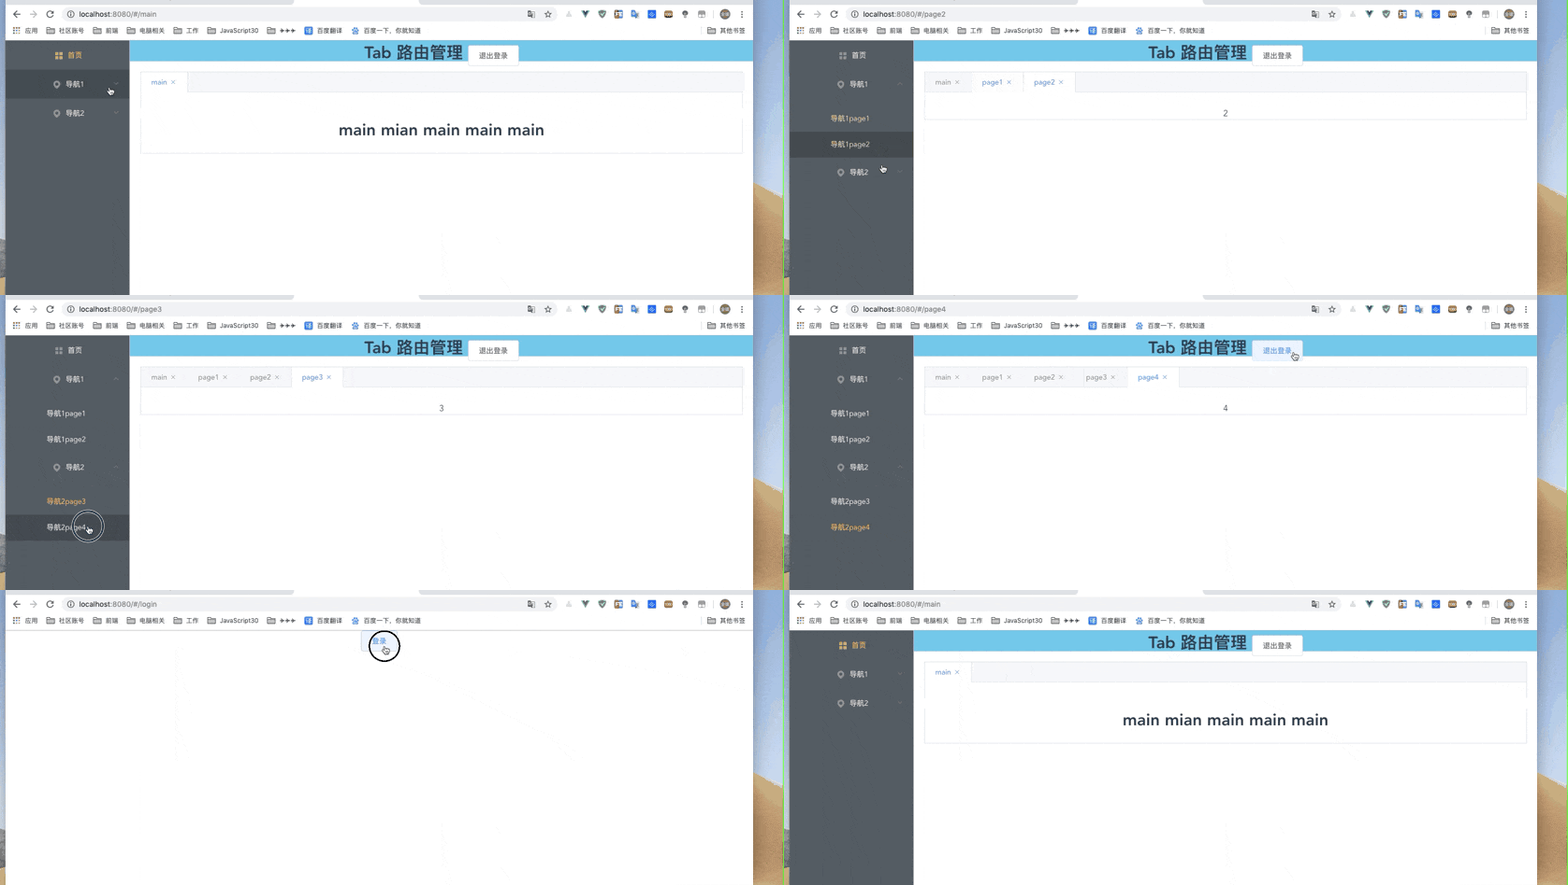
样式

准备
- 搭建好的vue脚手架(elementui,router,vuex)
- elementui(NavMenu 导航菜单,Tabs 标签页)
思路
- 将打开的所有路由放到一个栈里(openTab:[]),tabs显示遍历openTab
- 初始状态,将首页推入栈,并设置激活状态
- 当切换路由时(监听路由变化),判断栈里是否存在这个路由,若存在,只改变激活状态;若不存在,则推入栈,并改变激活状态。
- tabs 切换,调用@tab-click='tabClick’方法,跳转路由,(路由变化,走上一步中“若存在,只改变激活状态”)
- tabs 移除,调用@tab-remove=‘tabRemove’ 方法,移除栈(openTab)中对应的路由,若移除的路由是激活状态,那么跳转路由到栈中最后一个(路由变化);若移除的路由非激活状态,不做修改
涉及到的内容
vuex state:路由栈、激活状态 mutations: 添加、移除、修改激活状态
watch
mounted
tab 切换、移除两个方法
搭建
搭建页面框架
slider组件
<template>
      <el-menu
        :default-active="$route.path"
        class="slider"
        background-color="#545c64"
        text-color="#fff"
        active-text-color="#ffd04b"
        router
        >
        <el-menu-item index="/main" >
          <i class="el-icon-menu"></i>
          <span slot="title">首页</span>
        </el-menu-item>

        <el-submenu v-for="(item,index) in menuList" :key="index" :index='item.id'>
          <template slot="title">
            <i :class="item.icon"></i>
            <span>{{item.title}}</span>
          </template>
          <el-menu-item-group >
            <el-menu-item v-for="child in item.children" :key="child.id" :index='child.index'>{{child.childtitle}}</el-menu-item>
          </el-menu-item-group>
        </el-submenu>
      </el-menu>
</template>

<script>
export default {
  name: 'Slider',
  data(){
    return {
      menuList:[
        {
          id:'1',
          title: '导航1',
          icon:'el-icon-location',
          children:[
            {
              index:'/page1',
              childtitle:'导航1page1'
            },
            {
              index:'/page2',
              childtitle:'导航1page2'
            },
          ]
        },
        {
          id:'2',
          title: '导航2',
          icon:'el-icon-location',
          children:[
            {
              index:'/page3',
              childtitle:'导航2page3'
            },
            {
              index:'/page4',
              childtitle:'导航2page4'
            },
          ]
        }
      ]
    }
  },

}
</script>
<style scoped>
.slider{
  height: 100vh;
}
</style>
home页
<template>
  <div class="home">
    <el-row>
      <el-col :span="4">
        <!-- 左侧导航栏 -->
        <slider></slider>
      </el-col>
      <el-col :span='20'>
        <!-- header -->
        <nav-top></nav-top>
        <!-- 内容区 -->
        <div class="app-wrap">
           <!-- 此处放置el-tabs代码 -->
            <div >
              <el-tabs
                v-model="activeIndex"
                type="border-card"
                closable
                v-if="openTab.length"
                 @tab-click='tabClick'
                  @tab-remove='tabRemove'
                >
                <el-tab-pane
                  :key="item.name"
                  v-for="(item, index) in openTab"
                  :label="item.name"
                  :name="item.route"
                 >
                </el-tab-pane>
              </el-tabs>
            </div>
            <div class="content-wrap">
              <router-view/>
            </div>
        </div>
      </el-col>
    </el-row>
  </div>
</template>
通过路由配置,使页面可以正常的跳转
准备状态管理
state: {
    openTab:[],//所有打开的路由
    activeIndex:'/main' //激活状态
  },
  mutations: {
    // 添加tabs
    add_tabs (state, data) {
      this.state.openTab.push(data);
    },
    // 删除tabs
    delete_tabs (state, route) {
      let index = 0;
      for (let option of state.openTab) {
        if (option.route === route) {
          break;
        }
        index++;
      }
      this.state.openTab.splice(index, 1);
    },
    // 设置当前激活的tab
    set_active_index (state, index) {
      this.state.activeIndex = index;
    },
  },
在home页 ,或者silder页 , 初始的路由状态
mounted () {
    // 刷新时以当前路由做为tab加入tabs
    // 当前路由不是首页时,添加首页以及另一页到store里,并设置激活状态
    // 当当前路由是首页时,添加首页到store,并设置激活状态
   if (this.$route.path !== '/' && this.$route.path !== '/main') {
      console.log('1');
      this.$store.commit('add_tabs', {route: '/main' , name: 'main'});
      this.$store.commit('add_tabs', {route: this.$route.path , name: this.$route.name });
      this.$store.commit('set_active_index', this.$route.path);
    } else {
      console.log('2');
      this.$store.commit('add_tabs', {route: '/main', name: 'main'});
      this.$store.commit('set_active_index', '/main');
      this.$router.push('/');
    }
  },
注意这里 如果你刷新 只想保留首页,那么 mounted 中 ,你只需写else中的代码。
如果刷新想,保留首页和当前路由页,if else都要写()
监听路由变化
 watch:{
    '$route'(to,from){
        //判断路由是否已经打开
        //已经打开的 ,将其置为active
        //未打开的,将其放入队列里
        let flag = false;
        for(let item of this.openTab){
          console.log("item.name",item.name)
          console.log("t0.name",to.name)

          if(item.name === to.name){
            console.log('to.path',to.path);
            this.$store.commit('set_active_index',to.path)
            flag = true;
            break;
          }
        }

        if(!flag){
          console.log('to.path',to.path);
          this.$store.commit('add_tabs', {route: to.path, name: to.name});
          this.$store.commit('set_active_index', to.path);
        }

    }
  }
tab方法
//tab标签点击时,切换相应的路由
    tabClick(tab){
      console.log("tab",tab);
      console.log('active',this.activeIndex);
      this.$router.push({path: this.activeIndex});
    },
    //移除tab标签
    tabRemove(targetName){
      console.log("tabRemove",targetName);
      //首页不删
      if(targetName == '/'){
        return
      }
      this.$store.commit('delete_tabs', targetName);
      if (this.activeIndex === targetName) {
        // 设置当前激活的路由
        if (this.openTab && this.openTab.length >= 1) {
          console.log('=============',this.openTab[this.openTab.length-1].route)
          this.$store.commit('set_active_index', this.openTab[this.openTab.length-1].route);
          this.$router.push({path: this.activeIndex});
        } else {
          this.$router.push({path: '/'});
        }
      }
    }
登录 与 退出登录

做登录与退出时 ,需要清空路由
退出登录方法 或者 登录成功方法 调用
this.$store.state.openTab = [];
this.$store.state.activeIndex = '/main';
到此这篇关于element tab标签管理路由页面的项目实践的文章就介绍到这了,更多相关element tab标签管理路由页面内容请搜索脚本之家以前的文章或继续浏览下面的相关文章希望大家以后多多支持脚本之家!
