Python基于钉钉监控发送消息提醒的实现
作者:假脸
本文主要介绍了Python基于钉钉监控发送消息提醒的实现,文中通过示例代码介绍的非常详细,对大家的学习或者工作具有一定的参考学习价值,需要的朋友们下面随着小编来一起学习学习吧
一.使用前设置钉钉
1.既然是使用钉钉消息提醒,那么第需要有钉钉。
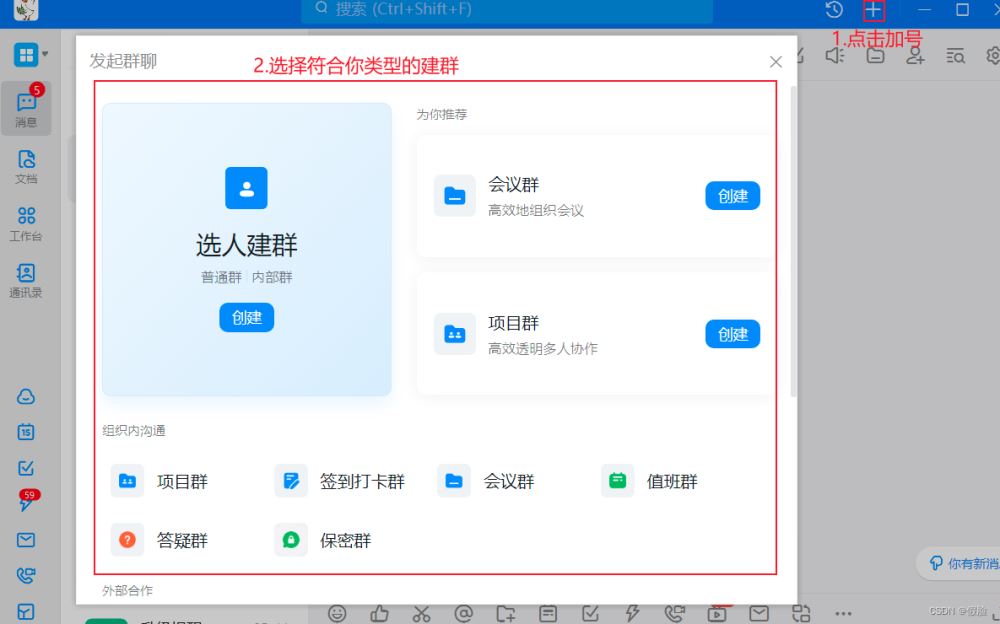
2.第二步自定义机器人是群机器人,所以需要有个群。

3.添加机器人,点击头像>机器人管理>自定义机器人

4.给机器人取个名字>选择添加到哪个群组>选择适合自己的安全设置>完成

二.安全设置
1.有三种安全设置方式:自定义关键词、加签、IP地址。
2.自定义关键词:简单来说就是你发送的内容必须包含这个关键词,才能发送成功。
3.加签:就是生成你特定的签名,在程序中,进行加密生成参数,请求时,携带此参数,才能发送成功。
4.IP地址:就是在设置的指定IP地址范围内进行请求,才能发送成功。
5.选择适合自己的安全设置方式,这里选择的是加签,即配置好后,代码在使用、复用、迁移等方面会稍加灵活一点,如果在公司,按实际需求选择就行。把这个签名记录下来,待会需要它来加密生成参数。
6.点击完成之后,就可以看到自己的Webhook,记下来,待会需要用到。

三.发送请求
1.首先,在__init__方法中,配置好机器人的信息。
def __init__(self):
# 安全设置使用加签方式
timestamp = str(round(time.time() * 1000))
secret = 'SEC7******fe0a' # 刚才记录下来的签名
secret_enc = secret.encode('utf-8')
string_to_sign = '{}\n{}'.format(timestamp, secret)
string_to_sign_enc = string_to_sign.encode('utf-8')
hmac_code = hmac.new(secret_enc, string_to_sign_enc, digestmod=hashlib.sha256).digest()
sign = urllib.parse.quote_plus(base64.b64encode(hmac_code))
# 以上就是加签的安全配置,其它安全设置,无需配置以上信息
# webhook地址
webhook = 'https://oapi.dingtalk.com/robot/send?******' # 刚才记录的webhook
self.webhook = "{}×tamp={}&sign={}".format(webhook, timestamp, sign) # 如果你的不是加签的安全方式,即可省去 ×tamp={}&sign={} 部分参数
# 配置请求headers
self.headers = {
"Content-Type": "application/json",
"Charset": "UTF-8" # 发起POST请求时,必须将字符集编码设置成UTF-8。
}
2.其次,发送请求
def send_req(self, message):
    """
    发送请求
    :param message: 你的消息体
    :return:
    """
    # 将请求数据进行json数据封装
    form_data = json.dumps(message)
    # 发起请求
    res_info = requests.post(url=self.webhook, headers=self.headers, data=form_data)
    # 打印返回的结果
    print('邮件发送结果:', res_info.json())
    print('通知成功!' if (res_info.json())['errmsg'] == 'ok' else '通知失败!')
3.再次,构造消息体,钉钉给出6种消息类型体
3.1.第一种、text型文本数据
def send_text_msg(self, content, at_mobiles=None, is_at_all=False):
    """
    发送text型文本数据
    :param content: 消息内容
    :param at_mobiles: 传入列表类型数据,@出现在列表中的电话联系人,如果群里没有该联系人,则不会@(可选参数)
    :param is_at_all: 是否@所有人,默认不艾特(可选参数)
    :return:
    """
    message = {
        "msgtype": "text",  # 消息类型
        "text": {
            "content": content
        },
        "at": {
            "atMobiles": at_mobiles,
            "isAtAll": is_at_all
        }
    }
    self.send_req(message)  # 发送消息
a.调用
DingTalkWarn().send_text_msg('测试消息发送!')
b.效果图

3.2.第二种、link型文本数据
def send_link_msg(self, text, title, message_url, pic_url=None):
    """
    发送link型文本数据
    :param text: 消息内容
    :param title: 消息标题
    :param message_url: 点击消息跳转的URL
    :param pic_url: 图片URL(可选参数)
    :return:
    """
    message = {
        "msgtype": "link",
        "link": {
            "text": text,  # 消息内容,如果太长只会部分展示
            "title": title,  # 消息标题
            "picUrl": pic_url,  # 图片URL
            "messageUrl": message_url  # 点击消息跳转的URL
        }
    }
    self.send_req(message)  # 发送消息
a.调用
DingTalkWarn().send_link_msg(
        text='爱分享,爱折腾,爱生活,乐于分享自己在学习过程中的一些心得、体会。',
        title='a'ゞ开心果的博客',
        message_url='https://blog.csdn.net/qq_45352972',
        pic_url='https://cdn.jsdelivr.net/gh/King-ing/CDN/assets/background.png'
    )
b.效果图

3.3.第三种、markdown型文本数据
def send_markdown_msg(self, text, title, at_mobiles=None, is_at_all=False):
    """
    发送markdown型文本数据
    :param text: markdown格式内容
    :param title: 标题
    :param at_mobiles: 传入列表类型数据,@出现在列表中的电话联系人,如果群里没有该联系人,则不会@(可选参数)
    :param is_at_all: 是否@所有人,默认不艾特(可选参数)
    :return:
    """
    message = {
        "msgtype": "markdown",
        "markdown": {
            "title": title,
            "text": text
        },
        "at": {
            "atMobiles": at_mobiles,
            "isAtAll": is_at_all
        }
    }
    self.send_req(message)  # 发送消息
a.调用
DingTalkWarn().send_markdown_msg(
text="## 这是一个二级标题\n \n###### {}发布".format(time.strftime("%Y-%m-%d %H:%M:%S")),
title='markdown格式数据',
)
b.效果图

3.4.第四种、整体跳转ActionCard类型的数据
def send_all_action_card_msg(self, text, title, single_url, single_title='阅读全文'):
    """
    发送整体跳转ActionCard类型的数据
    :param text: markdown格式内容
    :param title: 标题
    :param single_url: 详情url地址
    :param single_title: 点击进入详情按钮
    :return:
    """
    message = {
        "actionCard": {
            "title": title,
            "text": text,
            "singleTitle": single_title,
            "singleURL": single_url
        },
        "msgtype": "actionCard"
    }
    self.send_req(message)  # 发送消息
a.调用
DingTalkWarn().send_all_action_card_msg(
text='## 抓包工具-mitmproxy前奏\n \n介绍:mitmproxy类似于Fiddler、Charles的功能,可以支持HTTP跟HTTPS请求,只不过它是通过控制台的形式进行操作。mitmproxy有两个关联的组件,mitmdump跟mitmweb。mitmdump是mitmproxy的命令行接口;mitmweb是一个web程序,可以通...',
title='抓包工具-mitmproxy前奏',
single_url='https://blog.csdn.net/qq_45352972/article/details/111028741?spm=1001.2014.3001.5501'
)
b.效果图

3.5.第五种、独立跳转ActionCard类型的数据
def send_alone_action_card_msg(self, text, title, btn_orientation=1, btns=None):
    """
    发送独立跳转ActionCard类型的数据
    :param text: markdown格式文本数据
    :param title: 标题
    :param btn_orientation: 0-按钮竖直排列;1-按钮横向排列
    :param btns: 列表数据,里面存字符串,用来放按钮信息跟链接,如下
            [
                {
                    "title": "内容不错",
                    "actionURL": "https://www.dingtalk.com/"
                },
                {
                    "title": "不感兴趣",
                    "actionURL": "https://www.dingtalk.com/"
                }
            ]
    :return:
    """
    message = {
        "msgtype": "actionCard",
        "actionCard": {
            "title": title,
            "text": text,
            "hideAvatar": "0",
            "btnOrientation": btn_orientation,
            "btns": btns
        }
    }

    self.send_req(message)  # 发送消息
a.调用
DingTalkWarn().send_alone_action_card_msg(
text='### 查看好友博客\n',
title='查看好友博客',
btns=[
{
"title": "不感兴趣",
"actionURL": "https://www.dingtalk.com/"
},
{
"title": "我看看",
"actionURL": "https://blog.csdn.net/qq_45352972/"
}
]
)
b.效果图

3.6.第六种、FeedCard类型数据
def send_feed_card_msg(self, links):
    """
    发送FeedCard类型数据
    :param links: 列表类型,格式如下
            [
                {
                    "title": "时代的火车向前开1",
                    "messageURL": "https://www.dingtalk.com/",
                    "picURL": "https://img.alicdn.com/tfs/TB1NwmBEL9TBuNjy1zbXXXpepXa-2400-1218.png"
                },
                {
                    "title": "时代的火车向前开2",
                    "messageURL": "https://www.dingtalk.com/",
                    "picURL": "https://img.alicdn.com/tfs/TB1NwmBEL9TBuNjy1zbXXXpepXa-2400-1218.png"
                }
            ]
    :return:
    """
    message = {
        "msgtype": "feedCard",
        "feedCard": {
            "links": links
        }
    }
    self.send_req(message)  # 发送消息
a.调用
DingTalkWarn().send_feed_card_msg(
        links=[
            {
                "title": "爬虫之解决需要登录的网站",
                "messageURL": "https://blog.csdn.net/qq_45352972/article/details/113831698?spm=1001.2014.3001.5501",
                "picURL": "https://img-blog.csdnimg.cn/20210217102838577.png?x-oss-process=image/watermark,type_ZmFuZ3poZW5naGVpdGk,shadow_10,text_aHR0cHM6Ly9ibG9nLmNzZG4ubmV0L3FxXzQ1MzUyOTcy,size_16,color_FFFFFF,t_70#pic_center"
            },
            {
                "title": "控制台简单实现打印显示进度条",
                "messageURL": "https://blog.csdn.net/qq_45352972/article/details/112191329?spm=1001.2014.3001.5501",
                "picURL": "https://img-blog.csdnimg.cn/20210104184651355.png?x-oss-process=image/watermark,type_ZmFuZ3poZW5naGVpdGk,shadow_10,text_aHR0cHM6Ly9ibG9nLmNzZG4ubmV0L3FxXzQ1MzUyOTcy,size_16,color_FFFFFF,t_70"
            },
            {
                "title": "Email邮件提醒",
                "messageURL": "https://blog.csdn.net/qq_45352972/article/details/109280576?spm=1001.2014.3001.5501",
                "picURL": "https://img-blog.csdnimg.cn/2020102522530334.png?x-oss-process=image/watermark,type_ZmFuZ3poZW5naGVpdGk,shadow_10,text_aHR0cHM6Ly9ibG9nLmNzZG4ubmV0L3FxXzQ1MzUyOTcy,size_16,color_FFFFFF,t_70#pic_center"
            }
        ]
    )
b.效果图

四.完整代码
import base64
import hashlib
import hmac
import time
import urllib.parse
import requests
import json
class DingTalkWarn:
"""钉钉消息通知"""
def __init__(self):
# 安全设置使用加签方式
timestamp = str(round(time.time() * 1000))
# 刚才记录下来的签名
secret = 'SEC24e640447734a80b9d430d678765a103652b33f334a69974cfda88415e601d22'
secret_enc = secret.encode('utf-8')
string_to_sign = '{}\n{}'.format(timestamp, secret)
string_to_sign_enc = string_to_sign.encode('utf-8')
hmac_code = hmac.new(secret_enc, string_to_sign_enc, digestmod=hashlib.sha256).digest()
sign = urllib.parse.quote_plus(base64.b64encode(hmac_code))
# 以上就是加签的安全配置,其它安全设置,无需配置以上信息
# webhook地址(刚才记录的webhook)
webhook = 'https://oapi.dingtalk.com/robot/send?access_token=5f56131ba70c78f42a10c7e9531c8da55def990313a4a74cfc87bf82c4bb8b7b'
# 如果你的不是加签的安全方式,即可省去 ×tamp={}&sign={} 部分参数
self.webhook = "{}×tamp={}&sign={}".format(webhook, timestamp, sign)
# 配置请求headers
self.headers = {
"Content-Type": "application/json",
"Charset": "UTF-8" # 发起POST请求时,必须将字符集编码设置成UTF-8。
}
def send_text_msg(self, content, at_mobiles=None, is_at_all=False):
"""
发送text型文本数据
:param content: 消息内容
:param at_mobiles: 传入列表类型数据,@出现在列表中的电话联系人,如果群里没有该联系人,则不会@(可选参数)
:param is_at_all: 是否@所有人,默认不艾特(可选参数)
:return:
"""
message = {
"msgtype": "text", # 消息类型
"text": {
"content": content
},
"at": {
"atMobiles": at_mobiles,
"isAtAll": is_at_all
}
}
self.send_req(message) # 发送消息
def send_link_msg(self, text, title, message_url, pic_url=None):
"""
发送link型文本数据
:param text: 消息内容
:param title: 消息标题
:param message_url: 点击消息跳转的URL
:param pic_url: 图片URL(可选参数)
:return:
"""
message = {
"msgtype": "link",
"link": {
"text": text, # 消息内容,如果太长只会部分展示
"title": title, # 消息标题
"picUrl": pic_url, # 图片URL
"messageUrl": message_url # 点击消息跳转的URL
}
}
self.send_req(message) # 发送消息
def send_markdown_msg(self, text, title, at_mobiles=None, is_at_all=False):
"""
发送markdown型文本数据
:param text: markdown格式内容
:param title: 标题
:param at_mobiles: 传入列表类型数据,@出现在列表中的电话联系人,如果群里没有该联系人,则不会@(可选参数)
:param is_at_all: 是否@所有人,默认不艾特(可选参数)
:return:
"""
message = {
"msgtype": "markdown",
"markdown": {
"title": title,
"text": text
},
"at": {
"atMobiles": at_mobiles,
"isAtAll": is_at_all
}
}
self.send_req(message) # 发送消息
def send_all_action_card_msg(self, text, title, single_url, single_title=u'阅读全文'):
"""
发送整体跳转ActionCard类型的数据
:param text: markdown格式内容
:param title: 标题
:param single_url: 详情url地址
:param single_title: 点击进入详情按钮
:return:
"""
message = {
"actionCard": {
"title": title,
"text": text,
"singleTitle": single_title,
"singleURL": single_url
},
"msgtype": "actionCard"
}
self.send_req(message) # 发送消息
def send_alone_action_card_msg(self, text, title, btn_orientation=1, btns=None):
"""
发送独立跳转ActionCard类型的数据
:param text: markdown格式文本数据
:param title: 标题
:param btn_orientation: 0-按钮竖直排列;1-按钮横向排列
:param btns: 列表数据,里面存字符串,用来放按钮信息跟链接,如下
[
{
"title": "内容不错",
"actionURL": "https://www.dingtalk.com/"
},
{
"title": "不感兴趣",
"actionURL": "https://www.dingtalk.com/"
}
]
:return:
"""
message = {
"msgtype": "actionCard",
"actionCard": {
"title": title,
"text": text,
"hideAvatar": "0",
"btnOrientation": btn_orientation,
"btns": btns
}
}
self.send_req(message) # 发送消息
def send_feed_card_msg(self, links):
"""
发送FeedCard类型数据
:param links: 列表类型,格式如下
[
{
"title": "时代的火车向前开1",
"messageURL": "https://www.dingtalk.com/",
"picURL": "https://img.alicdn.com/tfs/TB1NwmBEL9TBuNjy1zbXXXpepXa-2400-1218.png"
},
{
"title": "时代的火车向前开2",
"messageURL": "https://www.dingtalk.com/",
"picURL": "https://img.alicdn.com/tfs/TB1NwmBEL9TBuNjy1zbXXXpepXa-2400-1218.png"
}
]
:return:
"""
message = {
"msgtype": "feedCard",
"feedCard": {
"links": links
}
}
self.send_req(message) # 发送消息
def send_req(self, message):
"""
发送请求
:param message: 你的消息体
:return:
"""
# 将请求数据进行json数据封装
form_data = json.dumps(message)
# 发起请求
res_info = requests.post(url=self.webhook, headers=self.headers, data=form_data)
# 打印返回的结果
print(u'邮件发送结果:', res_info.json())
print(u'通知成功!' if (res_info.json())['errmsg'] == 'ok' else u'通知失败!')
if __name__ == '__main__':
"""测试发送消息"""
DingTalkWarn().send_text_msg(u'测试消息发送!')
"""
DingTalkWarn().send_link_msg(
text='爱分享,爱折腾,爱生活,乐于分享自己在学习过程中的一些心得、体会。',
title='a'ゞ开心果的博客',
message_url='https://blog.csdn.net/qq_45352972',
pic_url='https://cdn.jsdelivr.net/gh/King-ing/CDN/assets/background.png'
)
DingTalkWarn().send_markdown_msg(
text="## 这是一个二级标题\n \n###### {}发布".format(time.strftime("%Y-%m-%d %H:%M:%S")),
title='markdown格式数据',
)
DingTalkWarn().send_all_action_card_msg(
text='## 抓包工具-mitmproxy前奏\n \n介绍:mitmproxy类似于Fiddler、Charles的功能,可以支持HTTP跟HTTPS请求,只不过它是通过控制台的形式进行操作。mitmproxy有两个关联的组件,mitmdump跟mitmweb。mitmdump是mitmproxy的命令行接口;mitmweb是一个web程序,可以通...',
title='抓包工具-mitmproxy前奏',
single_url='https://blog.csdn.net/qq_45352972/article/details/111028741?spm=1001.2014.3001.5501'
)
DingTalkWarn().send_alone_action_card_msg(
text='### 查看好友博客\n',
title='查看好友博客',
btns=[
{"title": "不感兴趣",
"actionURL": "https://www.dingtalk.com/"
},
{
"title": "我看看",
"actionURL": "https://blog.csdn.net/qq_45352972/"
}
]
)
DingTalkWarn().send_feed_card_msg(
links=[
{
"title": "爬虫之解决需要登录的网站",
"messageURL": "https://blog.csdn.net/qq_45352972/article/details/113831698?spm=1001.2014.3001.5501",
"picURL": "https://img-blog.csdnimg.cn/20210217102838577.png?x-oss-process=image/watermark,type_ZmFuZ3poZW5naGVpdGk,shadow_10,text_aHR0cHM6Ly9ibG9nLmNzZG4ubmV0L3FxXzQ1MzUyOTcy,size_16,color_FFFFFF,t_70#pic_center"
},
{
"title": "控制台简单实现打印显示进度条",
"messageURL": "https://blog.csdn.net/qq_45352972/article/details/112191329?spm=1001.2014.3001.5501",
"picURL": "https://img-blog.csdnimg.cn/20210104184651355.png?x-oss-process=image/watermark,type_ZmFuZ3poZW5naGVpdGk,shadow_10,text_aHR0cHM6Ly9ibG9nLmNzZG4ubmV0L3FxXzQ1MzUyOTcy,size_16,color_FFFFFF,t_70"
},
{
"title": "Email邮件提醒",
"messageURL": "https://blog.csdn.net/qq_45352972/article/details/109280576?spm=1001.2014.3001.5501",
"picURL": "https://img-blog.csdnimg.cn/2020102522530334.png?x-oss-process=image/watermark,type_ZmFuZ3poZW5naGVpdGk,shadow_10,text_aHR0cHM6Ly9ibG9nLmNzZG4ubmV0L3FxXzQ1MzUyOTcy,size_16,color_FFFFFF,t_70#pic_center"
}
]
)
"""
到此这篇关于Python基于钉钉监控发送消息提醒的实现的文章就介绍到这了,更多相关Python 钉钉监控发送消息提醒内容请搜索脚本之家以前的文章或继续浏览下面的相关文章希望大家以后多多支持脚本之家!
