Android中自定义ImageView添加文字说明详解
作者:芯_空
Android中的ImageView只能显示矩形的图片,为了用户体验更多,下面这篇文章主要给大家介绍了关于Android中自定义ImageView实现添加文字说明的相关资料,文中通过示例代码介绍的非常详细,需要的朋友可以参考借鉴,下面来一起看看吧。
前言
大家应该都有所体会,在android开发中,需要展示图片的地方有很多..正常情况下展示一张图片的时候还需要在下面添加一个文字说明..我们也可以用布局ImageView+TextView来实现..最常见的就是底部菜单,或者顶部菜单...图标下面还要添加一个文字说明...重复多次使用ImageView+TextView来实现会感觉有点麻烦..
下面就介绍一个简易的图片+文字的简单控件,分享出来供大家参考学习,下面话不多说了,来一起看看详细的介绍:
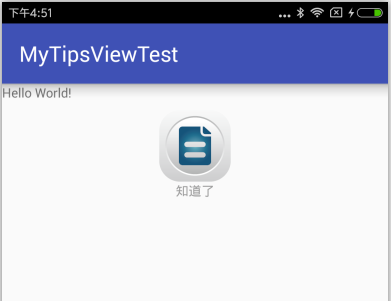
上效果图

效果图
下面我们开始撸代码.
MyImageTextViewNew.java
public class MyImageTextViewNew extends LinearLayout {

 private ImageView mImageView = null;
 private TextView mTextView = null;
 private int imageId;
 private int textId, textColorId;

 public MyImageTextViewNew(Context context) {
  this(context, null);
 }

 public MyImageTextViewNew(Context context, @Nullable AttributeSet attrs) {
  this(context, attrs, 0);
 }

 public MyImageTextViewNew(Context context, @Nullable AttributeSet attrs, int defStyleAttr) {
  super(context, attrs, defStyleAttr);
  this.setOrientation(LinearLayout.VERTICAL);//设置垂直排序
  this.setGravity(Gravity.CENTER);//设置居中
  if (mImageView == null) {
   mImageView = new ImageView(context);
  }
  if (mTextView == null) {
   mTextView = new TextView(context);
  }
  if (attrs == null)
   return;
  int count = attrs.getAttributeCount();
  for (int i = 0; i < count; i++) {
   String attrName = attrs.getAttributeName(i);//获取属性名称
   //根据属性获取资源ID
   switch (attrName) {
    //显示的图片
    case "image":
     imageId = attrs.getAttributeResourceValue(i, 0);
     break;
    //显示的文字
    case "text":
     textId = attrs.getAttributeResourceValue(i, 0);
     break;
    //显示的文字的颜色
    case "textColor":
     textColorId = attrs.getAttributeResourceValue(i, 0);
     break;
   }
  }
  init();
 }

 /**
  * 初始化状态
  */
 private void init() {
  this.setText(textId);
  mTextView.setGravity(Gravity.CENTER);//字体居中
  this.setTextColor(textColorId);
  this.setImgResource(imageId);
  addView(mImageView);//将图片控件加入到布局中
  addView(mTextView);//将文字控件加入到布局中
 }

 /**
  * 设置显示的图片
  *
  * @param resourceID 图片ID
  */
 private void setImgResource(int resourceID) {
  if (resourceID == 0) {
   this.mImageView.setImageResource(0);
  } else {
   this.mImageView.setImageResource(resourceID);
  }
 }

 /**
  * 设置显示的文字
  *
  * @param text
  */
 public void setText(int text) {
  this.mTextView.setText(text);
 }

 /**
  * 设置字体颜色(默认为黑色)
  *
  * @param color
  */
 private void setTextColor(int color) {
  if (color == 0) {
   this.mTextView.setTextColor(Color.BLACK);
  } else {
   this.mTextView.setTextColor(getResources().getColor(color));
  }
 }

}
简单解释下..实际上就是在LinearLayout布局中添加ImageView和TextView
这个View也比较简单,代码中也有部分简易的说明.
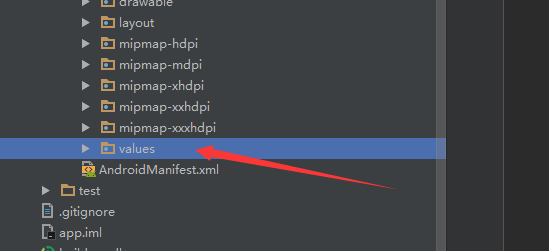
下面可能还需要一个属性文件
imageText.xml
<?xml version="1.0" encoding="utf-8"?>
<resources>

 <declare-styleable name="imageText">
  <attr name="image" format="integer" />
  <attr name="text" format="integer" />
  <attr name="textColor" format="integer" />
 </declare-styleable>

</resources>

配置文件存放位置
下面展示使用方法

实际使用
总结
以上就是这篇文章的全部内容了,希望本文的内容对大家的学习或者工作能带来一定的帮助,如果有疑问大家可以留言交流,谢谢大家对脚本之家的支持。
