
PyCharm中配置PyQt的实现步骤
作者:倔强老吕
PyCharm是JetBrains推出的一款强大的Python IDE,结合PyQt可以高效开发桌面GUI应用程序。
1. 安装PyQt
PyQt 是 Python 语言的 Qt 框架绑定,用于创建图形用户界面(GUI)应用程序。它是 Riverbank Computing 公司开发的,基于 Qt 框架。
1.PyQt 核心组件
QtWidgets: 包含各种 UI 控件(按钮、文本框等)
QtCore: 核心非 GUI 功能(信号/槽、文件 IO 等)
QtGui: 图形和图像功能
QtWebEngineWidgets: 网页渲染组件
安装 PyQt5
pip install PyQt5
pip install PyQt5-tools  # 包含 Qt Designer 等工具
2. 基础 PyQt 应用程序结构
import sys
from PyQt5.QtWidgets import QApplication, QMainWindow, QLabel

class MyWindow(QMainWindow):
    def __init__(self):
        super().__init__()
        self.setWindowTitle("PyQt 示例")
        self.setGeometry(100, 100, 400, 300)

        label = QLabel("Hello PyQt!", self)
        label.move(50, 50)

if __name__ == "__main__":
    app = QApplication(sys.argv)
    window = MyWindow()
    window.show()
    sys.exit(app.exec_())
3. 使用 Qt Designer 创建界面
启动 Qt Designer:
designer
或通过 PyCharm 的外部工具启动
设计界面并保存为 .ui 文件
将 .ui 文件转换为 .py 文件:
pyuic5 input.ui -o output.py
在代码中使用生成的 UI:
from PyQt5 import QtWidgets
from output import Ui_MainWindow

class MyApp(QtWidgets.QMainWindow, Ui_MainWindow):
    def __init__(self):
        super().__init__()
        self.setupUi(self)
        # 添加你的逻辑代码
2. PyCharm配置
2.1 配置外部工具
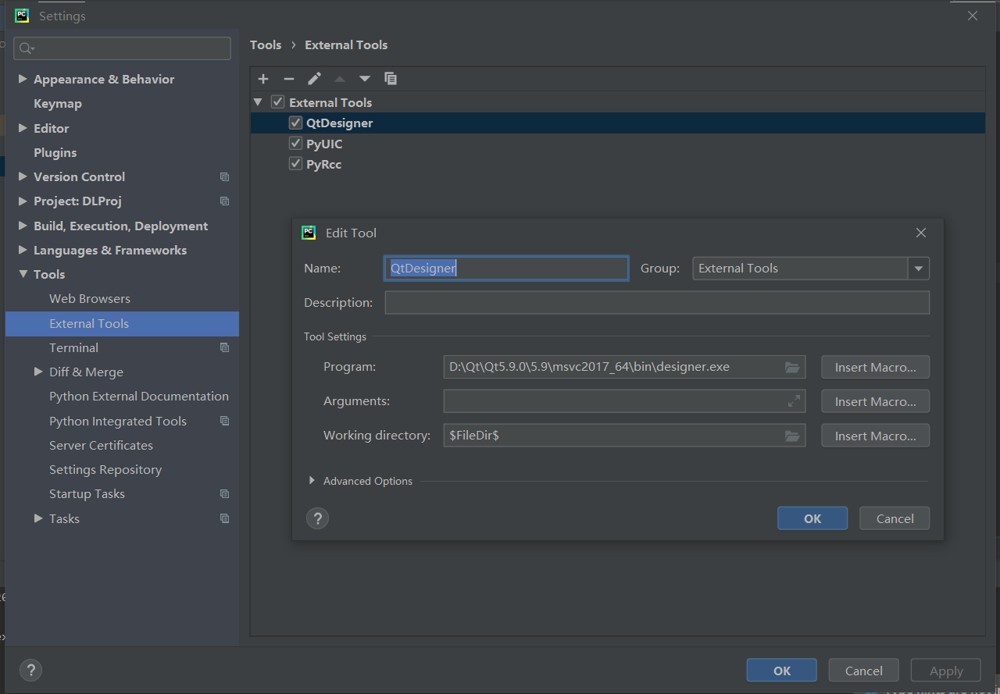
- 打开PyCharm,进入
File > Settings > Tools > External Tools - 点击"+"号添加新工具
配置Qt Designer
- Name: Qt Designer
- Program: 找到你的Python安装目录下的
designer.exe,通常在:
<Python安装目录>\Lib\site-packages\qt5_applications\Qt\bin\designer.exe
或
<Python安装目录>\Lib\site-packages\PyQt5\Qt\bin\designer.exe
Working directory: $ProjectFileDir$
配置PyUIC(将.ui文件转换为.py文件)
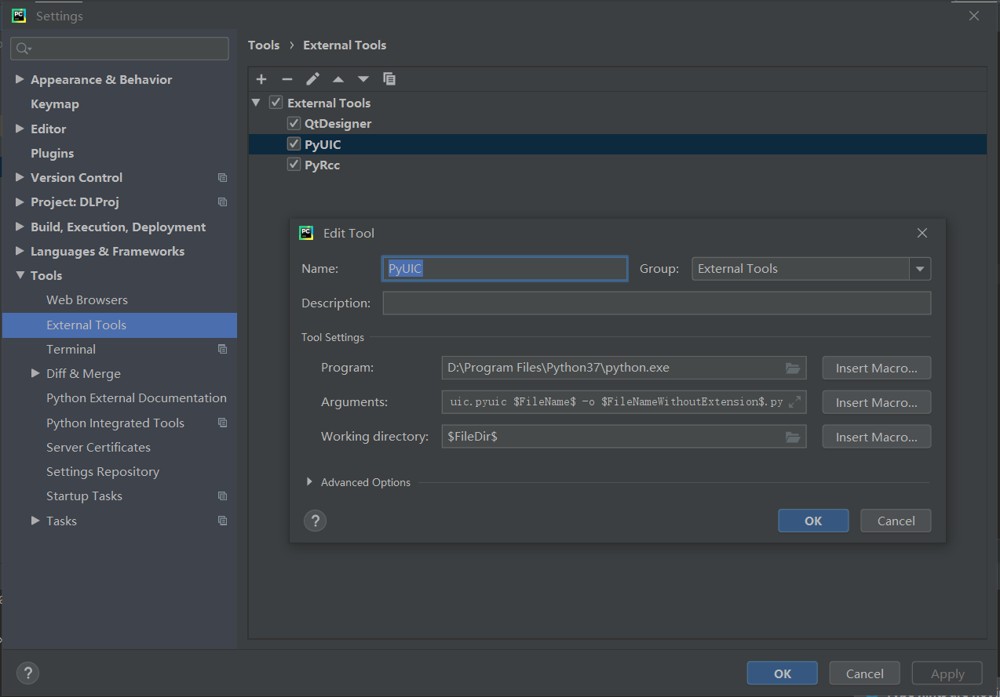
Name: PyUIC
Program: 你的Python解释器路径
Arguments:
-m PyQt5.uic.pyuic $FileName$ -o $FileNameWithoutExtension$.py
Working directory: $FileDir$
配置Pyrcc(用于资源文件编译)
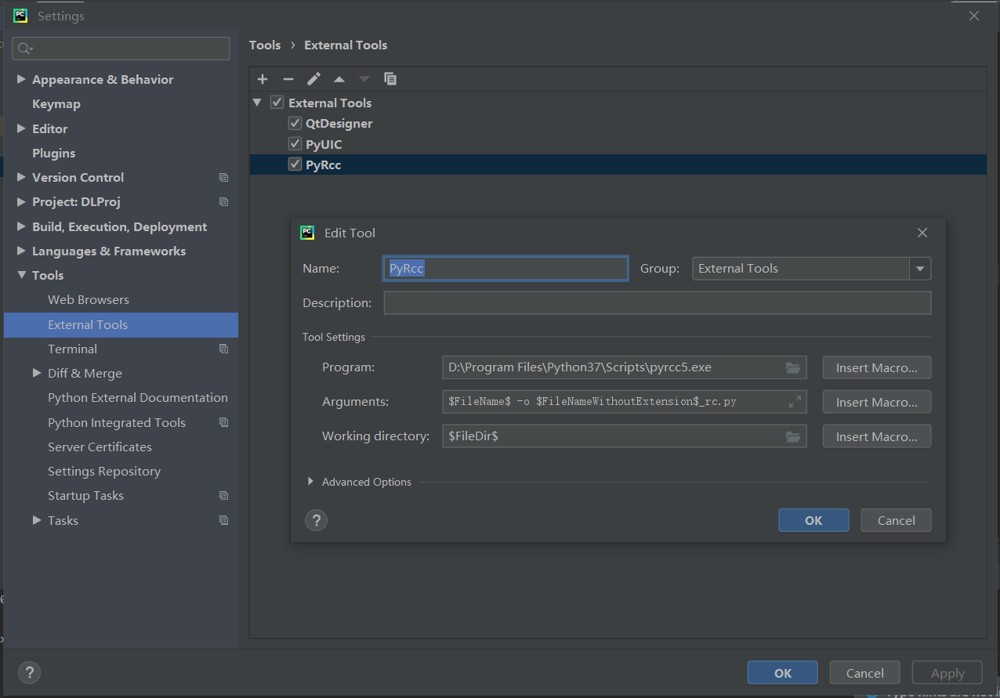
Name: Pyrcc
Program: 你的Python解释器路径
Arguments:
-m PyQt5.pyrcc_main $FileName$ -o $FileNameWithoutExtension$_rc.py
Working directory: $FileDir$
2.2 配置Qt Designer文件关联
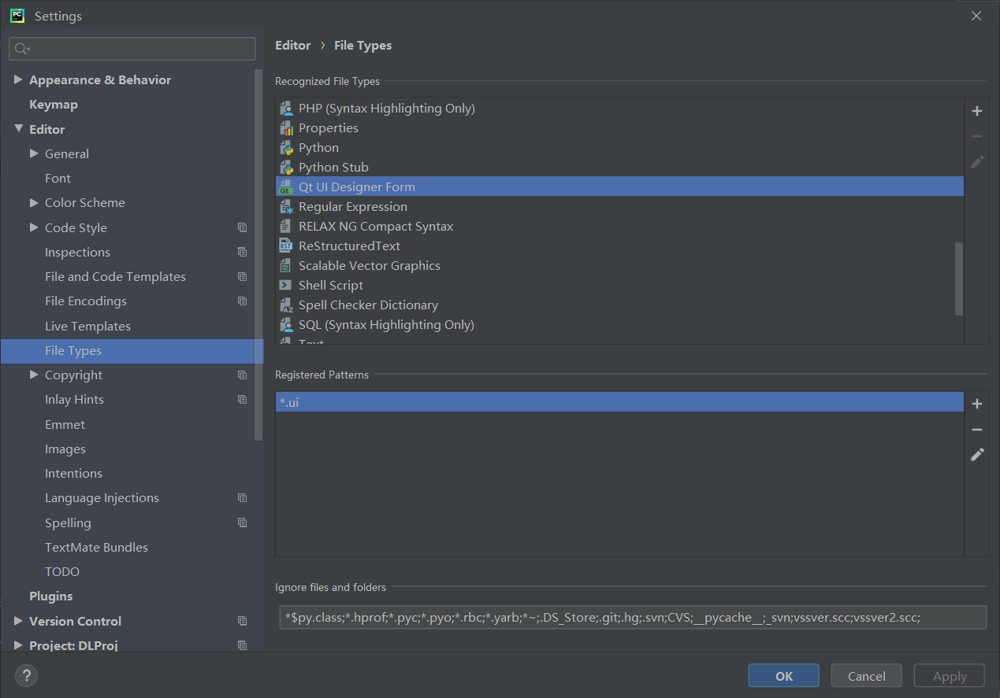
- 进入
File > Settings > Editor > File Types - 找到"UI Designer Form",添加
*.ui文件类型
3. 使用流程
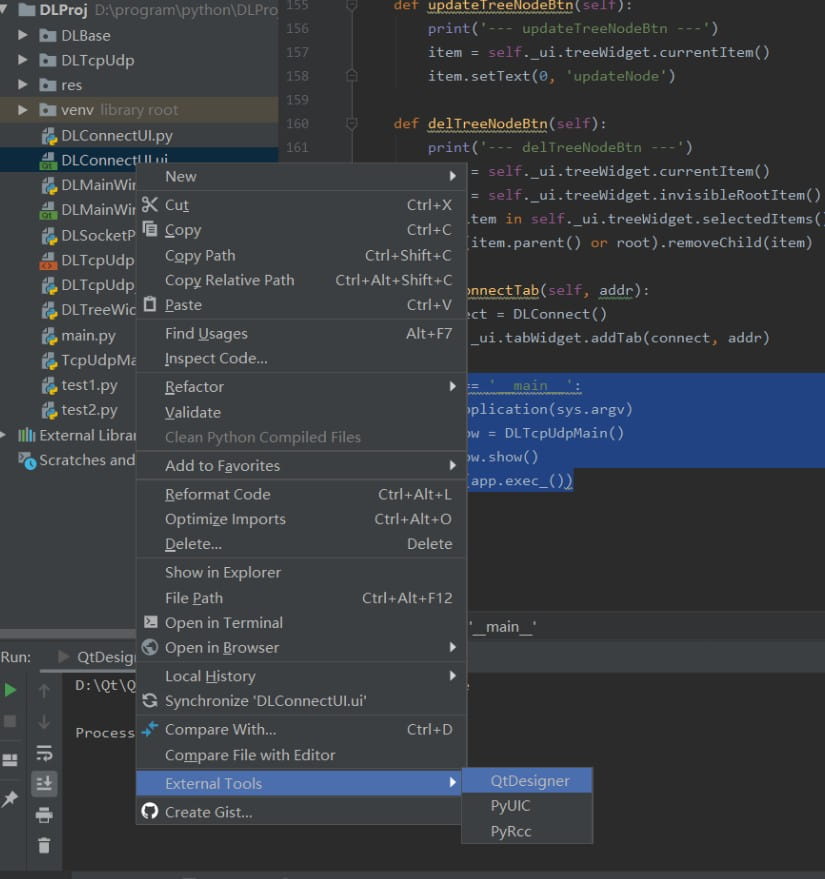
创建UI文件:
- 右键项目目录 > External Tools > Qt Designer
- 设计界面并保存为
.ui文件
转换为Python代码:
- 右键.ui文件 > External Tools > PyUIC
- 将生成对应的.py文件
使用生成的UI:
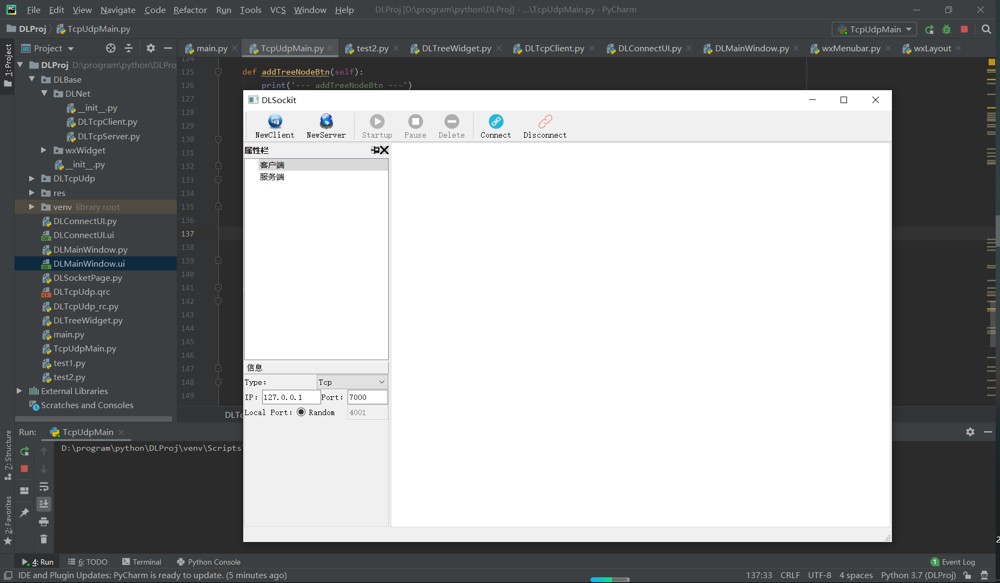
import sys
from PyQt5 import QtCore, QtGui, QtWidgets
from PyQt5.QtWidgets import QApplication, QMainWindow, QTreeWidgetItem,QWidget,QPushButton,QHBoxLayout
from DLMainWindow import Ui_MainWindow
from DLConnectUI import Ui_DLTcpUdp
from DLBase.DLNet.DLTcpClient import DLTcpClient
from DLBase.DLNet.DLTcpServer import DLTcpSever

class DLConnect(QWidget):
    def __init__(self, parent=None):
        super(DLConnect, self).__init__(parent)
        self._ui = Ui_DLTcpUdp()
        self._ui.setupUi(self)

class DLTcpUdpMain(QMainWindow):
    def __init__(self, parent=None):
        super(DLTcpUdpMain, self).__init__(parent)
        self._ui = Ui_MainWindow()
        self._ui.setupUi(self)
        self.InitTreeWidget()
        self.InitConnectTab()
        self._ui.splitter.setStretchFactor(1, 3);
        self.resize(1200, 800)


if __name__ == '__main__':
    app = QApplication(sys.argv)
    MainWindow = DLTcpUdpMain()
    MainWindow.show()
    sys.exit(app.exec_())
4. 调试配置
- 创建新的Python运行配置
- 确保勾选了
Emulate terminal in output console选项,这可以避免PyQt应用在PyCharm控制台中运行时的显示问题
5. 实用功能集成
1. 实时预览UI修改
安装pyqt5-tools的预览功能:
pip install pyqt5-tools
在PyCharm Terminal运行:
pyqt5-tools preview ui/main_window.ui
2. 热重载开发(代码修改不重启应用)
使用pyqt5-reload:
from pyqt5_reloader import run
run('main.py')
6. 常见问题解决
1. 界面显示不正常
- 确保所有
.ui文件已正确转换为.py - 检查布局管理器是否设置正确
- 尝试添加
QApplication.processEvents()
2. 资源文件加载失败
创建.qrc文件:
<RCC>
  <qresource prefix="/">
    <file>images/icon.png</file>
  </qresource>
</RCC>- 使用Pyrcc工具编译
- 在代码中导入生成的
_rc.py文件
3. 高DPI屏幕显示模糊
在主程序添加:
from PyQt5.QtCore import Qt
QApplication.setAttribute(Qt.AA_EnableHighDpiScaling)
QApplication.setAttribute(Qt.AA_UseHighDpiPixmaps)
7. 项目打包发布
1. 使用PyInstaller打包
pyinstaller --onefile --windowed --icon=app.ico main.py
2. 包含资源文件
创建.spec文件并修改:
a = Analysis(
    ['main.py'],
    datas=[('ui/main_window.ui', 'ui'), ('resources_rc.py', '.')],
    ...
)
通过以上配置,可以在PyCharm中高效地进行PyQt开发,充分利用IDE的代码补全、调试和版本控制功能,同时结合Qt Designer的可视化设计优势。
到此这篇关于PyCharm中配置PyQt的实现步骤的文章就介绍到这了,更多相关PyCharm配置PyQt内容请搜索脚本之家以前的文章或继续浏览下面的相关文章希望大家以后多多支持脚本之家!