
Python常用命令提示符使用方法详解
作者:殇淋狱陌
一、Python环境基础命令【Windows】
于Windows环境下,针对Python,在CMD(命令提示符)常用的命令以及具体用法,怎么用;
主要包含:运行脚本、包管理、虚拟环境、调试与信息查看、快捷执行、代码检查,以及Windows特有的命令和路径处理。
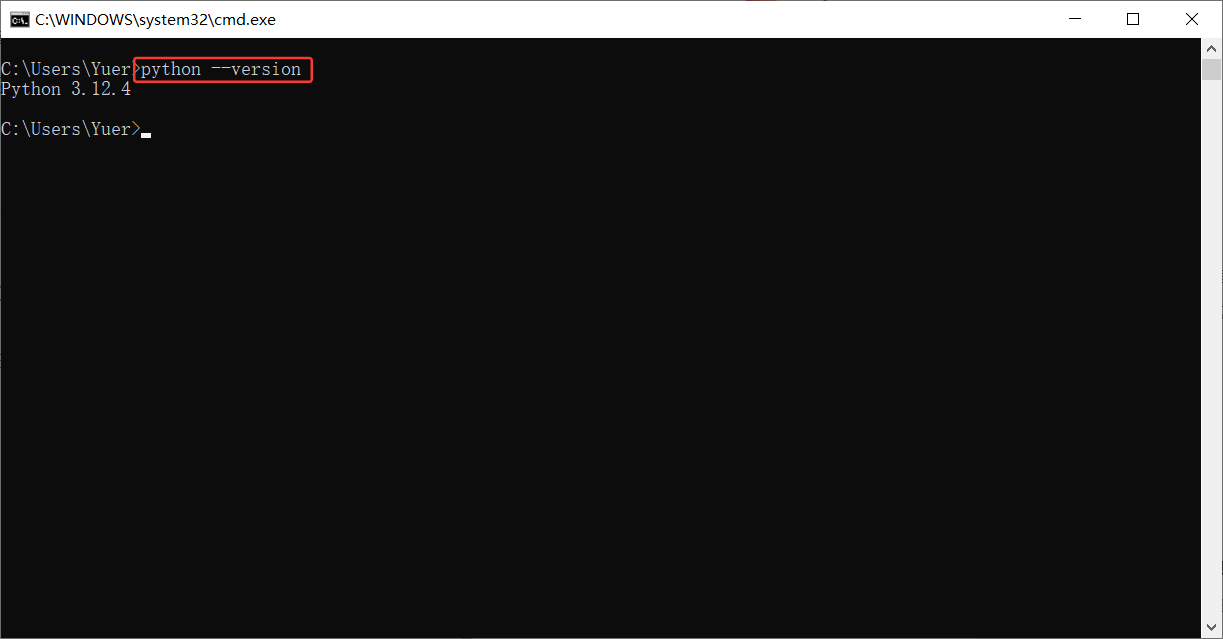
1、检查Python是否安装
使用python --version来查看所安装的Python版本:
python --version
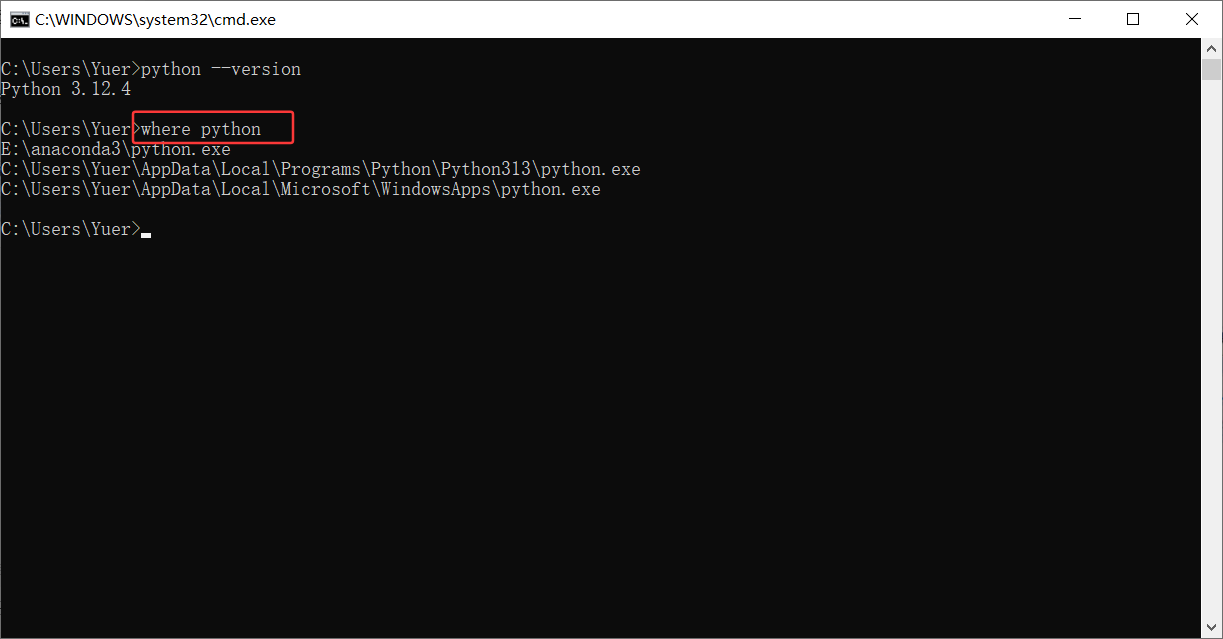
2、 查看Python的安装路径
查看Python的安装路径:列出所有Python解释器的安装路径;
where python
二、运行Python
1、直接运行脚本文件
比如现在要执行路径F:\Python\venvEnvironment\project\pythonProject\basic下的hello.py,如下图:

在Windows下的命令提示符(CMD),输入该文件所在路径F:\Python\venvEnvironment\project\pythonProject\basic,如下图:
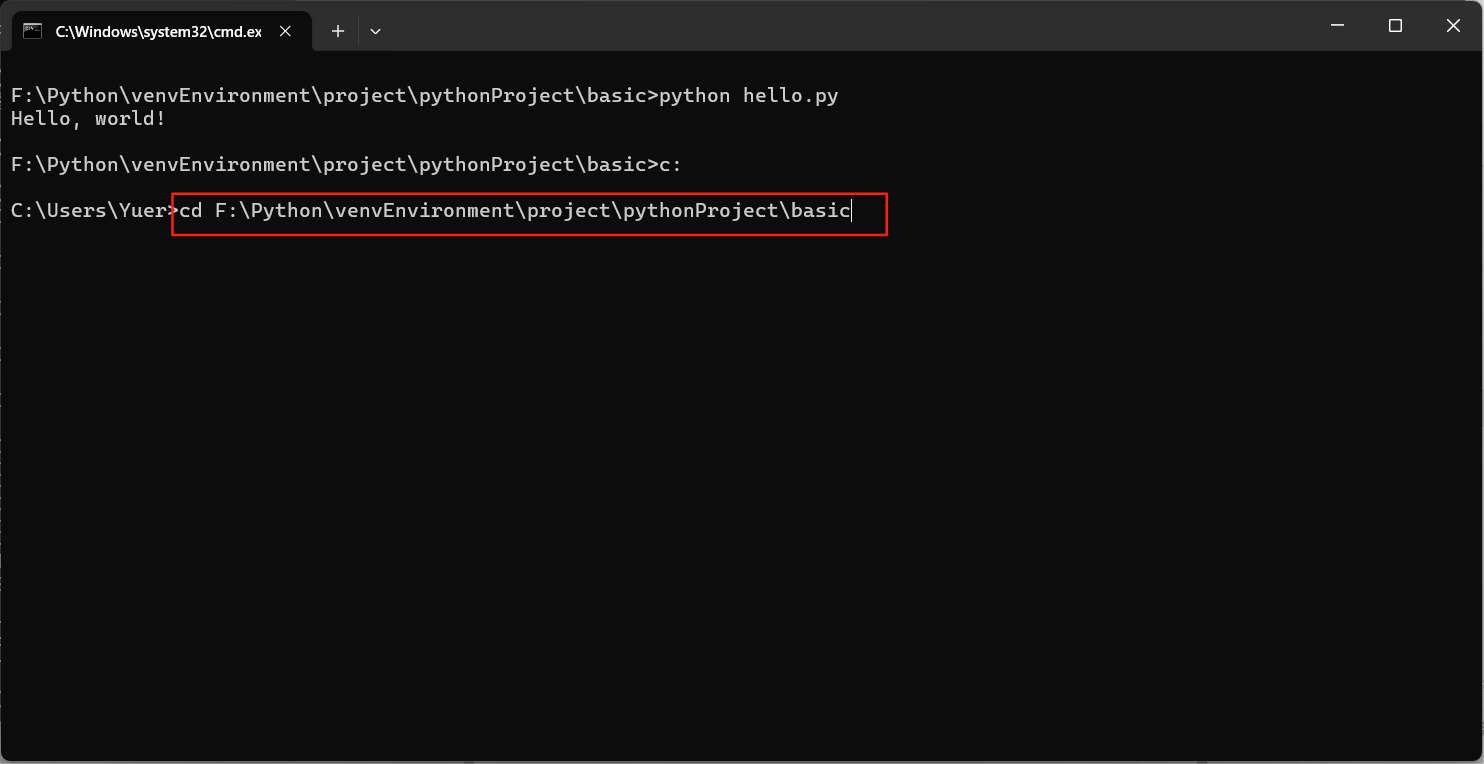
到路径下后,输入命令python hello.py回车就可以看到执行结果,如下:

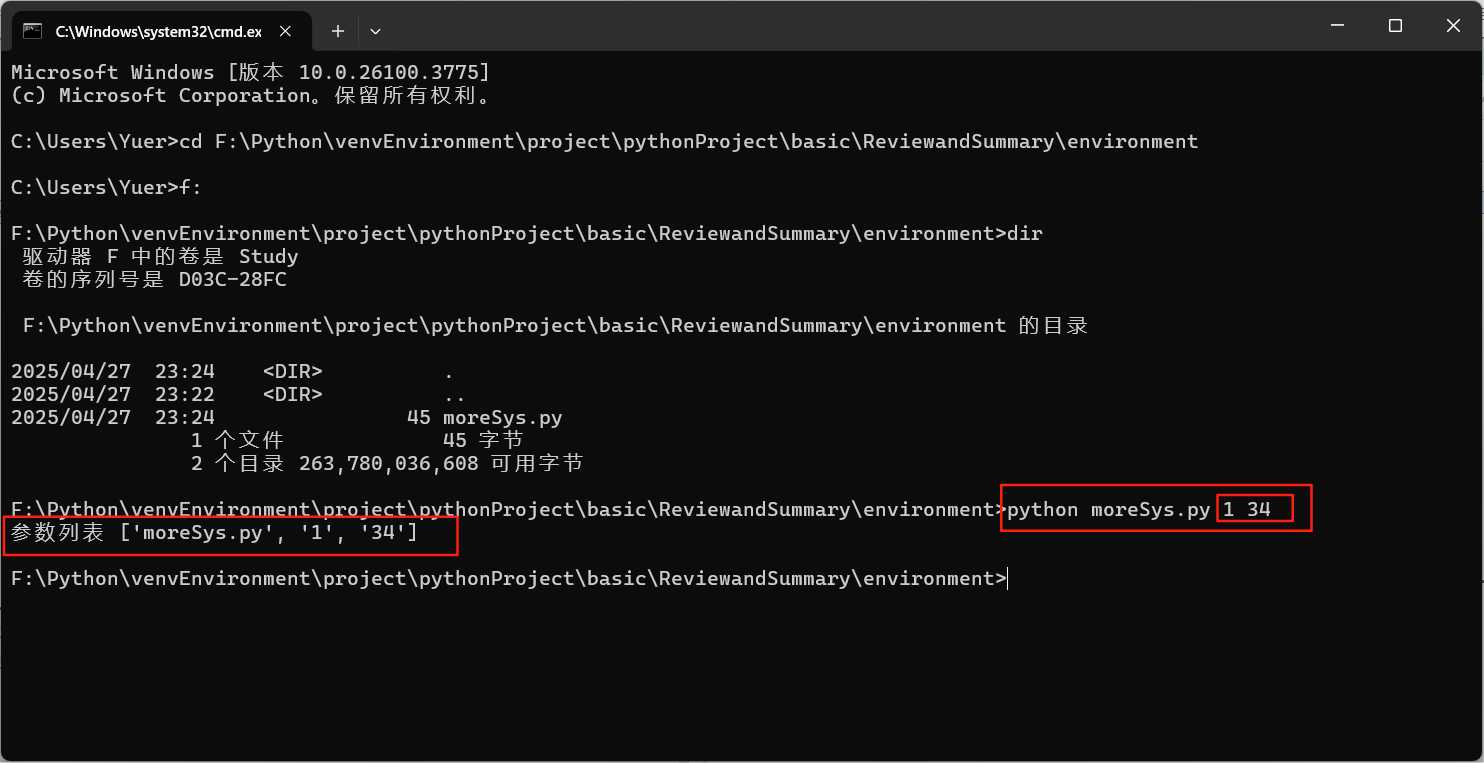
2、传递命令行参数
- 脚本内接收参数:在
moreSys.py中使用sys.argv获取参数列表: - 文件路径:
命令行输入脚本: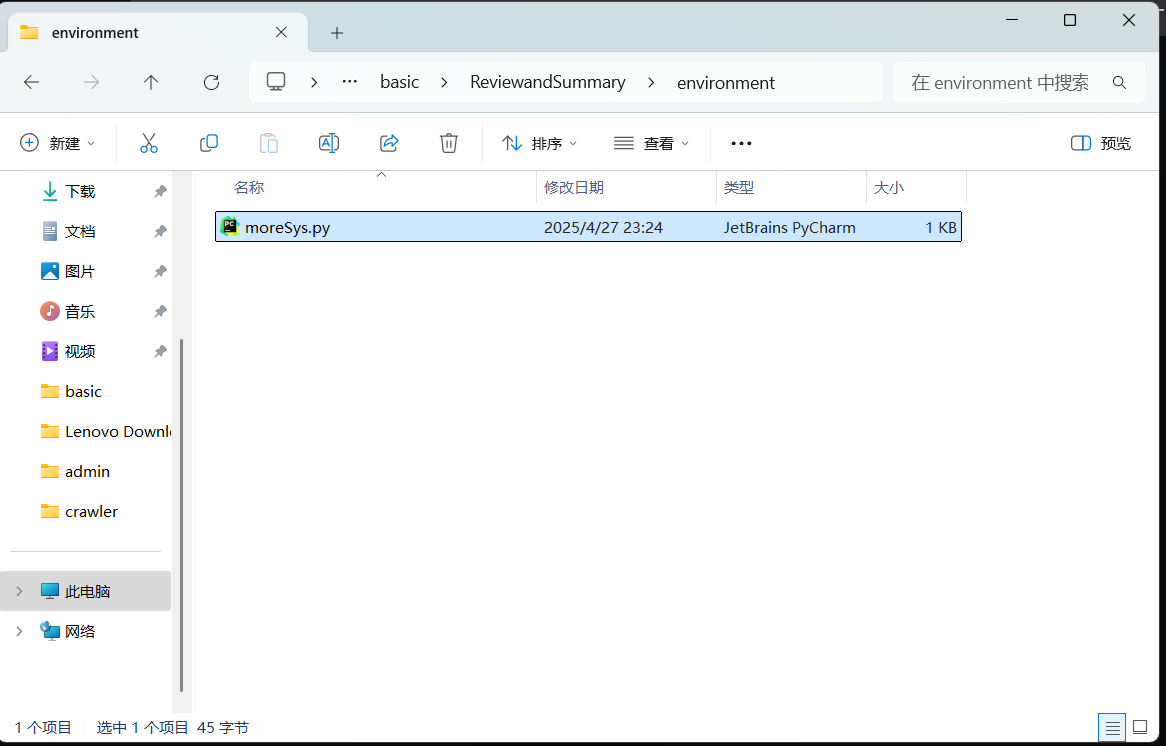


三、Python包管理(pip)&虚拟环境
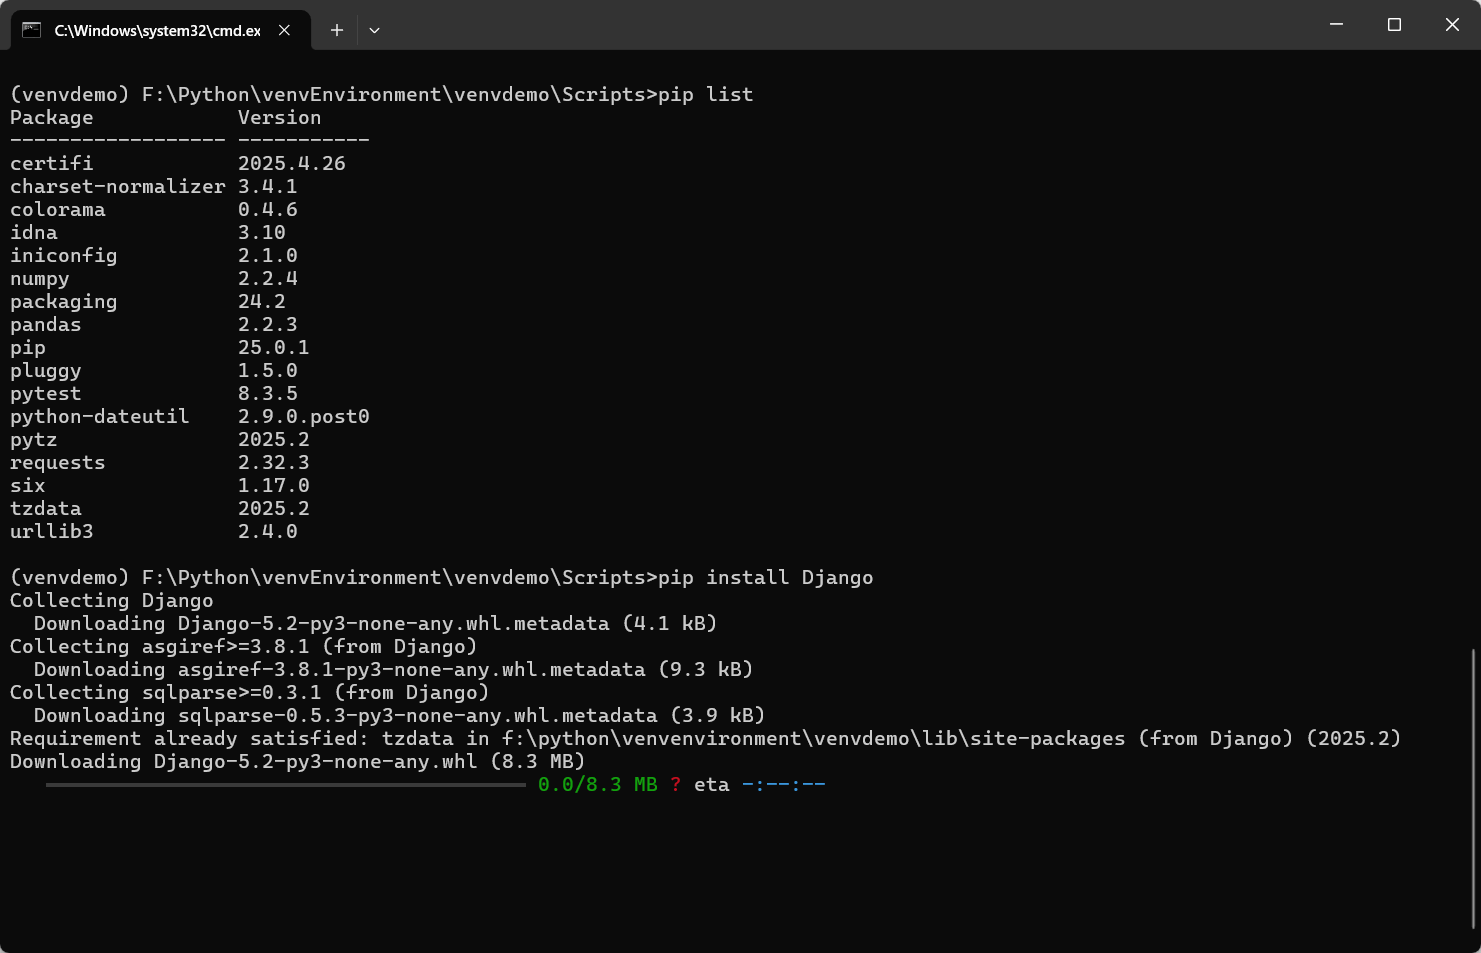
1、安装三方库
python -m pip install 包名
其中,安装三方库:python -m pip install 包名中的python -m可以省略,这里的python -m是指以模块模式运行pip,而不是直接调用系统环境中的pip可执行文件。python -m的作用:
如果系统中安装了多个Python版本(如Python 3.8、Python 3.13等等版本),每个版本都有独立的pip。此时如果,直接运行pip install可能会调用全局默认的pip(也就是与当前使用的Python版本不匹配)导致运行错误。因此,使用python -m就能很好的确保调用的是当前Python解释器对应的pip,进而避免版本冲突,导致运行错误。
python -m不仅限于pip,也可以用于其他模块:
创建虚拟环境:
python -m venv 虚拟环境名称启动HTTP服务器:
python -m http.server运行pytest测试:
python -m pytest
对比总结:
| 命令 | 含义 | 推荐场景 |
|---|---|---|
pip install pandas | 直接调用系统路径的 pip | 确保环境单一且无冲突时使用 |
python -m pip install pandas | 调用当前 Python 解释器对应的 pip | 推荐,尤其多版本 Python、虚拟环境中使用 |
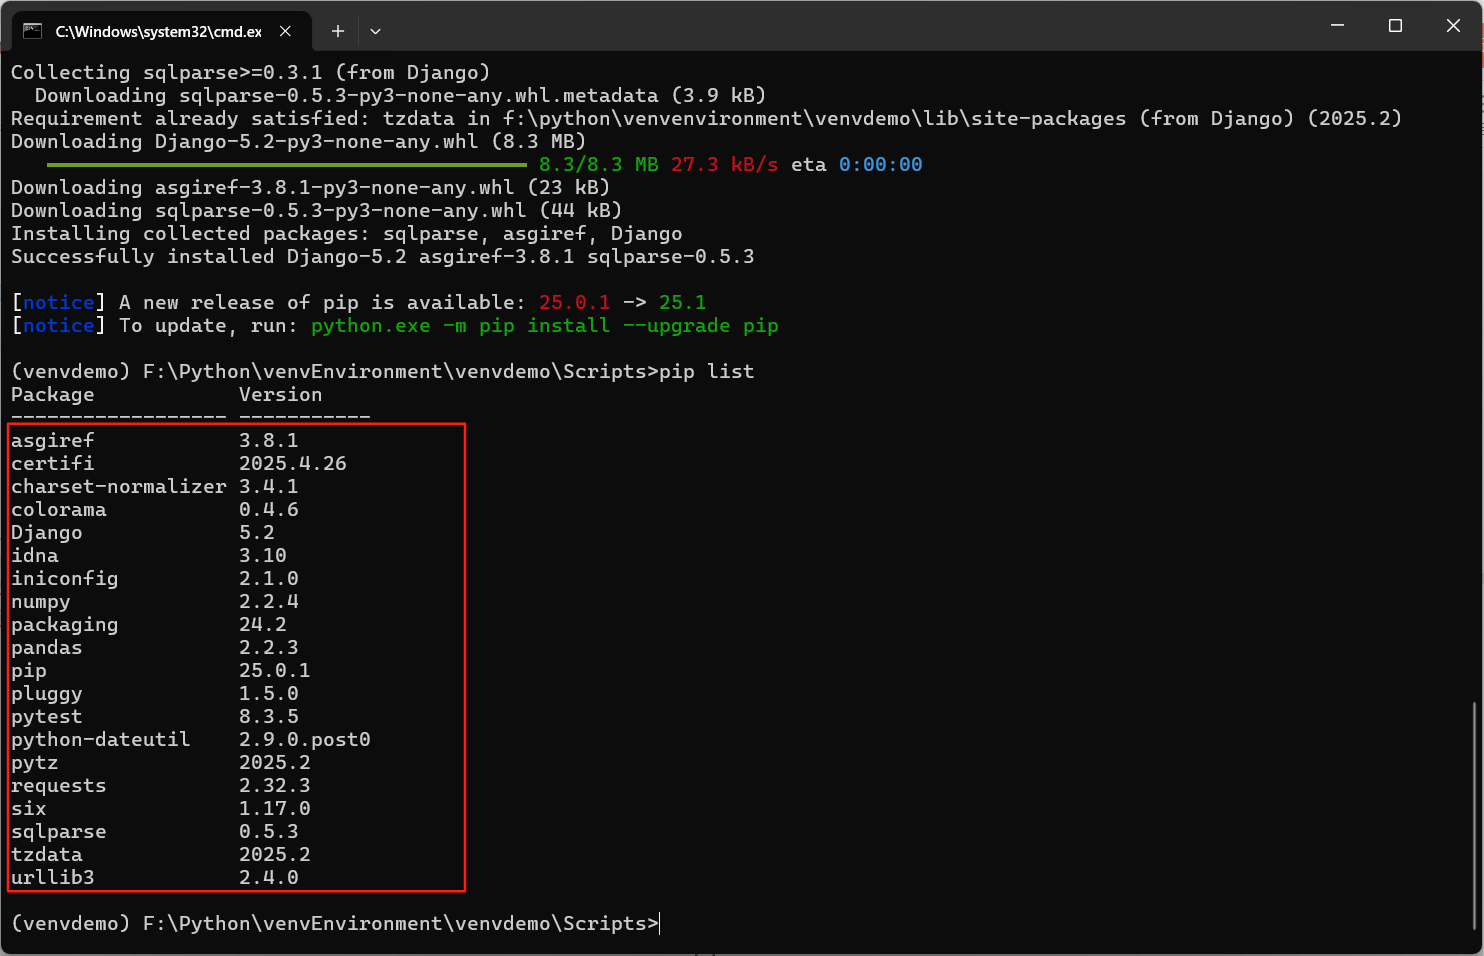
直接使用pip install 包名安装,比如安装Django,如下:
也可以指定版本进行安装,如下:
pip install Django == 5.2
2、卸载包
使用命令pip unstall 包名就可以卸载这个包;
3、导出与安装包依赖(虚拟环境)
我本地虚拟环境中,安装了很多第三方类库,如下图:
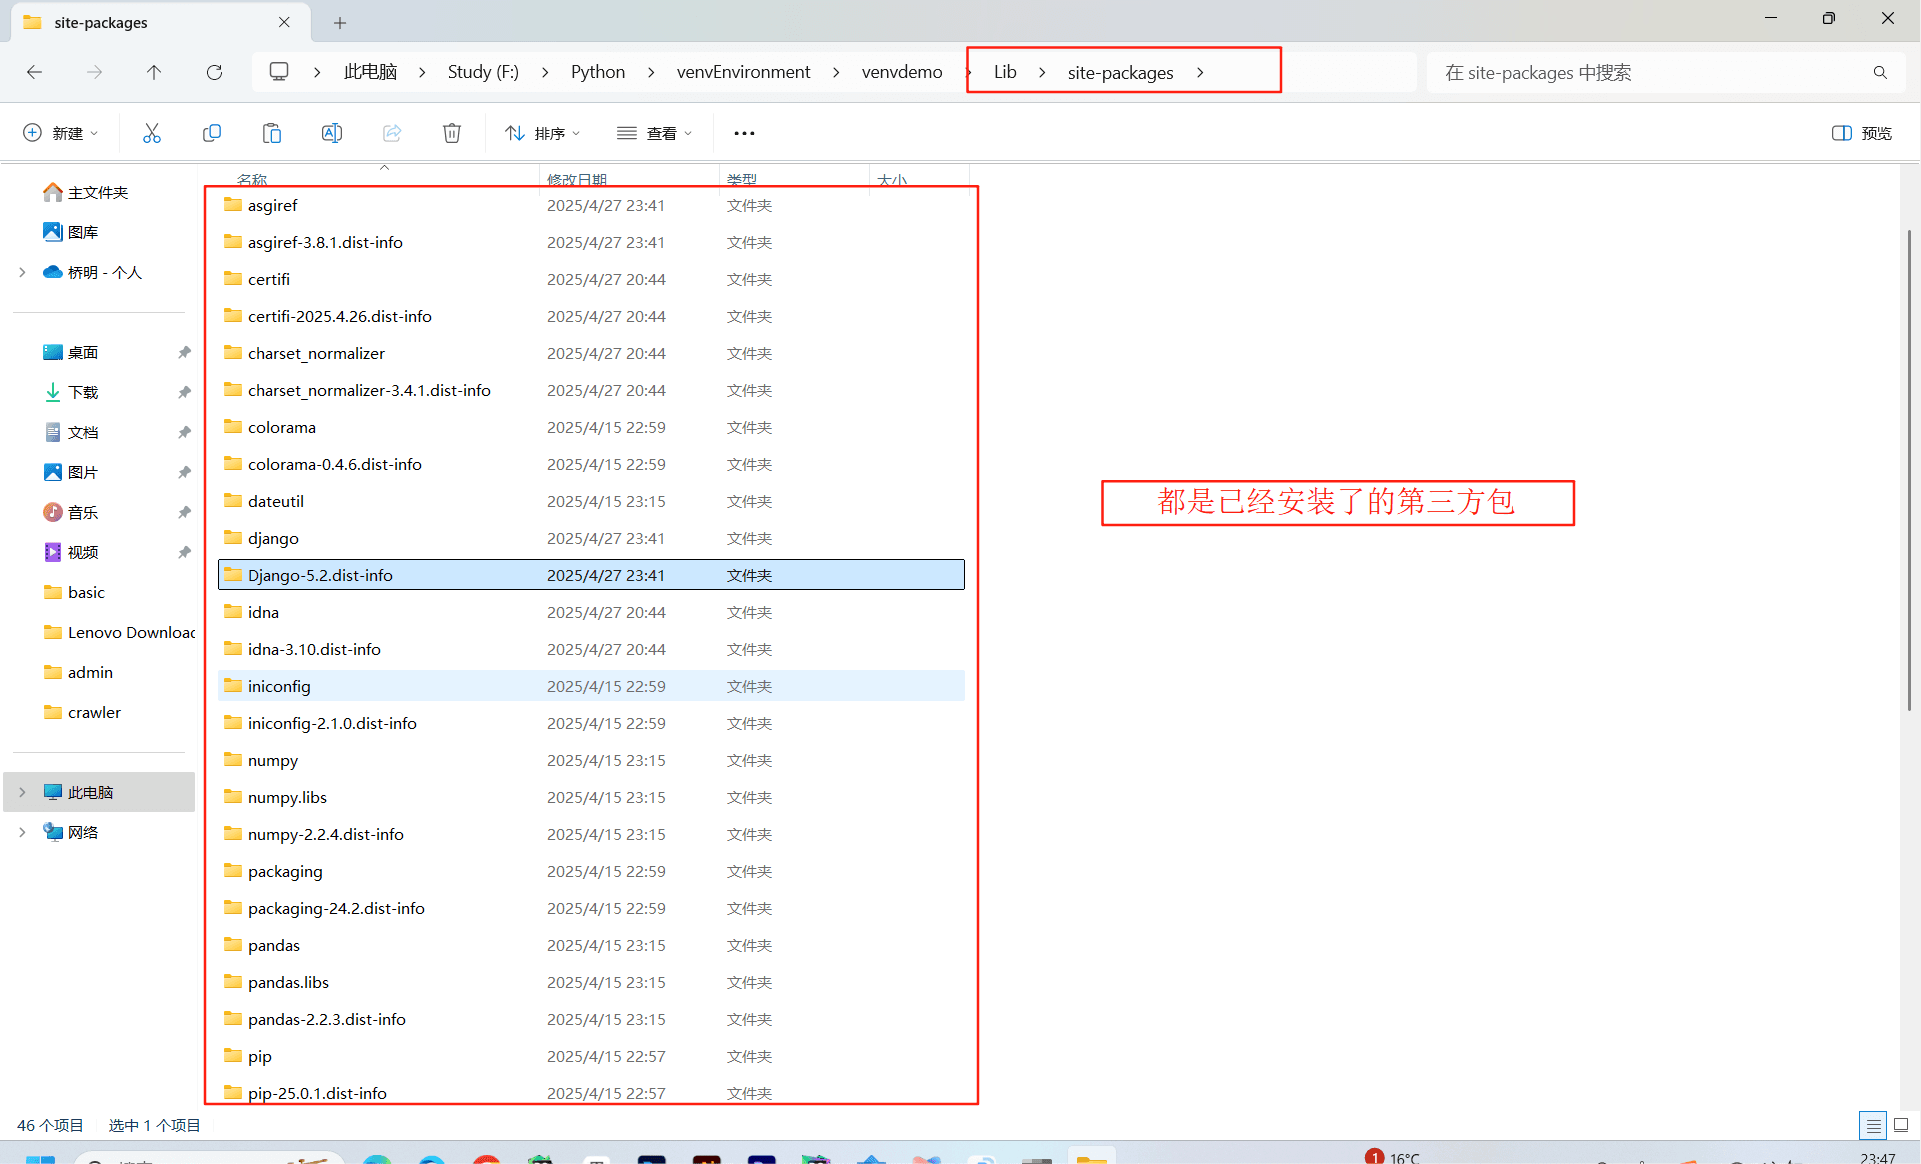
在命令提示符中,可以更清楚我安装了哪些第三方类库,如下:
首先需要讲解到一个虚拟环境的概念:
3.1 为什么需要虚拟环境
通常,我们的Python安装到C盘目录,即装载系统的盘符,而我们每次需要进行新的开发,需要导入安装一些第三方库,比如爬虫开发,我们从B站爬取到的视频通常是需要将视频和音频分开爬取,而进行视频和音频的合成就需要第三方库moviepy.editor,且需要它的版本是1.0.3,如果高于这个版本,运行时就会报错,报错如下,也是让人头疼得很:
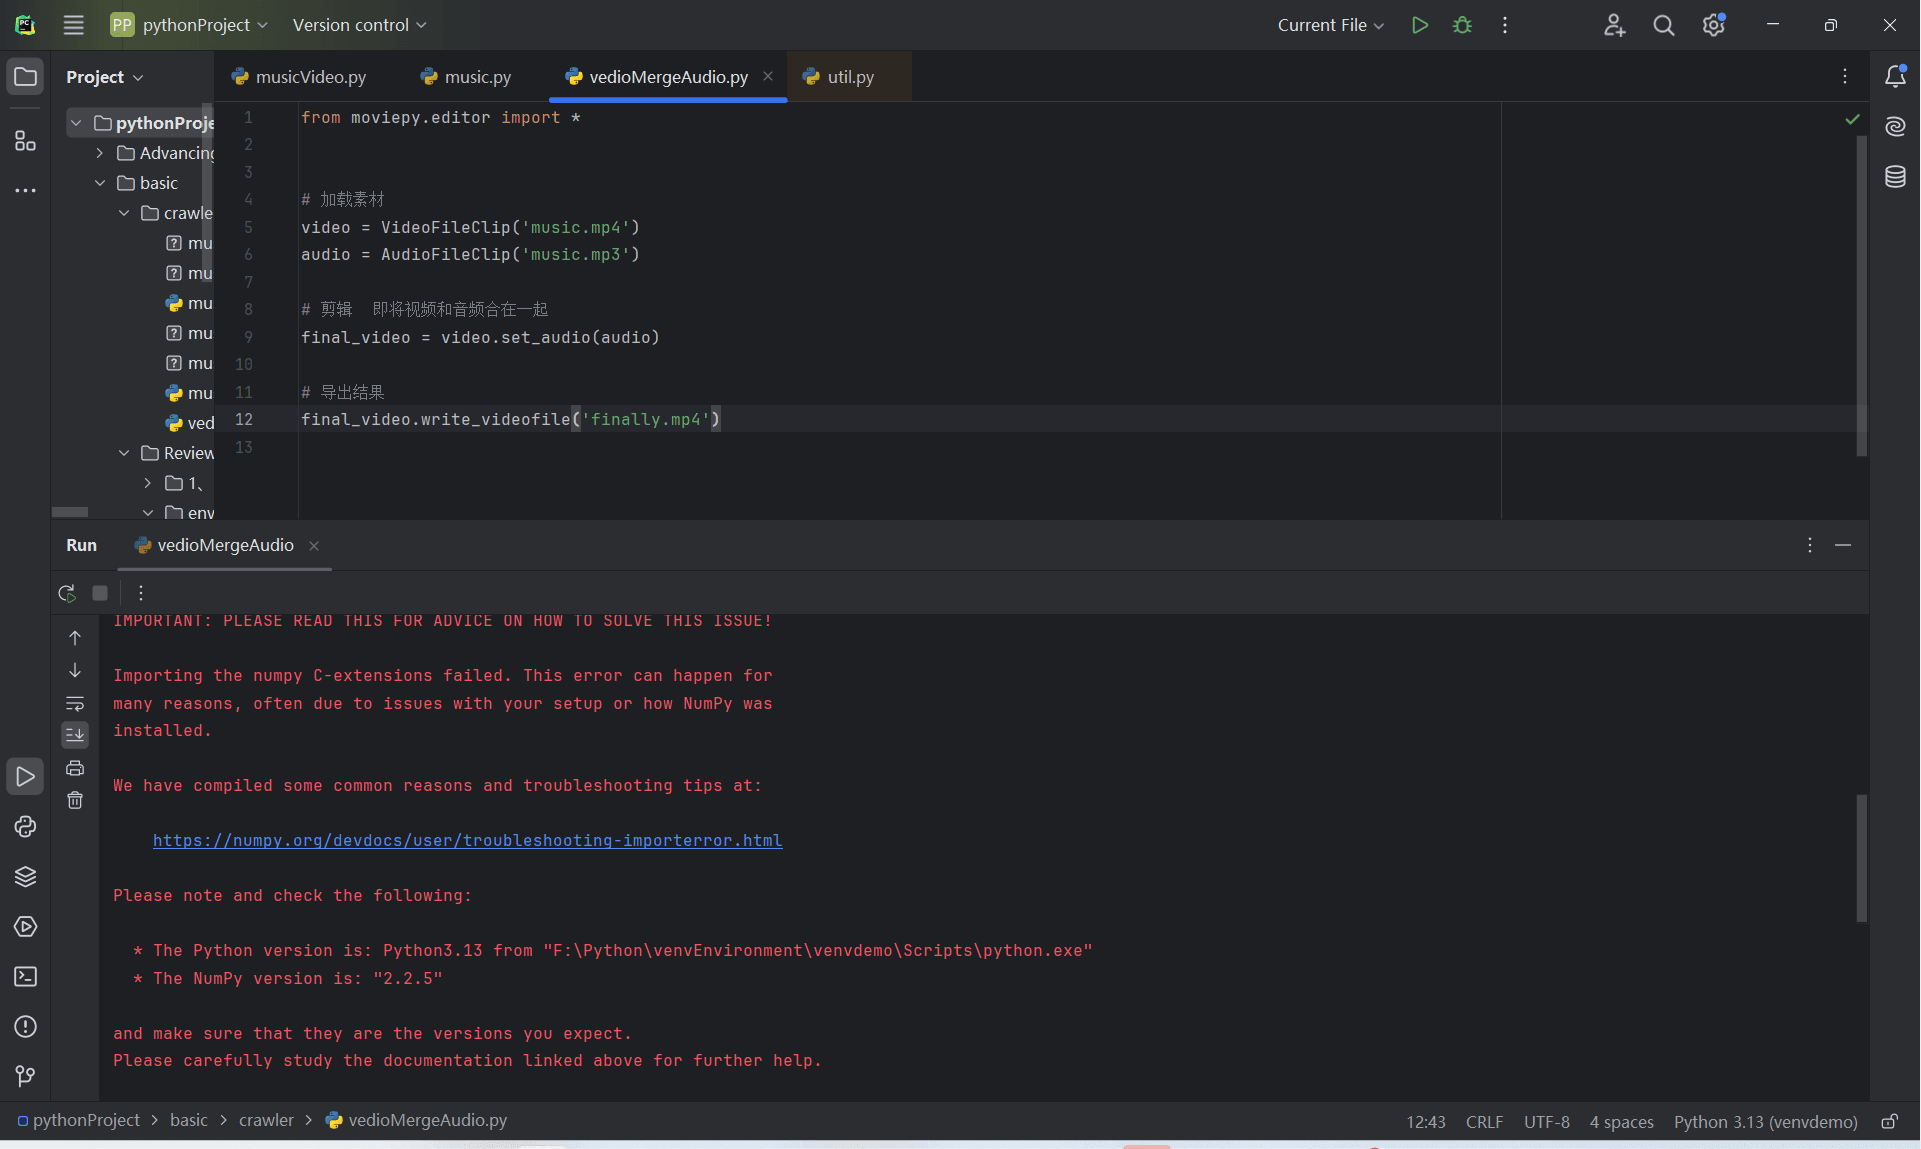
于Python版本而言,版本太高也是有问题的,因为低版本的第三方类库和高版本的Python出现了不兼容,即兼容性较差,下面的这段报错,就是因为Python版本太高,无论是最新的第三方类库moviepy还是指定版本moviepy==1.0.3,在运行时都会报错,故而推荐大家尽量不要使用最新的Python版本,因为兼容性较差;推荐安装3.6 到 3.10内的版本,进行开发。
Traceback (most recent call last):
  File "F:\Python\venvEnvironment\venvdemo\Lib\site-packages\numpy\_core\__init__.py", line 23, in <module>
    from . import multiarray
  File "F:\Python\venvEnvironment\venvdemo\Lib\site-packages\numpy\_core\multiarray.py", line 10, in <module>
    from . import overrides
  File "F:\Python\venvEnvironment\venvdemo\Lib\site-packages\numpy\_core\overrides.py", line 7, in <module>
    from numpy._core._multiarray_umath import (
        add_docstring,  _get_implementing_args, _ArrayFunctionDispatcher)
ImportError: DLL load failed while importing _multiarray_umath: 找不到指定的程序。

During handling of the above exception, another exception occurred:

Traceback (most recent call last):
  File "F:\Python\venvEnvironment\venvdemo\Lib\site-packages\numpy\__init__.py", line 127, in <module>
    from numpy.__config__ import show_config
  File "F:\Python\venvEnvironment\venvdemo\Lib\site-packages\numpy\__config__.py", line 4, in <module>
    from numpy._core._multiarray_umath import (
    ...<3 lines>...
    )
  File "F:\Python\venvEnvironment\venvdemo\Lib\site-packages\numpy\_core\__init__.py", line 49, in <module>
    raise ImportError(msg)
ImportError:

IMPORTANT: PLEASE READ THIS FOR ADVICE ON HOW TO SOLVE THIS ISSUE!

Importing the numpy C-extensions failed. This error can happen for
many reasons, often due to issues with your setup or how NumPy was
installed.

We have compiled some common reasons and troubleshooting tips at:

    https://numpy.org/devdocs/user/troubleshooting-importerror.html

Please note and check the following:

  * The Python version is: Python3.13 from "F:\Python\venvEnvironment\venvdemo\Scripts\python.exe"
  * The NumPy version is: "2.2.5"

and make sure that they are the versions you expect.
Please carefully study the documentation linked above for further help.

Original error was: DLL load failed while importing _multiarray_umath: 找不到指定的程序。


The above exception was the direct cause of the following exception:

Traceback (most recent call last):
  File "F:\Python\venvEnvironment\project\pythonProject\basic\crawler\vedioMergeAudio.py", line 1, in <module>
    from moviepy.editor import *
  File "F:\Python\venvEnvironment\venvdemo\Lib\site-packages\moviepy\editor.py", line 24, in <module>
    import imageio
  File "F:\Python\venvEnvironment\venvdemo\Lib\site-packages\imageio\__init__.py", line 24, in <module>
    from .core import FormatManager, RETURN_BYTES
  File "F:\Python\venvEnvironment\venvdemo\Lib\site-packages\imageio\core\__init__.py", line 10, in <module>
    from .util import Image, Array, Dict, asarray, image_as_uint, urlopen
  File "F:\Python\venvEnvironment\venvdemo\Lib\site-packages\imageio\core\util.py", line 10, in <module>
    import numpy as np
  File "F:\Python\venvEnvironment\venvdemo\Lib\site-packages\numpy\__init__.py", line 132, in <module>
    raise ImportError(msg) from e
ImportError: Error importing numpy: you should not try to import numpy from
        its source directory; please exit the numpy source tree, and relaunch
        your python interpreter from there.
- 虚拟环境能够很好的隔离实现不同的第三方库分离,避免冲突,便于进行Python项目开发:如果全局安装,就会导致第三方库版本冲突,出现不兼容报错,不便管理;而虚拟环境,就可以独立安装第三方类库,为每个项目支撑独立的依赖空间;
- 环境一致性:确保开发、测试和生产环境使用相同的依赖版本,避免“在我机器上能运行”的问题;
- 多Python版本支持:Python版本指的就是Python解释器本身的版本。目前Python每个版本的兼容性不太友好,特别现在最新的版本
3.13.*和稳定版的3.7 ~ 3.9期间的版本,目前是公认的稳定性最好。目前新版本和旧版本中的类库版本对于我们开发和维护就非常的不友好,就会发生上面的报错问题,而且头疼得很,而这时Python中的版本管理器Pyenv就特别的有用,它用于隔离不同的Python环境,且很方便的切换环境中的Python版本,这个Pyenv和Python虚拟环境关系也不太大,对于我们开发和维护就变得容易得多; - Python包库:包库或者叫软件源是Python第三方软件的库的集合,或者市场,可以发布、下载和管理软件包,其中
PyPI(Python Package Index)是Python编程语言的软件存储库。开发者可以通过PyPI查找和安装由Python社区开发和共享的软件,也可以将自己开发的库上传至PyPI。基于pip就可以查找、下载安装需要的软件包。为了提高下载速度,目前有很多Pypi的镜像服务器,在国内也有很多软件源,比如阿里的软件源是:mirrors.aliyun.com/pypi...。除此之外,还有其他软件源,如正对科学计算的anaconda的软件源repo.anaconda.com/;
3.2 创建虚拟环境
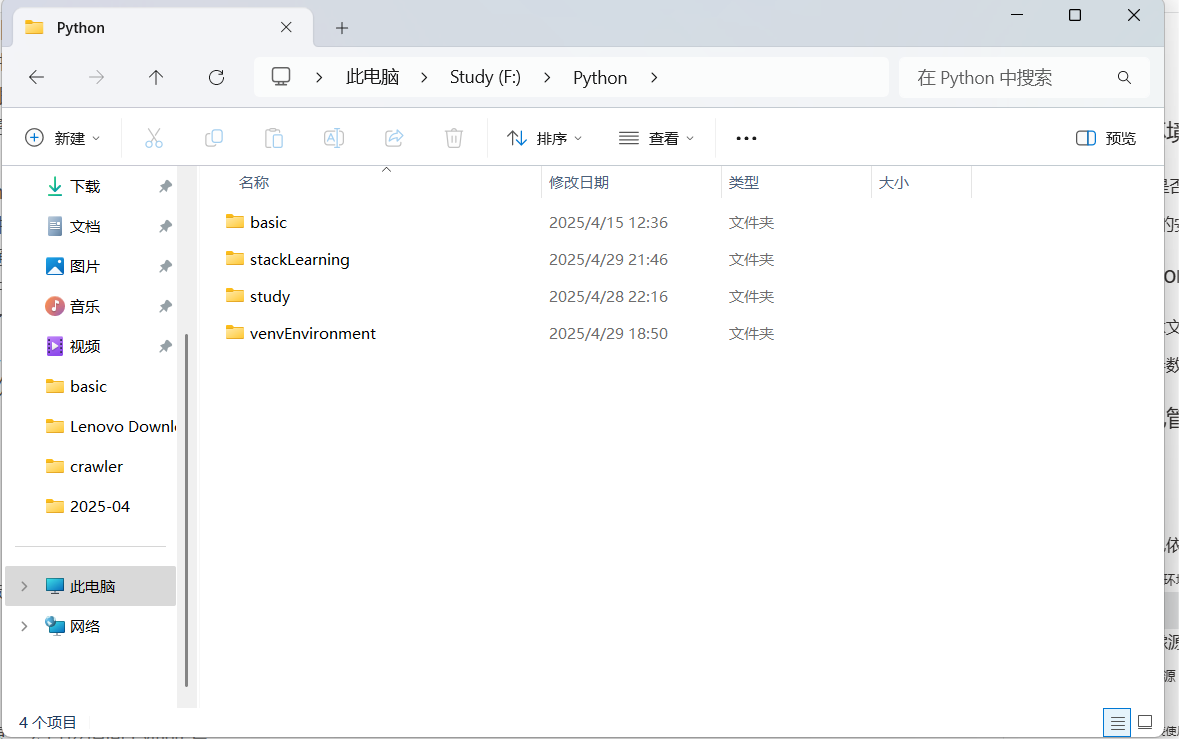
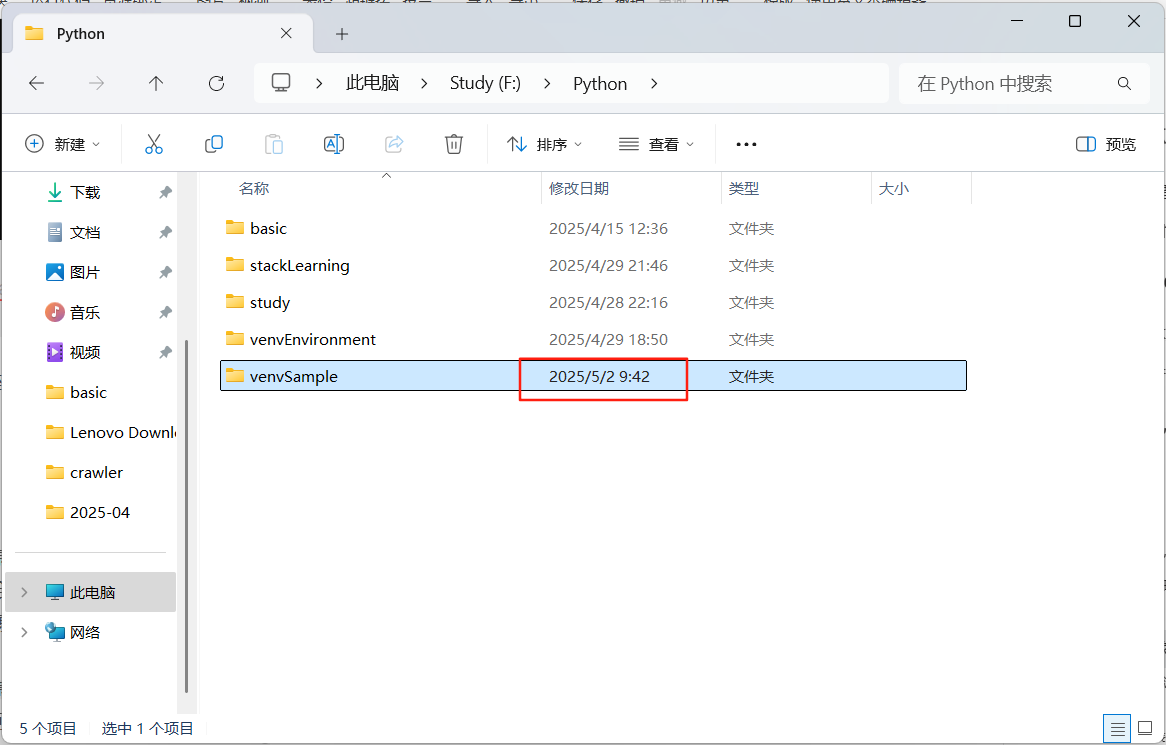
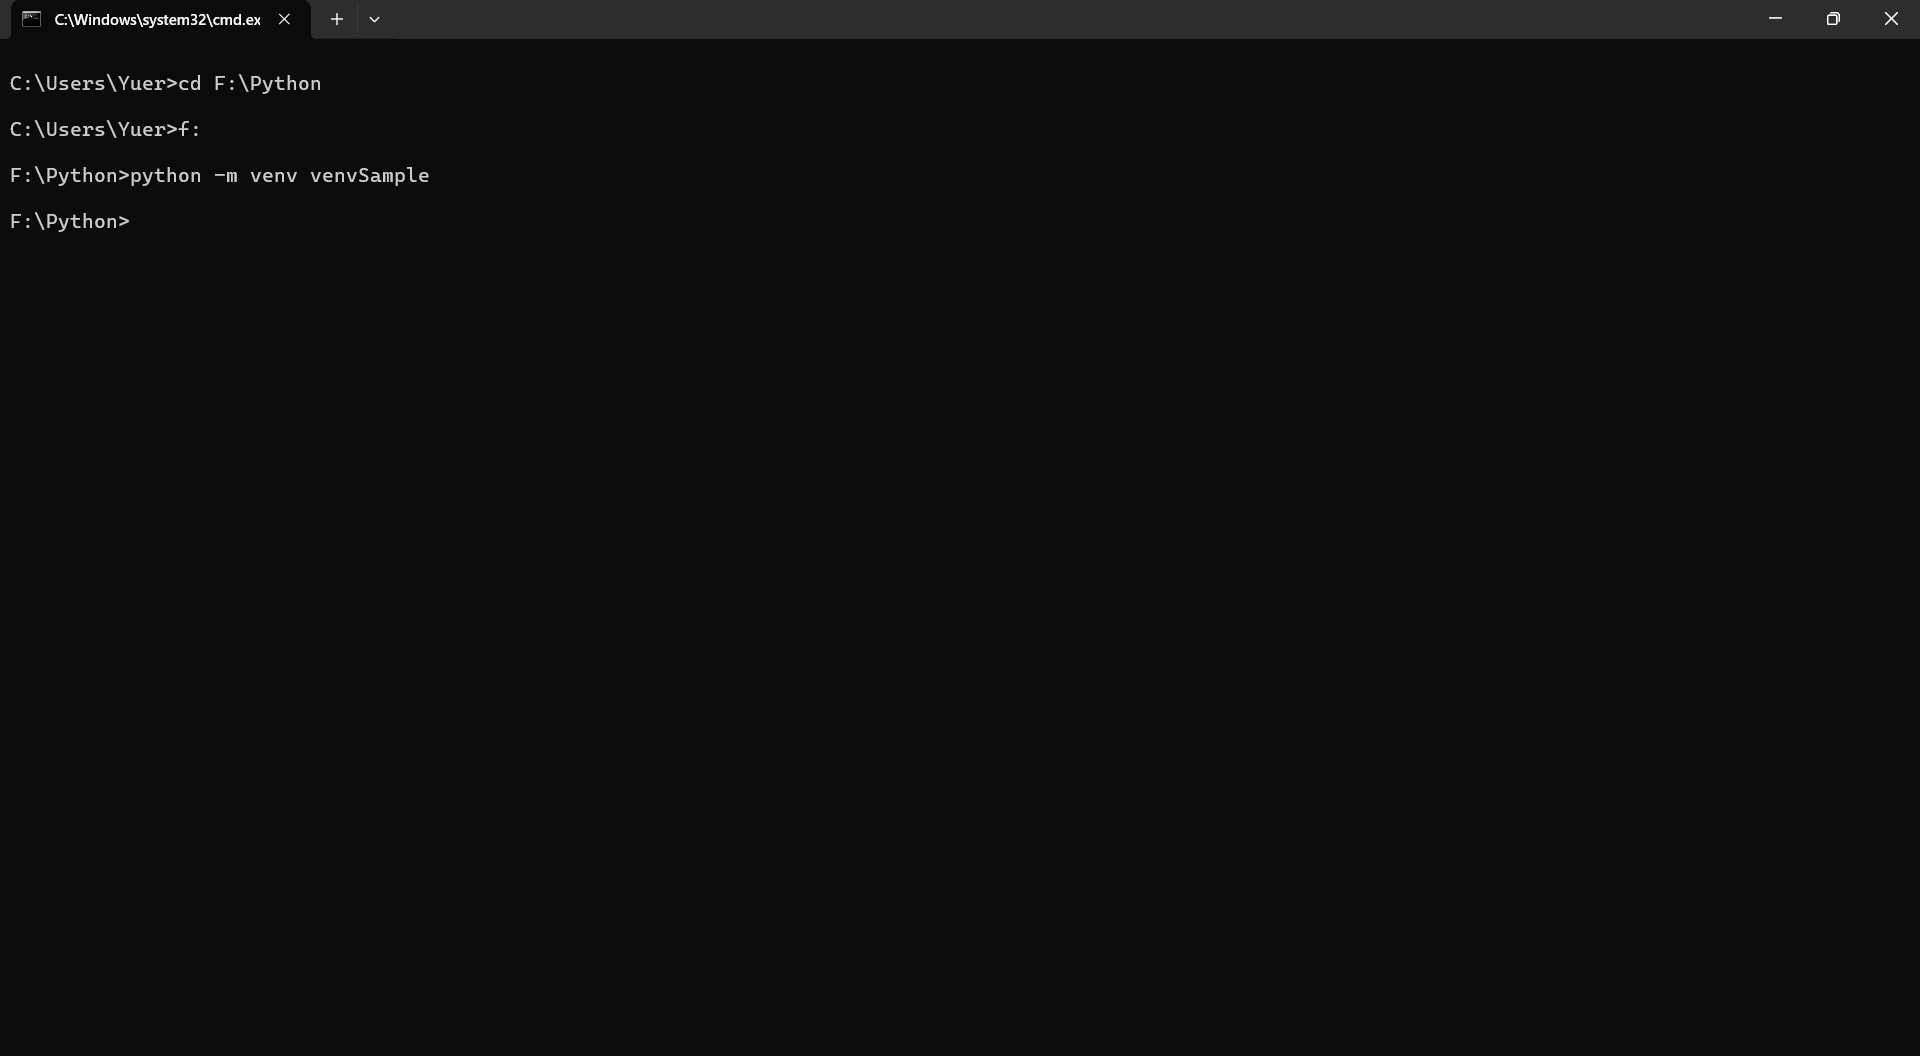
在命令提示符中,即CMD中,指定需要创建虚拟环境的路径,比如我要在路径F:\Python下创建一个名为venvSample的虚拟环境,则在CMD,中输入该路径,然后输入命名python -m venv venvSample,如下:
创建虚拟环境的过程:
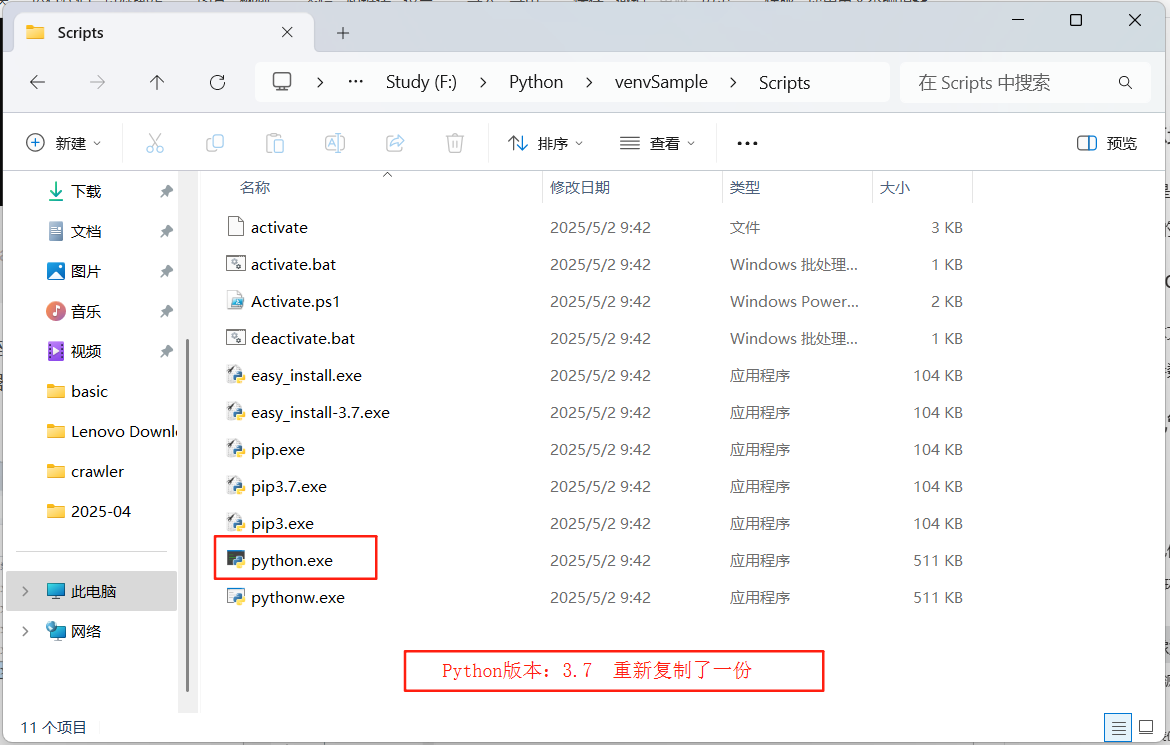
在路径F:\Python下,我们可以看到生成了一个venvSample的文件夹;
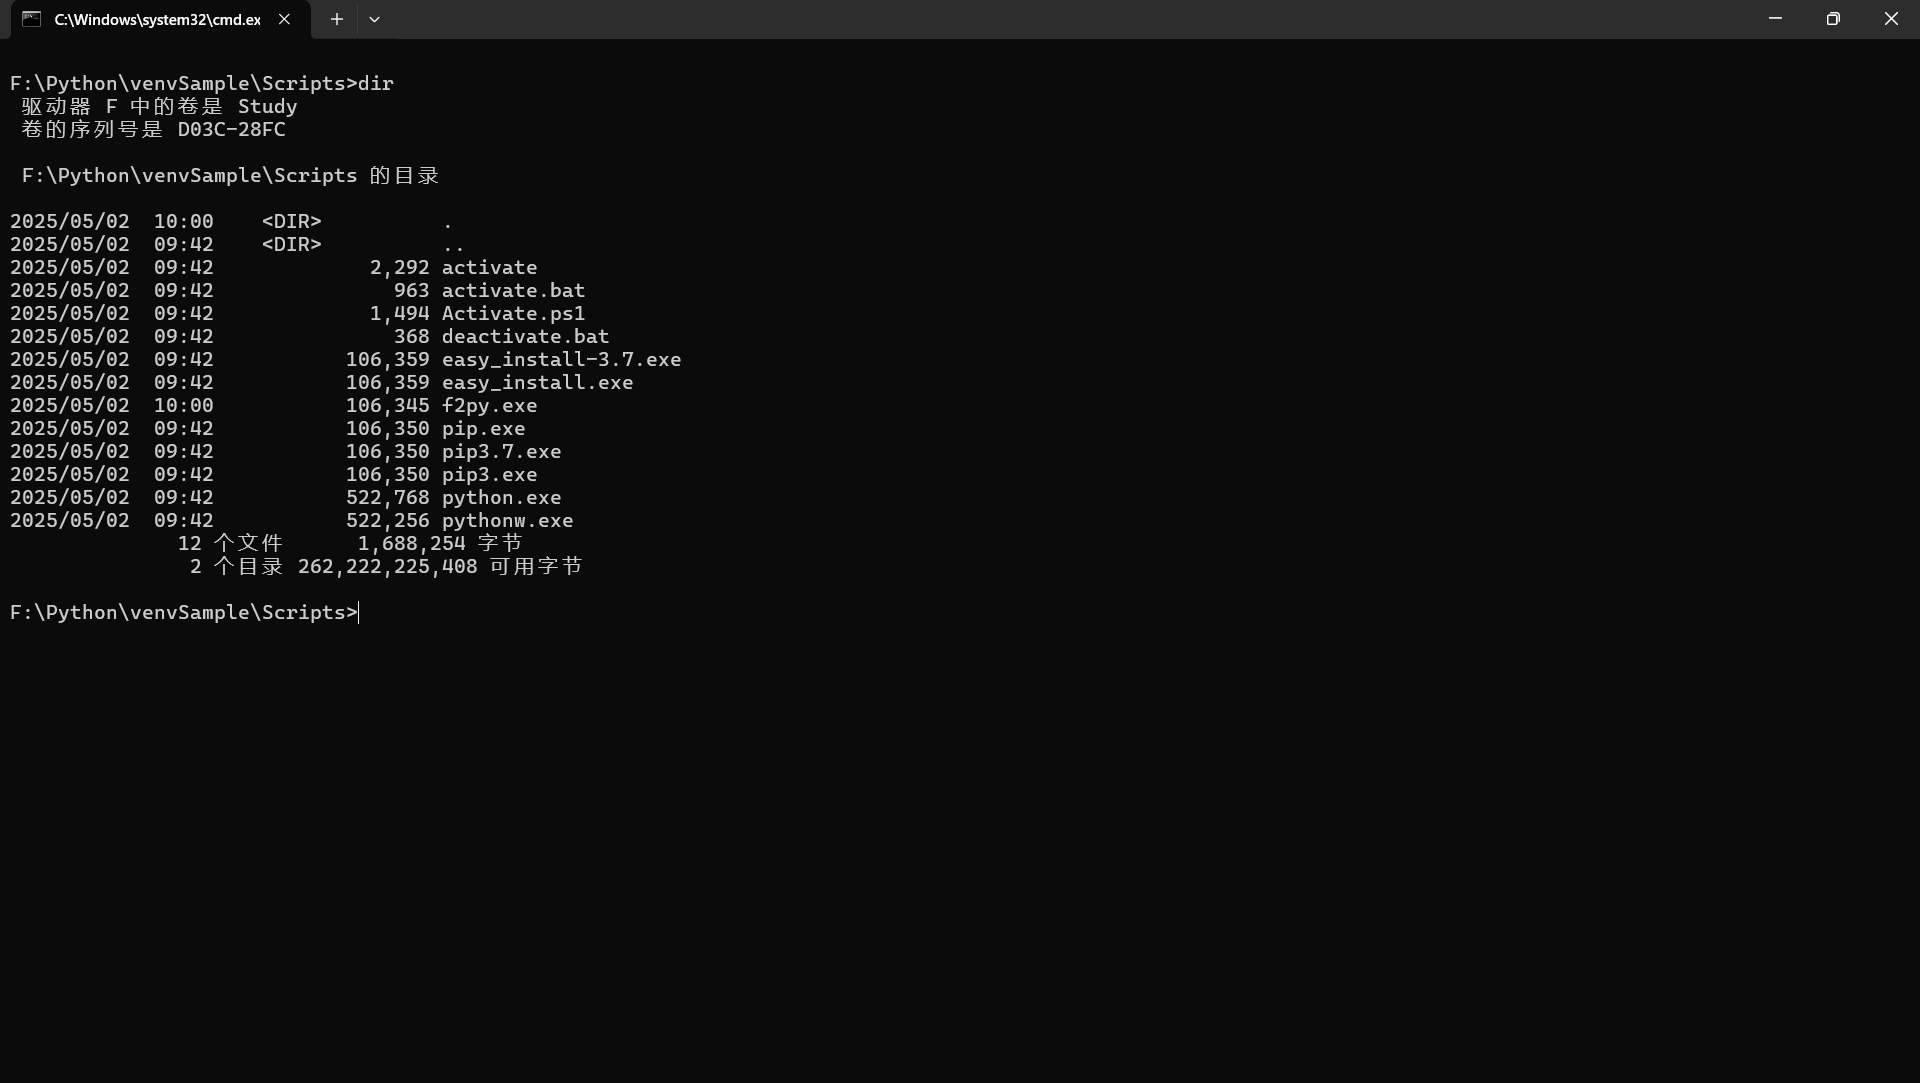
这个文件夹,将我本地的Python编辑器重新复制一份到此环境中,存于路径F:\Python\venvSample\Scripts下:
3.3 使用/退出虚拟环境
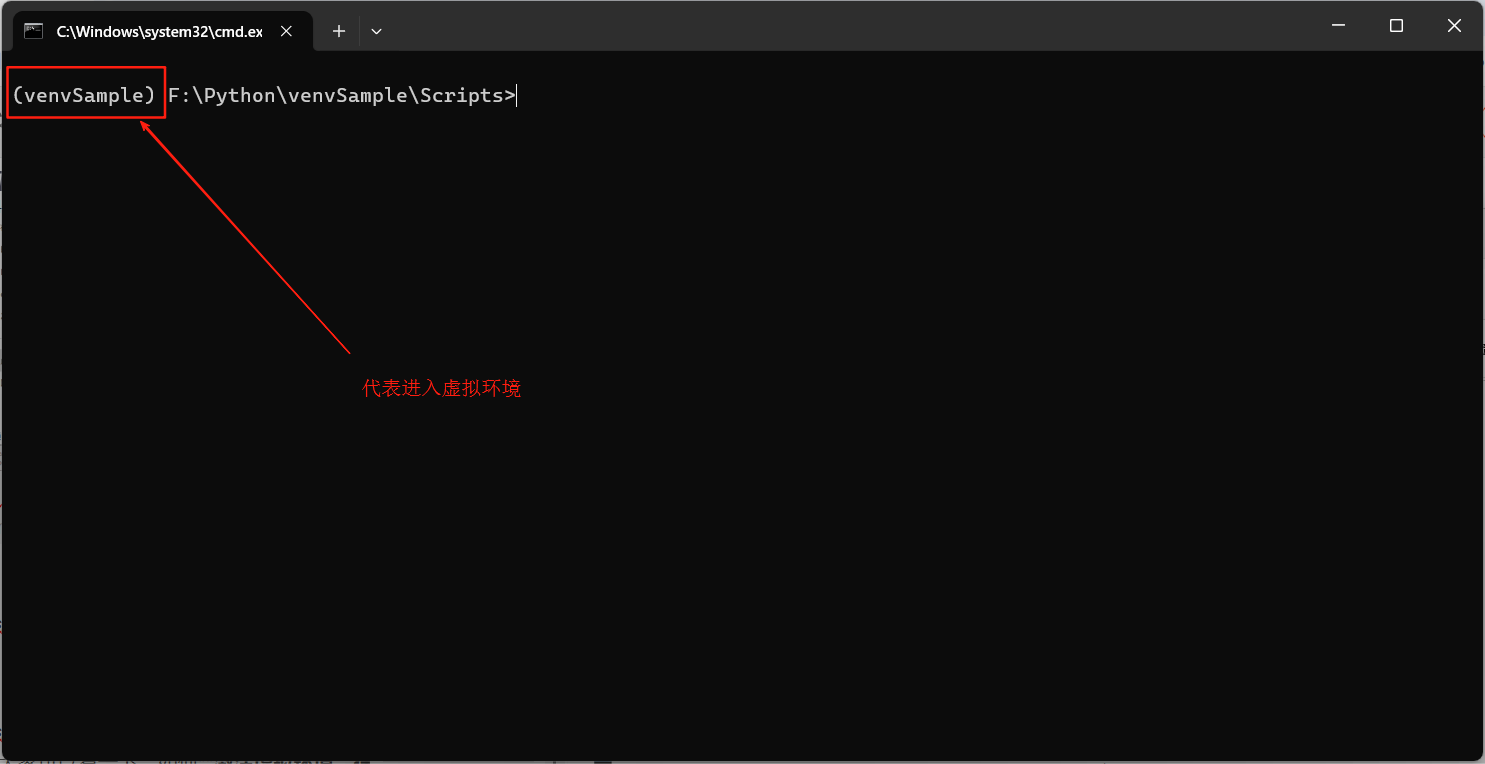
如果使用activate后,在命令提示符中,有(虚拟环境名称)则说明进入了虚拟环境中;
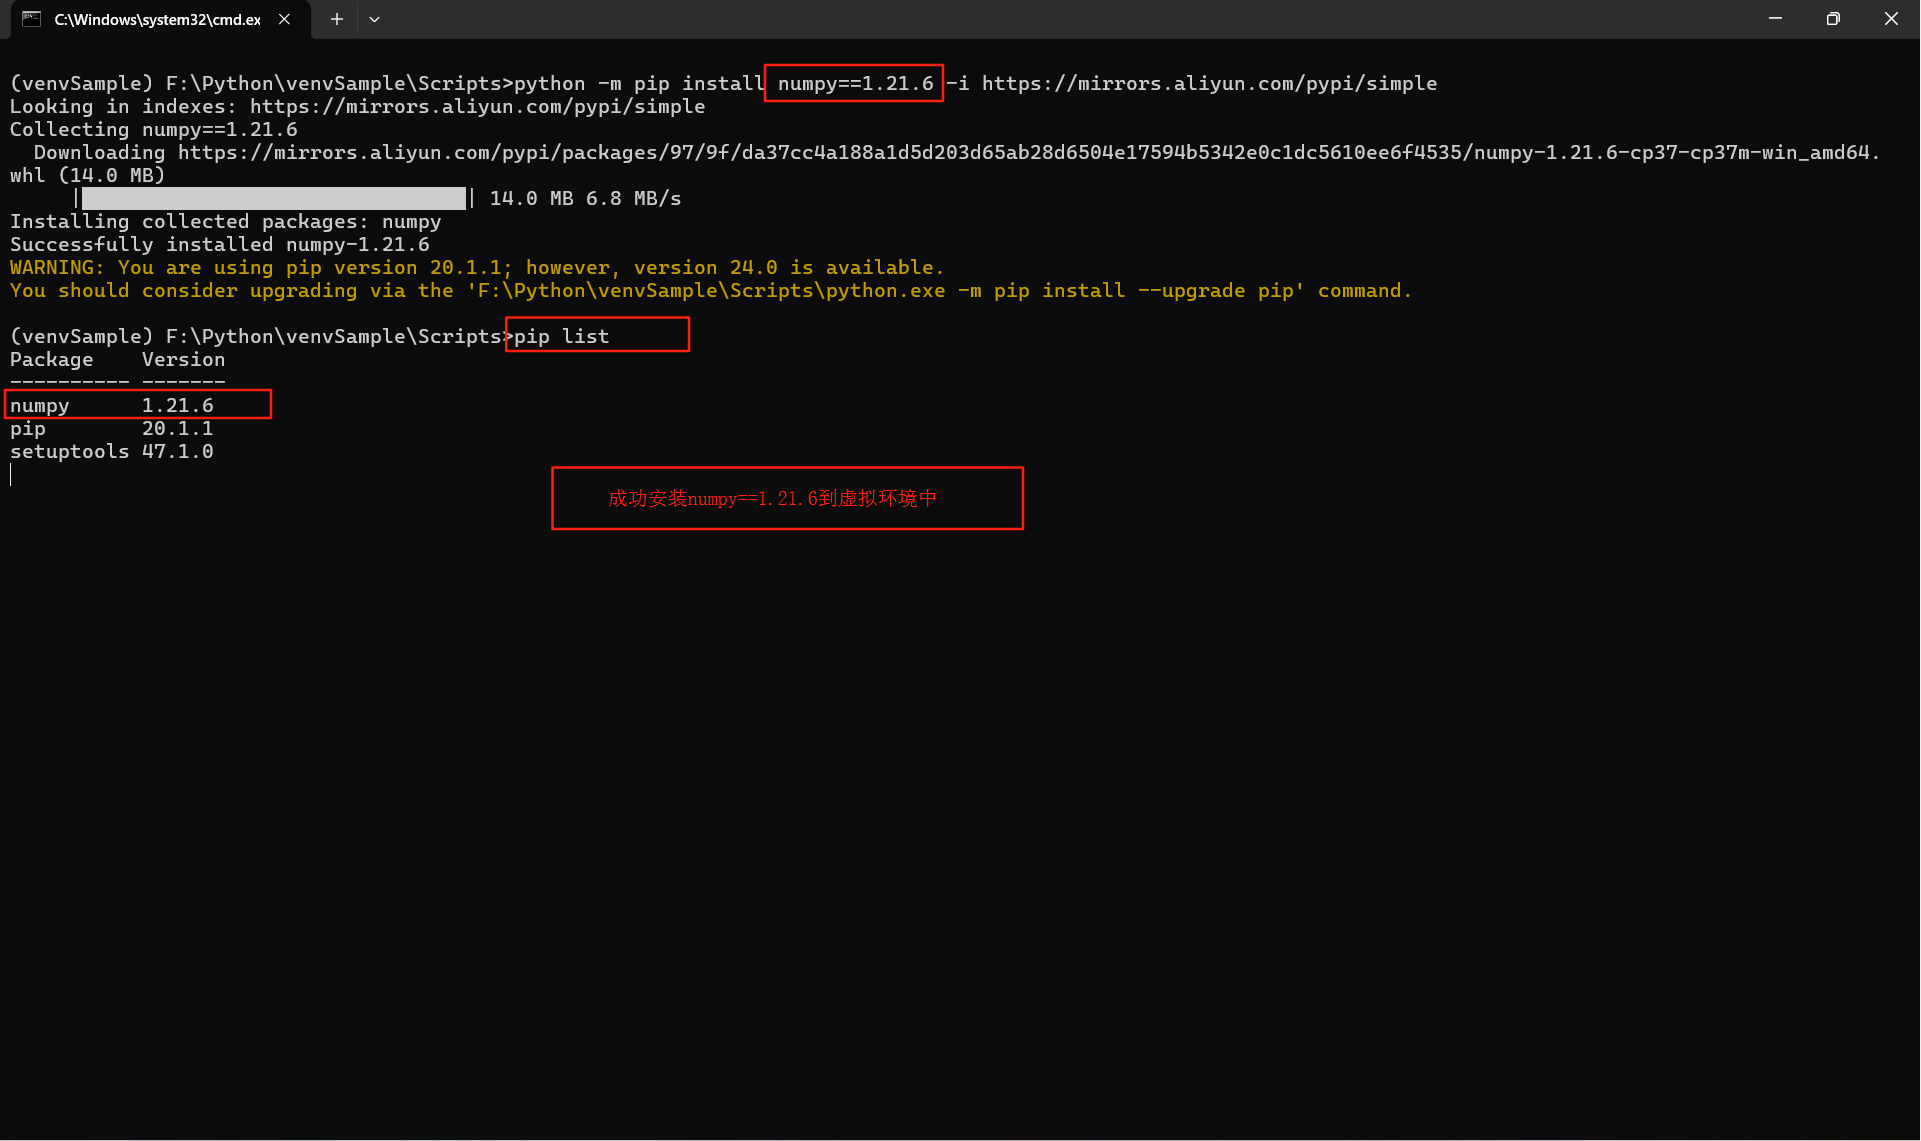
我们使用虚拟环境来安装第三方库numpy,下面是动图gif文件,大家可以看一下,如何激活虚拟环境,在虚拟环境中,安装三方库;
从上面的这个动图可以看出,指出安装的镜像路径,下载的速度会非常的快,这里,我使用的镜像源是阿里云的镜像:https://mirrors.aliyun.com/pypi/simple/;
我们要使用虚拟环境,则在虚拟环境路径下,使用命令activate来激活虚拟环境,使用命令deactivate来关闭虚拟环境;
查看是否安装成功,使用命令pip list来查看安装的三方库numpy==1.21.6;
3.4 安装其他项目的三方拓展包
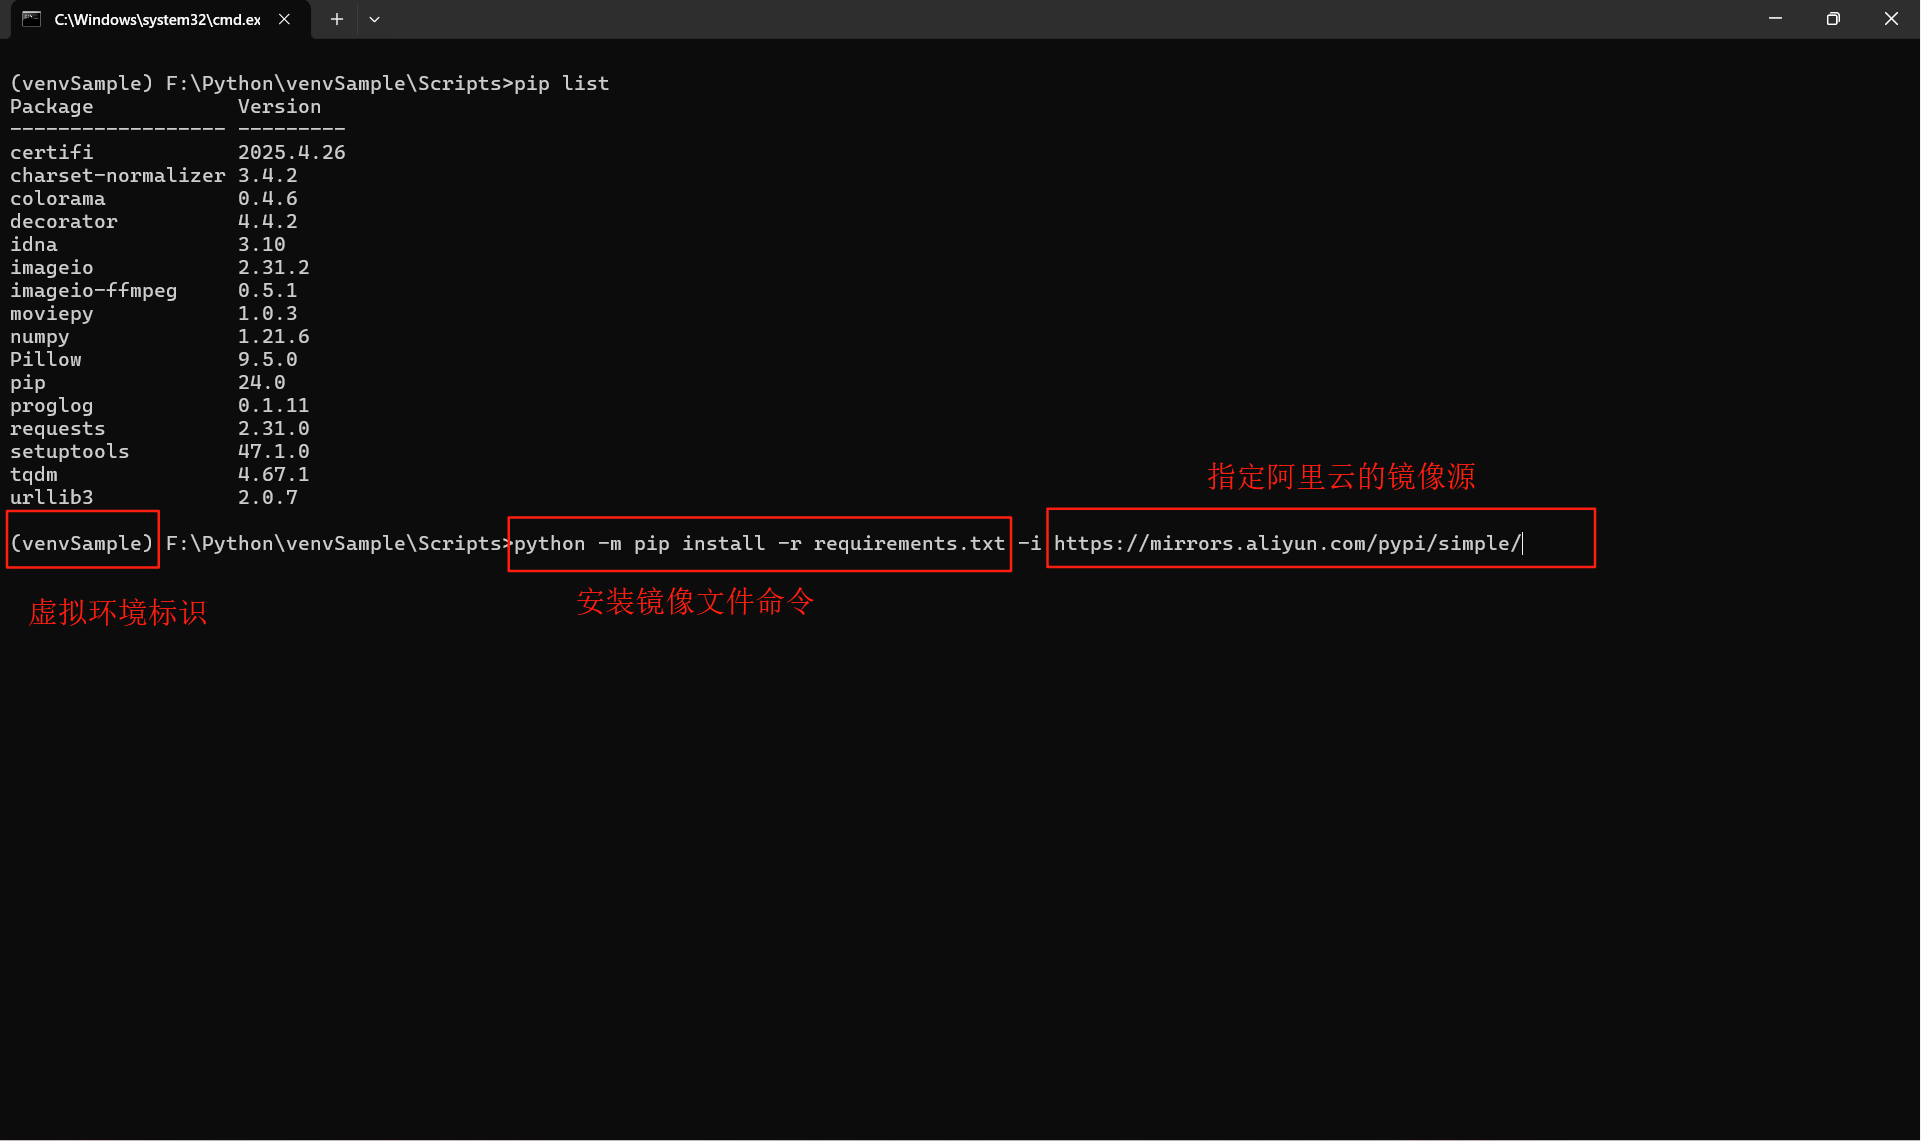
3.4.1 命令行安装
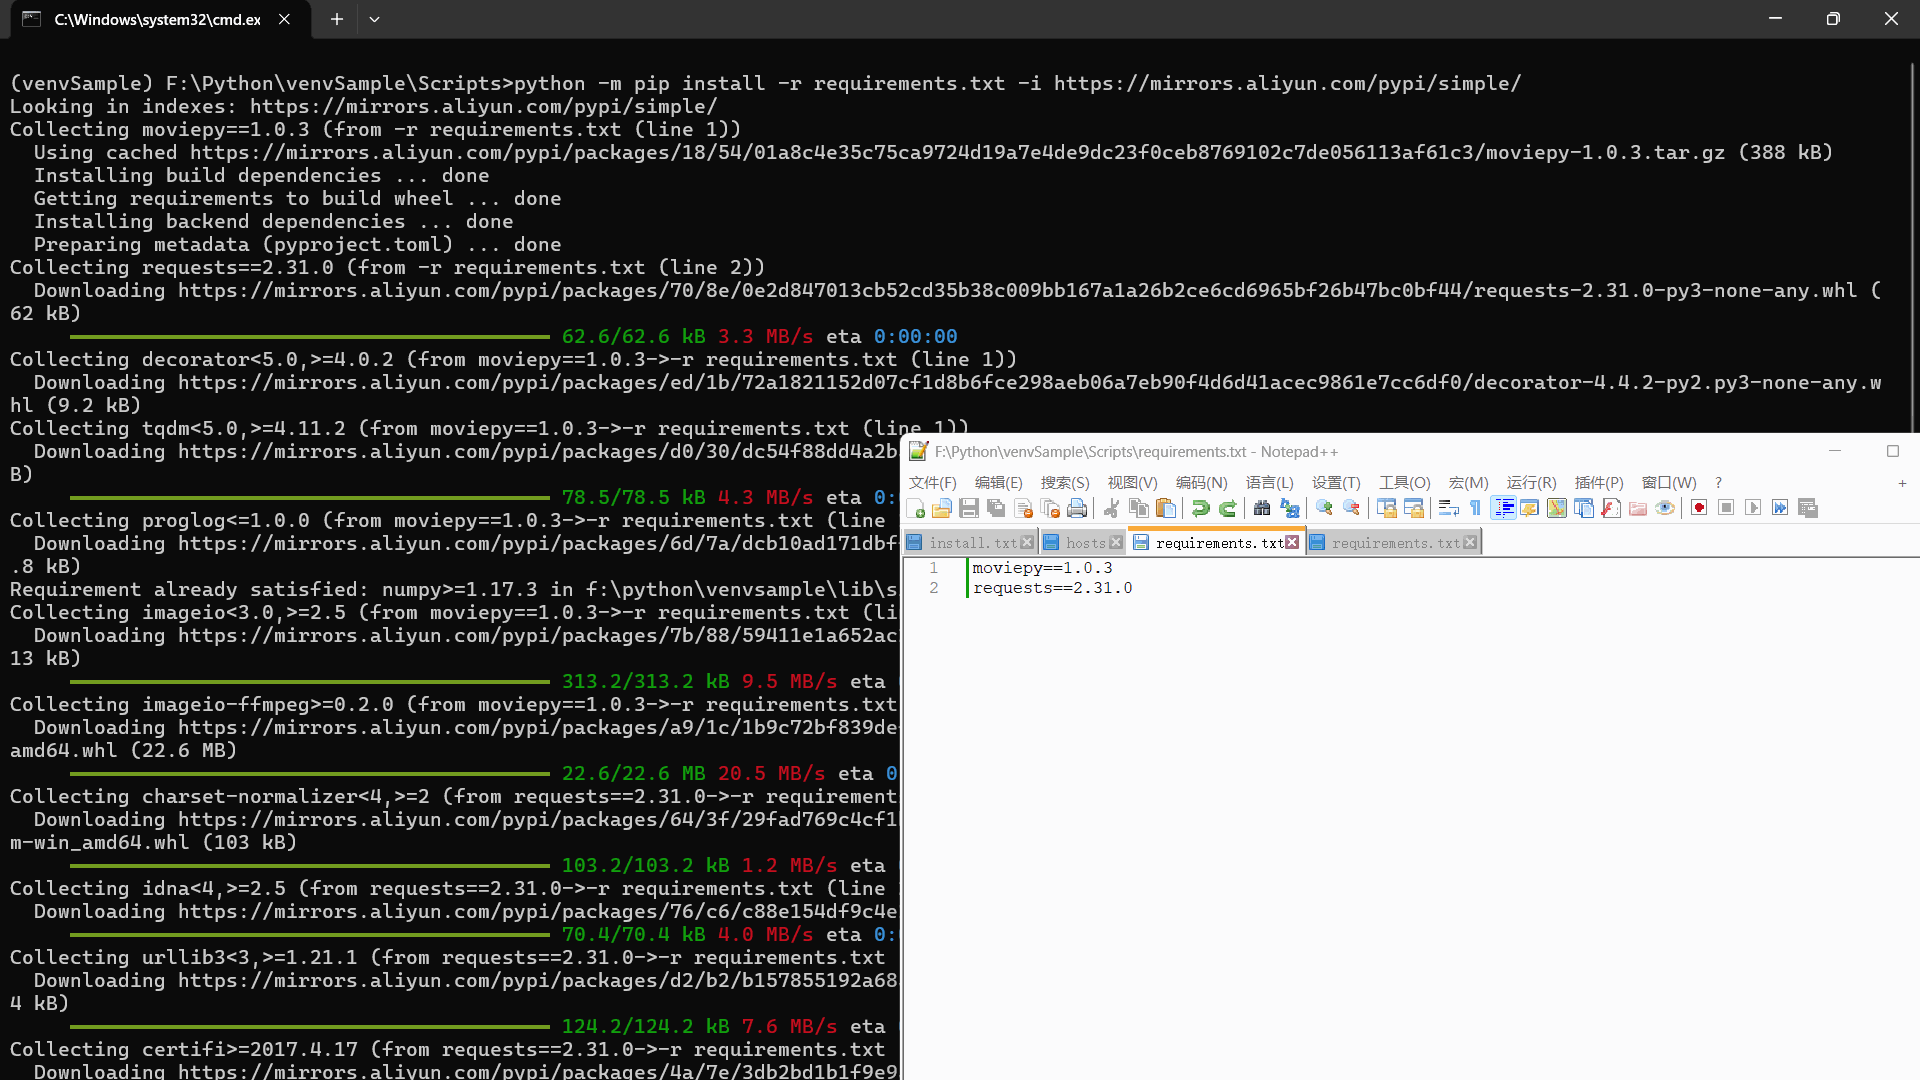
使用requirements.txt文件:打开创建的虚拟环境,在创建的虚拟环境中,将其他项目中需要安装的包使用命令python -m pip install -r requirements.txt 或者pip install -r requirements.txt进行安装;在这里我们指定了阿里云的镜像源:https://mirrors.aliyun.com/pypi/simple/,如果直接安装的话,安装速度特别的慢,它会调国外的第三方包镜像也就是Python官网的包;
安装过程:
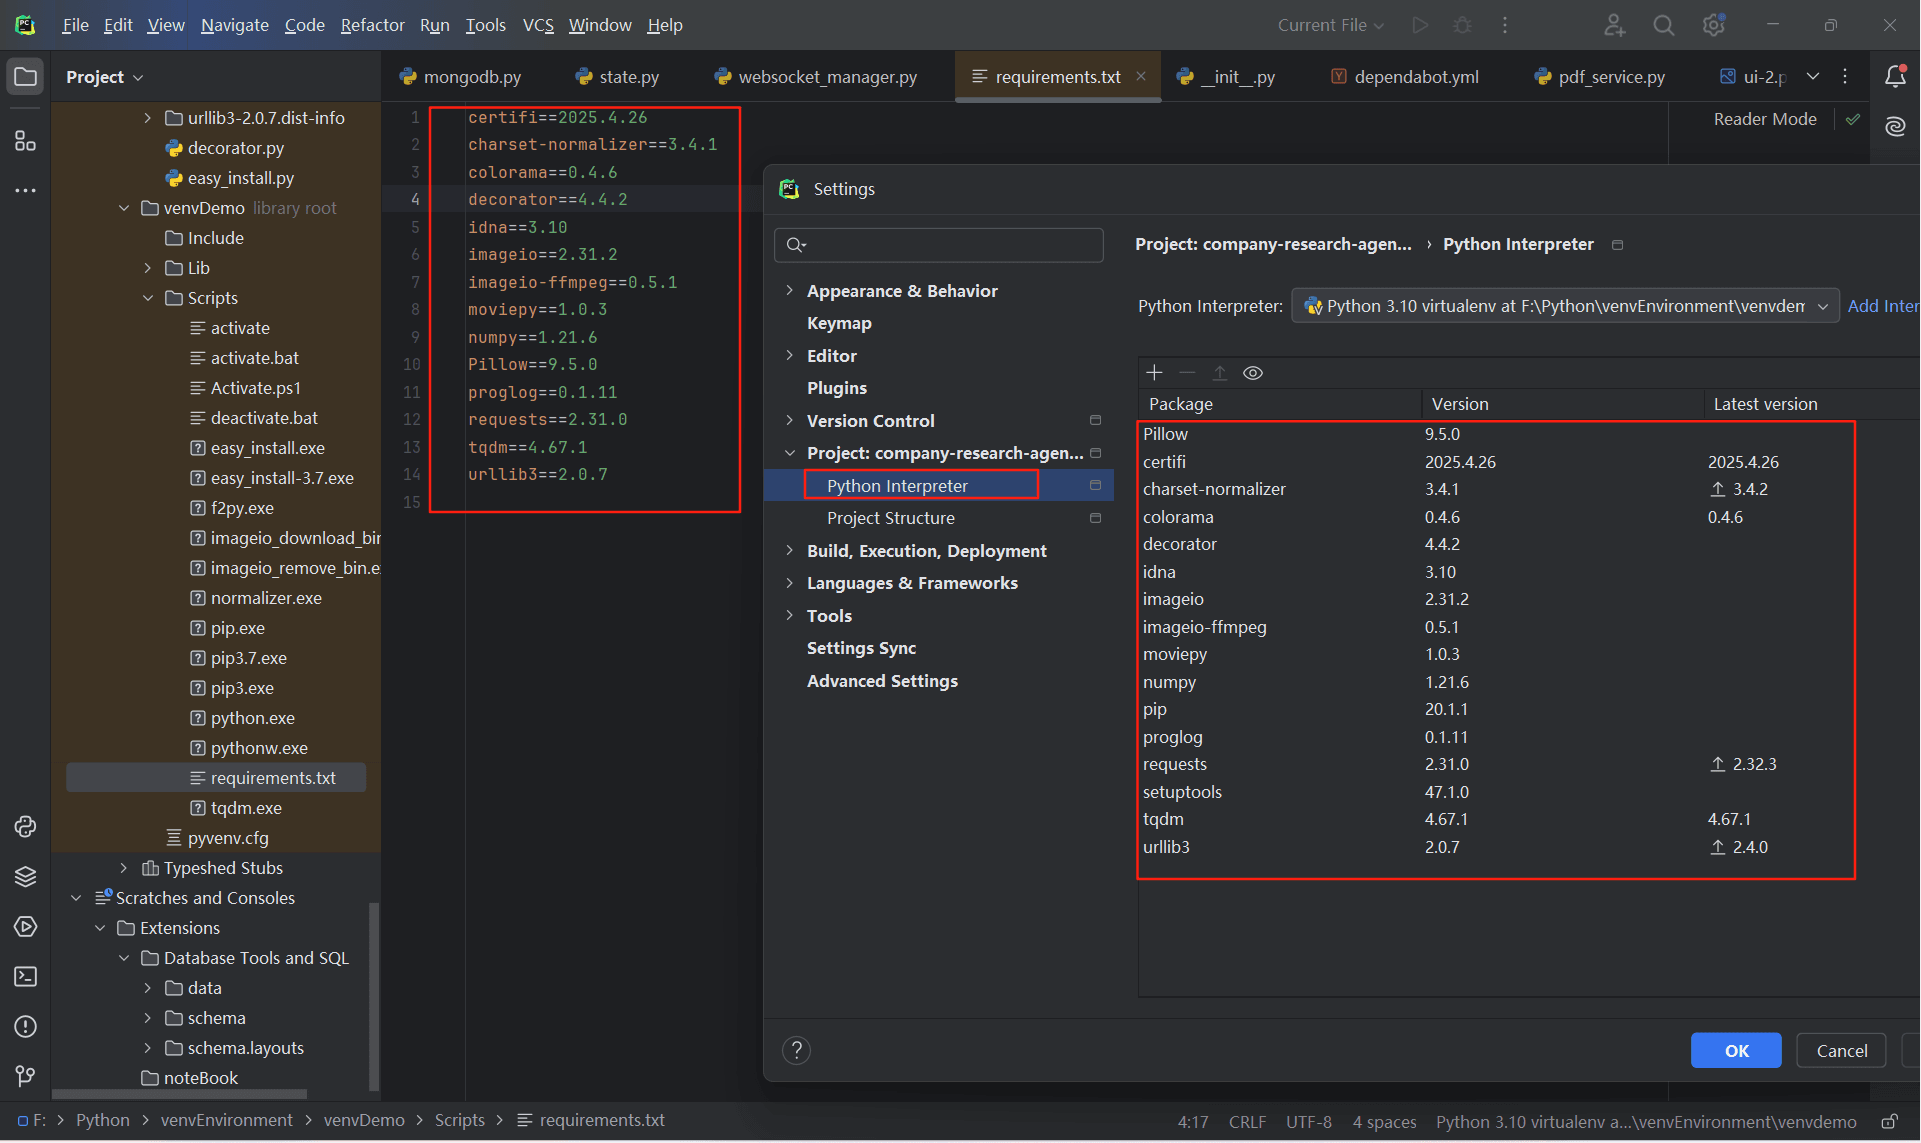
3.4.1 软件PyCharm安装
点击【File(文件)】 —> 【Settings(设置)】 —> 【找到你的项目名称】 —> 找到【Python Interpreter】,就可以看到你安装的三方包;
4、Python的镜像源
目前,如果我们不指定安装镜像源,会直接指向Python官网,由于服务器在国外,因此下载包的速度就会非常的慢,甚至还会出现超时、报错的情况;因此,选择一些好的镜像源下载安装第三方库,就可以加大下载安装的速度且一般不会报错;
接下来,列举国内常见的pip镜像源,安装完全度和下载速度排列,需要注意的是,镜像源的完全度和速度可能因地域和时间而异,建议据具体情况选择合适的镜像源。
4.1 国内常见的镜像源
- 清华大学(完全度和速度都比较好,一个优秀的镜像源)
https://pypi.tuna.tsinghua.edu.cn/simple
- 阿里云(完全度和速度也很好,不错的选择)
https://mirrors.aliyun.com/pypi/simple/
- 网易(速度比较快,完全度有限)
https://mirrors.163.com/pypi/simple/
- 豆瓣(速度较快,完全度也有限)
https://pypi.douban.com/simple/
- 百度云(速度较快,完全度也有限)
https://mirror.baidu.com/pypi/simple/
- 中科大(速度较快,完全度不如前面几个好)
https://pypi.mirrors.ustc.edu.cn/simple/
- 华为云(完全度和速度中等)
https://mirrors.huaweicloud.com/repository/pypi/simple/
- 腾讯云(速度一般,完全度一般)
https://mirrors.cloud.tencent.com/pypi/simple/
4.2 镜像源配置方法
4.2.1 镜像源下载安装使用方法
下载安装Python三方库,可以使用命令:
python -m pip install 安装三方库的版本号 -i https://mirrors.aliyun.com/pypi/simple/

# 或者

pip install 安装三方库的版本号 -i https://mirrors.aliyun.com/pypi/simple/


# 比如
pip install moviepy==1.0.3 -i https://mirrors.aliyun.com/pypi/simple/
四、总结
- Python环境的基础命令;
- 在命令提示符中运行Python文件以及传递命令行参数;
- 对Python中的三方库进行结构化管理以及安装多个Python版本后如何使用虚拟环境来将各个版本的Python环境进行隔离,各自调用各自的三方包;
- 在虚拟环境中,如何镜像其他项目的三方库,使用
requirements.txt来实现将本项目用到的三方包版本拷贝下来; - Python中的镜像源;
- 如何使用Python中的镜像源高速下载三方包;
到此这篇关于Python常用命令提示符使用的文章就介绍到这了,更多相关Python常用命令提示符内容请搜索脚本之家以前的文章或继续浏览下面的相关文章希望大家以后多多支持脚本之家!