
使用Python实现将图片转线条图
作者:一晌小贪欢
这篇文章主要为大家详细介绍了如何使用Python实现将图片转线条图,可以让图片看起来更加的有意思,感兴趣的小伙伴可以跟随小编一起学习一下
1、背景介绍
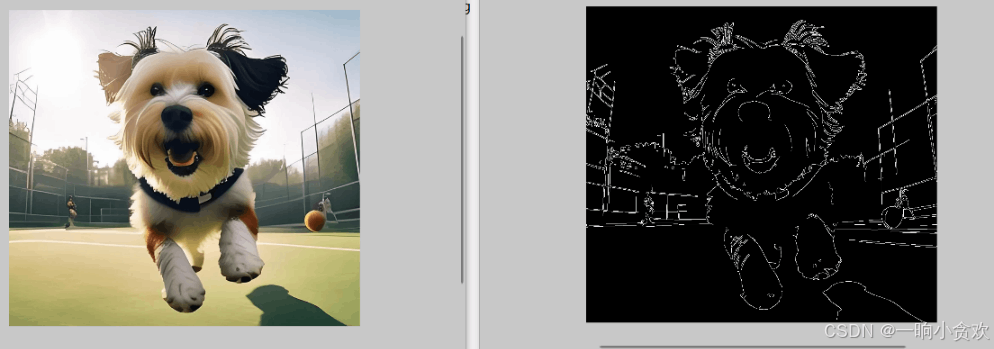
有时候我们需要将一张图转为线条图片,这样看起来更加的有意思,我们可以利用python中的一些图片处理的库对图片进行处理,先将图片使用灰度模式读取图片,然后将图片转换成线条图片
2、库的安装
| 库 | 用途 | 安装 |
|---|---|---|
| PyQt5 | 界面设计 | pip install PyQt5 -i https://pypi.tuna.tsinghua.edu.cn/simple/ |
| opencv-python | 视频处理 | pip install opencv-python -i https://pypi.tuna.tsinghua.edu.cn/simple/ |
| matplotlib | 图片处理 | pip install matplotlib -i https://pypi.tuna.tsinghua.edu.cn/simple/ |
| os | 获取路径 | 内置库无需安装 |
3、完整代码
注意事项,以下请用相对路径
image = cv2.imread('aaa.png', cv2.IMREAD_GRAYSCALE)
import cv2
import matplotlib.pyplot as plt
# 读取图片,使用灰度模式读取图片
image = cv2.imread('aaa.png', cv2.IMREAD_GRAYSCALE)
# 使用Canny边缘检测算法进行边缘提取,threshold1和threshold2是边缘检测的阈值
edges = cv2.Canny(image, threshold1=100, threshold2=200)
# 创建一个图形窗口,设置显示图像的大小
plt.figure(figsize=(10, 5))
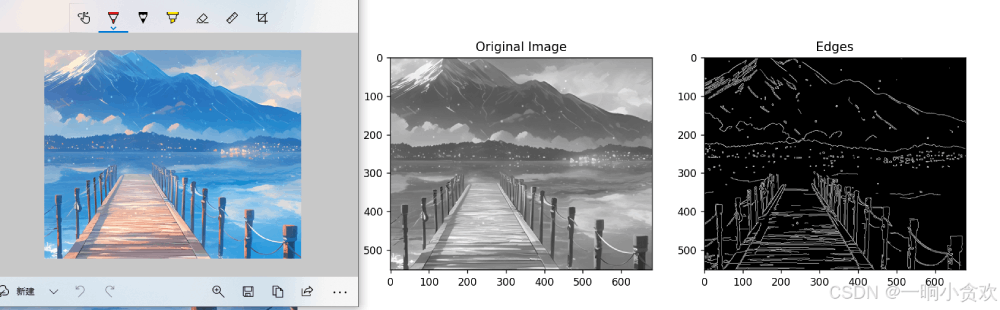
# 显示原始灰度图像
plt.subplot(1, 2, 1) # 将显示区域分为1行2列,当前显示第一列
plt.title('Original Image') # 给当前图像设置标题
plt.imshow(image, cmap='gray') # 显示图片,使用灰度色图
# 显示经过Canny算法处理后的边缘图像
plt.subplot(1, 2, 2) # 当前显示第二列
plt.title('Edges') # 给边缘图像设置标题
plt.imshow(edges, cmap='gray') # 显示边缘检测结果,使用灰度色图
# 显示所有图像
plt.show()
# 将边缘检测的结果保存为图片
cv2.imwrite('edges_output.jpg', edges)5、完整代码(GUI版本)
注意事项,以下请用相对路径
import sys
import cv2
import os
from PyQt5.QtWidgets import QApplication, QWidget, QVBoxLayout, QPushButton, QLabel, QFileDialog, QMessageBox
from PyQt5.QtCore import Qt


class ImageProcessor(QWidget):
    def __init__(self):
        super().__init__()
        self.initUI()

    def initUI(self):
        self.setWindowTitle('批量图像边缘检测')
        self.setGeometry(900, 500, 400, 200)

        layout = QVBoxLayout()

        self.label = QLabel('选择图片进行批量边缘检测', self)
        self.label.setAlignment(Qt.AlignCenter)
        layout.addWidget(self.label)

        self.btn_select = QPushButton('选择图片', self)
        self.btn_select.clicked.connect(self.select_images)
        layout.addWidget(self.btn_select)

        self.btn_process = QPushButton('处理并保存', self)
        self.btn_process.clicked.connect(self.process_images)
        layout.addWidget(self.btn_process)

        self.setLayout(layout)

    def select_images(self):
        # 选择多个图片文件
        options = QFileDialog.Options()
        self.filenames, _ = QFileDialog.getOpenFileNames(self, "选择图片文件", "",
                                                         "Images (*.png *.jpg *.bmp);;All Files (*)", options=options)
        if self.filenames:
            # 获取当前工作目录或自定义目录作为基准目录
            base_dir = os.getcwd()  # 或者指定一个路径,例如 r"C:\Users\小庄的Y9000P\Desktop"

            # 将绝对路径转换为相对路径
            self.filenames = [os.path.relpath(filename, base_dir) for filename in self.filenames]

            self.label.setText(f'已选择 {len(self.filenames)} 张图片')

    def process_images(self):
        if not self.filenames:
            QMessageBox.warning(self, '警告', '请先选择图片文件')
            return

        for filename in self.filenames:
            try:
                print(f"正在处理文件: {filename}")  # 添加调试信息
                # 读取图片,使用灰度模式读取图片
                image = cv2.imread(filename, cv2.IMREAD_GRAYSCALE)

                if image is None:
                    print(f"无法读取文件: {filename}")  # 添加调试信息
                    raise Exception(f"无法读取文件: {filename}")

                # 使用Canny边缘检测算法进行边缘提取
                edges = cv2.Canny(image, threshold1=100, threshold2=200)

                # 保存边缘检测结果
                output_filename = filename.rsplit('.', 1)[0] + '_edges.jpg'
                cv2.imwrite(output_filename, edges)

            except Exception as e:
                QMessageBox.warning(self, '错误', f'处理文件 {filename} 时出错: {str(e)}')
                continue

        QMessageBox.information(self, '完成', '所有图片处理完成并已保存')


if __name__ == '__main__':
    app = QApplication(sys.argv)
    ex = ImageProcessor()
    ex.show()
    sys.exit(app.exec_())
效果图
以上就是使用Python实现将图片转线条图的详细内容,更多关于Python图片的资料请关注脚本之家其它相关文章!