
yolov5使用flask部署至前端实现照片\视频识别功能
作者:代码与CPython
初学者在使用YOLO和Flask构建应用时,往往需要实现上传图片和视频的识别功能,本文介绍了如何在Flask框架中实现这一功能,包括文件上传、图片放大查看、视频识别以及识别后的文件下载,文中通过代码介绍的非常详细,需要的朋友可以参考下
前言
初学yolo flask时,需要此功能,Csdn、Github、B站找到许多代码,效果并不满意。
近期,再度尝试,实现简单功能。
实现功能:
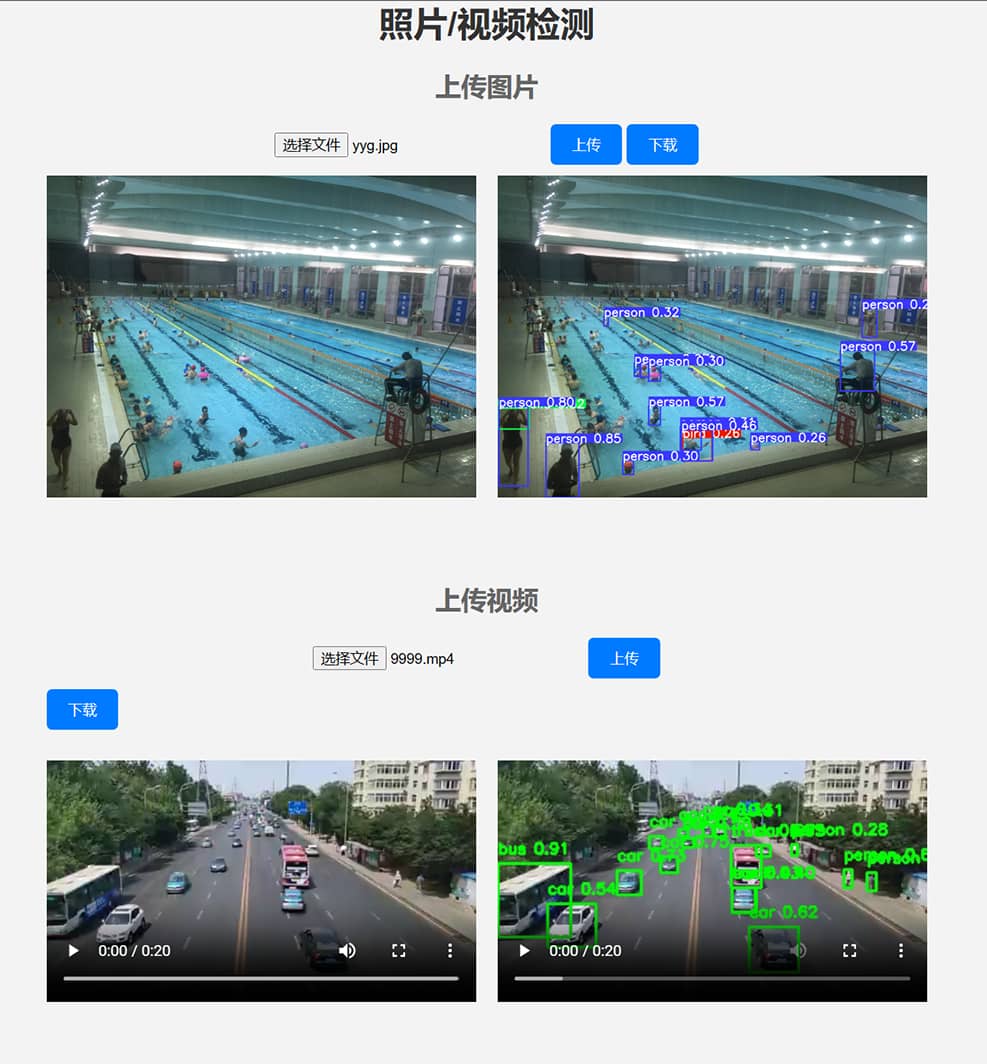
上传图片并识别,可以点击图片放大查看
上传视频并识别
识别后的文件下载功能
效果图如下
文件结构如下:
project/
static/空
templates/
index.html
app.py
相关代码:
app.py
import cv2
import numpy as np
import torch
from flask import Flask, request, jsonify, render_template
import base64
import os
from datetime import datetime

app = Flask(__name__)

# 全局变量:模型
model = None

# 提前加载模型
def load_model():
    global model
    model = torch.hub.load('', 'custom', path='yolov5s.pt', source='local')

# 路由处理图片检测请求
@app.route('/predict_image', methods=['POST'])
def predict_image():
    global model

    # 获取图像文件
    file = request.files['image']
    # 读取图像数据并转换为RGB格式
    image_data = file.read()
    nparr = np.frombuffer(image_data, np.uint8)
    image = cv2.imdecode(nparr, cv2.IMREAD_UNCHANGED)

    results = model(image)

    image = results.render()[0]

    # 将图像转换为 base64 编码的字符串
    _, buffer = cv2.imencode('.png', image)
    image_str = base64.b64encode(buffer).decode('utf-8')

    # 获取当前时间,并将其格式化为字符串
    current_time = datetime.now().strftime('%Y%m%d%H%M%S')
    # 构建保存路径
    save_dir = 'static'
    if not os.path.exists(save_dir):
        os.makedirs(save_dir)
    filename, extension = os.path.splitext(file.filename)  # 获取上传文件的文件名和扩展名
    save_filename = f'{filename}_{current_time}{extension}'
    save_path = os.path.join(save_dir, save_filename)
    cv2.imwrite(save_path, image)

    return jsonify({'image': image_str})

# 函数用于在视频帧上绘制检测结果
def detect_objects(frame, model):
    results = model(frame)
    detections = results.xyxy[0].cpu().numpy()  # 获取检测结果

    # 在帧上绘制检测结果
    for det in detections:
        # 获取边界框信息
        x1, y1, x2, y2, conf, class_id = det[:6]

        # 在帧上绘制边界框
        cv2.rectangle(frame, (int(x1), int(y1)), (int(x2), int(y2)), (0, 255, 0), 2)

        # 在帧上绘制类别和置信度
        label = f'{model.names[int(class_id)]} {conf:.2f}'
        cv2.putText(frame, label, (int(x1), int(y1) - 10), cv2.FONT_HERSHEY_SIMPLEX, 0.5, (0, 255, 0), 2)
    return frame

# 路由处理视频检测请求

@app.route("/predict_video", methods=["POST"])
def predict_video():
    global model

    # 从请求中获取视频文件
    video_file = request.files["video"]
    # 保存视频到临时文件
    temp_video_path = "temp_video.mp4"
    video_file.save(temp_video_path)

    # 逐帧读取视频
    video = cv2.VideoCapture(temp_video_path)

    # 获取视频的帧率和尺寸
    fps = video.get(cv2.CAP_PROP_FPS)
    width = int(video.get(cv2.CAP_PROP_FRAME_WIDTH))
    height = int(video.get(cv2.CAP_PROP_FRAME_HEIGHT))

    # 视频写入对象
    output_video_filename = f"output_video_{datetime.now().strftime('%Y%m%d%H%M%S')}.mp4"
    output_video_path = os.path.join("static", output_video_filename)
    fourcc = cv2.VideoWriter_fourcc(*"avc1")
    out_video = cv2.VideoWriter(output_video_path, fourcc, fps, (width, height))

    # 逐帧处理视频并进行目标检测
    while True:
        ret, frame = video.read()
        if not ret:
            break

        # 进行目标检测
        detection_result = detect_objects(frame, model)

        # 将处理后的帧写入输出视频
        out_video.write(detection_result)

    # 释放视频对象
    video.release()
    out_video.release()

    return jsonify({"output_video_path": output_video_filename})

@app.route('/')
def index():
    return render_template('index.html')

# 初始加载模型
load_model()

if __name__ == '__main__':
    app.run(debug=True)
index.html
<!DOCTYPE html>
<html lang="en">
<head>
<meta charset="UTF-8">
<meta name="viewport" content="width=device-width, initial-scale=1.0">
<title>Object Detection</title>
<style>
body {
font-family: Arial, sans-serif;
margin: 0;
padding: 0;
background-color: #f3f3f3;
display: flex;
justify-content: center;
align-items: center;
height: 100vh;
flex-direction: column;
}
#content {
text-align: center;
max-width: 820px;
margin-top: 20px;
}
h1 {
color: #333;
}
h2 {
color: #666;
}
input[type="file"] {
margin-bottom: 10px;
}
.media-container {
display: flex;
max-width: 100%;
margin-bottom: 20px;
}
.media-container:first-child {
margin-right: 20px; /* 在第一个容器的右侧添加间隔 */
}
.media-container img,
.media-container video {
max-width: 100%;
height: auto;
}
.original {
width: 400px;
overflow: hidden;
}
.processed {
flex: 2; /* 右边容器占据剩余空间 */
}
button {
padding: 10px 20px;
background-color: #007bff;
color: #fff;
border: none;
border-radius: 5px;
cursor: pointer;
margin-bottom: 10px;
}
/* 新增样式:模态框 */
.modal {
display: none; /* 默认隐藏 */
position: fixed;
z-index: 1;
left: 0;
top: 0;
width: 100%;
height: 100%;
overflow: auto;
background-color: rgba(0, 0, 0, 0.9); /* 半透明黑色背景 */
}
.modal-content {
margin: auto;
display: block;
width: 80%;
max-width: 800px;
position: absolute;
left: 50%;
top: 50%;
transform: translate(-50%, -50%);
text-align: center; /* 居中显示图片 */
}
.close {
color: #ccc;
font-size: 36px;
font-weight: bold;
cursor: pointer;
position: absolute;
top: 10px;
right: 10px;
}
.close:hover,
.close:focus {
color: #fff;
text-decoration: none;
}
#downloadButton {
padding: 10px 20px;
background-color: #007bff;
color: #fff;
border: none;
border-radius: 5px;
cursor: pointer;
margin-bottom: 10px;
}
/* 新增样式:响应式图片 */
.modal-content img,
.modal-content video {
max-width: 100%;
height: auto;
}
</style>
</head>
<body>
<!-- 新增模态框 -->
<div id="myModal" class="modal" onclick="closeModal()">
<div class="modal-content" id="modalContent" onclick="stopPropagation(event)">
<!-- 放大后的图片或视频将在这里显示 -->
<span class="close" onclick="closeModal()">×</span>
</div>
</div>
<div id="content">
<h1>照片/视频检测</h1>
<!-- 上传图片 -->
<h2>上传图片</h2>
<input type="file" id="imageFile" accept="image/*" onchange="displaySelectedImage()">
<button onclick="uploadImage()">上传</button>
<button id="downloadImageButton" onclick="downloadProcessedImage()">下载</button>
<br>
<div class="media-container">
<div class="original media-container" onclick="enlargeImage()">
<img id="uploadedImage" src="#" alt="Uploaded Image" style="display:none;">
<button id="zoomInButton" style="display:none;">Zoom In</button>
</div>
<div class="processed media-container" onclick="enlargeImage2()">
<img id="processedImage" src="#" alt="Processed Image" style="display:none;">
</div>
</div>
<br>
<!-- 上传视频 -->
<h2>上传视频</h2>
<input type="file" id="videoFile" accept="video/mp4,video/x-m4v,video/*" onchange="displaySelectedVideo()">
<button onclick="uploadVideo()">上传</button>
<button id="downloadButton" onclick="downloadProcessedVideo()">下载</button>
<br>
<div class="media-container">
<div class="original media-container" >
<video id="uploadedVideo" src="#" controls style="display:none;"></video>
</div>
<div class="processed media-container">
<video id="processedVideo" controls style="display:none;"></video>
</div>
</div>
<br>
</div>
<script>
// 显示选择的权重文件
// 显示选择的图片并添加点击放大功能
function displaySelectedImage() {
var fileInput = document.getElementById('imageFile');
var file = fileInput.files[0];
var imageElement = document.getElementById('uploadedImage');
imageElement.src = URL.createObjectURL(file);
imageElement.style.display = 'inline';
document.getElementById('zoomInButton').style.display = 'inline';
}
// 显示模态框并放大图片
function enlargeImage() {
var modal = document.getElementById('myModal');
var modalImg = document.getElementById('modalContent');
var img = document.getElementById('uploadedImage');
modal.style.display = 'block';
modalImg.innerHTML = '<img src="' + img.src + '">';
}
// 显示模态框并放大图片
function enlargeImage2() {
var modal = document.getElementById('myModal');
var modalImg = document.getElementById('modalContent');
var img = document.getElementById('processedImage');
modal.style.display = 'block';
modalImg.innerHTML = '<img src="' + img.src + '">';
}
// 显示选择的视频并添加点击放大功能
function displaySelectedVideo() {
var fileInput = document.getElementById('videoFile');
var file = fileInput.files[0];
var videoElement = document.getElementById('uploadedVideo');
videoElement.src = URL.createObjectURL(file);
videoElement.style.display = 'block';
}
// 上传图片并向后端发送请求
function uploadImage() {
var fileInput = document.getElementById('imageFile');
var file = fileInput.files[0];
var formData = new FormData();
formData.append('image', file);
fetch('/predict_image', {
method: 'POST',
body: formData
})
.then(response => response.json())
.then(data => {
var imageElement = document.getElementById('processedImage');
imageElement.src = 'data:image/png;base64,' + data.image;
imageElement.style.display = 'inline';
document.getElementById('downloadImageButton').style.display = 'inline';
})
.catch(error => console.error('Error:', error));
}
// 下载处理后的图片
function downloadProcessedImage() {
var imageElement = document.getElementById('processedImage');
var url = imageElement.src;
var a = document.createElement('a');
a.href = url;
a.download = 'processed_image.png';
document.body.appendChild(a);
a.click();
document.body.removeChild(a);
}
// 上传视频并向后端发送请求
function uploadVideo() {
var fileInput = document.getElementById('videoFile');
var file = fileInput.files[0];
var formData = new FormData();
formData.append('video', file);
fetch('/predict_video', {
method: 'POST',
body: formData
})
.then(response => response.json())
.then(data => {
var videoElement = document.getElementById('processedVideo');
// 修改路径为正确的 Flask url_for 生成的路径
videoElement.src = '{{ url_for("static", filename="") }}' + data.output_video_path;
videoElement.style.display = 'block';
var downloadButton = document.getElementById('downloadButton');
downloadButton.style.display = 'block';
})
.catch(error => console.error('Error:', error));
}
// 下载处理后的视频
function downloadProcessedVideo() {
var videoElement = document.getElementById('processedVideo');
var url = videoElement.src;
var a = document.createElement('a');
a.href = url;
a.download = 'processed_video.mp4';
document.body.appendChild(a);
a.click();
document.body.removeChild(a);
}
// 关闭模态框
function closeModal() {
var modal = document.getElementById('myModal');
modal.style.display = 'none';
}
</script>
</body>
</html>使用说明:
index.html放入templates文件夹中
运行app.py
注:此处加载模型路径更改为自己的
model = torch.hub.load('', 'custom', path='yolov5s.pt', source='local')如果模型读取不到,显示
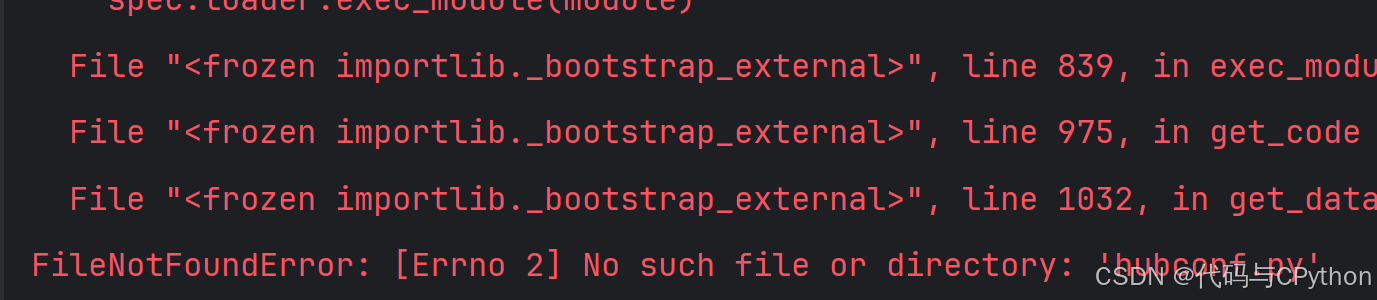
FileNotFoundError: [Errno 2] No such file or directory: 'hubconf.py'
去yolov5官网,下载yolov5-master到项目文件夹
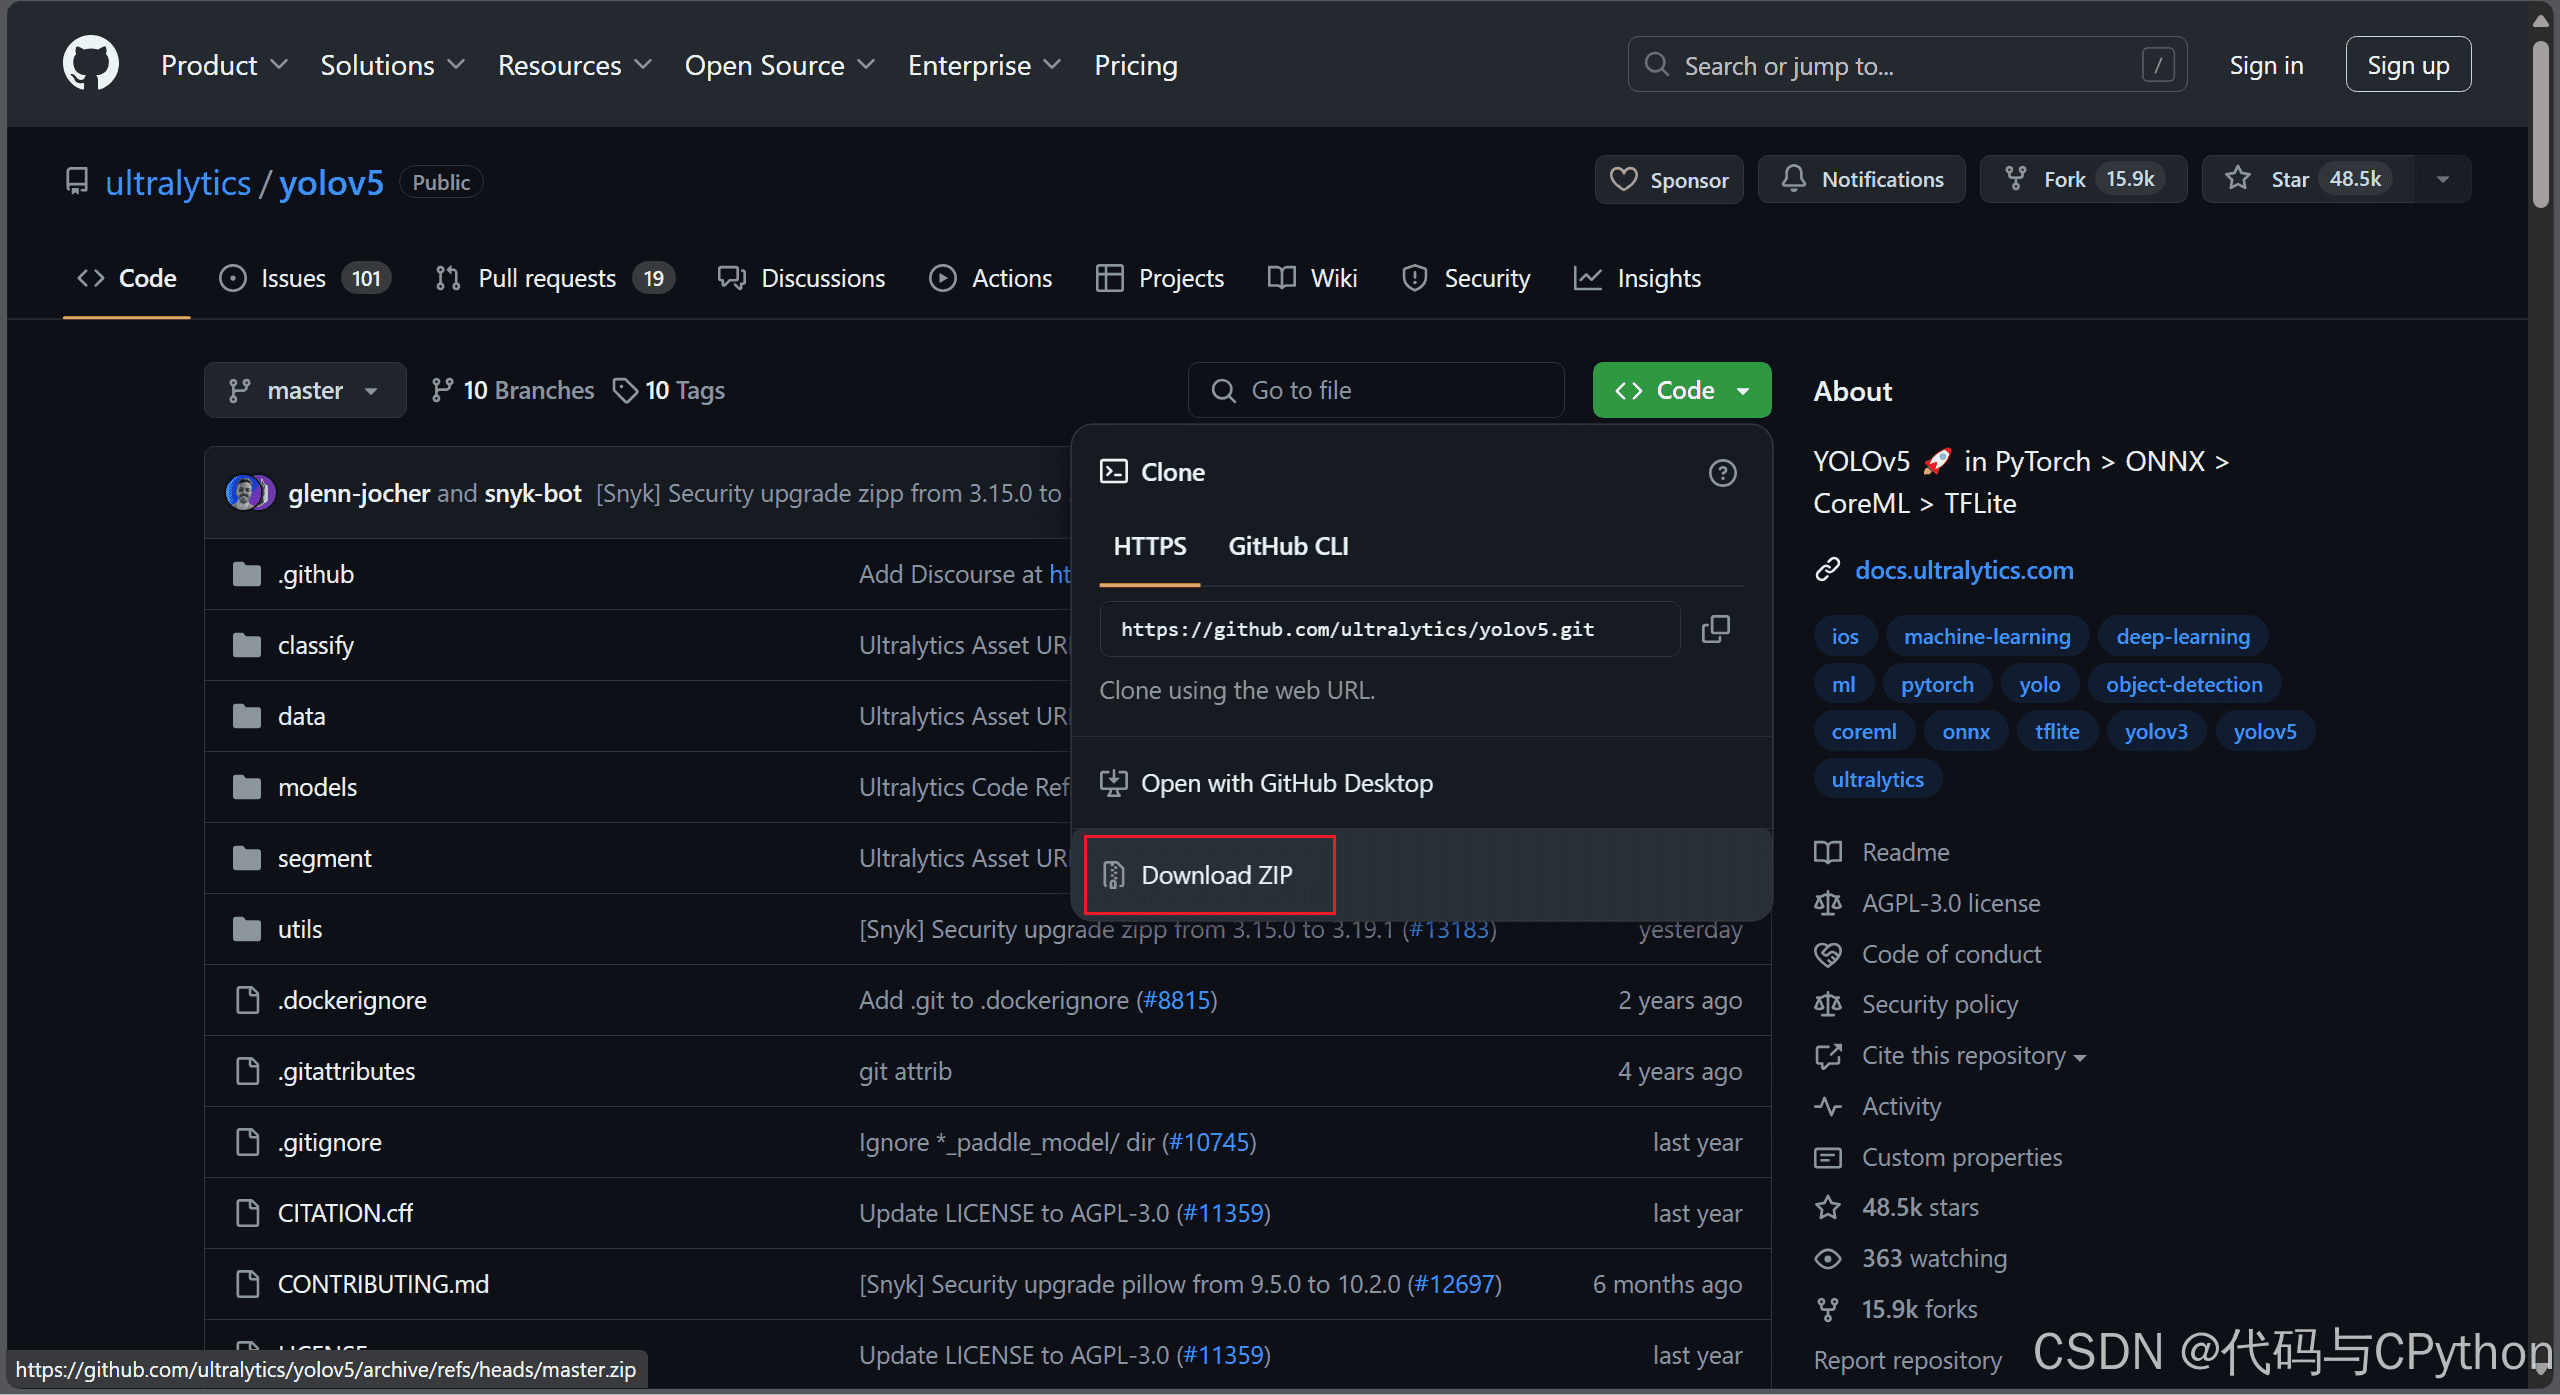
并将yolov5s.pt文件复制到yolov5-master文件夹中,修改model路径
model = torch.hub.load('yolov5-master', 'custom', path='yolov5s.pt', source='local')总结
到此这篇关于yolov5使用flask部署至前端实现照片\视频识别功能的文章就介绍到这了,更多相关yolov5 flask部署前端照片视频识别内容请搜索脚本之家以前的文章或继续浏览下面的相关文章希望大家以后多多支持脚本之家!