python使用PyGame实现打砖块游戏
作者:微小冷
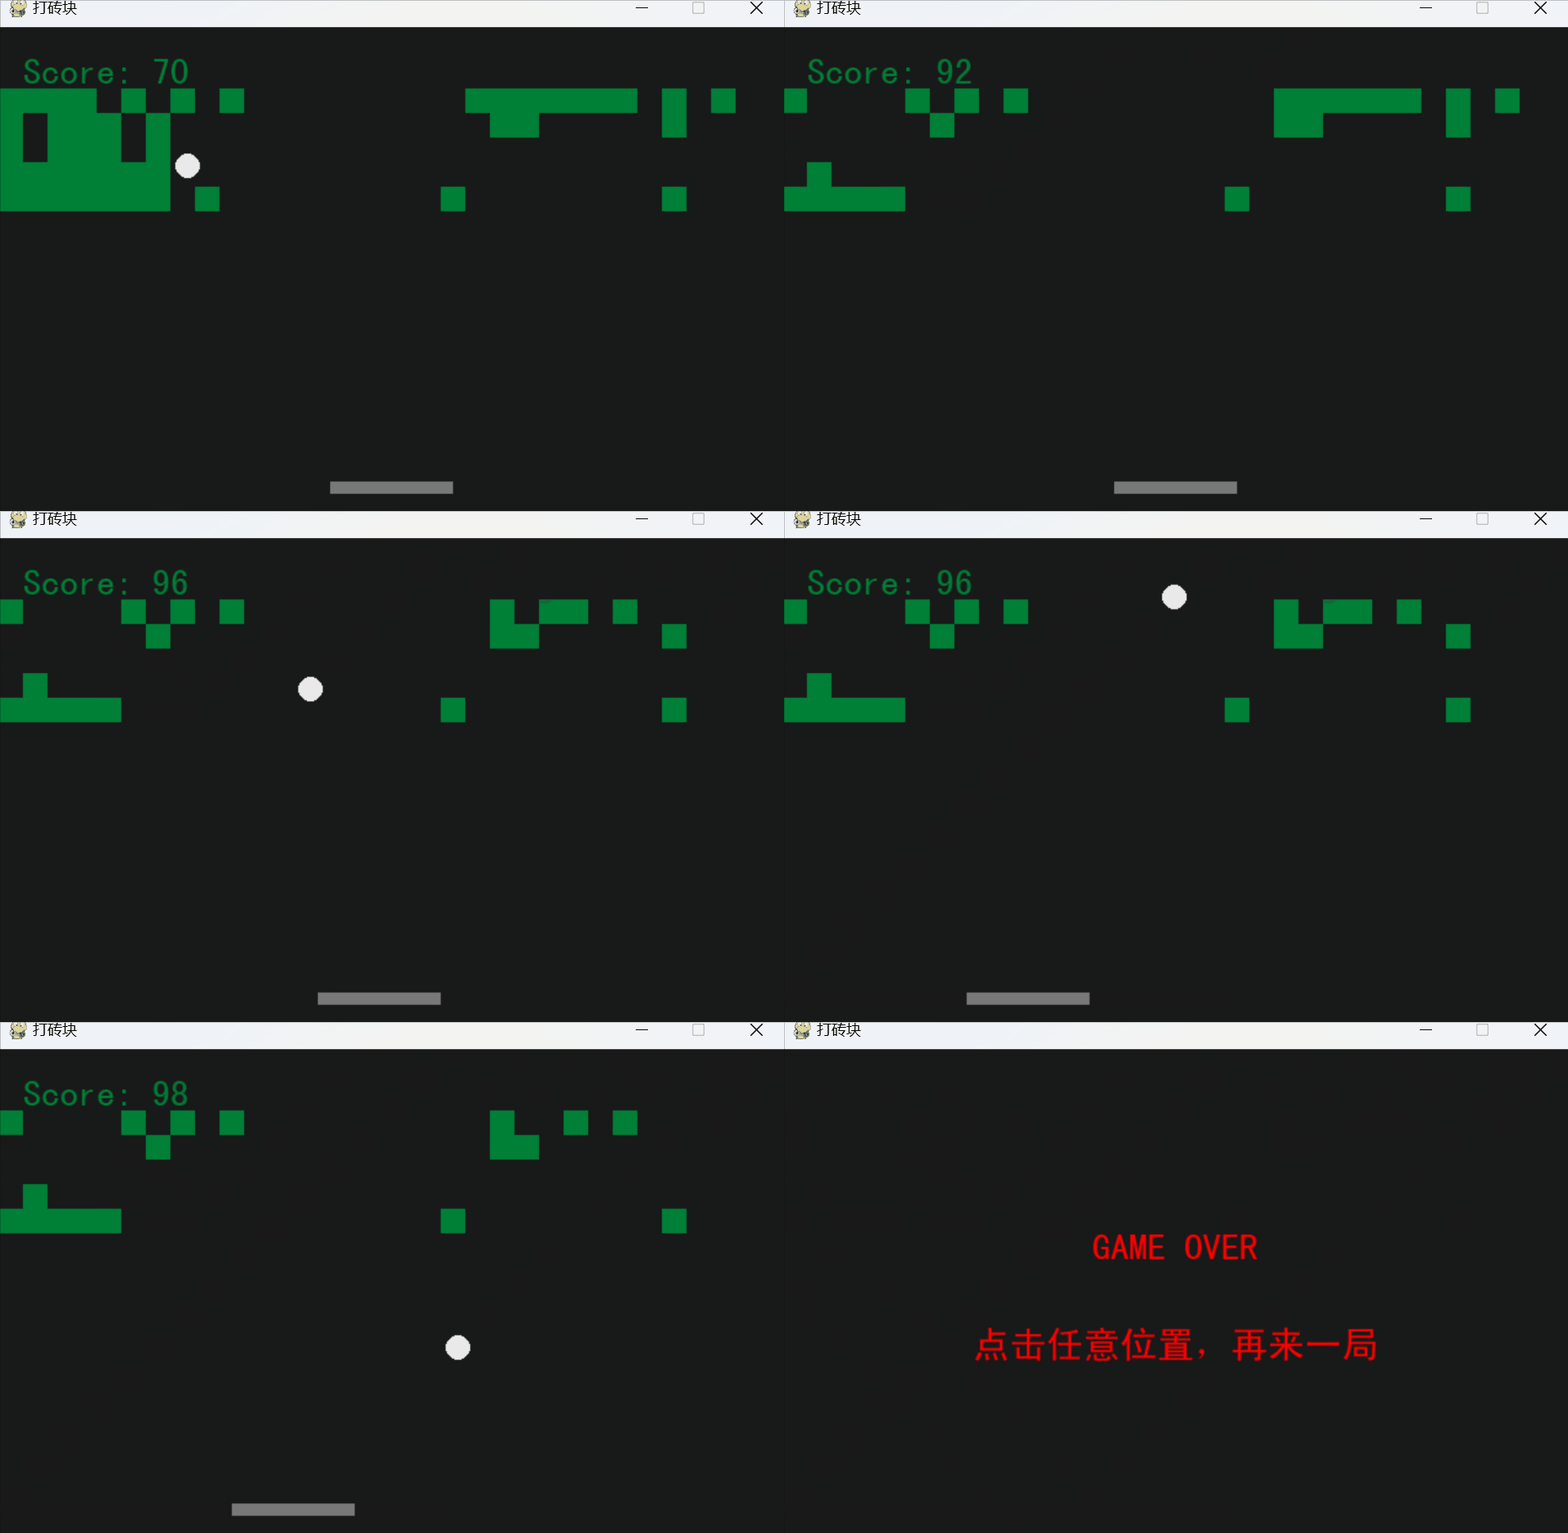
效果

在设计游戏之前,先设置一些常量,供后续选用。
import pygame
import random

WIDTH, HEIGHT = 640, 400 # 游戏窗口尺寸

SIZE = 20   # 砖块尺寸

# 颜色定义
C_PADDLE = (120, 120, 120)
C_BRICK = (0, 128, 55)
C_BALL = (233,233,233)
BLACK = (25, 25, 25)
RED = (255, 0, 0)
砖块实现
可玩性比较高的打砖块游戏,其砖块有着不同的属性,有一些砖块打不掉,有些在打碎之后会掉落一些东西,接住之后可以发生裂变反应。考虑到作为一个初学者小游戏,我们先让所有砖块有着相同的特质,但为了日后的扩展,所以用类来实现砖块。
作为一个砖块来说,只有三个属性,坐标( x , y ) (x,y)(x,y)以及边长size,又因为砖块不会动,所以这些参数仅作为传入的参数,而无需调用。而砖块唯一的行为,就是与小球发生碰撞,所以需要有一个判定方法。最终,砖块类实现如下
class Brick:
    def __init__(self, col, row, dy=50, size=SIZE, color=C_BRICK):
        x = col*size
        y = row*size + dy
        self.color = color
        self.rect = pygame.Rect(x, y, size, size)

    def hitRect(self, rect):
        return self.rect.colliderect(rect)

    def draw(self, screen):
        pygame.draw.rect(screen, self.color, self.rect)
在实际应用中,显然不可能只有一个砖块,所以在Brick中设置一个静态方法,用以生成随机的砖块,其生成逻辑是,随机生成一个数,如果这个数大于0.3,那么就在当前位置生成一个砖块,否则跳过。
@staticmethod
def randBricks(dense=0.3, size=SIZE, xEdge=WIDTH):
    bricks = []
    for row in range(5):
        col = 0
        while (col+1)* size < xEdge:
            bricks.append(Brick(col, row))
            col += 1 if random.random()>dense else 2
    return bricks
小车
和砖块相比,小车只多了一个左右移动的功能,即点击左箭头,相左移动,点击右箭头,向右移动。而且其移动的范围不能超出x轴的边界,其小车类实现如下。
class Car:
    def __init__(self, width, height=10, speed = 10, color=C_PADDLE,
                 xEdge=WIDTH, yEdge=HEIGHT):
        self.width, self.height = width, height
        self.xEdge = xEdge
        self.color = color
        self.x = (xEdge - width) // 2
        self.y = yEdge - 30
        self.vx = speed     # 只有x方向的速度

    def move(self, keys):
        if keys[pygame.K_LEFT] and self.x > 0:
            self.x -= self.vx
        if keys[pygame.K_RIGHT] and self.x < self.xEdge - self.width:
            self.x += self.vx

    def draw(self, screen):
        pygame.draw.rect(screen, self.color, (self.x, self.y, self.width, self.height))
小球
相比于不动的砖块,只需要左右移动的小车,小球的行为会稍微复杂一点,不仅需要考虑和墙壁以及小车的碰撞,也要考虑和砖块的碰撞。在这个过程中,需要进行诸多边界的判断,所以除了小球的半径和位置之外,设置L,R,U,D四个函数,用于计算其左右上下的边界位置。小球类实现如下。
class Ball:
    # xEdge, yEdge分别是水平核垂直方向的边缘
    def __init__(self, radius, speed=5,
                 xEdge=WIDTH, yEdge=HEIGHT, color=C_BALL):
        self.r = radius
        self.xEdge, self.yEdge = xEdge, yEdge
        self.color = color
        self.x = random.randint(radius, xEdge - radius)
        self.y = random.randint(yEdge//3, yEdge // 2)
        self.vx = self.vy = speed

    L = lambda self : self.x - self.r
    R = lambda self : self.x + self.r
    U = lambda self : self.y + self.r
    D = lambda self : self.y - self.r
    xy = lambda self : (self.x, self.y)

    def move(self):
        self.x += self.vx
        self.y += self.vy

    def rect(self):
        d = self.r * 2
        return pygame.Rect(self.L(), self.D(), d, d)

    # 撞击边缘
    def hitEdge(self):
        if self.L() < 0 or self.R() > self.xEdge:
            self.vx *= -1
        if self.U() < 0:
            self.vy *= -1
        elif self.U() > self.yEdge:
            return True
        return False

    # 撞击car
    def hitCar(self, car):
        if self.y + self.r >= car.y and car.x <= self.x <= car.x + car.width:
            self.vy *= -1

    def hitBricks(self, bricks):
        for brick in bricks[:]:
            if brick.hitRect(self.rect()):
                self.vy *= -1
                bricks.remove(brick)
                return 1
        return 0

    def draw(self, screen):
        pygame.draw.circle(screen, self.color, (self.x, self.y), self.r)
其中,hitBricks的返回值为1时,表示击中了砖块,否则表示未击中。
初始化和主循环
在具体写主循环之前,先设置一个GameOver的显示函数,这个函数的出镜率很高,在之前的实战中也用到过。
def drawGamerOver(screen, font, width=WIDTH, height=HEIGHT):
    w, h = font.size('GAME OVER')
    msg = font.render('GAME OVER', True, RED)
    screen.blit(msg, ((width - w) // 2, (height - h) // 2 - 40))

    w, h = font.size('点击任意位置,再来一局')
    msg = font.render('点击任意位置,再来一局', True, RED)
    screen.blit(msg, ((width - w) // 2, (height - h) // 2 + 40))
然后是初始化,主要包括小球、小车、砖块的初始化,以及PyGame的初始化。
def init():
    ball = Ball(10)
    car = Car(100)
    bricks = Brick.randBricks()
    return ball, car, bricks

# 初始化 Pygame
pygame.init()
window = pygame.display.set_mode((WIDTH, HEIGHT))
font = pygame.font.Font(r"SimHei.ttf", 30)
pygame.display.set_caption("打砖块")


# 初始化弹球、板、砖块的位置
ball, car, bricks = init()
score, running, gameOver = 0, True, False
其running用于调控主循环,gameOver则表示当前游戏失败,若失败,则跳入游戏失败的窗口。最后,主循环如下
while True:
    for event in pygame.event.get():
        if event.type == pygame.QUIT:
            pygame.quit()
            running = False
            break
        if gameOver:
            ball, car, bricks = init()
            gameOver, score = False, 0

    if not running:
        break

    if not gameOver:
        keys = pygame.key.get_pressed()
        car.move(keys)      # 移动小车
        ball.move()         # 移动弹球
        ball.hitCar(car)
        if ball.hitEdge():
            bricks = Brick.randBricks()  # 重新初始化游戏
            gameOver = True  # 游戏结束

        score += ball.hitBricks(bricks)

    # 清空窗口
    window.fill(BLACK)

    if not gameOver:
        car.draw(window)
        ball.draw(window)
        for brick in bricks:
            brick.draw(window)
        # 显示分数
        score_text = font.render(f"Score: {score}", True, C_BRICK)
        window.blit(score_text, (20, 20))
    else:
        drawGamerOver(window, font)

    pygame.display.flip()   # 更新屏幕显示
    pygame.time.delay(30)   # 控制帧率
以上就是python使用PyGame实现打砖块游戏的详细内容,更多关于python PyGame打砖块游戏的资料请关注脚本之家其它相关文章!
