
SpringBoot设置欢迎页的三种方式详解
作者:好好研究
这篇文章主要为大家详细介绍了SpringBoot实现欢迎页的三种方式,包括静态资源的自动映射,Controller映射和WebMvcConfigurer 配置类,文中的示例代码讲解详细,感兴趣的小伙伴可以了解下
方式一:SpringBoot对静态资源的自动映射(最基础)
SpringBoot框架将欢迎页做了自动配置,不需要任何配置,只需在静态资源目录下添加index.jsp欢迎页即可。
1. 导入jquery‐webjar依赖
<!--引入jquery‐webjar 在访问的时候只需要写webjars下面资源的名称即可-->
<dependency>
<groupId>org.webjars</groupId>
<artifactId>jquery</artifactId>
<version>3.3.1</version>
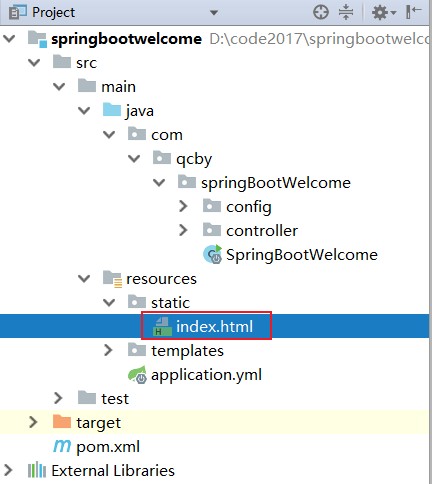
</dependency>2. 在 src/main/resources/static/ 下新建一个 index.html
<!DOCTYPE html>
<html lang="en">
<head>
    <meta charset="UTF-8">
    <title>Title</title>
</head>
<body>
    <h2>SpringBoot对静态资源的自动映射</h2>
    <p>springboot自动配置,在静态资源下查找index.html文件</p>
</body>
</html>
3. 访问当前项目的任何资源,都去(静态资源的文件夹)找映射
优先级:从高到低
# 任选其一
"classpath:/META‐INF/resources/index.html",
"classpath:/resources/index.html",
"classpath:/static/index.html",
"classpath:/public/index.html"
"/":当前项目的根路径
4. 适用场景:
- 纯静态的 HTML 页面,
- 不需要编写xml,
- 不需要后端传数据,
- 也不使用 Thymeleaf 语法。
方式二:SpringBoot-Controller映射(最常用)
最常用的一种获取动态页面的方式,页面通常放在classpath:/templates/目录下(模板引擎默认目录)。
1. 在 src/main/resources/templates/ 下新建一个 index.html

<!DOCTYPE html>
<html lang="en" xmlns:th="http://www.thymeleaf.org">
<head>
    <meta charset="UTF-8">
    <title>Title</title>
</head>
<body>
    <h2 th:text="${message}"></h2>
    <h2>且使用Thymeleaf 模板引擎</h2>
</body>
</html>
2. 在controller层建一个java文件
package com.qcby.springBootWelcome.controller;

import org.springframework.stereotype.Controller;
import org.springframework.ui.Model;
import org.springframework.web.bind.annotation.RequestMapping;

@Controller
public class WelcomeController {
    @RequestMapping("/")
    public String welcomeHello(Model model){
        model.addAttribute("message","SpringBoot-Controller映射");
        return "index";
    }
}

3. 访问路径:classpath:/templates/index.html
4. 适用场景:
- 使用 Thymeleaf 模板引擎的动态页面
- 需要后端数据交互
方式三:WebMvcConfigurer 配置类
1. 在 src/main/resources/templates/ 下新建一个 login.html

<!DOCTYPE html>
<html lang="en">
<head>
    <meta charset="UTF-8">
    <title>Title</title>
</head>
<body>
    <h2>登录页面</h2>
    <h3>适用 WebMvcConfigurer 配置类</h3>
</body>
</html>
2. 创建WebConfig配置类
package com.qcby.springBootWelcome.config;

import org.springframework.context.annotation.Configuration;
import org.springframework.web.servlet.config.annotation.ViewControllerRegistry;
import org.springframework.web.servlet.config.annotation.WebMvcConfigurer;

@Configuration
public class WebConfig implements WebMvcConfigurer{
    @Override
    public void addViewControllers(ViewControllerRegistry registry) {
        // 直接映射到静态页面
//        registry.addViewController("/").setViewName("login.html");

        // 或者映射到模板引擎页面
         registry.addViewController("/").setViewName("login");
    }
}

3. 访问路径:classpath:/templates/login.html
4. 适用场景:
- 使用 Thymeleaf 模板引擎的动态页面
- 不需要后端传特定数据,仅仅是做路由跳
总结
这三种方式的优先级:SpringBoot-Controller映射 > WebMvcConfigurer 配置类 > SpringBoot对静态资源的自动映射
| 方法 | 适用场景 | 优点 | 缺点 |
|---|---|---|---|
| 静态资源默认 | 简单静态页面 | 无需配置 | 功能单一 |
| WebMvcConfigurer | 需要URL映射 | 灵活 | 需要代码配置 |
| Controller方式 | 动态内容 | 功能强大 | 代码量多 |
| 模板引擎 | 动态页面 | 前后端结合 | 需要学习模板语法 |
到此这篇关于SpringBoot设置欢迎页的三种方式详解的文章就介绍到这了,更多相关SpringBoot设置欢迎页内容请搜索脚本之家以前的文章或继续浏览下面的相关文章希望大家以后多多支持脚本之家!