
Spring Boot 配置文件从基础语法到验证码实战
作者:想不明白的过度思考者
Spring Boot 配置文件深度解析:从基础语法到验证码实战

摘要
本文深入探讨了 Spring Boot 配置文件的核心作用及其主流格式。通过对比 Properties 与 YAML (YML) 的语法差异、优先级及适用场景,结合 @Value 与 @ConfigurationProperties 注解的代码实战,帮助开发者掌握配置读取的高级技巧。文章最后通过一个“图形验证码”综合案例,演示了如何将配置项优雅地集成到实际业务中。
1. 配置文件概述:告别硬编码
在软件开发中,硬编码 (Hard Coding) 是指将数据直接嵌入源代码的行为 。这种做法会导致程序灵活性差,例如手机字体大小若被写死,将无法满足不同用户的偏好 。
配置文件的作用在于解决硬编码问题,将易变信息(如数据库连接、端口号、第三方密钥)集中管理 。当程序启动时,它会从配置文件中读取数据并加载运行,从而实现用户与应用的交互 。
2. Spring Boot 配置文件的三大格式
Spring Boot 在启动时会自动从 classpath 路径寻找并加载以下格式的文件 :
| 格式名称 | 后缀名 | 特点 |
|---|---|---|
| Properties | .properties | 早期默认格式,创建项目时的默认选择 |
| YAML | .yml | 缩写形式,开发中最常用,支持树形结构 |
| YAML | .yaml | 全称形式,与 .yml 使用方式一致 |
2.1 优先级与共存说明
- 共存性:理论上两者可并存于同一项目 。
- 优先级:当配置冲突时,
.properties的优先级高于.yml。 - 建议:实际开发中应统一使用一种格式以降低维护成本 。
3. Properties 语法与读取实战
3.1 基础语法
Properties 采用 key=value 的键值对形式,使用 # 作为注释 。
文件配置如下:
# 设置项目启动端口
server.port=8080
# 数据库连接配置
spring.datasource.url=jdbc:mysql://127.0.0.1:3306/testdb
spring.datasource.username=root
3.2 使用 @Value 读取配置
在 Java 代码中,可以使用 ${} ({}里面填写键名)格式配合 @Value 注解主动读取内容 。
import org.springframework.beans.factory.annotation.Value;
import org.springframework.web.bind.annotation.RequestMapping;
import org.springframework.web.bind.annotation.RestController;
@RequestMapping("/prop")
@RestController
public class PropertiesController {
    @Value("${spring.datasource.url}")
    private String url;
    @RequestMapping("/read")
    public String readProperties() {
        return "从配置文件中读取url" + url;
    }
}
运行效果:

3.3 properties缺点
properties配置是以key-value的形式配置的,如下图所示:

从上述配置key看出,properties配置文件中会有很多的冗余的信息,比如这些:

想要解决这个问题,就得使用yml配置文件的格式化了
4. YAML (YML) 进阶指南
YAML 是一种树形结构的标记语言,通过缩进表示层级 。
4.1 核心语法规范

- 冒号空格:
key和value之间必须有 英文冒号+空格,空格不可省略 。 - 数据类型支持:支持字符串、布尔值、整数、浮点数以及
null(用~表示) 。
单层级与多层级的表示规则

多层级的key前面要空两个格,且同级需对齐!
4.2 yaml语法与读取示例
yaml文件配置如下

Java代码读取配置信息
import org.springframework.beans.factory.annotation.Value;
import org.springframework.web.bind.annotation.RequestMapping;
import org.springframework.web.bind.annotation.RestController;
@RequestMapping("/yaml")
@RestController
public class yamlController {
    @Value("${yaml}")
    private String yaml;
    @Value("${spring.datasource.username}")
    private String username;
    @Value("${spring.datasource.password}")
    private String password;
    @RequestMapping("/read")
    public String read() {
        System.out.println(yaml);
        System.out.println(username);
        System.out.println(password);
        return "success";
    }
}
运行结果

打印配置

4.3 字符串的引号差异
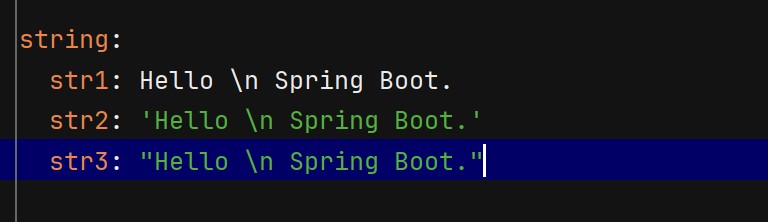
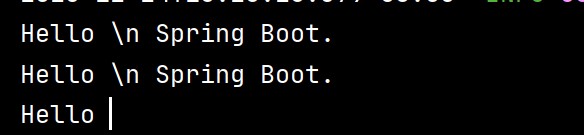
YAML 中字符串默认不加引号,但单双引号有本质区别 :
- 单引号 (‘’):会转义特殊字符,使其变为普通字符串(如
\n输出为字符\n) - 双引号 (“”):不会转义特殊字符,保留其本身含义(如
\n输出为换行)
4.4 对象、集合与 Map 的读取
配置对象
YML 配置示例:
student:
  id: 1
  name: Java
  age: 18
Java 实体类映射:
对于复杂数据形态,建议使用 @ConfigurationProperties 注解 。
@Data
@ConfigurationProperties(prefix = "student")  // 会从配置文件中找到student的前缀
@Configuration
public class Student {
    private Integer id;
    private String name;
    private Integer age;
}
运行打印结果

配置集合
YML 配置示例:
dbtypes:
  name:
    - mysql
    - sqlserver
    - db2
  map:
    k1: kk1
    k2: kk2
    k3: kk3
Java 实体类映射:
对于复杂数据形态,建议使用 @ConfigurationProperties 注解 。
@Data
@ConfigurationProperties(prefix = "dbtypes")
@Configuration
public class DbTypeConfig {
    private List<String> name;
    private Map<String, String> map;
}
运行打印结果

5. 综合性练习:验证码案例实战
本案例基于 Hutool 第三方工具包实现一个后端生成、校验验证码的功能 。


5.1 需求分析
- 后端生成验证码图片并返回流 。
- 将验证码及其生成时间存入
Session。 - 用户提交验证码,后端校验一致性及有效期(1分钟内有效) 。
5.2 约定前后端交互接口
接口定义
- 生成验证码
请求URL:/captcha/getCaptcha响应:验证码图片内容 - 校验验证码是否正确
请求:/captcha/check请求URL: /captcha/check 请求参数: captcha=xn8d
响应:true
根据用户输⼊的验证码,校验验证码是否正确.true:验证成功.false:验证失败.
配置文件定义(解决硬编码问题)
在 application.yml 中定义验证码的尺寸及 Session 的 Key :
spring:
  application:
    name: spring-captcha-demo
captcha:
  width: 100
  height: 40
#  通过设置session配置项,避免日后需要到处修改
  session:
    code: SESSION_CODE_KEY
    date: SESSION_DATE_KEY
验证码相关接口
import cn.hutool.captcha.CaptchaUtil;
import cn.hutool.captcha.LineCaptcha;
import cn.overthinker.spring.captcha.demo.model.CaptchaProperties;
import jakarta.servlet.http.HttpServletRequest;
import jakarta.servlet.http.HttpServletResponse;
import jakarta.servlet.http.HttpSession;
import org.springframework.beans.factory.annotation.Autowired;
import org.springframework.util.StringUtils;
import org.springframework.web.bind.annotation.RequestMapping;
import org.springframework.web.bind.annotation.RestController;
import java.io.IOException;
@RestController
@RequestMapping("/captcha")
public class CaptchaController {
    @Autowired
    private CaptchaProperties captchaProperties;
    private  static long VILD_MiLLTS_TIME = 5 * 60 * 1000;
    @RequestMapping("/getCaptcha")
    public void genCaptcha(HttpServletRequest request, HttpServletResponse response) {
        //定义图形验证码的长和宽
        LineCaptcha lineCaptcha = CaptchaUtil.createLineCaptcha(captchaProperties.getWidth(), captchaProperties.getHeight());
        String code = lineCaptcha.getCode();
        System.out.println(code);
        //图形验证码写出,可以写出到文件,也可以写出到流
        try {
            response.setContentType("image/jpeg");
            response.setHeader("Pragma", "No-cache");
            lineCaptcha.write(response.getOutputStream());
            //拿到这个请求的session,并且将code写入到session
            HttpSession session = request.getSession();
            session.setAttribute(captchaProperties.getSession().getCode(), code);
            //记录时间保持五分钟内有效
            session.setAttribute(captchaProperties.getSession().getDate(), System.currentTimeMillis());
            response.getOutputStream().close();
        } catch (IOException e) {
            throw new RuntimeException(e);
        }
    }
    @RequestMapping("/check")
    public Boolean checkCaptcha(String captcha, HttpSession session) {
        //先判断是否为空
        if(!StringUtils.hasLength(captcha)) {
            return false;
        }
        // 从session中获取code和时间
        String code = session.getAttribute(captchaProperties.getSession().getCode()).toString();
        long data = (long)session.getAttribute(captchaProperties.getSession().getDate());
        if(captcha.equalsIgnoreCase(code) && (System.currentTimeMillis() - data < VILD_MiLLTS_TIME)) {
            return true;
        }
        return false;
    }
}
前端相关代码
<!DOCTYPE html>
<html lang="en">
<head>
<meta charset="utf-8">
<title>验证码</title>
<style>
#inputCaptcha {
height: 30px;
vertical-align: middle;
}
#verificationCodeImg{
vertical-align: middle;
}
#checkCaptcha{
height: 40px;
width: 100px;
}
</style>
</head>
<body>
<h1>输入验证码</h1>
<div id="confirm">
<input type="text" name="inputCaptcha" id="inputCaptcha">
<img id="verificationCodeImg" src="/captcha/getCaptcha" style="cursor: pointer;" title="看不清?换一张" />
<input type="button" value="提交" id="checkCaptcha">
</div>
<script src="https://cdn.bootcdn.net/ajax/libs/jquery/3.6.4/jquery.min.js"></script>
<script>
$("#verificationCodeImg").click(function(){
$(this).hide().attr('src', '/captcha/getCaptcha?dt=' + new Date().getTime()).fadeIn();
});
$("#checkCaptcha").click(function () {
// alert("验证码校验");
$.ajax({
url:'/captcha/check',
type:'post',
data:{
captcha:$('#inputCaptcha').val()
},
success:function (result) {
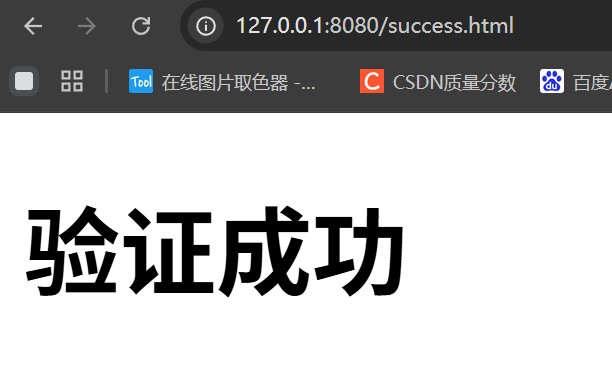
if(result){
location.href = 'success.html';
}else {
alert("验证码错误!");
}
}
});
});
</script>
</body>
</html>运行结果

6. 总结
- Properties 语法简单但存在冗余,适用于简单项目 。
- YAML 结构清晰、支持类型丰富,是目前 Spring Boot 开发的主流选择 。
- 读取技巧:简单配置用
@Value,结构化配置(对象/集合)首选@ConfigurationProperties。 - 建议:yml可以和properties共存,但⼀个项目中建议只使用⼀种配置类型文件
参考链接:
到此这篇关于Spring Boot 配置文件从基础语法到验证码实战的文章就介绍到这了,更多相关Spring Boot 配置文件内容请搜索脚本之家以前的文章或继续浏览下面的相关文章希望大家以后多多支持脚本之家!