
SpringBoot中登录验证码的4种实现方案
作者:风象南
在当今互联网安全形势日益严峻的环境下,验证码已成为保护用户账户安全、防止破解和自动化攻击的重要手段。尤其在登录系统中,合理使用验证码不仅能有效阻止机器人批量尝试账号密码,还能降低账户被盗风险,提升系统安全性。
本文将详细介绍在SpringBoot应用中实现四种登录验证码的技术方案,包括图形验证码、短信验证码、邮箱验证码和滑动拼图验证码。
方案一:基于Kaptcha的图形验证码
原理介绍
图形验证码是最传统且应用最广泛的验证码类型,原理是在服务端生成随机字符串并渲染成图片,用户需要识别图片中的字符并输入。图形验证码实现简单,对用户体验影响较小,是中小型应用的理想选择。
实现步骤
1. 添加Kaptcha依赖
<dependency>
    <groupId>com.github.penggle</groupId>
    <artifactId>kaptcha</artifactId>
    <version>2.3.2</version>
</dependency>
2. 配置Kaptcha生成器
@Configuration
public class KaptchaConfig {

    @Bean
    public Producer kaptchaProducer() {
        Properties properties = new Properties();
        // 图片宽度
        properties.setProperty(Constants.KAPTCHA_IMAGE_WIDTH, "150");
        // 图片高度
        properties.setProperty(Constants.KAPTCHA_IMAGE_HEIGHT, "50");
        // 字体大小
        properties.setProperty(Constants.KAPTCHA_TEXTPRODUCER_FONT_SIZE, "32");
        // 字体颜色
        properties.setProperty(Constants.KAPTCHA_TEXTPRODUCER_FONT_COLOR, "black");
        // 文本集合,验证码值从此集合中获取
        properties.setProperty(Constants.KAPTCHA_TEXTPRODUCER_CHAR_STRING, "0123456789ABCDEFGHIJKLMNOPQRSTUVWXYZ");
        // 验证码长度
        properties.setProperty(Constants.KAPTCHA_TEXTPRODUCER_CHAR_LENGTH, "4");
        // 干扰线颜色
        properties.setProperty(Constants.KAPTCHA_NOISE_COLOR, "blue");
        // 去除背景渐变
        properties.setProperty(Constants.KAPTCHA_OBSCURIFICATOR_IMPL, "com.google.code.kaptcha.impl.ShadowGimpy");

        Config config = new Config(properties);
        return config.getProducerImpl();
    }
}
3. 创建验证码存储服务
@Service
public class CaptchaService {

    @Autowired
    private RedisTemplate<String, String> redisTemplate;

    // 验证码有效期(秒)
    private static final long CAPTCHA_EXPIRATION = 300;

    // 存储验证码
    public void storeCaptcha(String sessionId, String captchaCode) {
        redisTemplate.opsForValue().set(
                "CAPTCHA:" + sessionId,
                captchaCode,
                CAPTCHA_EXPIRATION,
                TimeUnit.SECONDS);
    }

    // 验证验证码
    public boolean validateCaptcha(String sessionId, String userInputCaptcha) {
        String key = "CAPTCHA:" + sessionId;
        String storedCaptcha = redisTemplate.opsForValue().get(key);

        if (storedCaptcha != null && storedCaptcha.equalsIgnoreCase(userInputCaptcha)) {
            // 验证成功后立即删除,防止重复使用
            redisTemplate.delete(key);
            return true;
        }

        return false;
    }
}
4. 实现验证码生成控制器
@RestController
@RequestMapping("/captcha")
public class CaptchaController {

    @Autowired
    private Producer kaptchaProducer;

    @Autowired
    private CaptchaService captchaService;

    @GetMapping("/image")
    public void getImageCaptcha(HttpServletResponse response, HttpServletRequest request) throws IOException {
        // 清除浏览器缓存
        response.setDateHeader("Expires", 0);
        response.setHeader("Cache-Control", "no-store, no-cache, must-revalidate");
        response.addHeader("Cache-Control", "post-check=0, pre-check=0");
        response.setHeader("Pragma", "no-cache");
        response.setContentType("image/jpeg");

        // 创建验证码文本
        String capText = kaptchaProducer.createText();

        // 获取会话ID
        String sessionId = request.getSession().getId();

        // 存储验证码
        captchaService.storeCaptcha(sessionId, capText);

        // 创建验证码图片
        BufferedImage image = kaptchaProducer.createImage(capText);
        ServletOutputStream out = response.getOutputStream();

        // 输出图片
        ImageIO.write(image, "jpg", out);
        out.flush();
        out.close();
    }
}
5. 登录控制器集成验证码校验
@RestController
@RequestMapping("/auth")
public class AuthController {

    @Autowired
    private CaptchaService captchaService;

    @Autowired
    private UserService userService;

    @PostMapping("/login")
    public ResponseEntity<?> login(@RequestBody LoginRequest loginRequest, HttpServletRequest request) {
        // 获取会话ID
        String sessionId = request.getSession().getId();

        // 验证验证码
        if (!captchaService.validateCaptcha(sessionId, loginRequest.getCaptcha())) {
            return ResponseEntity.badRequest().body(new ApiResponse(false, "验证码错误或已过期"));
        }

        // 用户名密码验证
        boolean authenticated = userService.authenticate(
                loginRequest.getUsername(),
                loginRequest.getPassword());

        if (authenticated) {
            // 生成Token或设置会话
            String token = jwtTokenProvider.generateToken(loginRequest.getUsername());
            return ResponseEntity.ok(new JwtAuthResponse(token));
        } else {
            return ResponseEntity.badRequest().body(new ApiResponse(false, "用户名或密码错误"));
        }
    }
}
6. 前端集成示例
<div class="login-form">
    <form id="loginForm">
        <div class="form-group">
            <label for="username">用户名</label>
            <input type="text" class="form-control" id="username" name="username" required>
        </div>
        <div class="form-group">
            <label for="password">密码</label>
            <input type="password" class="form-control" id="password" name="password" required>
        </div>
        <div class="form-group">
            <label for="captcha">验证码</label>
            <div class="captcha-container">
                <input type="text" class="form-control" id="captcha" name="captcha" required>
                <img id="captchaImg" src="/captcha/image" alt="验证码" onclick="refreshCaptcha()">
            </div>
        </div>
        <button type="submit" class="btn btn-primary">登录</button>
    </form>
</div>
<script>
function refreshCaptcha() {
    document.getElementById('captchaImg').src = '/captcha/image?t=' + new Date().getTime();
}

document.getElementById('loginForm').addEventListener('submit', function(e) {
    e.preventDefault();

    const data = {
        username: document.getElementById('username').value,
        password: document.getElementById('password').value,
        captcha: document.getElementById('captcha').value
    };

    fetch('/auth/login', {
        method: 'POST',
        headers: {
            'Content-Type': 'application/json'
        },
        body: JSON.stringify(data)
    })
    .then(response => response.json())
    .then(data => {
        if (data.token) {
            localStorage.setItem('token', data.token);
            window.location.href = '/dashboard';
        } else {
            alert(data.message);
            refreshCaptcha();
        }
    })
    .catch(error => {
        console.error('Error:', error);
        refreshCaptcha();
    });
});
</script>
优缺点分析
优点
- 实现简单,开发成本低
- 对服务器资源占用少
- 用户体验相对友好
- 无需第三方服务,降低依赖
缺点
- 安全性较低,容易被OCR识别破解
- 对视障用户不友好
- 在移动设备上体验不佳
- 随着AI发展,图形验证码的安全性逐渐降低
方案二:基于短信验证码
原理介绍
短信验证码通过向用户手机发送一次性验证码实现身份验证。用户需要输入收到的验证码完成登录过程。这种方式不仅验证了账号密码的正确性,还确认了用户对手机号的控制权,大幅提高了安全性。
实现步骤
1. 添加阿里云SDK依赖
<dependency>
    <groupId>com.aliyun</groupId>
    <artifactId>aliyun-java-sdk-core</artifactId>
    <version>4.5.3</version>
</dependency>
2. 配置短信服务参数
@Configuration
@ConfigurationProperties(prefix = "aliyun.sms")
@Data
public class SmsProperties {
    private String accessKeyId;
    private String accessKeySecret;
    private String signName;
    private String templateCode;
    private String endpoint = "dysmsapi.aliyuncs.com";
}
# application.properties aliyun.sms.access-key-id=YOUR_ACCESS_KEY_ID aliyun.sms.access-key-secret=YOUR_ACCESS_KEY_SECRET aliyun.sms.sign-name=YOUR_SMS_SIGN_NAME aliyun.sms.template-code=SMS_TEMPLATE_CODE
3. 实现短信服务
@Service
@Slf4j
public class SmsService {

    @Autowired
    private SmsProperties smsProperties;

    @Autowired
    private RedisTemplate<String, String> redisTemplate;

    private static final long SMS_EXPIRATION = 300; // 5分钟过期
    private static final String SMS_PREFIX = "SMS_CAPTCHA:";

    /**
     * 发送短信验证码
     * @param phoneNumber 手机号
     * @return 是否发送成功
     */
    public boolean sendSmsCaptcha(String phoneNumber) {
        try {
            // 生成6位随机验证码
            String captcha = generateCaptcha(6);

            // 存储验证码
            redisTemplate.opsForValue().set(
                    SMS_PREFIX + phoneNumber,
                    captcha,
                    SMS_EXPIRATION,
                    TimeUnit.SECONDS);

            // 构建短信客户端
            DefaultProfile profile = DefaultProfile.getProfile(
                    "cn-hangzhou",
                    smsProperties.getAccessKeyId(),
                    smsProperties.getAccessKeySecret());
            IAcsClient client = new DefaultAcsClient(profile);

            // 构建短信请求
            CommonRequest request = new CommonRequest();
            request.setSysMethod(MethodType.POST);
            request.setSysDomain(smsProperties.getEndpoint());
            request.setSysVersion("2017-05-25");
            request.setSysAction("SendSms");
            request.putQueryParameter("RegionId", "cn-hangzhou");
            request.putQueryParameter("PhoneNumbers", phoneNumber);
            request.putQueryParameter("SignName", smsProperties.getSignName());
            request.putQueryParameter("TemplateCode", smsProperties.getTemplateCode());

            // 设置模板参数,将验证码作为参数传入
            Map<String, String> templateParam = Map.of("code", captcha);
            request.putQueryParameter("TemplateParam", new ObjectMapper().writeValueAsString(templateParam));

            // 发送短信
            CommonResponse response = client.getCommonResponse(request);
            log.info("短信发送结果: {}", response.getData());

            // 解析响应
            JsonNode responseJson = new ObjectMapper().readTree(response.getData());
            return "OK".equals(responseJson.get("Code").asText());

        } catch (Exception e) {
            log.error("发送短信验证码失败", e);
            return false;
        }
    }

    /**
     * 验证短信验证码
     * @param phoneNumber 手机号
     * @param captcha 用户输入的验证码
     * @return 是否验证成功
     */
    public boolean validateSmsCaptcha(String phoneNumber, String captcha) {
        String key = SMS_PREFIX + phoneNumber;
        String storedCaptcha = redisTemplate.opsForValue().get(key);

        if (storedCaptcha != null && storedCaptcha.equals(captcha)) {
            // 验证成功后删除验证码,防止重复使用
            redisTemplate.delete(key);
            return true;
        }

        return false;
    }

    /**
     * 生成指定长度的随机数字验证码
     */
    private String generateCaptcha(int length) {
        StringBuilder captcha = new StringBuilder();
        Random random = new Random();

        for (int i = 0; i < length; i++) {
            captcha.append(random.nextInt(10));
        }

        return captcha.toString();
    }
}
4. 实现短信验证码控制器
@RestController
@RequestMapping("/captcha")
public class SmsCaptchaController {

    @Autowired
    private SmsService smsService;

    @PostMapping("/sms/send")
    public ResponseEntity<?> sendSmsCaptcha(@RequestBody PhoneNumberRequest request) {
        String phoneNumber = request.getPhoneNumber();

        // 验证手机号格式
        if (!isValidPhoneNumber(phoneNumber)) {
            return ResponseEntity.badRequest().body(new ApiResponse(false, "手机号格式不正确"));
        }

        // 发送短信验证码
        boolean sent = smsService.sendSmsCaptcha(phoneNumber);

        if (sent) {
            return ResponseEntity.ok(new ApiResponse(true, "验证码已发送,请注意查收"));
        } else {
            return ResponseEntity.status(HttpStatus.INTERNAL_SERVER_ERROR)
                    .body(new ApiResponse(false, "验证码发送失败,请稍后再试"));
        }
    }

    // 验证手机号格式(简化版)
    private boolean isValidPhoneNumber(String phoneNumber) {
        return phoneNumber != null && phoneNumber.matches("^1[3-9]\d{9}$");
    }
}
5. 登录控制器集成短信验证码
@RestController
@RequestMapping("/auth")
public class SmsLoginController {

    @Autowired
    private SmsService smsService;

    @Autowired
    private UserService userService;

    @Autowired
    private JwtTokenProvider jwtTokenProvider;

    @PostMapping("/sms-login")
    public ResponseEntity<?> smsLogin(@RequestBody SmsLoginRequest request) {
        String phoneNumber = request.getPhoneNumber();
        String captcha = request.getCaptcha();

        // 验证短信验证码
        if (!smsService.validateSmsCaptcha(phoneNumber, captcha)) {
            return ResponseEntity.badRequest().body(new ApiResponse(false, "验证码错误或已过期"));
        }

        // 查找或创建用户
        User user = userService.findOrCreateByPhone(phoneNumber);

        if (user != null) {
            // 生成JWT令牌
            String token = jwtTokenProvider.generateToken(user.getUsername());
            return ResponseEntity.ok(new JwtAuthResponse(token));
        } else {
            return ResponseEntity.status(HttpStatus.INTERNAL_SERVER_ERROR)
                    .body(new ApiResponse(false, "登录失败,请稍后再试"));
        }
    }
}
6. 前端集成示例
<div class="sms-login-form">
    <form id="smsLoginForm">
        <div class="form-group">
            <label for="phoneNumber">手机号</label>
            <input type="text" class="form-control" id="phoneNumber" name="phoneNumber" required>
        </div>
        <div class="form-group">
            <label for="smsCaptcha">验证码</label>
            <div class="captcha-container">
                <input type="text" class="form-control" id="smsCaptcha" name="smsCaptcha" required>
                <button type="button" class="btn btn-outline-primary" id="sendSmsBtn">获取验证码</button>
            </div>
        </div>
        <button type="submit" class="btn btn-primary">登录</button>
    </form>
</div>
<script>
let countdown = 60;

document.getElementById('sendSmsBtn').addEventListener('click', function() {
    const phoneNumber = document.getElementById('phoneNumber').value;

    if (!phoneNumber || !/^1[3-9]\d{9}$/.test(phoneNumber)) {
        alert('请输入正确的手机号');
        return;
    }

    // 发送短信验证码请求
    fetch('/captcha/sms/send', {
        method: 'POST',
        headers: {
            'Content-Type': 'application/json'
        },
        body: JSON.stringify({ phoneNumber: phoneNumber })
    })
    .then(response => response.json())
    .then(data => {
        alert(data.message);
        if (data.success) {
            startCountdown();
        }
    })
    .catch(error => {
        console.error('Error:', error);
        alert('发送验证码失败,请稍后再试');
    });
});

function startCountdown() {
    const btn = document.getElementById('sendSmsBtn');
    btn.disabled = true;

    let timer = setInterval(() => {
        btn.textContent = `${countdown}秒后重新获取`;
        countdown--;

        if (countdown < 0) {
            clearInterval(timer);
            btn.disabled = false;
            btn.textContent = '获取验证码';
            countdown = 60;
        }
    }, 1000);
}

document.getElementById('smsLoginForm').addEventListener('submit', function(e) {
    e.preventDefault();

    const data = {
        phoneNumber: document.getElementById('phoneNumber').value,
        captcha: document.getElementById('smsCaptcha').value
    };

    fetch('/auth/sms-login', {
        method: 'POST',
        headers: {
            'Content-Type': 'application/json'
        },
        body: JSON.stringify(data)
    })
    .then(response => response.json())
    .then(data => {
        if (data.token) {
            localStorage.setItem('token', data.token);
            window.location.href = '/dashboard';
        } else {
            alert(data.message);
        }
    })
    .catch(error => {
        console.error('Error:', error);
        alert('登录失败,请稍后再试');
    });
});
</script>
优缺点分析
优点
- 安全性高,验证了用户对手机的控制权
- 可以作为无密码登录的方式,简化用户操作
- 适合移动应用和需要高安全性的场景
- 可与其他验证方式结合,实现多因素认证
缺点
- 依赖第三方短信服务,存在成本
- 可能受网络和运营商影响,导致延迟
- 对国际用户不友好
- 用户频繁登录时,体验不佳
方案三:基于Spring Mail的邮箱验证码
原理介绍
邮箱验证码通过向用户注册的电子邮箱发送一次性验证码实现身份验证。这种方式与短信验证码类似,但使用电子邮件作为传递媒介,适合对成本敏感或不需要实时验证的场景。
实现步骤
1. 添加Spring Mail依赖
<dependency>
    <groupId>org.springframework.boot</groupId>
    <artifactId>spring-boot-starter-mail</artifactId>
</dependency>
<dependency>
    <groupId>org.springframework.boot</groupId>
    <artifactId>spring-boot-starter-thymeleaf</artifactId>
</dependency>
2. 配置邮件服务
# application.properties
spring.mail.host=smtp.gmail.com
spring.mail.port=587
spring.mail.username=your-email@gmail.com
spring.mail.password=your-app-password
spring.mail.properties.mail.smtp.auth=true
spring.mail.properties.mail.smtp.starttls.enable=true
spring.mail.properties.mail.smtp.starttls.required=true

# 自定义配置
app.email.from=noreply@yourapp.com
app.email.personal=Your App Name
3. 创建邮件验证码服务
@Service
@Slf4j
public class EmailCaptchaService {

    @Autowired
    private JavaMailSender mailSender;

    @Autowired
    private RedisTemplate<String, String> redisTemplate;

    @Autowired
    private TemplateEngine templateEngine;

    @Value("${app.email.from}")
    private String fromEmail;

    @Value("${app.email.personal}")
    private String emailPersonal;

    private static final long EMAIL_CAPTCHA_EXPIRATION = 600; // 10分钟过期
    private static final String EMAIL_CAPTCHA_PREFIX = "EMAIL_CAPTCHA:";

    /**
     * 发送邮箱验证码
     * @param email 电子邮箱
     * @return 是否发送成功
     */
    public boolean sendEmailCaptcha(String email) {
        try {
            // 生成6位随机验证码
            String captcha = generateCaptcha(6);

            // 存储验证码
            redisTemplate.opsForValue().set(
                    EMAIL_CAPTCHA_PREFIX + email,
                    captcha,
                    EMAIL_CAPTCHA_EXPIRATION,
                    TimeUnit.SECONDS);

            // 准备邮件内容
            Context context = new Context();
            context.setVariable("captcha", captcha);
            context.setVariable("expirationMinutes", EMAIL_CAPTCHA_EXPIRATION / 60);
            String emailContent = templateEngine.process("email/captcha-template", context);

            // 创建MIME邮件
            MimeMessage message = mailSender.createMimeMessage();
            MimeMessageHelper helper = new MimeMessageHelper(message, true, "UTF-8");

            // 设置发件人、收件人、主题和内容
            helper.setFrom(new InternetAddress(fromEmail, emailPersonal));
            helper.setTo(email);
            helper.setSubject("登录验证码");
            helper.setText(emailContent, true);

            // 发送邮件
            mailSender.send(message);
            log.info("邮箱验证码已发送至: {}", email);

            return true;
        } catch (Exception e) {
            log.error("发送邮箱验证码失败", e);
            return false;
        }
    }

    /**
     * 验证邮箱验证码
     * @param email 电子邮箱
     * @param captcha 用户输入的验证码
     * @return 是否验证成功
     */
    public boolean validateEmailCaptcha(String email, String captcha) {
        String key = EMAIL_CAPTCHA_PREFIX + email;
        String storedCaptcha = redisTemplate.opsForValue().get(key);

        if (storedCaptcha != null && storedCaptcha.equals(captcha)) {
            // 验证成功后删除验证码,防止重复使用
            redisTemplate.delete(key);
            return true;
        }

        return false;
    }

    /**
     * 生成指定长度的随机数字验证码
     */
    private String generateCaptcha(int length) {
        StringBuilder captcha = new StringBuilder();
        Random random = new Random();

        for (int i = 0; i < length; i++) {
            captcha.append(random.nextInt(10));
        }

        return captcha.toString();
    }
}
4. 创建邮件模板
<!-- src/main/resources/templates/email/captcha-template.html -->
<!DOCTYPE html>
<html xmlns:th="http://www.thymeleaf.org">
<head>
    <meta charset="UTF-8">
    <title>登录验证码</title>
    <style>
        body {
            font-family: Arial, sans-serif;
            line-height: 1.6;
            color: #333;
        }
        .container {
            max-width: 600px;
            margin: 0 auto;
            padding: 20px;
            border: 1px solid #ddd;
            border-radius: 5px;
        }
        .header {
            text-align: center;
            padding-bottom: 10px;
            border-bottom: 1px solid #eee;
        }
        .content {
            padding: 20px 0;
        }
        .code {
            font-size: 24px;
            font-weight: bold;
            text-align: center;
            padding: 10px;
            margin: 20px 0;
            background-color: #f5f5f5;
            border-radius: 5px;
            letter-spacing: 5px;
        }
        .footer {
            font-size: 12px;
            color: #777;
            text-align: center;
            padding-top: 10px;
            border-top: 1px solid #eee;
        }
    </style>
</head>
<body>
    <div class="container">
        <div class="header">
            <h2>登录验证码</h2>
        </div>
        <div class="content">
            <p>您好,</p>
            <p>您正在进行登录操作,请使用以下验证码完成验证:</p>
            <div class="code" th:text="${captcha}">123456</div>
            <p>验证码有效期为 <span th:text="${expirationMinutes}">10</span> 分钟,请及时使用。</p>
            <p>如果这不是您的操作,请忽略此邮件。</p>
        </div>
        <div class="footer">
            <p>此邮件由系统自动发送,请勿回复。</p>
        </div>
    </div>
</body>
</html>
5. 实现邮箱验证码控制器
@RestController
@RequestMapping("/captcha")
public class EmailCaptchaController {

    @Autowired
    private EmailCaptchaService emailCaptchaService;

    @PostMapping("/email/send")
    public ResponseEntity<?> sendEmailCaptcha(@RequestBody EmailRequest request) {
        String email = request.getEmail();

        // 验证邮箱格式
        if (!isValidEmail(email)) {
            return ResponseEntity.badRequest().body(new ApiResponse(false, "邮箱格式不正确"));
        }

        // 发送邮箱验证码
        boolean sent = emailCaptchaService.sendEmailCaptcha(email);

        if (sent) {
            return ResponseEntity.ok(new ApiResponse(true, "验证码已发送,请查收邮件"));
        } else {
            return ResponseEntity.status(HttpStatus.INTERNAL_SERVER_ERROR)
                    .body(new ApiResponse(false, "验证码发送失败,请稍后再试"));
        }
    }

    // 验证邮箱格式
    private boolean isValidEmail(String email) {
        String regex = "^[\w-\.]+@([\w-]+\.)+[\w-]{2,4}$";
        return email != null && email.matches(regex);
    }
}
6. 登录控制器集成邮箱验证码
@RestController
@RequestMapping("/auth")
public class EmailLoginController {

    @Autowired
    private EmailCaptchaService emailCaptchaService;

    @Autowired
    private UserService userService;

    @Autowired
    private JwtTokenProvider jwtTokenProvider;

    @PostMapping("/email-login")
    public ResponseEntity<?> emailLogin(@RequestBody EmailLoginRequest request) {
        String email = request.getEmail();
        String captcha = request.getCaptcha();

        // 验证邮箱验证码
        if (!emailCaptchaService.validateEmailCaptcha(email, captcha)) {
            return ResponseEntity.badRequest().body(new ApiResponse(false, "验证码错误或已过期"));
        }

        // 查找或创建用户
        User user = userService.findOrCreateByEmail(email);

        if (user != null) {
            // 生成JWT令牌
            String token = jwtTokenProvider.generateToken(user.getUsername());
            return ResponseEntity.ok(new JwtAuthResponse(token));
        } else {
            return ResponseEntity.status(HttpStatus.INTERNAL_SERVER_ERROR)
                    .body(new ApiResponse(false, "登录失败,请稍后再试"));
        }
    }
}
优缺点分析
优点
- 成本低廉,适合预算有限的项目
- 无需依赖第三方服务,可自行部署
- 可发送富文本内容,支持品牌定制
- 适合注册和找回密码等非实时场景
缺点
- 邮件可能被归类为垃圾邮件或延迟送达
- 用户体验不如短信验证码直接
- 邮件服务器配置相对复杂
- 不适合对实时性要求高的场景
方案四:基于AJ-Captcha的滑动拼图验证码
原理介绍
滑动拼图验证码是一种更现代的验证方式,通过让用户拖动滑块完成拼图来验证人机交互。这种验证码在用户体验和安全性之间取得了很好的平衡,既能有效防止自动化攻击,又不会像传统图形验证码那样影响用户体验。
实现步骤
1. 添加AJ-Captcha依赖
<dependency>
   <groupId>com.anji-plus</groupId>
   <artifactId>captcha-spring-boot-starter</artifactId>
   <version>1.4.0</version>
</dependency>
2. 配置滑动验证码参数
aj:
  captcha:
    cache-type: local
    expires-in: 300
    req-frequency-limit-count: 50
    cache-number: 1000
    jigsaw: classpath:images/jigsaw
    pic-click: classpath:images/pic-click
3. 自定义滑动验证码控制器
@RestController
@RequestMapping("/captcha")
public class JigsawCaptchaController {

    @Autowired
    private CaptchaService captchaService;

    @RequestMapping(value = "/get", method = {RequestMethod.GET, RequestMethod.POST})
    public ResponseModel get(@RequestParam(value = "type", defaultValue = "slide") String captchaType) {
        CaptchaVO captchaVO = new CaptchaVO();
        captchaVO.setCaptchaType(captchaType);
        return captchaService.get(captchaVO);
    }

    @PostMapping("/check")
    public ResponseModel check(@RequestBody CaptchaVO captchaVO) {
        return captchaService.check(captchaVO);
    }
}
4. 登录控制器集成滑动验证码
@RestController
@RequestMapping("/auth")
public class JigsawLoginController {

    @Autowired
    private CaptchaService captchaService;

    @PostMapping("/jigsaw-login")
    public ResponseEntity<?> jigsawLogin(@RequestBody JigsawLoginRequest request) {
        // 验证滑动验证码
        CaptchaVO captchaVO = new CaptchaVO();
        captchaVO.setCaptchaVerification(request.getCaptchaVerification());

        ResponseModel response = captchaService.verification(captchaVO);

        if (!response.isSuccess()) {
            return ResponseEntity.badRequest().body(new ApiResponse(false, "验证码校验失败"));
        }

        // TODO 模拟验证用户名密码
        boolean authenticated = request.getPassword().equals("admin");

        if (authenticated) {
            // TODO 模拟生成令牌
            String token = IdUtil.simpleUUID();
            return ResponseEntity.ok(new JwtAuthResponse(token));
        } else {
            return ResponseEntity.badRequest().body(new ApiResponse(false, "用户名或密码错误"));
        }
    }
}
@SpringBootApplication
public class Main {
public static void main(String[] args) {
SpringApplication.run(Main.class, args);
}
@Bean
public CaptchaService captchaService(){
BlockPuzzleCaptchaServiceImpl clickWordCaptchaService = new BlockPuzzleCaptchaServiceImpl();
Properties properties = new Properties();
properties.setProperty(Const.CAPTCHA_FONT_TYPE,"WenQuanZhengHei.ttf");
clickWordCaptchaService.init(properties);
return clickWordCaptchaService;
}
}5. 前端集成示例
注:依赖的本地js文件可从 https://github.com/anji-plus/captcha/tree/master/view/html 获取
<!DOCTYPE html>
<html>
<head>
    <meta charset="UTF-8">
    <title>滑动验证码登录</title>
    <link rel="stylesheet" href="https://cdn.jsdelivr.net/npm/bootstrap@4.5.3/dist/css/bootstrap.min.css">
    <link rel="stylesheet" href="https://cdn.jsdelivr.net/npm/aj-captcha@1.3.0/dist/captcha.min.css">
    <meta http-equiv="Content-Type" content="text/html; charset=utf-8">
    <meta name="viewport" content="width=device-width,initial-scale=1,minimum-scale=1,maximum-scale=1,user-scalable=no"/>
    <link rel="stylesheet" type="text/css" href="css/verify.css">
    <style>

    </style>
</head>
<body>
<div class="container mt-5">
    <div class="row justify-content-center">
        <div class="col-md-6">
            <div class="card">
                <div class="card-header">用户登录</div>
                <div class="card-body">
                    <form id="loginForm">
                        <div class="form-group">
                            <label for="username">用户名</label>
                            <input type="text" class="form-control" id="username" name="username" required>
                        </div>
                        <div class="form-group">
                            <label for="password">密码</label>
                            <input type="password" class="form-control" id="password" name="password" required>
                        </div>
                        <div class="form-group">
                            <div id="captcha"></div>
                            <input type="hidden" id="captchaVerification" name="captchaVerification">
                        </div>

                        <div id="slidePanel" ></div>

                        <button type="submit" class="btn btn-primary btn-block">登录</button>
                    </form>
                </div>
            </div>
        </div>
    </div>
</div>
<script src="https://cdn.jsdelivr.net/npm/jquery@3.5.1/dist/jquery.min.js"></script>
<script>
    (function () {
      if (!window.Promise) {
        document.writeln('<script src="https://cdnjs.cloudflare.com/ajax/libs/es6-promise/4.1.1/es6-promise.min.js"><' + '/' + 'script>');
      }
    })();
</script>
<script src="./js/crypto-js.js"></script>
<script src="./js/ase.js"></script>
<script src="./js/verify.js" ></script>
<script>
    let captchaVerification;
    // 初始化验证码  嵌入式
    $('#slidePanel').slideVerify({
        baseUrl:'http://localhost:8080',  // 服务器请求地址;
        mode:'fixed',
        imgSize : {       //图片的大小对象
            width: '400px',
            height: '200px',
        },
        barSize:{
            width: '400px',
            height: '40px',
        },
        ready : function() {  //加载完毕的回调
        },
        success : function(params) { //成功的回调
            // 返回的二次验证参数 合并到验证通过之后的逻辑 参数中回传服务器
            captchaVerification = params.captchaVerification;
        },
        error : function() {        //失败的回调
        }
    });

    // 表单提交处理
    document.getElementById('loginForm').addEventListener('submit', function(e) {
        e.preventDefault();

        if (!captchaVerification) {
            alert('请先完成滑动验证');
            return;
        }

        var data = {
            username: document.getElementById('username').value,
            password: document.getElementById('password').value,
            captchaVerification: captchaVerification
        };

        fetch('/auth/jigsaw-login', {
            method: 'POST',
            headers: {
                'Content-Type': 'application/json'
            },
            body: JSON.stringify(data)
        })
        .then(response => response.json())
        .then(data => {
            if (data.token) {
                localStorage.setItem('token', data.token);
                alert('login success');
            } else {
                alert(data.message);
            }
        })
        .catch(error => {
            console.error('Error:', error);
        });
    });
</script>
</body>
</html>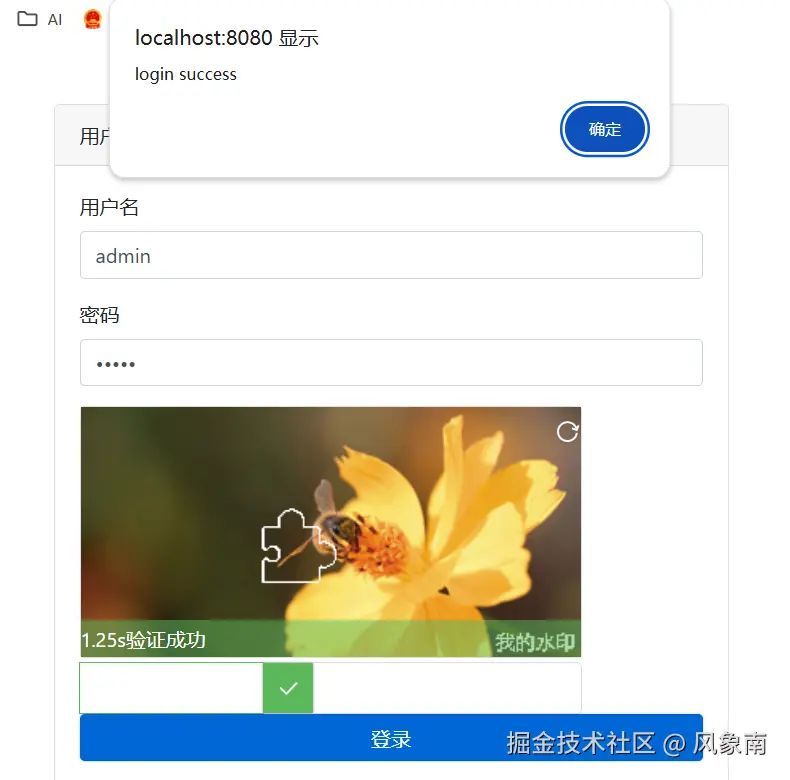
优缺点分析
优点
- 用户体验良好,交互更加自然
- 安全性较高,难以被自动化工具破解
- 支持移动端和桌面端
- 可定制化程度高,支持品牌化设计
缺点
- 实现相对复杂,需要前后端配合
- 依赖JavaScript,不支持纯静态环境
四种验证码方案对比
| 特性/方案 | 图形验证码 | 短信验证码 | 邮箱验证码 | 滑动拼图验证码 |
|---|---|---|---|---|
| 安全性 | 中 | 高 | 中高 | 高 |
| 实现复杂度 | 低 | 中 | 中 | 高 |
| 适用场景 | 简单应用 | 高安全性需求 | 注册、找回密码 | 现代Web应用 |
| 防机器人效果 | 一般 | 优秀 | 良好 | 优秀 |
| 是否需要第三方 | 否 | 是 | 否 | 否 |
总结
在实际项目中,可以根据应用特点、用户需求和安全要求选择合适的验证码方案,甚至可以组合多种方案,在不同场景下使用不同的验证方式,既保障系统安全,又提供良好的用户体验。
随着AI技术的发展,验证码技术也在不断演进。对于重要系统,建议定期评估和更新验证码方案,以应对新型的自动化攻击手段。
到此这篇关于SpringBoot中登录验证码的4种实现方案的文章就介绍到这了,更多相关springboot登录验证码内容请搜索脚本之家以前的文章或继续浏览下面的相关文章希望大家以后多多支持脚本之家!