
Springboot3+Redis实现消息队列的多种方法小结
作者:jolly_xu
Redis实现消息队列和RabbitMQ的优缺点
Redis实现消息队列的优点:
- 性能高:Redis是内存数据库,读写速度快,适合高并发的消息推送。
- 数据结构丰富:Redis支持多种数据结构,如列表(list)、集合(set)、有序集合(zset)等,可以实现多种消息队列模式。
- 易用性:Redis的命令简单,学习成本低,易于上手。
- 持久化:Redis支持RDB和AOF持久化,能够保证数据的安全。
- 分布式支持:Redis支持主从复制、哨兵和集群,可以实现高可用和分布式架构。
Redis实现消息队列的缺点:
- 功能有限:相比于专业的消息队列中间件,Redis的消息队列功能相对简单,不支持复杂的消息路由、事务、消息优先级等特性。
- 消息可靠性:Redis没有内置的消息确认机制,需要自行实现,可能会增加开发复杂度。
- 数据量限制:受内存限制,Redis不适合存储大量消息。
- 消息持久化问题:虽然Redis支持持久化,但在大数据量情况下,持久化可能会影响性能。
RabbitMQ的优点:
- 功能强大:RabbitMQ是一个专业的消息队列中间件,支持消息持久化、事务、消息优先级、延迟消息、死信队列等高级特性。
- 高可用性:RabbitMQ支持镜像队列,可以实现高可用架构。
- 灵活的路由:RabbitMQ支持多种交换机类型(direct, topic, headers, fanout),可以实现复杂的消息路由。
- 客户端支持广泛:RabbitMQ有多种语言客户端,方便集成。
- 社区活跃:RabbitMQ有活跃的社区,问题解决速度快。
RabbitMQ的缺点:
- 性能相对较低:相比于Redis,RabbitMQ的性能略低,尤其是在高并发场景下。
- 资源消耗:RabbitMQ需要更多的系统资源,如CPU和内存。
- 复杂性:RabbitMQ的概念模型较为复杂,学习曲线较陡峭
Redis适合于需要高速读写、轻量级消息队列的场景,如果业务对消息队列的功能要求不高,且已经使用了Redis,可以考虑使用Redis实现消息队列。其他情况下还是建议使用RabbitMQ
1.Spring Data Redis
这是Spring框架提供的一个用于简化Redis操作的模块。
初始准备
1.1首先配置Pom依赖
<dependency>
            <groupId>org.springframework.boot</groupId>
            <artifactId>spring-boot-starter-data-redis</artifactId>
</dependency>
1.2 在yml中配置redis相关信息
由于spring.redis.host 这种配置已经被弃用,在新版的springboot中,需要在spring.data.redis.host 进行配置
spring:
  data:
    redis:
    # 改为自己的地址和密码
      host: 10.69.37.213
      port: 6379
      password: Jolly
      # 连接超时时间,单位ms
      connect-timeout: 50000
      # 选择第几个数据库,默认为0,最大值15
      database: 0
      lettuce:
        pool:
          # 最大的活跃连接数,不会超过这个数,根据项目预期并发量调整
          max-active: 50
          # max-idle 指定了连接池中的最大空闲连接数。
          # 空闲连接是指那些没有被使用,但是已经创建并且保持在连接池中的连接
          # 这个值应该与max-active相匹配或者稍微低一些,
          # 以保持连接池中有足够的空闲连接来处理突发请求。
          # 设置得太高可能会导致资源浪费,因为空闲连接会占用内存和其他资源。
          max-idle: 30
          #这个配置指定了连接池中的最小空闲连接数。
          #这个设置可以确保连接池始终保持一定数量的空闲连接,以便在请求到来时可以立即使用,而不需要等待连接的创建。
          # 这个值应该根据你的应用程序的基线负载来设置
          min-idle: 10
          # 当连接池达到最大活跃连接数时,客户端等待可用连接的最大时间(以毫秒为单位)。-1 表示无限等待
          # 如果设置为一个正数,那么在等待时间超过这个值后,会抛出一个异常。
          max-wait: -1
1.3 设置redis的序列化
为了防止存入到redis的数据出现乱码的情况,进行序列化的设置
import org.springframework.context.annotation.Bean;
import org.springframework.context.annotation.Configuration;
import org.springframework.data.redis.connection.RedisConnectionFactory;
import org.springframework.data.redis.core.RedisTemplate;
import org.springframework.data.redis.serializer.Jackson2JsonRedisSerializer;
import org.springframework.data.redis.serializer.StringRedisSerializer;
import org.springframework.boot.autoconfigure.condition.ConditionalOnMissingBean;

@Configuration
public class redisConfig {

	@ConditionalOnMissingBean(name = "redisTemplate")
    @Bean
    public RedisTemplate<Object, Object> redisTemplate(RedisConnectionFactory connectionFactory) {
        RedisTemplate<Object, Object> template = new RedisTemplate<>();
        template.setConnectionFactory(connectionFactory);
        // 默认为utf-8,可以进行修改
        template.setKeySerializer(new StringRedisSerializer());
        // 原版默认使用jdk的序列化方式JdkSerializationRedisSerializer
        Jackson2JsonRedisSerializer serializer = new Jackson2JsonRedisSerializer(Object.class);
        template.setValueSerializer(serializer);
        // 设置Hash的序列化化方式
        template.setHashKeySerializer(new StringRedisSerializer());
        template.setHashValueSerializer(serializer);
        // 设置属性
        template.afterPropertiesSet();
        return template;
    }
}
2.Redis实现消息队列的方式
2.1 使用Redis的List实现消息队列
首先构造一个简单的订单类,用于后面消息队列测试
import lombok.AllArgsConstructor;
import lombok.Data;

@Data
@AllArgsConstructor
public class order implements Serializable {
    private int id;
    private String userid;
    private String goodName;
}
我们使用最简单的方式来实现消息队列,直接不断轮询List中是否有消息
import jakarta.annotation.Resource;
import org.springframework.data.redis.core.RedisTemplate;
import org.springframework.web.bind.annotation.GetMapping;
import org.springframework.web.bind.annotation.RestController;

@RestController
public class Mq {

    @Resource
    private RedisTemplate<String, Object> redisTemplate;

	// 队列名
    private final String queue = "order_queue";

    @GetMapping("/order")
    public void order(){
       	// 为了模拟消息的获取,异步开启一个线程,进行消息处理
        Thread thread = new Thread(() -> {
            try {
                processData();
            } catch (InterruptedException e) {
                throw new RuntimeException(e);
            }
        });
        thread.start();
         // 模拟产生10条消息,放入队列
        for (int i = 0; i < 10; i++) {
            order order = new order(i, i, "goods" + i);
            redisTemplate.opsForList().leftPush(queue, order);
            System.out.println("放入消息队列:"+i);
        }
    }

    // 处理消息,不断的轮询队列中的消息
    public void processData() throws InterruptedException {
        while (true){
            Object order = redisTemplate.opsForList().rightPop(queue);
            if(order == null){
                System.out.println("当前没有消息");
                Thread.sleep(1000);
            }else{
                System.out.println("处理消息:"+order);
            }
        }
    }
}
这种方式是最简单的方式,但是不推荐,因为一直轮询是会浪费CPU资源的,拉低服务端的性能。
2.2 消息订阅模式
Redis 支持消息队列的一种模式是通过其发布订阅(Publish/Subscribe)功能。这种模式允许客户端订阅一个或多个频道(channel),并接收发送到这些频道的消息。
2.2.1 发布消息
这一步是比较简单的,直接调用方法即可.
    @Resource
    private RedisTemplate<String, Object> redisTemplate;

    private final String CHANNEL_NAME  = "order_queue";

	@GetMapping("/order")
    public void order(){
        // 模拟产生10条消息,放入队列
        for (int i = 0; i < 10; i++) {
            order order = new order(i, i, "goods" + i);
            //发布消息
            redisTemplate.convertAndSend(CHANNEL_NAME, order);
            System.out.println("放入消息队列:"+i);
        }
    }
2.2.2 消息监听
首先我们需要取实现MessageListener接口的方法
import org.springframework.data.redis.connection.Message;
import org.springframework.data.redis.connection.MessageListener;
import org.springframework.stereotype.Service;

@Service
public class sub implements MessageListener {

	// 当监听到有消息的时候,就会执行这个方法
    @Override
    public void onMessage(Message message, byte[] pattern) {
        String msg = new String(message.getBody());
        // 模拟延迟处理
        try {
            Thread.sleep(2000);  // 假设处理需要2秒
        } catch (InterruptedException e) {
            Thread.currentThread().interrupt();
        }
        System.out.println("处理消息:"+msg);
    }

}
然后可以在开始的redisConfig类里面加上下面的代码
	/**
     * 因为标记了@Bean 注解,所以会在springboot启动的时候调用该方法创建,也可以放在其他地方进行创建
     * 当调用这个方法时,RedisConnectionFactory 这个对象已经存在于springboot的容器内,然后调用这个
     * 方法的时候就会传入该参数,执行方法后会创建一个RedisMessageListenerContainer,这样可以在其他类
     * 里面管理这些监听MessageListener
     * @param connectionFactory
     * @return
     */
    @Bean
    public RedisMessageListenerContainer redisContainer(RedisConnectionFactory connectionFactory) {
        // 首先创建一个监听的容器,这个容器可以传入多个MessageListener
        RedisMessageListenerContainer container = new RedisMessageListenerContainer();
        // 注入一个连接池工厂
        container.setConnectionFactory(connectionFactory);
        // 创建一个自己的监听类
        sub sub = new sub();
        // 然后和名为order_queue的通道进行绑定
        container.addMessageListener(sub,new ChannelTopic("order_queue"));
        return container;
    }
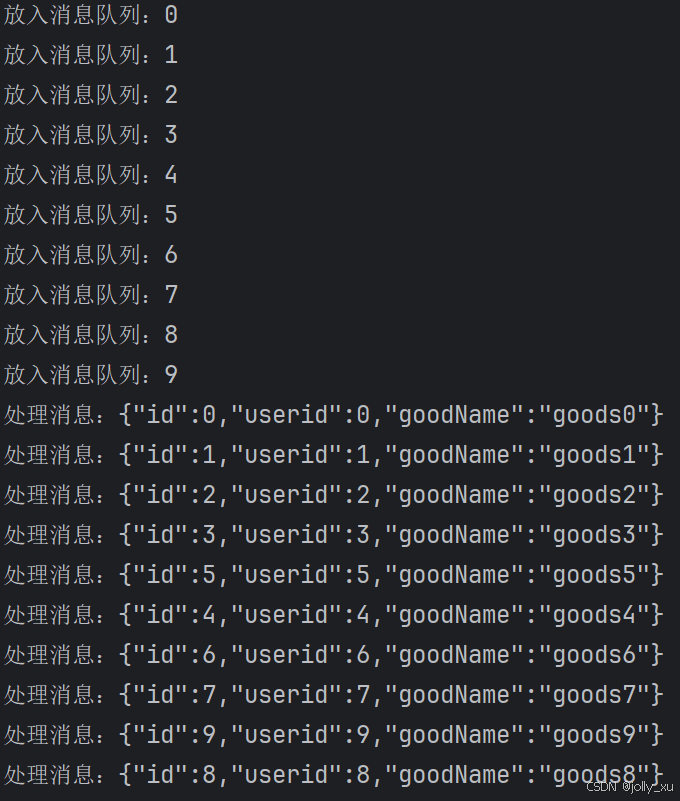
2.2.3 结果
2.3 基于Stream进行实现
Redis Stream 是 Redis 5.0 版本引入的一种新的数据结构,用于存储和操作消息流。它类似于消息队列,但提供了更丰富的功能,允许你以有序、可持久化的方式存储多个字段-值对的消息。
2.3.1 优点
- 持久化存储:Stream可以持久化消息到磁盘,即使Redis服务器重启,消息也不会丢失。
- 有序性:Stream保证了消息的有序性,每个消息都有一个唯一的ID,按照进入队列的顺序排列。
- 多消费者:Stream支持多个消费者,可以有不同的组(Consumer Groups)消费同一个Stream,而且每个消费者可以独立消费,不会互相影响。
- 消息确认机制:消费者可以读取消息并进行确认(ACK),确保消息不会因为消费者故障而丢失。
- 消息回溯:Stream允许新的消费者从任意位置开始消费消息,包括从Stream的开始位置,这使得新的消费者可以回溯并处理之前的消息。
- 灵活的消息长度:Stream中的消息可以是任意长度的字符串,可以包含复杂的数据结构,如JSON。
- 阻塞读取:消费者可以使用
BLPOP或BRPOP等命令进行阻塞读取,直到有新的消息到来。 - 事务支持:可以利用Redis的事务特性,确保消息的写入和读取操作是原子性的。
- 时间戳:每个消息可以包含时间戳字段,便于进行基于时间的消息管理。
- 易于监控:Stream的结构便于监控队列的长度、消费者状态等信息。
2.3.2 实现
我们模拟一个抢购订单场景,比如我们的服务器只能每秒处理50个请求,请求太多可能会导致我们的服务直接宕机,那么我们可以把请求放入消息队列,让消息队列来抗住大量的请求。
我们的策略可以是消息队列限量50个请求,当请求到来时,消息数量大于50n我们直接返回让用户重试,服务太忙的提示,这也是很常见的提示。
import com.xujialin.springboot3_study.entity.order;
import jakarta.annotation.PostConstruct;
import jakarta.annotation.Resource;
import org.springframework.data.redis.RedisSystemException;
import org.springframework.data.redis.connection.stream.*;
import org.springframework.data.redis.core.RedisTemplate;
import org.springframework.data.redis.core.StringRedisTemplate;
import org.springframework.web.bind.annotation.GetMapping;
import org.springframework.web.bind.annotation.RestController;

import java.time.Duration;
import java.util.HashMap;
import java.util.List;

@RestController
public class streamCont {

    @Resource
    private RedisTemplate<String,Object> redisTemplate;

    private String stream_key = "stream_key";


    @GetMapping("/order")
    public void order() {
        //封装请求,假装这是高并发场景
        for (int j = 0; j < 100; j++) {
            new Thread(() -> {
                for (int i = 0; i < 100; i++) {
                    order order = new order(i, i, "goods" + i);
                    HashMap<String,order> map = new HashMap<>();
                    map.put("order", order);
                    Long size = redisTemplate.opsForStream().size(stream_key);
                    if(size > 500){
                        System.out.println("活动太火爆了,请重试!");
                        continue;
                    }
                    redisTemplate.opsForStream().add(stream_key,map);
                }
            }).start();
        }
        System.out.println("恭喜你抢到了");
    }

    @PostConstruct
    public void init(){
        // 第一个是stream的key,第二个是组名
//        redisTemplate.opsForStream().createGroup(stream_key, "g1");
        try {
            redisTemplate.opsForStream().createGroup(stream_key, "g1");
        } catch (RedisSystemException e) {
            // 如果 group 已存在,抛出异常,可忽略
            System.out.println("group已经存在");
        }
        for (int i = 0; i < 5; i++) {
            new Thread(new consumer()).start();
        }
    }

    class consumer implements Runnable {

        @Override
        public void run() {
            while(true){
                // 读取消息
                List<MapRecord<String, Object, Object>> list = redisTemplate.opsForStream().read(
                        // 为g1消费者组创建一个消费则名字,可以为每个线程的名字,也可以为一个固定的名字,
                        // 一条消息最多只能被组里面的一个消费者消费,如果一条消息同时被两个消费者消费,
                        // 那么这两个消费者应该隶属于不同的消费者组,所以同一个名字或者不同的名字,对于同一个
                        // 消费组没有太大区别
                        Consumer.from("g1", Thread.currentThread().getName()),
                        // 创建一个读取选项,创建一个空的 StreamReadOptions 实例。这是配置读取选项的起点
                        // .count(1): 设置读取操作返回的最大消息数量。意味着每次读取操作最多只会返回一条消息。
                        //.block(Duration.ofSeconds(2)): 配置读取操作为阻塞模式,并设置阻塞的超时时间为2s,
                        // 也可以设置单位
                        StreamReadOptions.empty().count(1).block(Duration.ofSeconds(2)),
                        // 创建一个偏移量,ReadOffset.lastConsumed(): 这是指定读取消息的偏移量。
                        // 表示从消费者组中最后一次确认消费的消息之后开始读取新的消息。
                        StreamOffset.create( "stream_key", ReadOffset.lastConsumed()));

                // 读取消息
                if (list != null && !list.isEmpty()) {
                    MapRecord<String, Object, Object> entries = list.get(0);
                    // 模拟处理消息
                    System.out.println(entries);
                    // 确认消息
                    redisTemplate.opsForStream().acknowledge("stream_key","g1",entries.getId());
                }
            }
        }
    }
}
还可以使用更优雅的实现,使用 StreamMessageListenerContainer 可以创建一个更高级的消息监听机制,它允许你注册 StreamListener,这样你就可以实现基于事件的异步消息处理,而不是阻塞读取。这种方式更适合生产环境,因为它提供了更好的资源管理和错误处理机制。
到此这篇关于Springboot3+Redis实现消息队列的多种方法小结的文章就介绍到这了,更多相关Springboot3 Redis消息队列内容请搜索脚本之家以前的文章或继续浏览下面的相关文章希望大家以后多多支持脚本之家!