SpringBoot集成MQ的过程(四种交换机的实例)
作者:Eliauk544
RabbitMQ交换机(Exchange)的核心作用
在RabbitMQ中,交换机 是消息路由的核心组件,负责接收生产者发送的消息,并根据规则(如路由键、头信息等)将消息分发到对应的队列中。
不同交换机类型决定了消息的路由逻辑,使用不同的交换机在不同的场景下可以提高消息系统的高可用性。
1. 直连交换机(Direct Exchange)
路由机制
- 精确匹配路由键(Routing Key):消息会被发送到与
Routing Key完全匹配 的队列。 - 典型场景:一对一或一对多的精确消息分发。
应用场景
- 任务分发:如订单处理系统,根据订单类型(如
order.payment、order.shipping)分发到不同队列。 - 日志分类:将不同级别的日志(
log.error、log.info)路由到对应的处理服务。
使用直连交换机实现消息发送和接收
1.创建一个SpringBoot项目,在yml文件配置如下:
server:
  port: 8021
spring:
  application:
    name: rabbitmq-provider
  #配置rabbitMq 服务器
  rabbitmq:
    host: 127.0.0.1
    port: 5672
    username: guest
    password: guest
2.初始化队列和交换机,并进行绑定
package com.atguigu.demomq;
import org.springframework.amqp.core.Binding;
import org.springframework.amqp.core.BindingBuilder;
import org.springframework.amqp.core.DirectExchange;
import org.springframework.amqp.core.Queue;
import org.springframework.context.annotation.Bean;
import org.springframework.context.annotation.Configuration;
/**
 * 功能:
 * 作者:程序员ZXY
 * 日期:2025/3/8 下午1:55
 */
@Configuration
public class DirectRabbitConfig {
    @Bean
    public  Queue TestDirectQueue(){
        return new Queue("TestDirectQueue",true);
    }
    @Bean
    DirectExchange TestDirectExchange(){
        return new DirectExchange("TestDirectExchange",true,false);
    }
    @Bean
    Binding bindingDirect(){
        return BindingBuilder.bind(TestDirectQueue())
                .to(TestDirectExchange())
                .with("TestDirectRouting");
    }
}
3.实现sendDirectMessage发送消息请求,由生产者发送到MQ,TestDirectRouting作为Key,用于精确转发。
package com.atguigu.demomq;
import org.springframework.amqp.rabbit.core.RabbitTemplate;
import org.springframework.beans.factory.annotation.Autowired;
import org.springframework.web.bind.annotation.GetMapping;
import org.springframework.web.bind.annotation.RestController;
import java.time.LocalDateTime;
import java.time.format.DateTimeFormatter;
import java.util.HashMap;
import java.util.Map;
import java.util.UUID;
/**
 * 功能:
 * 作者:程序员ZXY
 * 日期:2025/3/8 下午2:12
 */
@RestController
public class SendMessageController {
    @Autowired
    private RabbitTemplate rabbitTemplate;
    @GetMapping("/sendDirectMessage")
    public String sendDirectMessage() {
        String messageId = String.valueOf(UUID.randomUUID());
        String messageData = "Hello MQ!";
        String createTime = LocalDateTime.now().format(DateTimeFormatter.ofPattern("yyyy-MM-dd HH:mm:ss"));
        Map<String,Object> map=new HashMap<>();
        map.put("messageId",messageId);
        map.put("messageData",messageData);
        map.put("createTime",createTime);
        //将消息携带绑定键值:TestDirectRouting 发送到交换机TestDirectExchange
        rabbitTemplate.convertAndSend("TestDirectExchange", "TestDirectRouting", map);
        return "OK";
    }
}
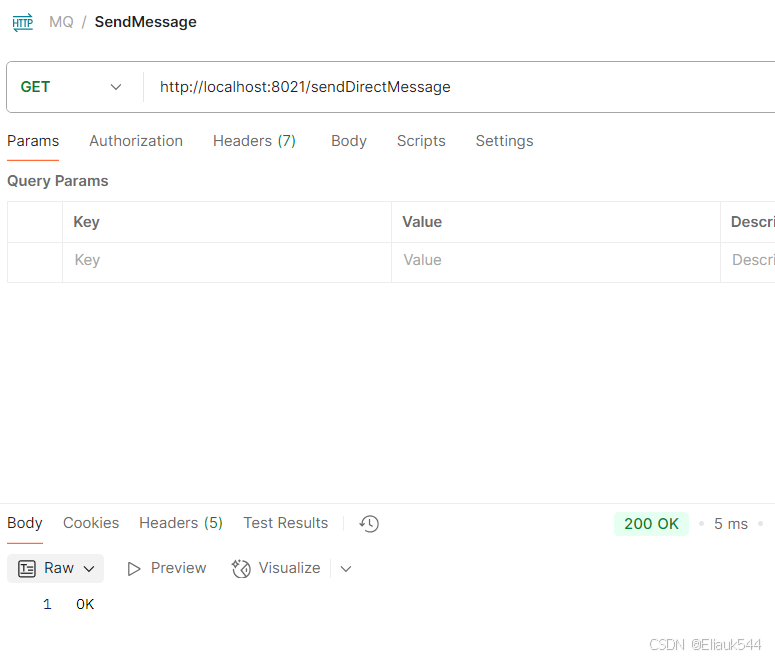
4.此时就可以启动项目发送消息了,使用PostMan发送消息,返回OK说明发送成功
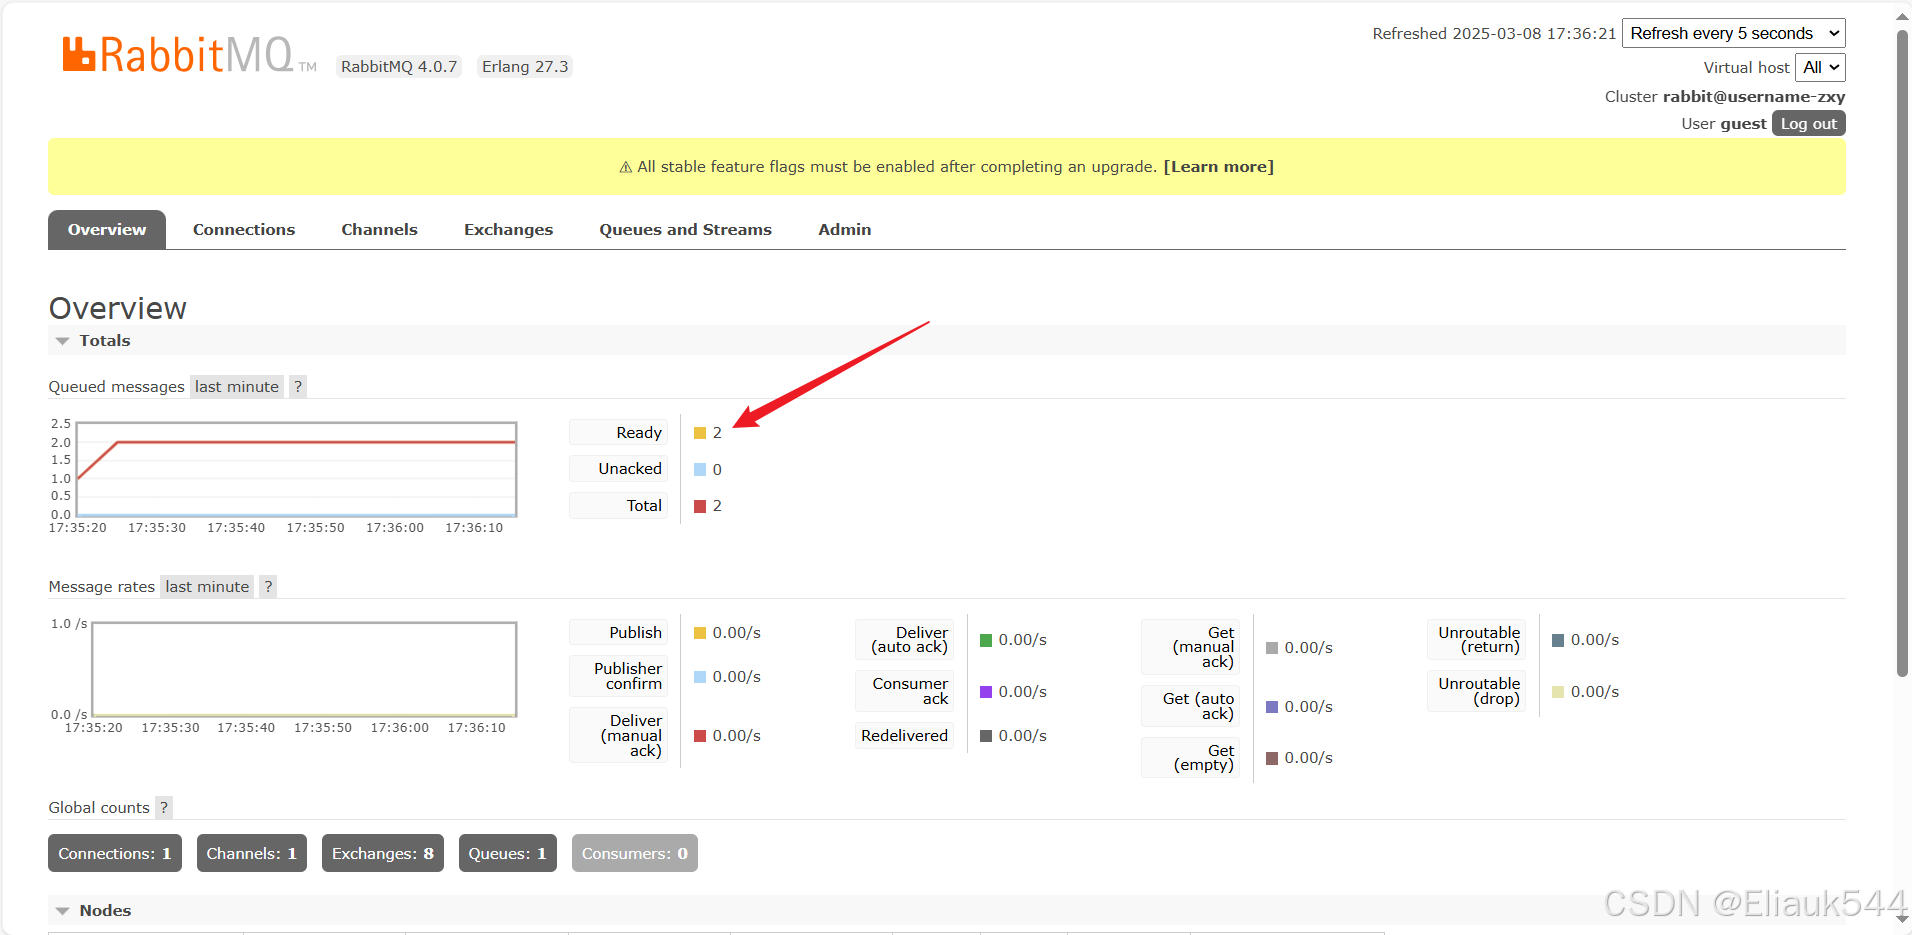
5.进入http://localhost:15672/,可以看到消息发送成功,我这里是请求了两次(也就是发了两条消息)。
6.接下来写消费者的消费过程,新创建一个SpringBoot项目,在yml文件配置如下
server:
  port: 8022
spring:
  application:
    name: rabbitmq-provider
  #配置rabbitMq 服务器
  rabbitmq:
    host: 127.0.0.1
    port: 5672
    username: guest
    password: guest
7.消费者配置类,同样TestDirectRouting用于唯一识别Key
package com.atguigu.demomq2;
import org.springframework.amqp.core.Binding;
import org.springframework.amqp.core.BindingBuilder;
import org.springframework.amqp.core.DirectExchange;
import org.springframework.amqp.core.Queue;
import org.springframework.context.annotation.Bean;
import org.springframework.context.annotation.Configuration;
/**
 * 功能:
 * 作者:程序员ZXY
 * 日期:2025/3/8 下午
 */
@Configuration
public class DirectRabbitConfig {
    @Bean
    public Queue TestDirectQueue() {
        return new Queue("TestDirectQueue",true);
    }
    @Bean
    DirectExchange TestDirectExchange() {
        return new DirectExchange("TestDirectExchange");
    }
    @Bean
    Binding bindingDirect() {
        return BindingBuilder.bind(TestDirectQueue()).to(TestDirectExchange()).with("TestDirectRouting");
    }
}
8.消费者 接收消息@RabbitListener(queues = "TestDirectQueue")用于监听指定队列发送的消息
package com.atguigu.demomq2;
import org.springframework.amqp.rabbit.annotation.RabbitHandler;
import org.springframework.amqp.rabbit.annotation.RabbitListener;
import org.springframework.stereotype.Component;
import java.util.Map;
@Component
@RabbitListener(queues = "TestDirectQueue")
public class DirectReceiver {
    @RabbitHandler
    public void process(Map testMessage) {
        System.out.println("DirectReceiver消费者收到消息  : " + testMessage.toString());
    }
}
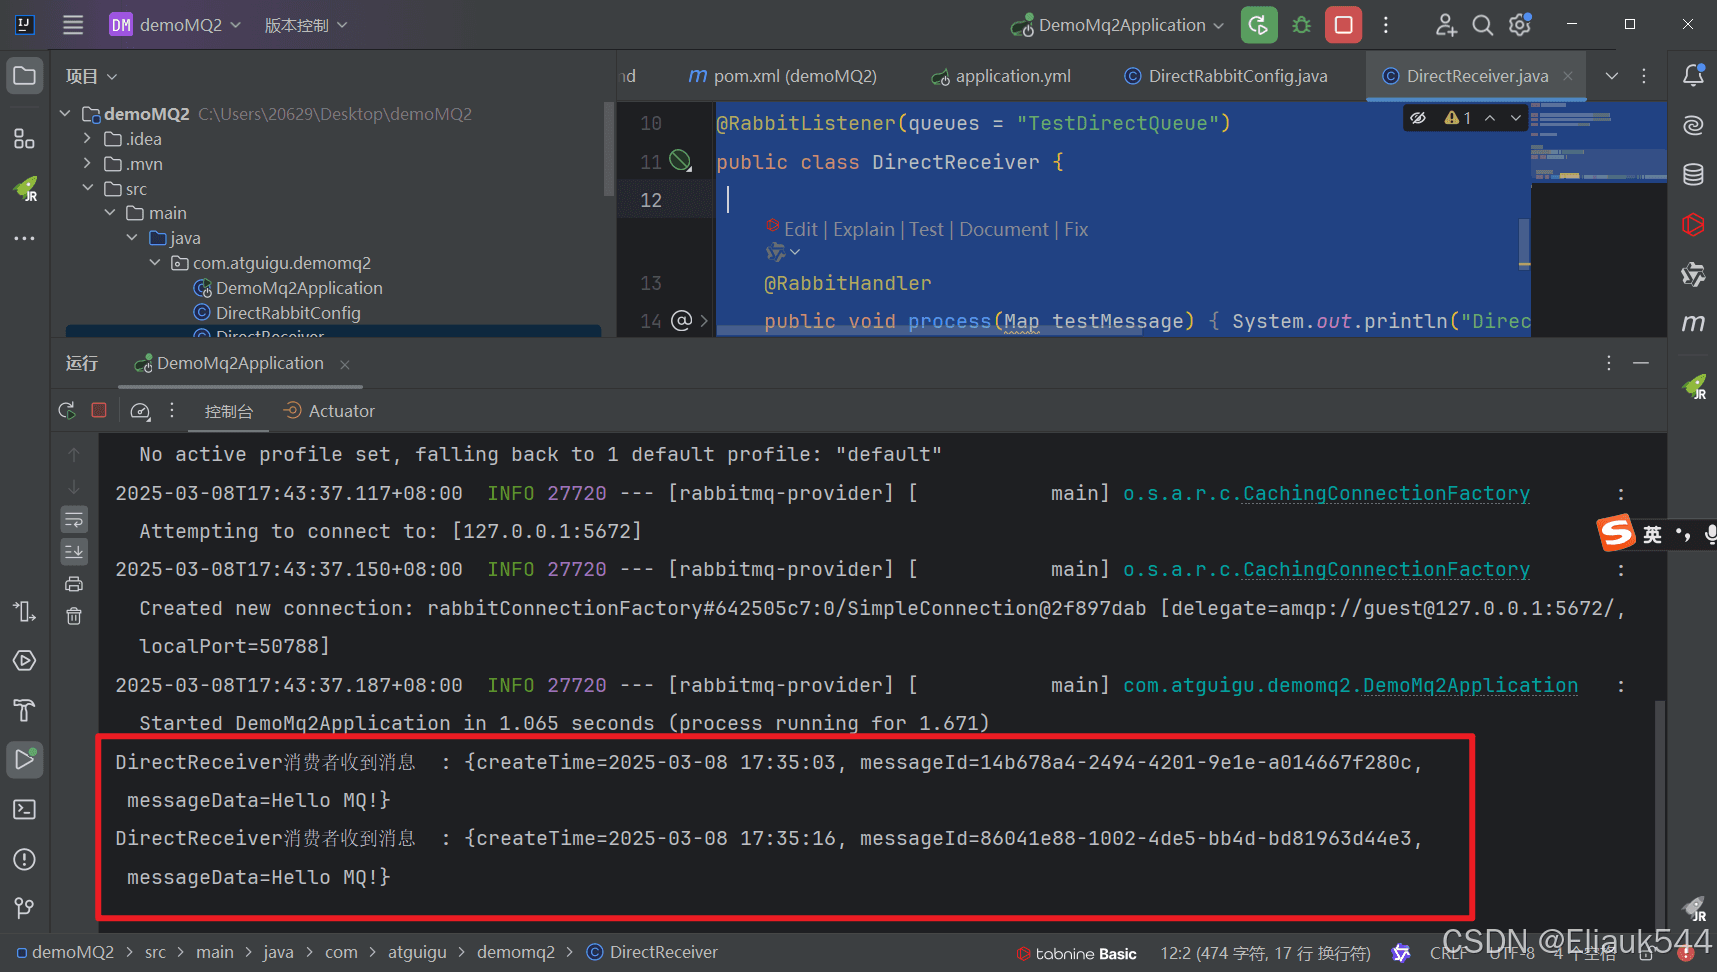
9.启动消费者,成功接收消息
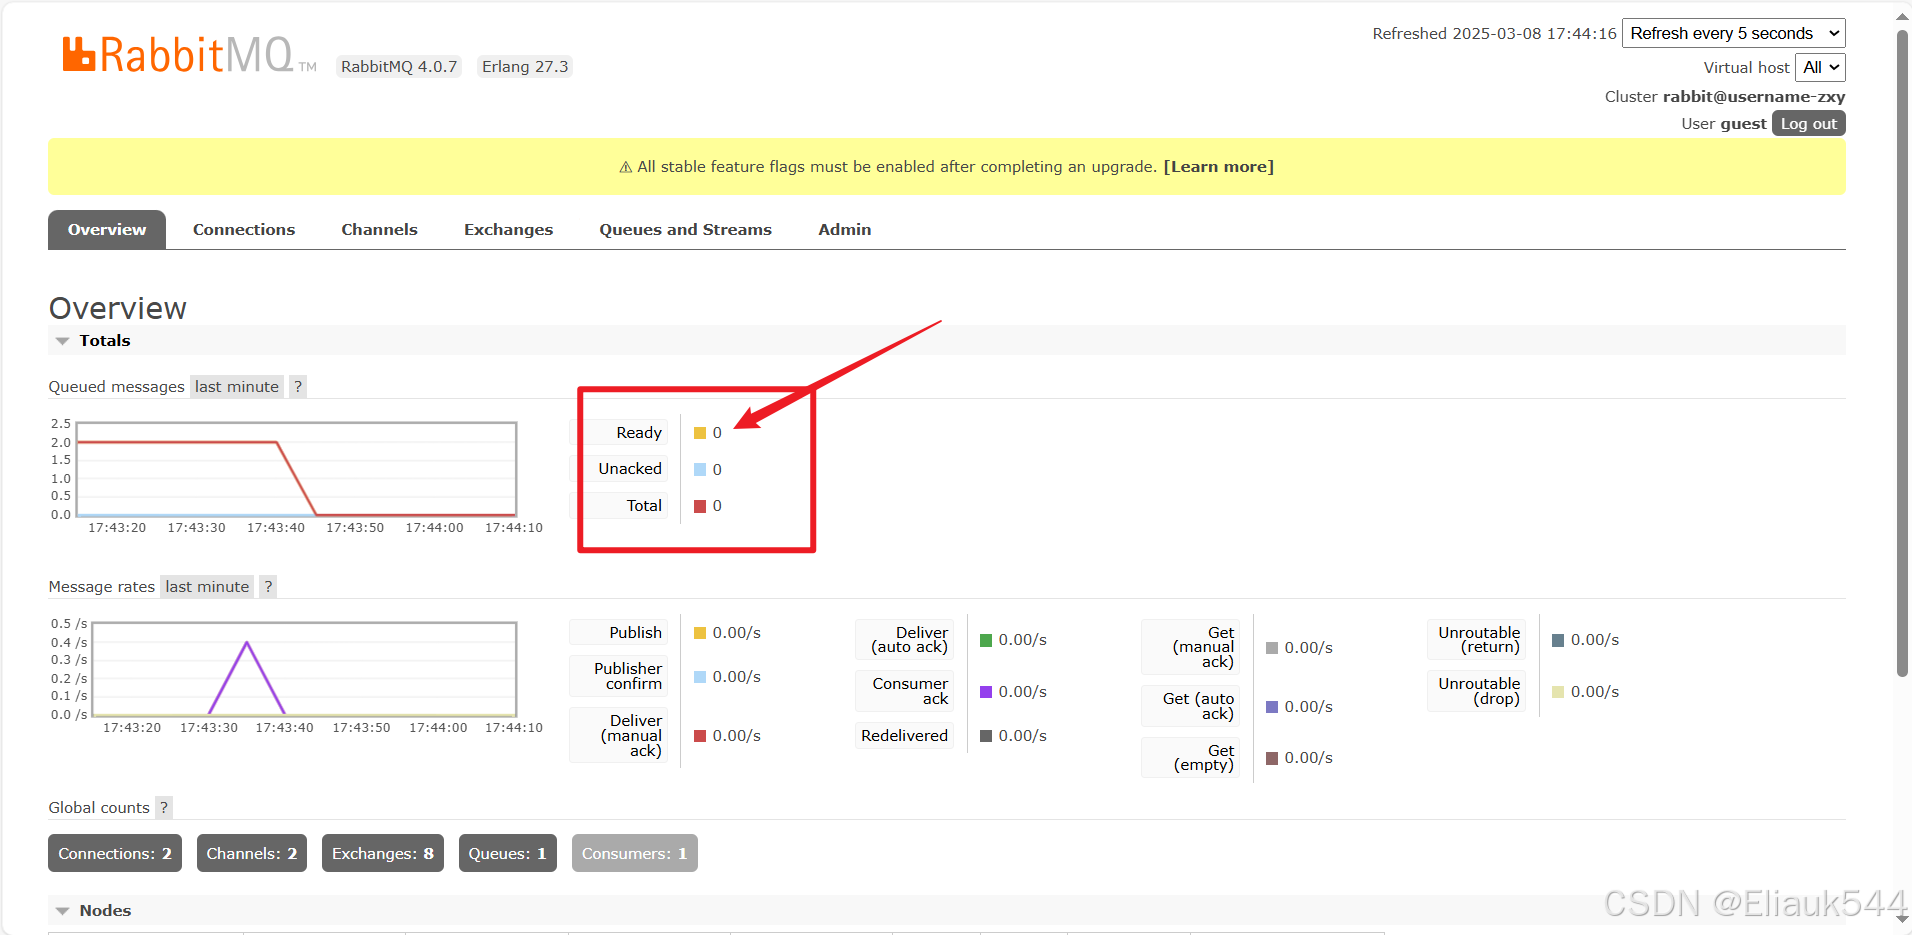
10.查看MQ控制台,消息成功被消费
2. 扇出交换机(Fanout Exchange)
路由机制(一个交换机转发到多个队列)
- 广播模式:忽略
Routing Key,将消息发送到所有绑定的队列。 - 典型场景:消息的全局通知或并行处理。
应用场景
- 实时通知系统:如用户注册成功后,同时发送邮件、短信、更新缓存。
- 日志广播:多个服务订阅同一日志源,各自独立处理。
使用扇出交换机实现消息发送和接收
1.扇出交换机配置
package com.atguigu.demomq;
import org.springframework.amqp.core.Binding;
import org.springframework.amqp.core.BindingBuilder;
import org.springframework.amqp.core.FanoutExchange;
import org.springframework.amqp.core.Queue;
import org.springframework.context.annotation.Bean;
import org.springframework.context.annotation.Configuration;
@Configuration
public class FanoutExchangeConfig {
    // 定义扇出交换机
    @Bean
    public FanoutExchange fanoutExchange() {
        return new FanoutExchange("fanout.user.register", true, false);
    }
    // 定义邮件队列
    @Bean
    public Queue emailQueue() {
        return new Queue("fanout.user.email", true);
    }
    // 定义短信队列
    @Bean
    public Queue smsQueue() {
        return new Queue("fanout.user.sms", true);
    }
    // 绑定所有队列到扇出交换机(无需路由键)
    @Bean
    public Binding emailBinding() {
        return BindingBuilder.bind(emailQueue()).to(fanoutExchange());
    }
    @Bean
    public Binding smsBinding() {
        return BindingBuilder.bind(smsQueue()).to(fanoutExchange());
    }
}
2.生产者
package com.atguigu.demomq;
import org.springframework.amqp.rabbit.core.RabbitTemplate;
import org.springframework.beans.factory.annotation.Autowired;
import org.springframework.web.bind.annotation.GetMapping;
import org.springframework.web.bind.annotation.RestController;
@RestController
public class FanoutUserService {
    @Autowired
    private RabbitTemplate rabbitTemplate;
    @GetMapping("/sendFanoutMessage")
    public String sendRegisterBroadcast() {
        rabbitTemplate.convertAndSend(
            "fanout.user.register",
            "", // 扇出交换机忽略路由键
            "message MQ"
        );
        return "OK Fan";
    }
}
3.消费者
package com.atguigu.demomq2;
import org.springframework.amqp.rabbit.annotation.RabbitListener;
import org.springframework.stereotype.Component;
@Component
public class FanoutNotificationConsumer {
    @RabbitListener(queues = "fanout.user.email")
    public void handleEmail(String message) {
        System.out.println("[Email] Received: " + message);
    }
    @RabbitListener(queues = "fanout.user.sms")
    public void handleSms(String message) {
        System.out.println("[SMS] Received: " + message);
    }
}
4.请求并查看消费结果
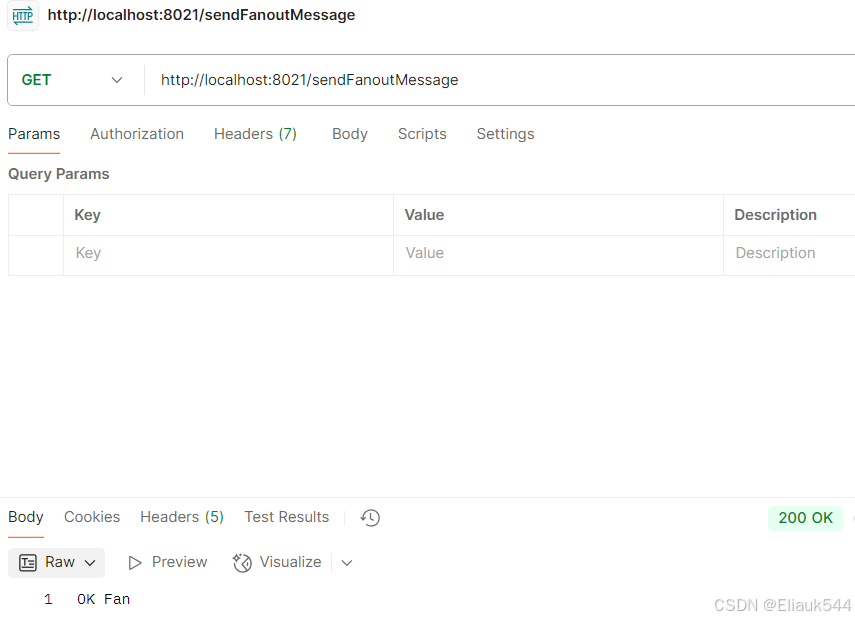
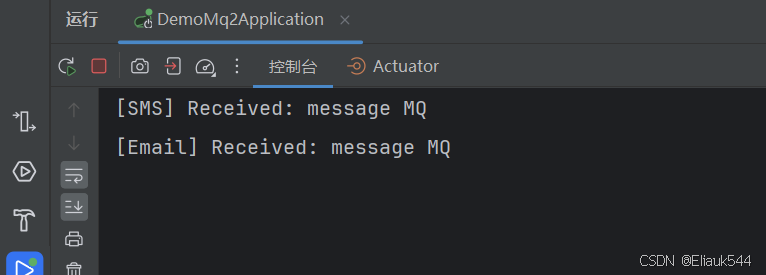
可以看到一个交换机完成消费两条消息
3. 主题交换机(Topic Exchange)
- 路由机制 模式匹配路由键:使用
*(匹配一个单词)和#(匹配多个单词)通配符。 - 典型场景:灵活的多条件消息路由。
应用场景
- 新闻订阅系统:用户订阅特定主题(如
news.sports.*、news.tech.#)。 - 设备状态监控:根据设备类型和区域路由消息(如
sensor.temperature.room1)。
1.配置主题交换机
package com.atguigu.demomq;
import org.springframework.amqp.core.Binding;
import org.springframework.amqp.core.BindingBuilder;
import org.springframework.amqp.core.Queue;
import org.springframework.amqp.core.TopicExchange;
import org.springframework.context.annotation.Bean;
import org.springframework.context.annotation.Configuration;
@Configuration
public class TopicExchangeConfig {
    // 定义主题交换机
    @Bean
    public TopicExchange topicExchange() {
        return new TopicExchange("topic.news", true, false);
    }
    // 定义体育新闻队列
    @Bean
    public Queue sportsQueue() {
        return new Queue("topic.news.sports", true);
    }
    // 定义科技新闻队列
    @Bean
    public Queue techQueue() {
        return new Queue("topic.news.tech", true);
    }
    // 绑定体育队列:匹配 news.sports.*
    @Bean
    public Binding sportsBinding() {
        return BindingBuilder.bind(sportsQueue())
                .to(topicExchange())
                .with("news.sports.*");
    }
    // 绑定科技队列:匹配 news.tech.#
    @Bean
    public Binding techBinding() {
        return BindingBuilder.bind(techQueue())
                .to(topicExchange())
                .with("news.tech.#");
    }
}
2.生产者
package com.atguigu.demomq;
import org.springframework.amqp.rabbit.core.RabbitTemplate;
import org.springframework.beans.factory.annotation.Autowired;
import org.springframework.stereotype.Service;
import org.springframework.web.bind.annotation.GetMapping;
import org.springframework.web.bind.annotation.RestController;
@RestController
public class TopicNewsService {
    @Autowired
    private RabbitTemplate rabbitTemplate;
    @GetMapping("/sendTopicMessage1")
    public String  sendSportsNews() {
        rabbitTemplate.convertAndSend(
            "topic.news",
            "news.sports.football",
                "* message:news.sports.football"
        );
        return "*OK";
    }
    @GetMapping("/sendTopicMessage2")
    public String sendTechNews() {
        rabbitTemplate.convertAndSend(
            "topic.news",
            "news.tech.ai.abc.123456",
            "# message:news.tech.ai.abc.123456"
        );
        return "#OK";
    }
}
3. 消费者
package com.atguigu.demomq2;
import org.springframework.amqp.rabbit.annotation.RabbitListener;
import org.springframework.stereotype.Component;
@Component
public class TopicNewsConsumer {
    @RabbitListener(queues = "topic.news.sports")
    public void handleSports(String message) {
        System.out.println("[Sports] Received: " + message);
    }
    @RabbitListener(queues = "topic.news.tech")
    public void handleTech(String message) {
        System.out.println("[Tech] Received: " + message);
    }
}
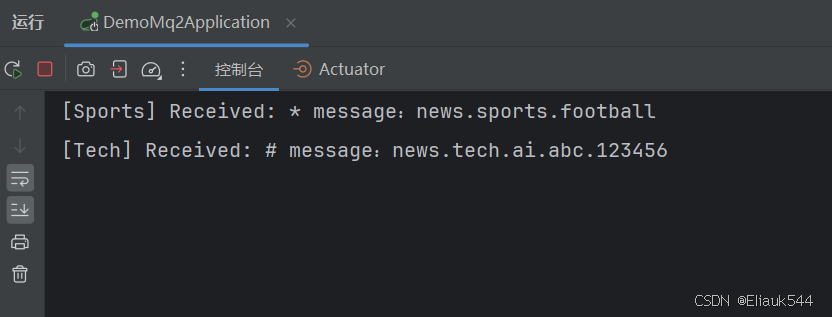
4.发送请求
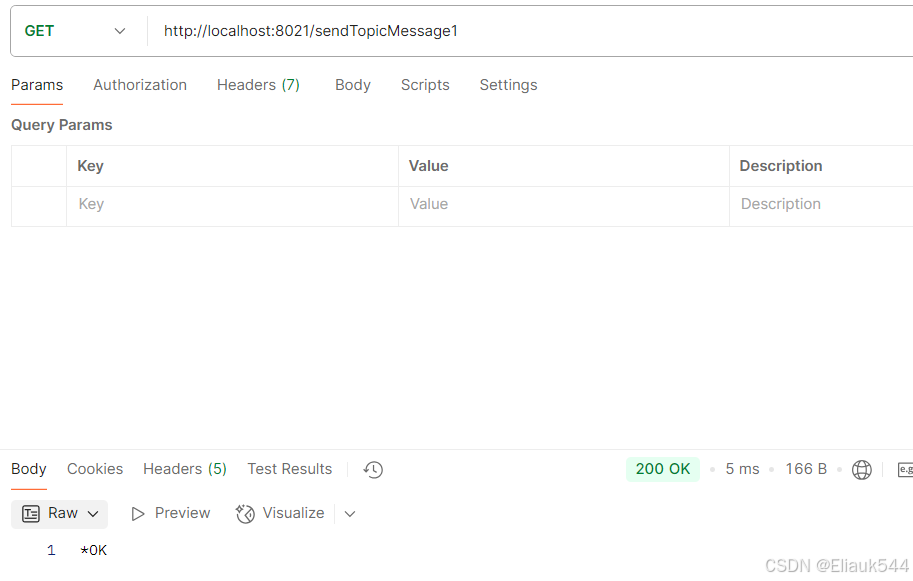
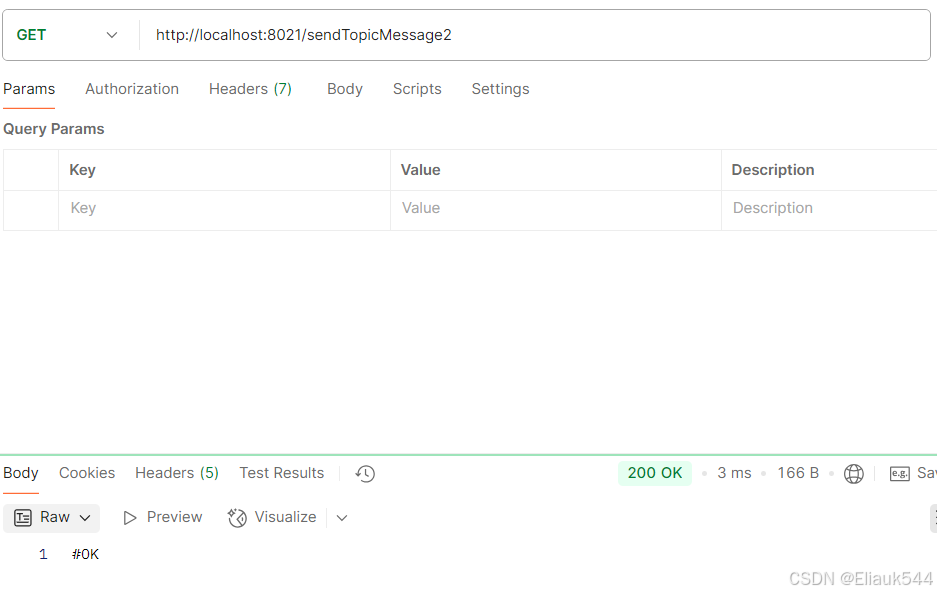
可以看到消息成功消费,第一个为*通配符,第二个为#通配符
4. 头交换机(Headers Exchange)
路由机制( 我的理解是一种基于 多条件组合 的消息路由机制)
- 基于消息头(Headers)匹配:忽略
Routing Key,通过键值对(Headers)匹配队列绑定的条件。 - 匹配规则:
x-match参数设为all(需全部匹配)或any(匹配任意一个)。
应用场景
- 复杂路由逻辑:如根据消息的版本号、语言等元数据路由。
- 多维度过滤:如同时匹配用户类型(
user_type: vip)和地理位置(region: asia)。
1.头交换机配置
package com.atguigu.demomq;
import org.springframework.amqp.core.Binding;
import org.springframework.amqp.core.BindingBuilder;
import org.springframework.amqp.core.HeadersExchange;
import org.springframework.amqp.core.Queue;
import org.springframework.context.annotation.Bean;
import org.springframework.context.annotation.Configuration;
import java.util.HashMap;
import java.util.Map;
@Configuration
public class HeadersExchangeConfig {
    // 定义头交换机
    @Bean
    public HeadersExchange headersExchange() {
        return new HeadersExchange("headers.user", true, false);
    }
    // 定义VIP用户队列
    @Bean
    public Queue vipQueue() {
        return new Queue("headers.user.vip", true);
    }
    // 绑定VIP队列,要求同时匹配 userType=vip 和 region=asia
    @Bean
    public Binding vipBinding() {
        Map<String, Object> headers = new HashMap<>();
        headers.put("userType", "vip");
        headers.put("region", "asia");
        return BindingBuilder.bind(vipQueue())
                .to(headersExchange())
                .whereAll(headers).match(); // whereAll 表示需全部匹配
    }
}
2.生产者
package com.atguigu.demomq;
import org.springframework.amqp.core.Message;
import org.springframework.amqp.core.MessageProperties;
import org.springframework.amqp.rabbit.core.RabbitTemplate;
import org.springframework.beans.factory.annotation.Autowired;
import org.springframework.stereotype.Service;
import org.springframework.web.bind.annotation.GetMapping;
import org.springframework.web.bind.annotation.RestController;
@RestController
public class HeaderUserVipService {
    @Autowired
    private RabbitTemplate rabbitTemplate;
    @GetMapping("/sendHeaderMessage")
    public String  sendVipMessage() {
        MessageProperties props = new MessageProperties();
        props.setHeader("userType", "vip");
        props.setHeader("region", "asia");
        Message msg = new Message("HeaderMessage".getBytes(), props);
        rabbitTemplate.send("headers.user", "", msg);
        return "OK";
    }
}
3.消费者
package com.atguigu.demomq2;
import org.springframework.amqp.core.Message;
import org.springframework.amqp.rabbit.annotation.RabbitListener;
import org.springframework.stereotype.Component;
@Component
public class HeaderUserVipConsumer {
    @RabbitListener(queues = "headers.user.vip")
    public void handleVip(Message message) {
        String body = new String(message.getBody());
        System.out.println("[VIP] Received: " + body);
    }
}
4.PostMan测试
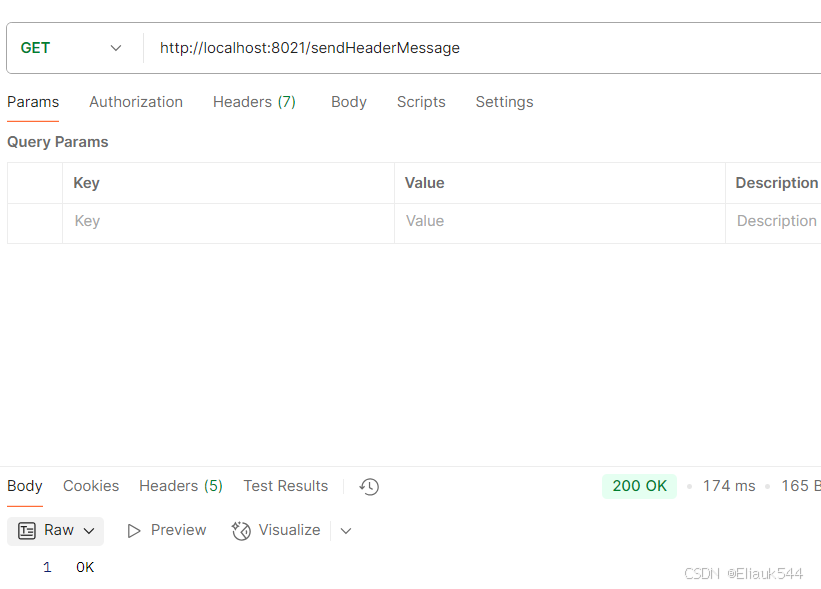
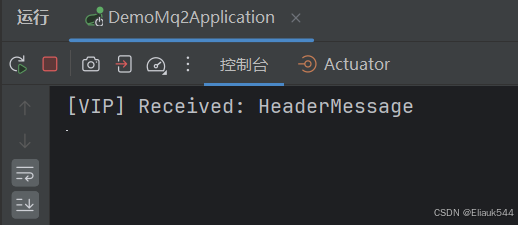
这里仅消费交换机初始化时满足所有设定条件的消息,我们可以测试一下不满足条件时发送消息

消费者不消费消息

总结

需要代码自己进行测试的 可以Git自取
git clone https://gitee.com/myselfzxy/mq-producer.git
git clone https://gitee.com/myselfzxy/mq-customer.git
到此这篇关于SpringBoot集成MQ,四种交换机的实例的文章就介绍到这了,更多相关SpringBoot集成MQ内容请搜索脚本之家以前的文章或继续浏览下面的相关文章希望大家以后多多支持脚本之家!
