
SpringBoot+SseEmitter和Vue3+EventSource实现实时数据推送
作者:麦当劳不要薯条
本文主要介绍了SpringBoot+SseEmitter和Vue3+EventSource实现实时数据推送,文中通过示例代码介绍的非常详细,对大家的学习或者工作具有一定的参考学习价值,需要的朋友们下面随着小编来一起学习学习吧
EventSource 的优点
- 简单易用:EventSource 使用简单,基于标准的 HTTP 协议,无需复杂的握手过程。
- 自动重连:EventSource 具有内置的重连机制,确保连接中断后自动重新连接。
- 轻量级:EventSource 使用长轮询机制,消耗的资源相对较少,适合低带宽环境。
- 跨域支持:EventSource 允许在跨域环境下进行通信,通过适当的响应头授权来自不同域的客户端连接。
1、SpringBoot实现SseEmitter
1.1简易业务层
import org.springframework.http.MediaType;
import org.springframework.web.bind.annotation.GetMapping;
import org.springframework.web.bind.annotation.RequestMapping;
import org.springframework.web.bind.annotation.RestController;
import org.springframework.web.servlet.mvc.method.annotation.SseEmitter;
import java.io.IOException;
import java.util.Map;
import java.util.concurrent.ConcurrentHashMap;
/**
* Author tm
* Date 2023/9/25
* Version 1.0
*/
@RestController
@RequestMapping(path = "/sysTest/see")
public class SseControllerTest {
private static Map<String, SseEmitter> sseCache = new ConcurrentHashMap<>();
/**
* 前端传递标识,生成唯一的消息通道
*/
@GetMapping(path = "subscribe", produces = {MediaType.TEXT_EVENT_STREAM_VALUE})
public SseEmitter push(String id) throws IOException {
// 超时时间设置为3s,用于演示客户端自动重连
SseEmitter sseEmitter = new SseEmitter(30000L);
// 设置前端的重试时间为1s
sseEmitter.send(SseEmitter.event().reconnectTime(1000).data("连接成功"));
sseCache.put(id, sseEmitter);
System.out.println("add " + id);
sseEmitter.onTimeout(() -> {
System.out.println(id + "超时");
sseCache.remove(id);
});
sseEmitter.onCompletion(() -> System.out.println("完成!!!"));
return sseEmitter;
}
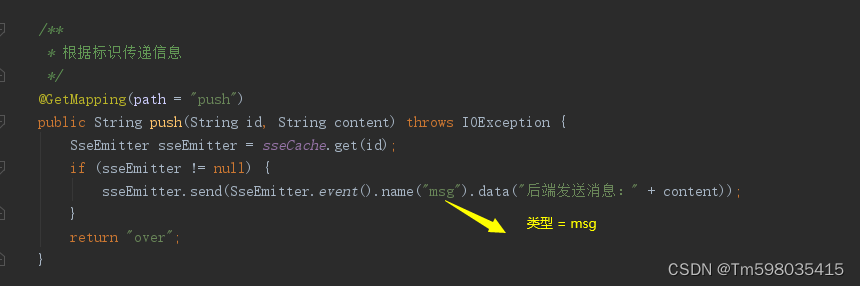
/**
* 根据标识传递信息
*/
@GetMapping(path = "push")
public String push(String id, String content) throws IOException {
SseEmitter sseEmitter = sseCache.get(id);
if (sseEmitter != null) {
sseEmitter.send(SseEmitter.event().name("msg").data("后端发送消息:" + content));
}
return "over";
}
/**
* 根据标识移除SseEmitter
*/
@GetMapping(path = "over")
public String over(String id) {
SseEmitter sseEmitter = sseCache.get(id);
if (sseEmitter != null) {
sseEmitter.complete();
sseCache.remove(id);
}
return "over";
}
}
2、Vue3对接EventSource
const initEventSource = ()=>{
if (typeof (EventSource) !== 'undefined') {
const evtSource = new EventSource('https://xxx.xxx.x.x/sysTest/see/subscribe?id=002', { withCredentials: true }) // 后端接口,要配置允许跨域属性
// 与事件源的连接刚打开时触发
evtSource.onopen = function(e){
console.log(e);
}
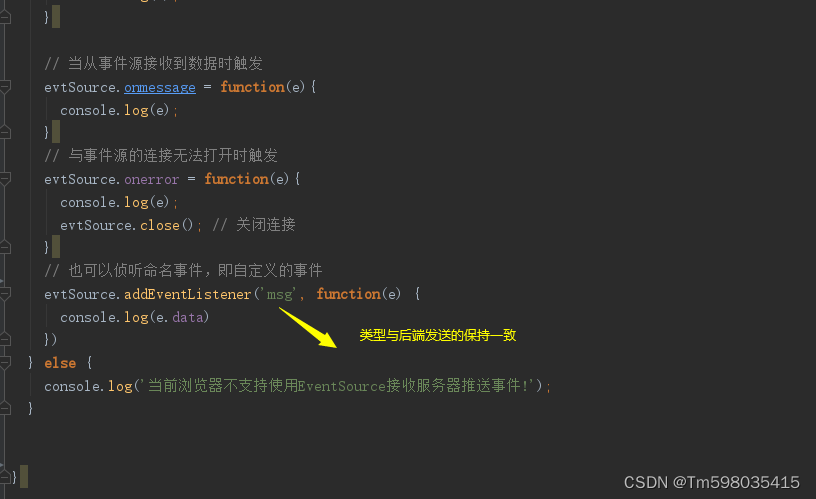
// 当从事件源接收到数据时触发
evtSource.onmessage = function(e){
console.log(e);
}
// 与事件源的连接无法打开时触发
evtSource.onerror = function(e){
console.log(e);
evtSource.close(); // 关闭连接
}
// 也可以侦听命名事件,即自定义的事件
evtSource.addEventListener('msg', function(e) {
console.log(e.data)
})
} else {
console.log('当前浏览器不支持使用EventSource接收服务器推送事件!');
}
}
3、测试、验证、使用
使用postMan调用接口测试
3.1、 postMan调用后端"push"接口发送消息
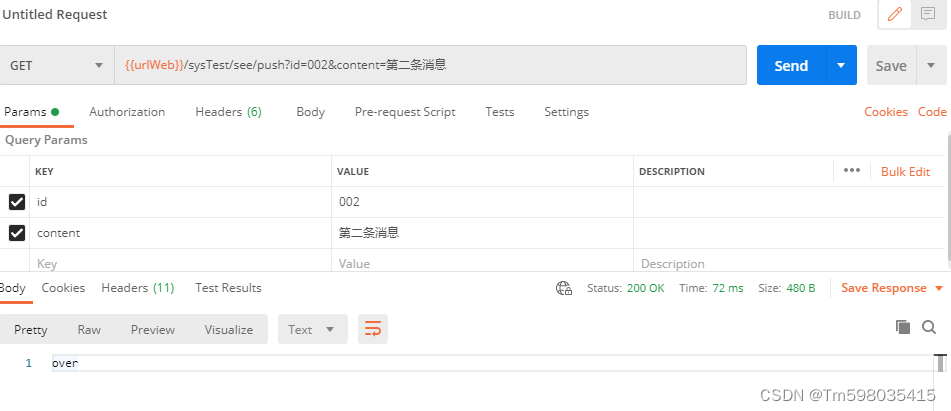
3.2、前端实时接收到数据

4、踩坑
4.1、nginx对于EventSource连接要特殊处理
#eventSource
location /es/ {
    proxy_pass  http://请求地址/;
    #必须要设置当前Connection 属性
    proxy_set_header Connection '';
    proxy_http_version 1.1;
    chunked_transfer_encoding off;
    proxy_buffering off;
    proxy_cache off;
}
4.2、连接通道接口类型一定要设置MediaType.TEXT_EVENT_STREAM_VALUE

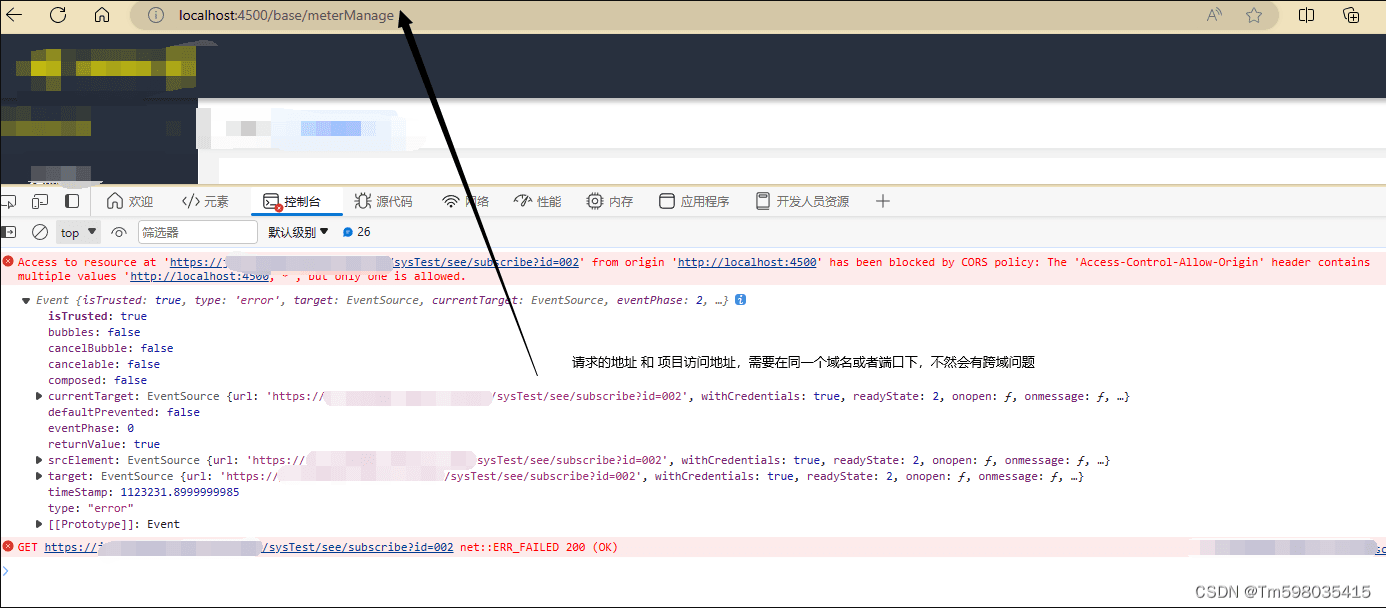
4.3、 跨越问题,项目地址和接口地址需要在同一域名下
4.4 、EventSource监听事件的类型需要与后端发送的类型一致
到此这篇关于SpringBoot+SseEmitter和Vue3+EventSource实现实时数据推送的文章就介绍到这了,更多相关SpringBoot 实时数据推送内容请搜索脚本之家以前的文章或继续浏览下面的相关文章希望大家以后多多支持脚本之家!