
Spring Boot2 整合连接 Redis的操作方法
作者:ChinaRainbowSea
1.在 springboot 中 , 整合 redis
可以通过 RedisTemplate 完成对 redis 的操作, 包括设置数据/获取数据
比如添加和读取数据
具体整合实现:
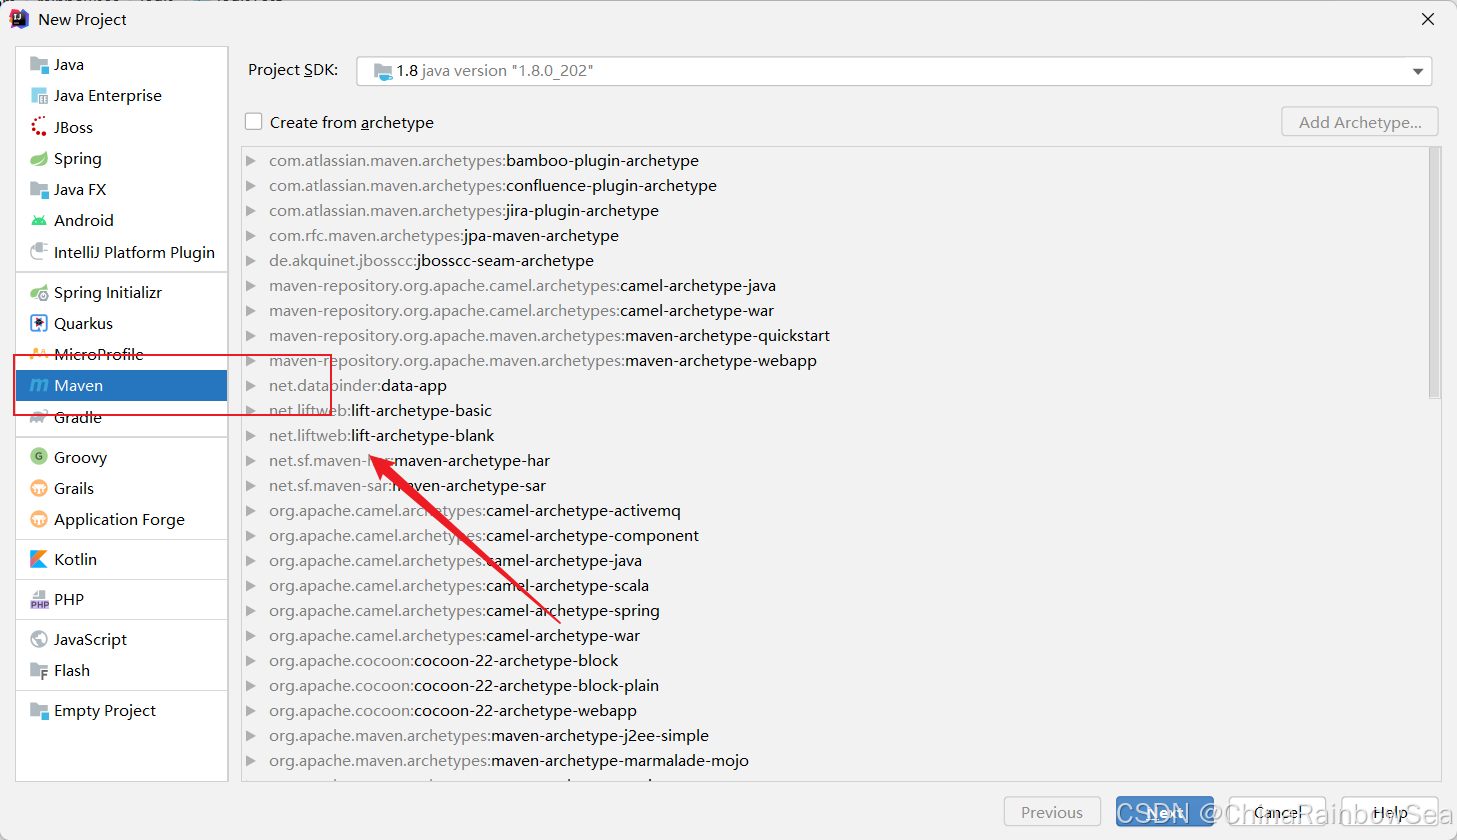
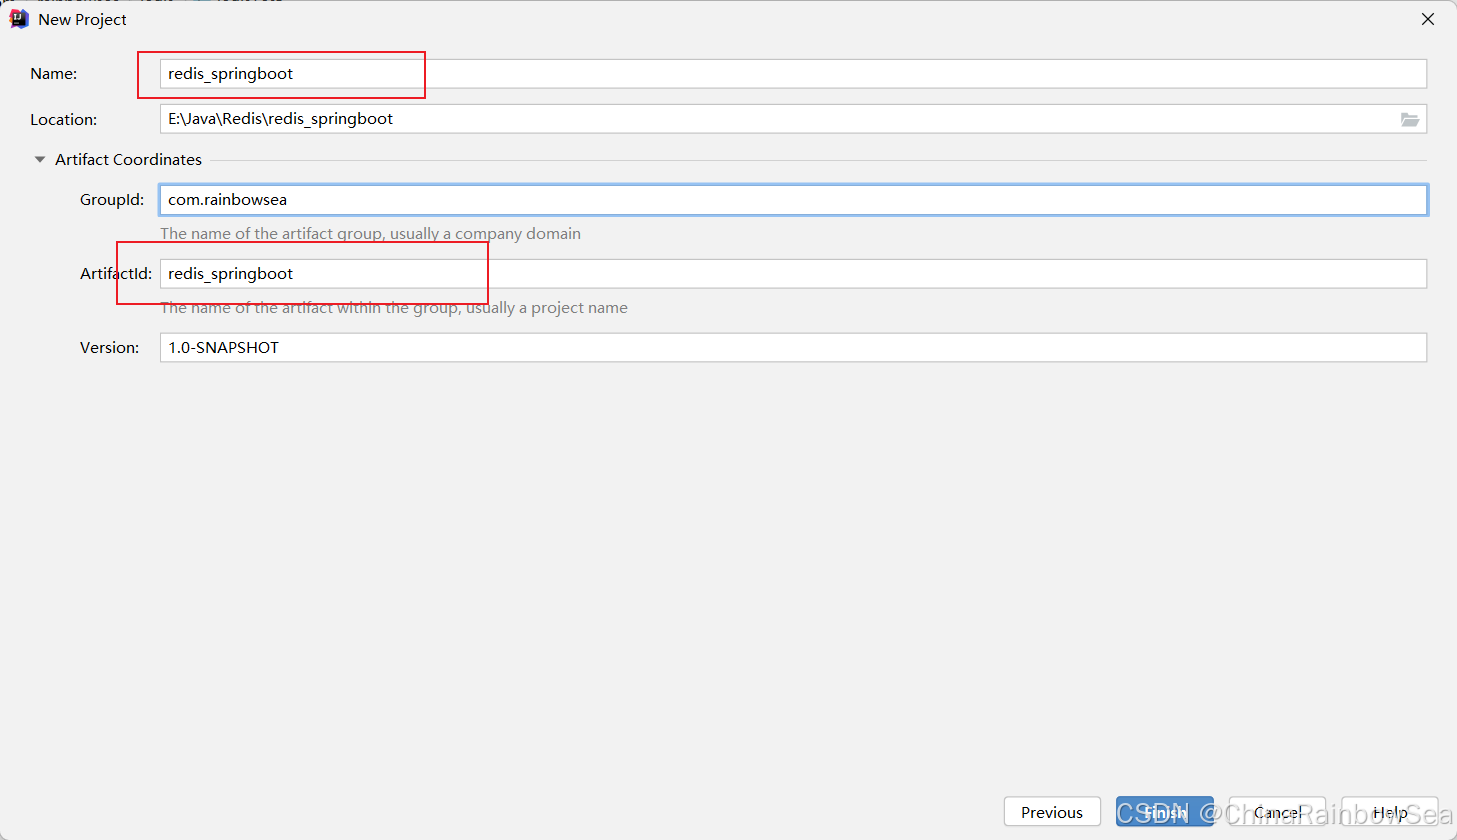
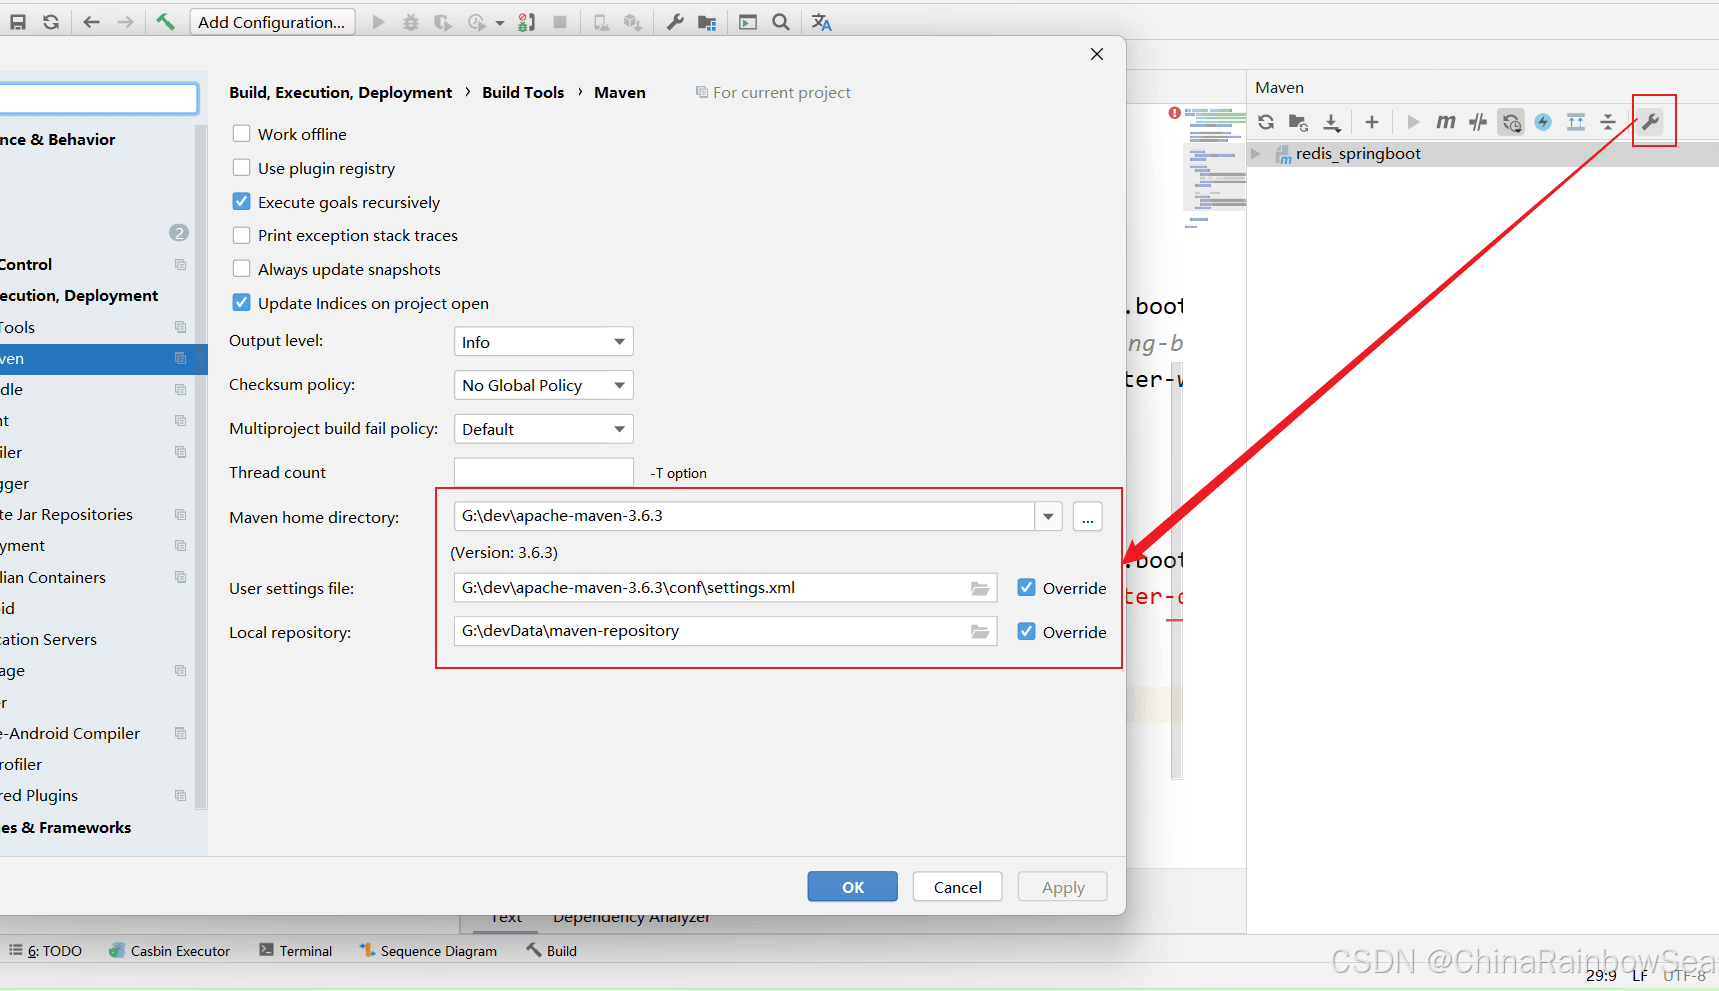
创建 Maven 项目:
在 pom.xml 文件当中导入相关的 jar 依赖。如下:

<?xml version="1.0" encoding="UTF-8"?>
<project xmlns="http://maven.apache.org/POM/4.0.0"
xmlns:xsi="http://www.w3.org/2001/XMLSchema-instance"
xsi:schemaLocation="http://maven.apache.org/POM/4.0.0 http://maven.apache.org/xsd/maven-4.0.0.xsd">
<modelVersion>4.0.0</modelVersion>
<parent>
<groupId>org.springframework.boot</groupId>
<artifactId>spring-boot-starter-parent</artifactId>
<version>2.6.6</version>
<relativePath/> <!-- lookup parent from repository -->
</parent>
<groupId>com.rainbowsea</groupId>
<artifactId>redis_springboot</artifactId>
<version>1.0-SNAPSHOT</version>
<properties>
<java.version>1.8</java.version>
</properties>
<dependencies>
<dependency>
<groupId>org.springframework.boot</groupId>
<!-- 说明: 如果这里是 spring-boot-start 就改成如下 spring-boot-start-web-->
<artifactId>spring-boot-starter-web</artifactId>
</dependency>
<!-- redis-->
<dependency>
<groupId>org.springframework.boot</groupId>
<artifactId>spring-boot-starter-data-redis</artifactId>
</dependency>
<!-- spring2.X 集成 redis 所需 common-pool-->
<dependency>
<groupId>org.apache.commons</groupId>
<artifactId>commons-pool2</artifactId>
<!--不要带版本号,防止冲突-->
</dependency>
<dependency>
<groupId>org.springframework.boot</groupId>
<artifactId>spring-boot-starter-test</artifactId>
<scope>test</scope>
</dependency>
<!-- json 转换的 jar 包依赖-->
<dependency>
<groupId>com.fasterxml.jackson.core</groupId>
<artifactId>jackson-databind</artifactId>
<version>2.13.2.2</version>
</dependency>
</dependencies>
<!-- 插件-->
<build>
<plugins>
<plugin>
<groupId>org.springframework.boot</groupId>
<artifactId>spring-boot-maven-plugin</artifactId>
</plugin>
</plugins>
</build>
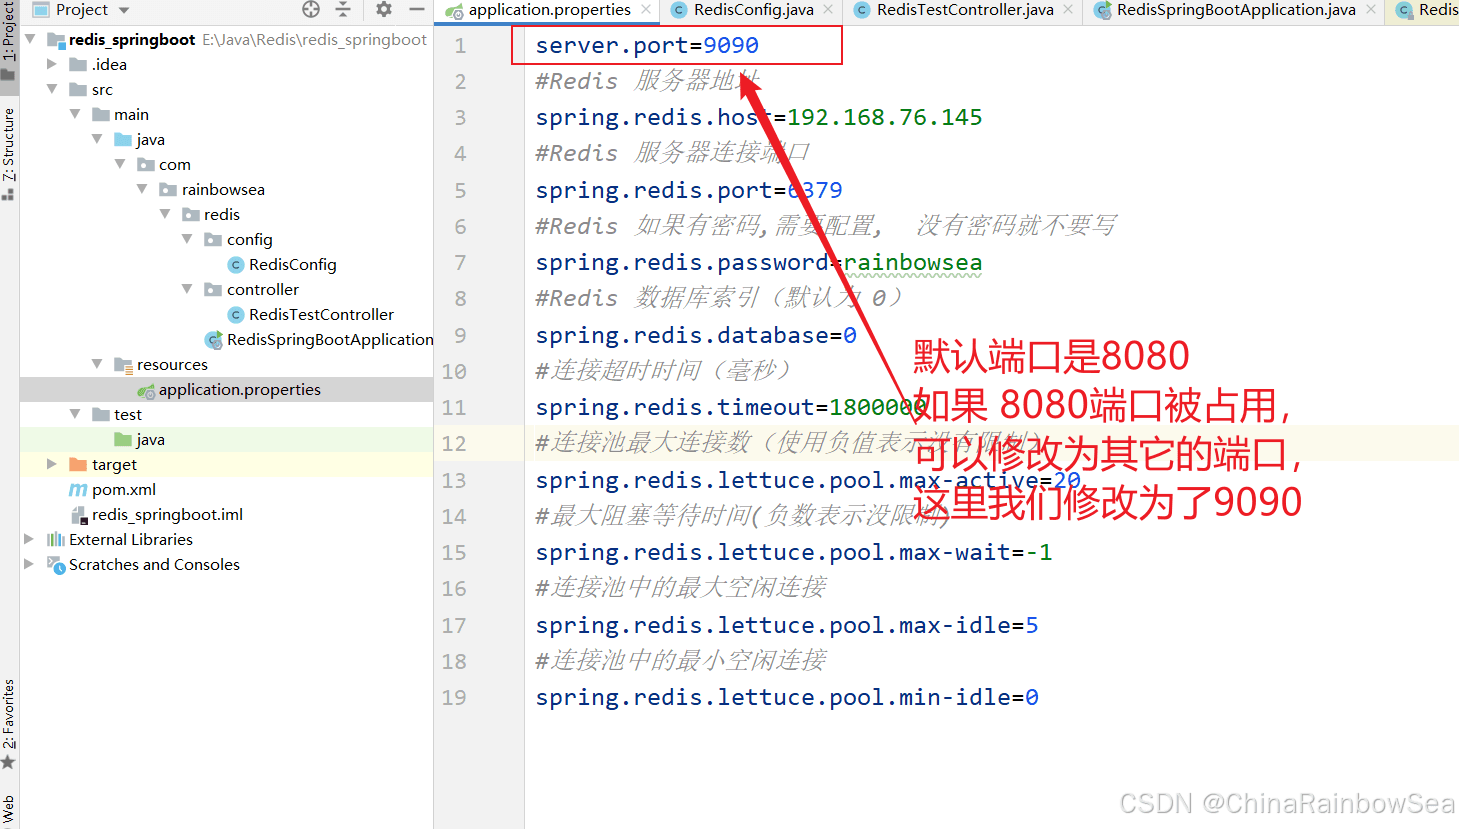
</project>在 resources 目录下创建 application.properties,完成 redis 的基本配置,如下所示:
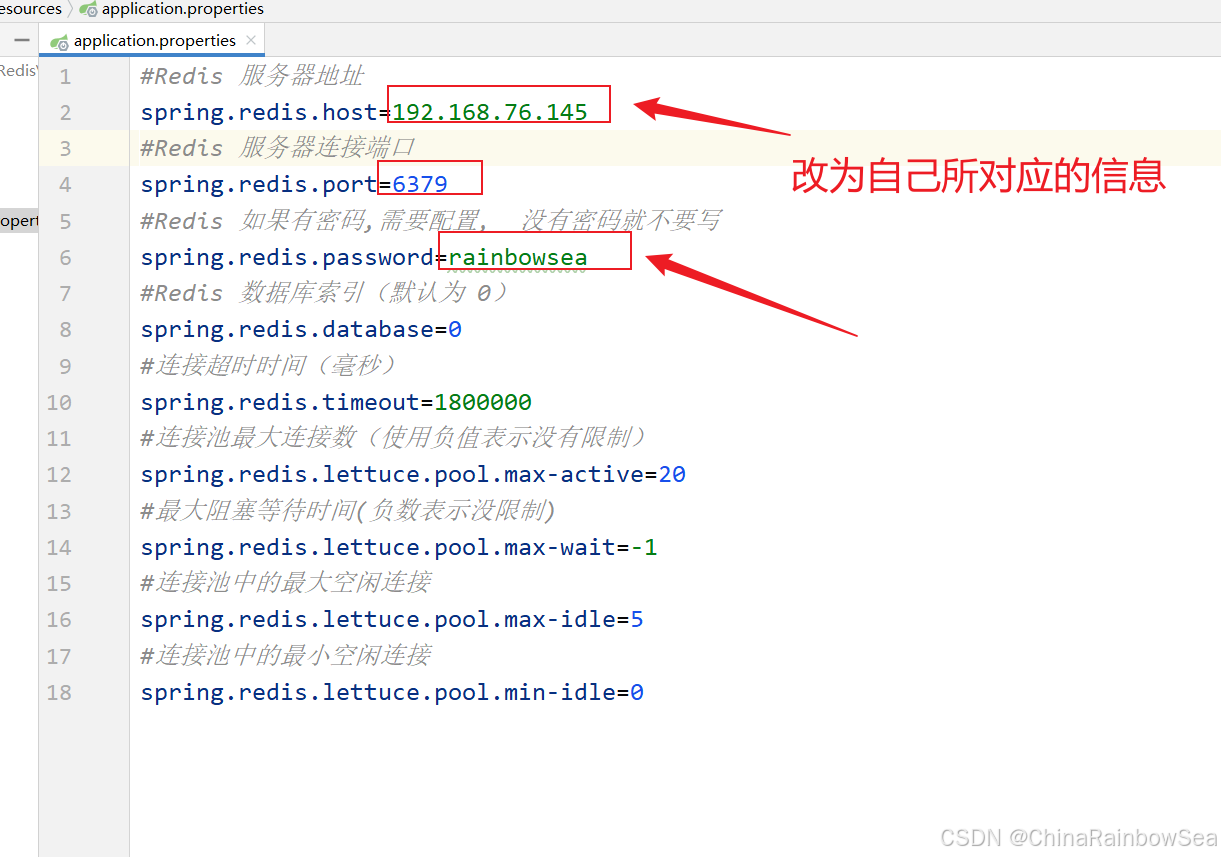
#Redis 服务器地址
spring.redis.host=192.168.76.145
#Redis 服务器连接端口
spring.redis.port=6379
#Redis 如果有密码,需要配置,  没有密码就不要写
spring.redis.password=rainbowsea
#Redis 数据库索引(默认为 0)
spring.redis.database=0
#连接超时时间(毫秒)
spring.redis.timeout=1800000
#连接池最大连接数(使用负值表示没有限制)
spring.redis.lettuce.pool.max-active=20
#最大阻塞等待时间(负数表示没限制)
spring.redis.lettuce.pool.max-wait=-1
#连接池中的最大空闲连接
spring.redis.lettuce.pool.max-idle=5
#连接池中的最小空闲连接
spring.redis.lettuce.pool.min-idle=0
创建/定义一个 Redis 配置类。
- 这个 Redis 配置类是对要使用 RedisTemplate bean 对象的配置,可以理解成是一个常规配置。
- 和我们以前学过的一个 JdbcTemplate 的设计理念类似。
- 如果不是配置,那么 Spring boot 会使用默认配置,这个默认配置,会出现一些问题,比如:redisTemplate 的 key 序列化等问题,所以通常我们需要配置这个。Redis 配置类.
创建:\redis_springboot\src\main\java\com\rainbowsea\redis\config\ RedisConfig.java 配置类

package com.rainbowsea.redis.config;
import org.springframework.cache.annotation.CachingConfigurerSupport;
import org.springframework.cache.annotation.EnableCaching;
import org.springframework.context.annotation.Configuration;
import com.fasterxml.jackson.annotation.JsonAutoDetect;
import com.fasterxml.jackson.annotation.JsonTypeInfo;
import com.fasterxml.jackson.annotation.PropertyAccessor;
import com.fasterxml.jackson.databind.ObjectMapper;
import com.fasterxml.jackson.databind.jsontype.impl.LaissezFaireSubTypeValidator;
import org.springframework.cache.CacheManager;
import org.springframework.cache.annotation.CachingConfigurerSupport;
import org.springframework.cache.annotation.EnableCaching;
import org.springframework.context.annotation.Bean;
import org.springframework.context.annotation.Configuration;
import org.springframework.data.redis.cache.RedisCacheConfiguration;
import org.springframework.data.redis.cache.RedisCacheManager;
import org.springframework.data.redis.connection.RedisConnectionFactory;
import org.springframework.data.redis.core.RedisTemplate;
import org.springframework.data.redis.serializer.Jackson2JsonRedisSerializer;
import org.springframework.data.redis.serializer.RedisSerializationContext;
import org.springframework.data.redis.serializer.RedisSerializer;
import org.springframework.data.redis.serializer.StringRedisSerializer;
import java.time.Duration;
@EnableCaching  // 配置开启缓存
@Configuration // 定义配置类
public class RedisConfig extends CachingConfigurerSupport {
    @Bean
    public RedisTemplate<String, Object> redisTemplate(RedisConnectionFactory factory) {
        RedisTemplate<String, Object> template =
                new RedisTemplate<>();
        System.out.println("template=>" + template);
        RedisSerializer<String> redisSerializer =
                new StringRedisSerializer();
        Jackson2JsonRedisSerializer jackson2JsonRedisSerializer = new Jackson2JsonRedisSerializer(Object.class);
        ObjectMapper om = new ObjectMapper();
        om.setVisibility(PropertyAccessor.ALL, JsonAutoDetect.Visibility.ANY);
        om.activateDefaultTyping(
                LaissezFaireSubTypeValidator.instance, ObjectMapper.DefaultTyping.NON_FINAL, JsonTypeInfo.As.WRAPPER_ARRAY);
        jackson2JsonRedisSerializer.setObjectMapper(om);
        template.setConnectionFactory(factory);
        // key 序列化方式
        template.setKeySerializer(redisSerializer);
        // value 序列化
        template.setValueSerializer(jackson2JsonRedisSerializer);
        // value hashmap 序列化
        template.setHashValueSerializer(jackson2JsonRedisSerializer);
        return template;
    }
    @Bean
    public CacheManager cacheManager(RedisConnectionFactory factory) {
        RedisSerializer<String> redisSerializer =
                new StringRedisSerializer();
        Jackson2JsonRedisSerializer jackson2JsonRedisSerializer = new Jackson2JsonRedisSerializer(Object.class);
        //解决查询缓存转换异常的问题
        ObjectMapper om = new ObjectMapper();
        om.setVisibility(PropertyAccessor.ALL, JsonAutoDetect.Visibility.ANY);
        om.activateDefaultTyping(
                LaissezFaireSubTypeValidator.instance,
                ObjectMapper.DefaultTyping.NON_FINAL,
                JsonTypeInfo.As.WRAPPER_ARRAY);
        jackson2JsonRedisSerializer.setObjectMapper(om);
        // 配置序列化(解决乱码的问题),过期时间 600 秒
        RedisCacheConfiguration config = RedisCacheConfiguration.defaultCacheConfig()
                .entryTtl(Duration.ofSeconds(600))
                .serializeKeysWith(RedisSerializationContext.SerializationPair.fromSerializer(redisSerializer))
                .serializeValuesWith(RedisSerializationContext.SerializationPair.fromSerializer(jackson2JsonRedisSerializer))
                .disableCachingNullValues();
        RedisCacheManager cacheManager = RedisCacheManager.builder(factory)
                .cacheDefaults(config)
                .build();
        return cacheManager;
    }
}
创建 controller 访问设置/获取到 Redis 数据库当中的数据。
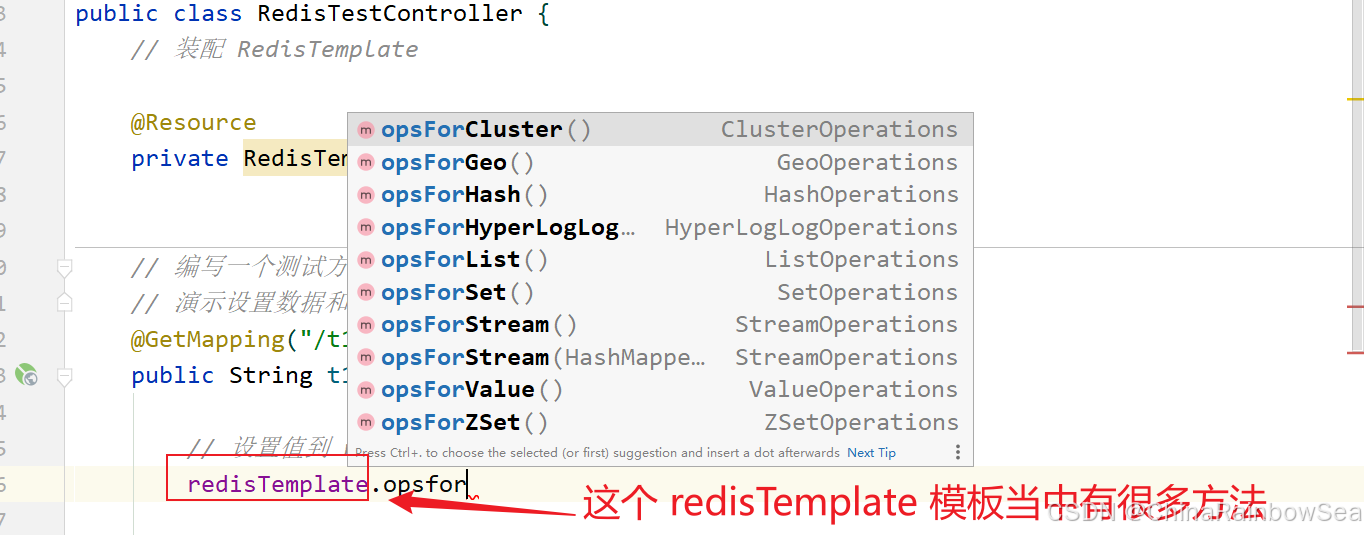
重点: 我们这里的
RedisTemplate模板对象,就是已经配置好了 Jedis 的连接上 Redis的一个模板,该模板提供了很多,我们操作 Redis 数据库的方法。就和我们前面学习 MySQL ,操作连接 MySQL 当中的 JdbcTemplate 模板是类似的。
如下所示:
package com.rainbowsea.redis.controller;
import org.springframework.data.redis.core.RedisTemplate;
import org.springframework.web.bind.annotation.GetMapping;
import org.springframework.web.bind.annotation.RequestMapping;
import org.springframework.web.bind.annotation.RestController;
import javax.annotation.Resource;
@RestController
@RequestMapping("/redisTest")
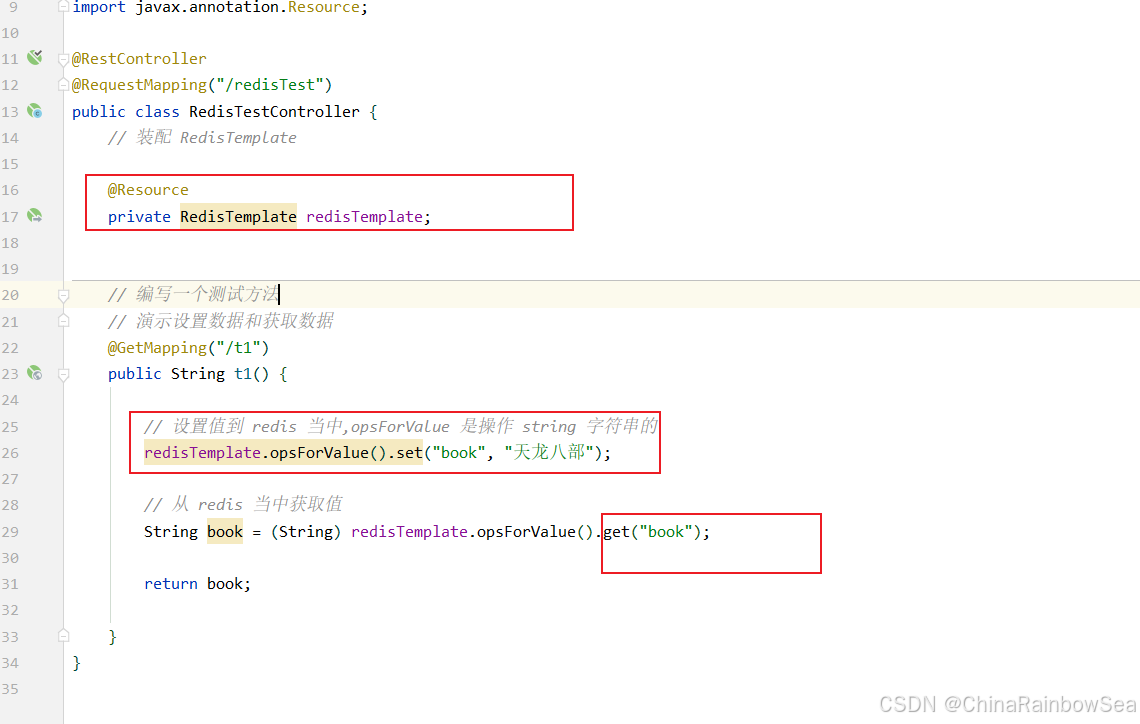
public class RedisTestController {
// 装配 RedisTemplate
@Resource
private RedisTemplate redisTemplate;
// 编写一个测试方法
// 演示设置数据和获取数据
@GetMapping("/t1")
public String t1() {
// 设置值到 redis 当中,opsForValue 是操作 string 字符串的
redisTemplate.opsForValue().set("book", "天龙八部");
// 从 redis 当中获取值
String book = (String) redisTemplate.opsForValue().get("book");
return book;
}
}创建场景启动器。
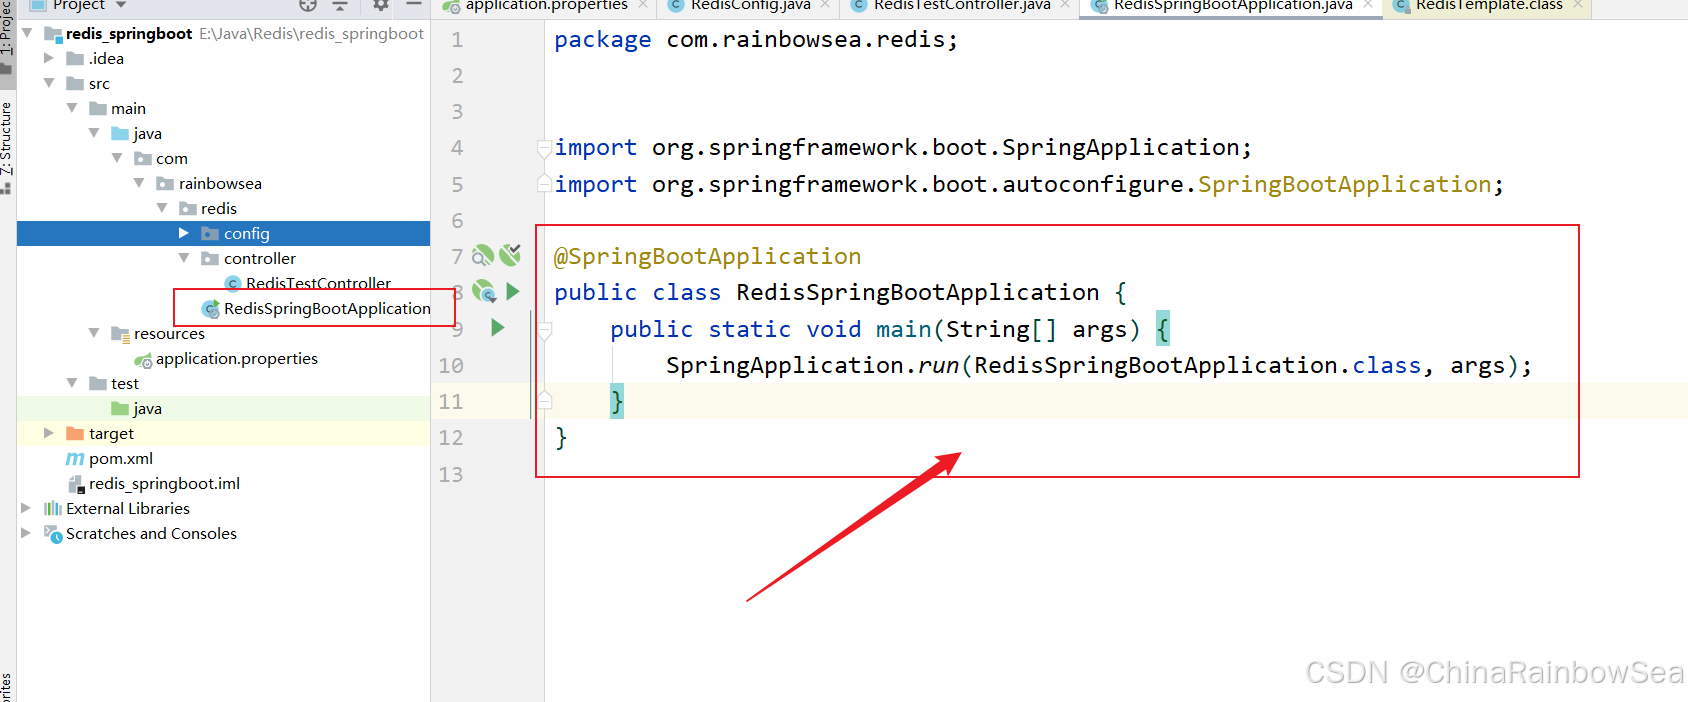
package com.rainbowsea.redis;
import org.springframework.boot.SpringApplication;
import org.springframework.boot.autoconfigure.SpringBootApplication;
@SpringBootApplication
public class RedisSpringBootApplication {
    public static void main(String[] args) {
        SpringApplication.run(RedisSpringBootApplication.class, args);
    }
}
启动程序run, 打开浏览器地址栏上输入:http://localhost:9090/redisTest/t1 。
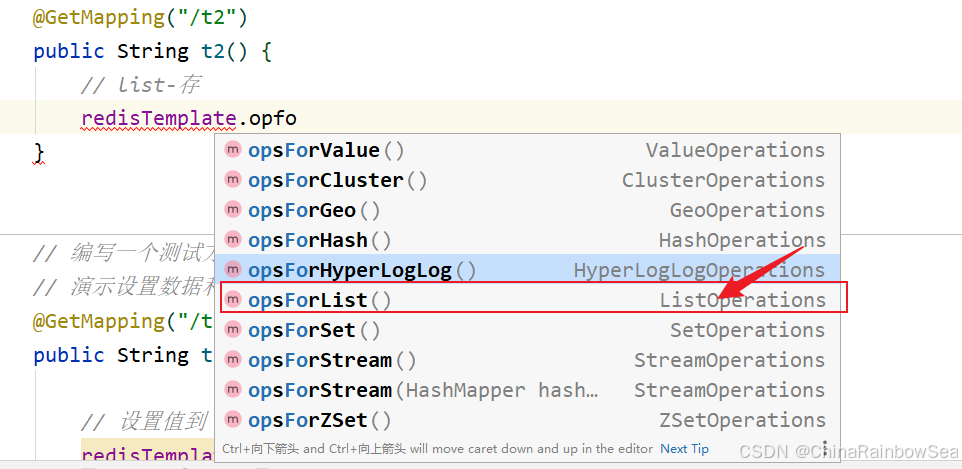
**演示:如何操作 List **

package com.rainbowsea.redis.controller;
import org.springframework.data.redis.core.RedisTemplate;
import org.springframework.web.bind.annotation.GetMapping;
import org.springframework.web.bind.annotation.RequestMapping;
import org.springframework.web.bind.annotation.RestController;
import javax.annotation.Resource;
import java.util.List;
@RestController
@RequestMapping("/redisTest")
public class RedisTestController {
// 装配 RedisTemplate
@Resource
private RedisTemplate redisTemplate;
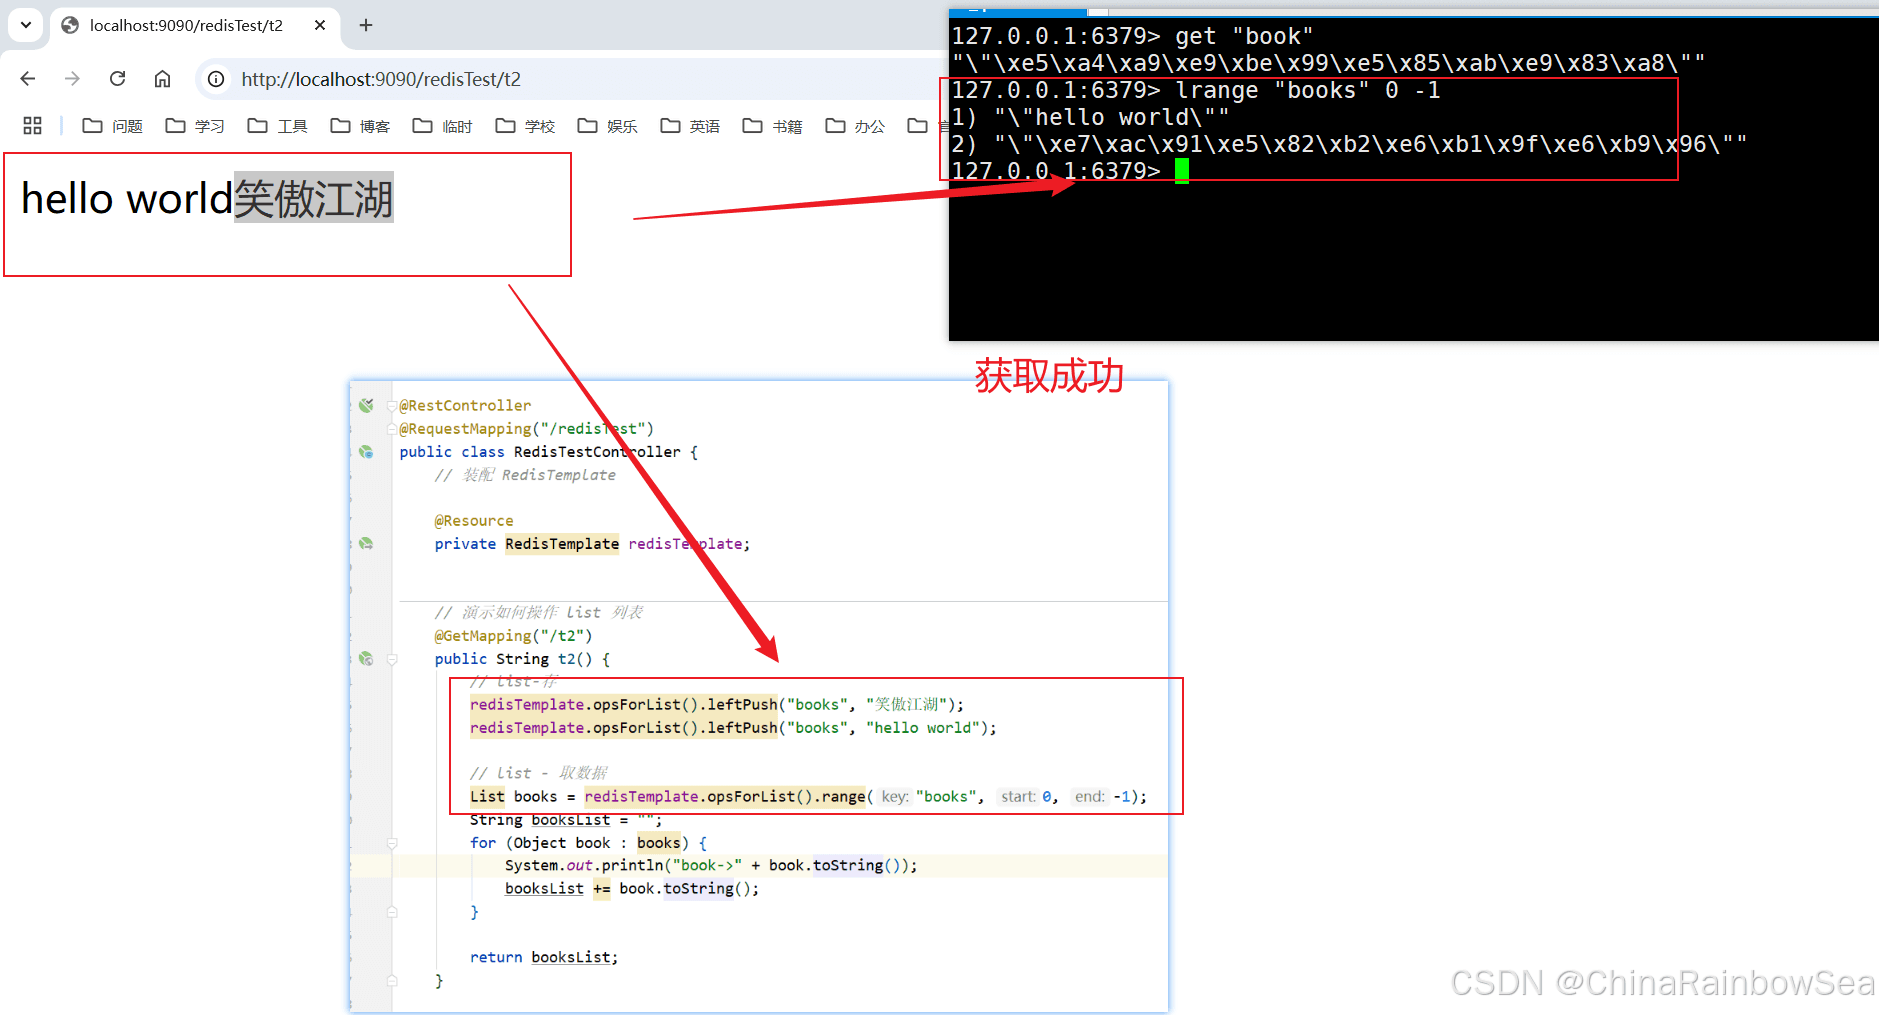
// 演示如何操作 list 列表
@GetMapping("/t2")
public String t2() {
// list-存
redisTemplate.opsForList().leftPush("books", "笑傲江湖");
redisTemplate.opsForList().leftPush("books", "hello world");
// list - 取数据
List books = redisTemplate.opsForList().range("books", 0, -1);
String booksList = "";
for (Object book : books) {
System.out.println("book->" + book.toString());
booksList += book.toString();
}
return booksList;
}
// 编写一个测试方法
// 演示设置数据和获取数据
@GetMapping("/t1")
public String t1() {
// 设置值到 redis 当中,opsForValue 是操作 string 字符串的
redisTemplate.opsForValue().set("book", "天龙八部");
// 从 redis 当中获取值
String book = (String) redisTemplate.opsForValue().get("book");
return book;
}
}
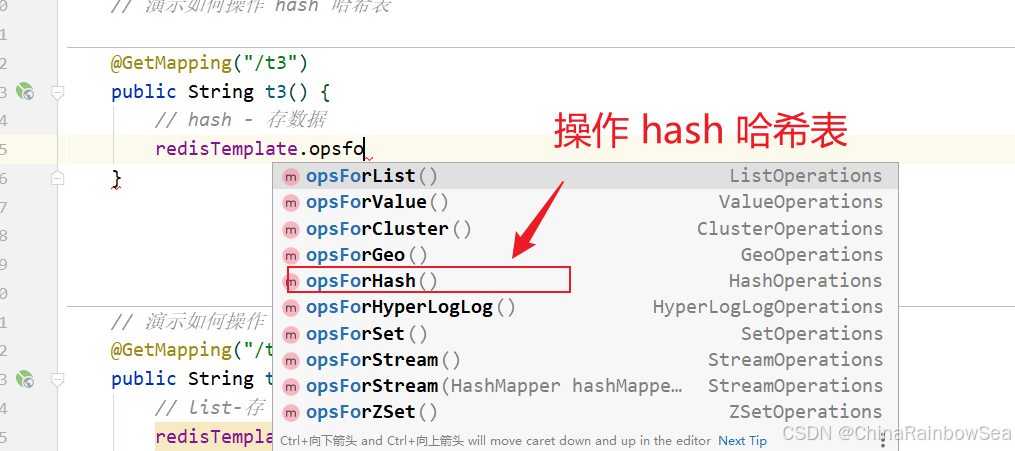
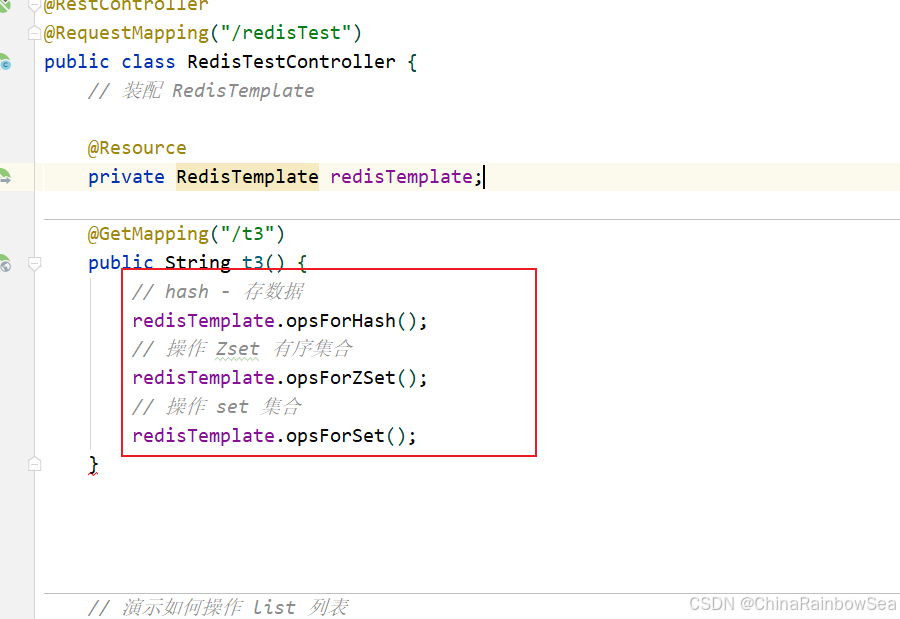
演示:如何操作 hash
@RestController
@RequestMapping("/redisTest")
public class RedisTestController {
    // 装配 RedisTemplate
    @Resource
    private RedisTemplate redisTemplate;
    @GetMapping("/t3")
    public String t3() {
        // hash - 存数据
        redisTemplate.opsForHash();
        // 操作 Zset 有序集合
        redisTemplate.opsForZSet();
        // 操作 set 集合
        redisTemplate.opsForSet();
        return null;
    }
2. 注意事项和细节
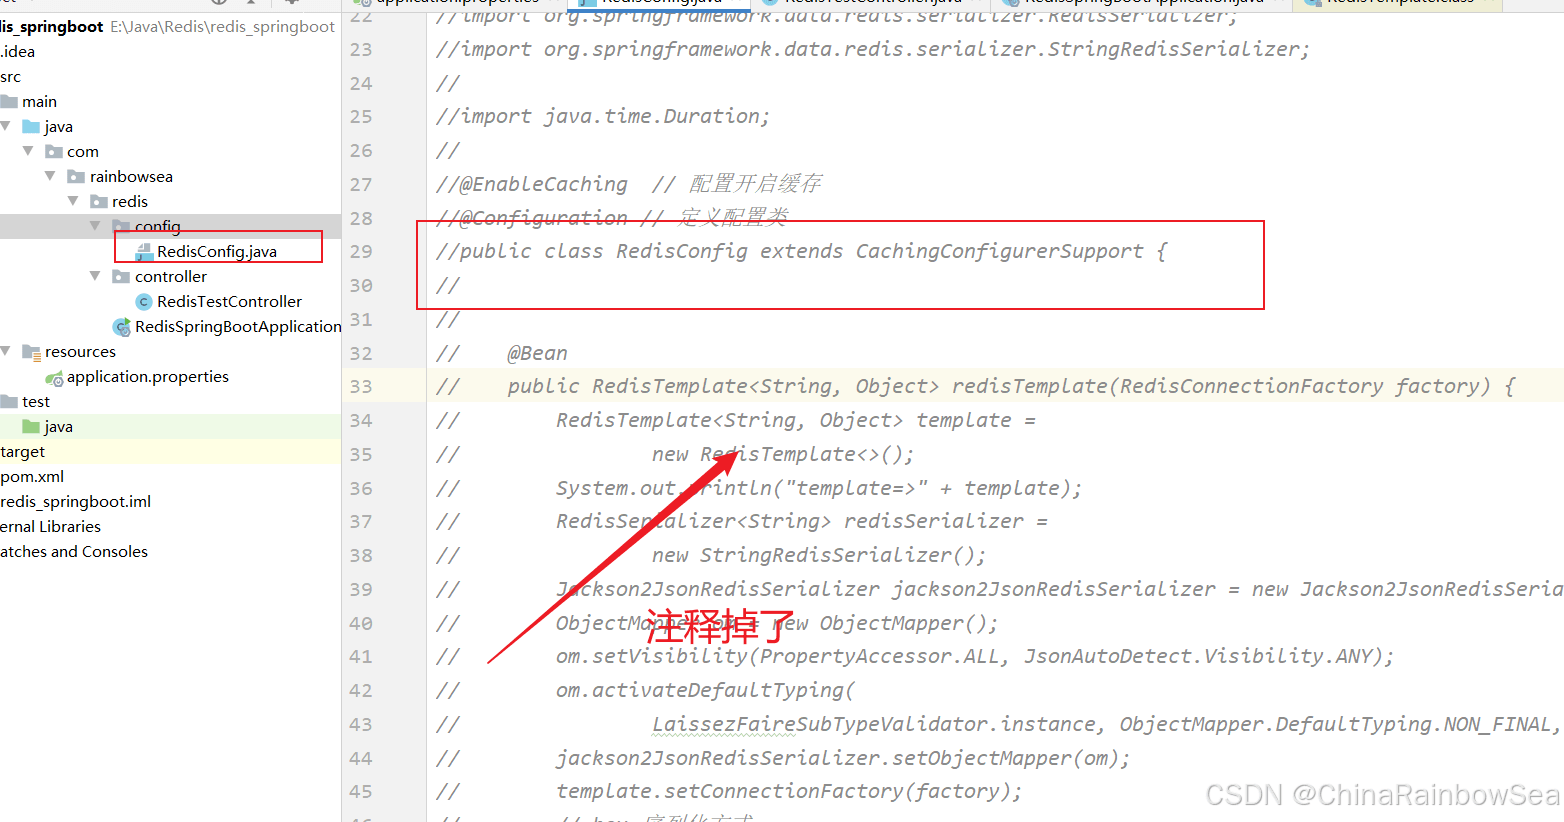
如果没有提供 RedisConfig 配置类 , springboot 会使用默认配置 也可以使用。但是会存在问题。比如 redisTemplate 模糊查找 key 数据为空。
测试:
这里我们先将 我们配置的 RedisConfig 配置类注释掉。
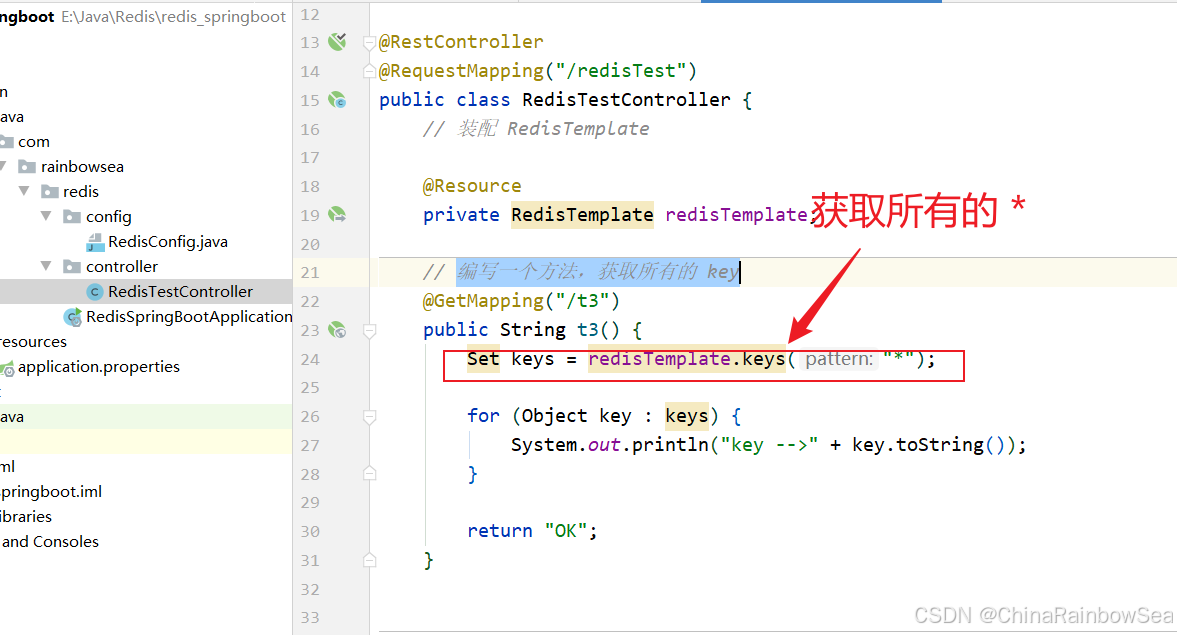
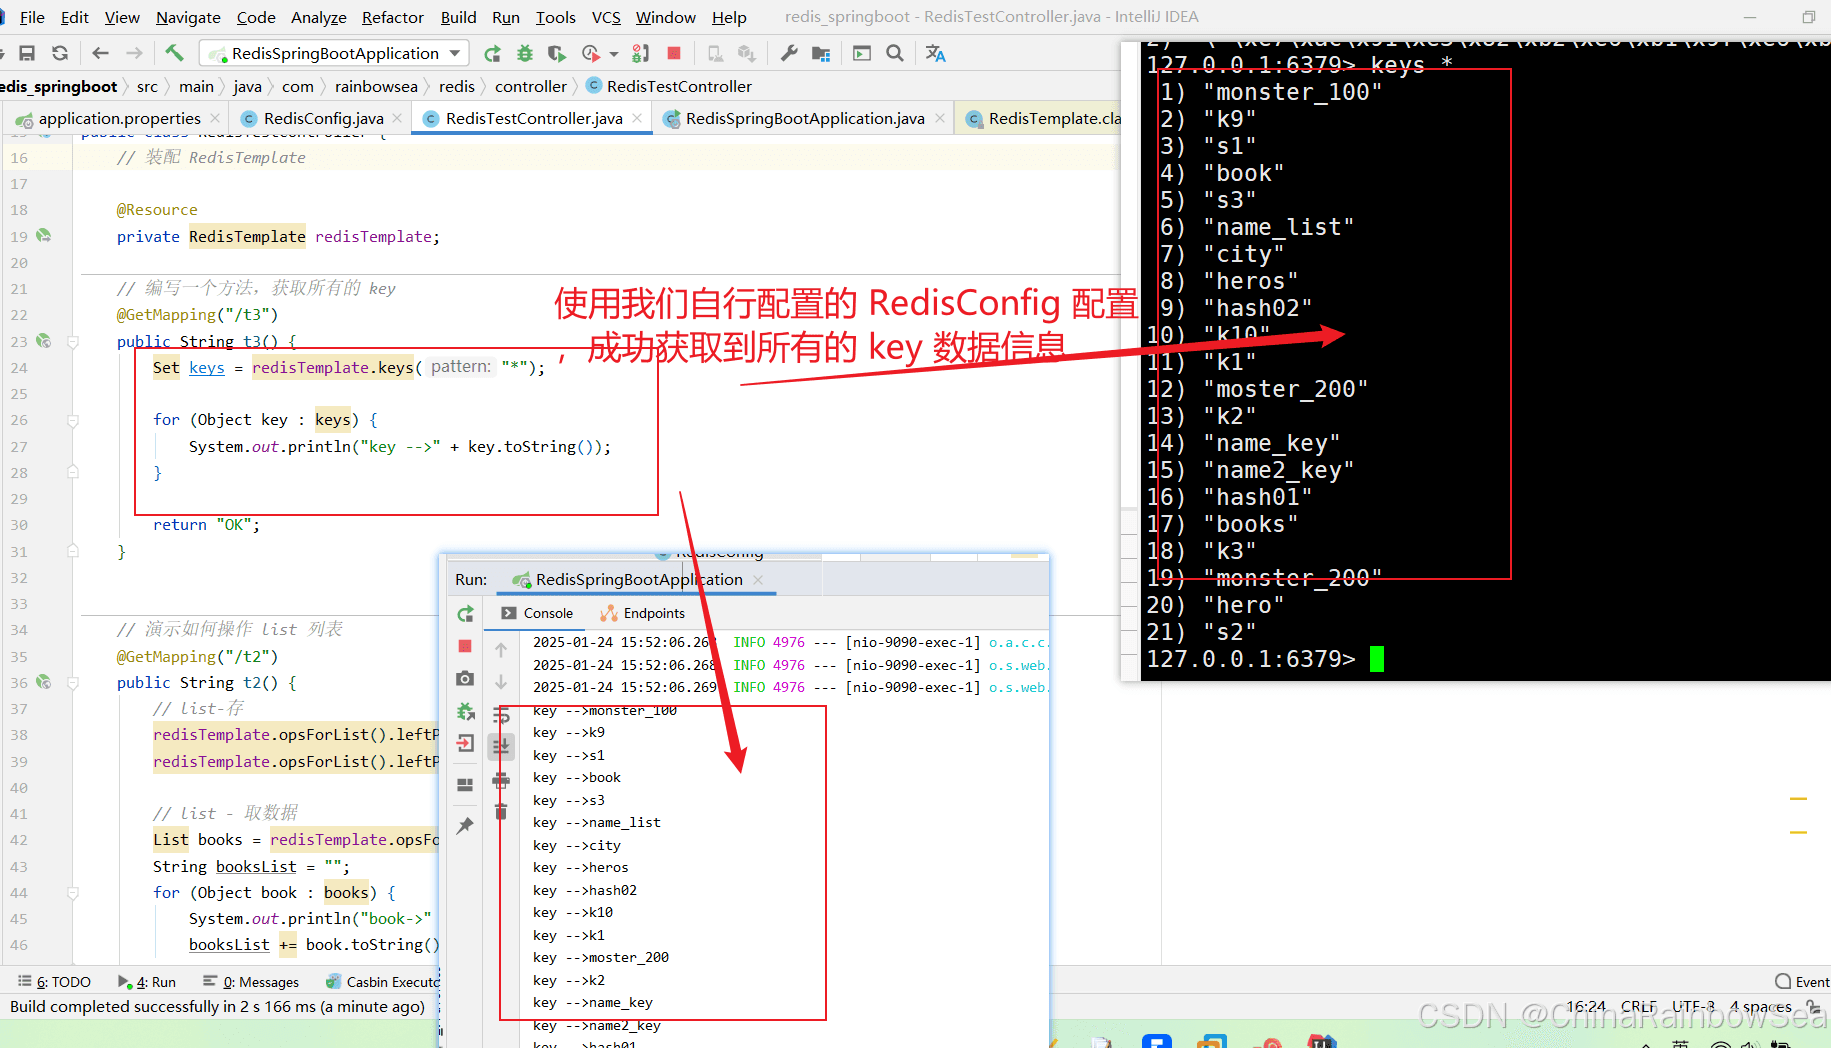
编写一个方法,获取所有的 key:
*,表示获取所有的 key
@RestController
@RequestMapping("/redisTest")
public class RedisTestController {
    // 装配 RedisTemplate
    @Resource
    private RedisTemplate redisTemplate;
    // 编写一个方法,获取所有的 key
    @GetMapping("/t3")
    public String t3() {
        Set keys = redisTemplate.keys("*");
        for (Object key : keys) {
            System.out.println("key -->" + key.toString());
        }
        return "OK";
    }
}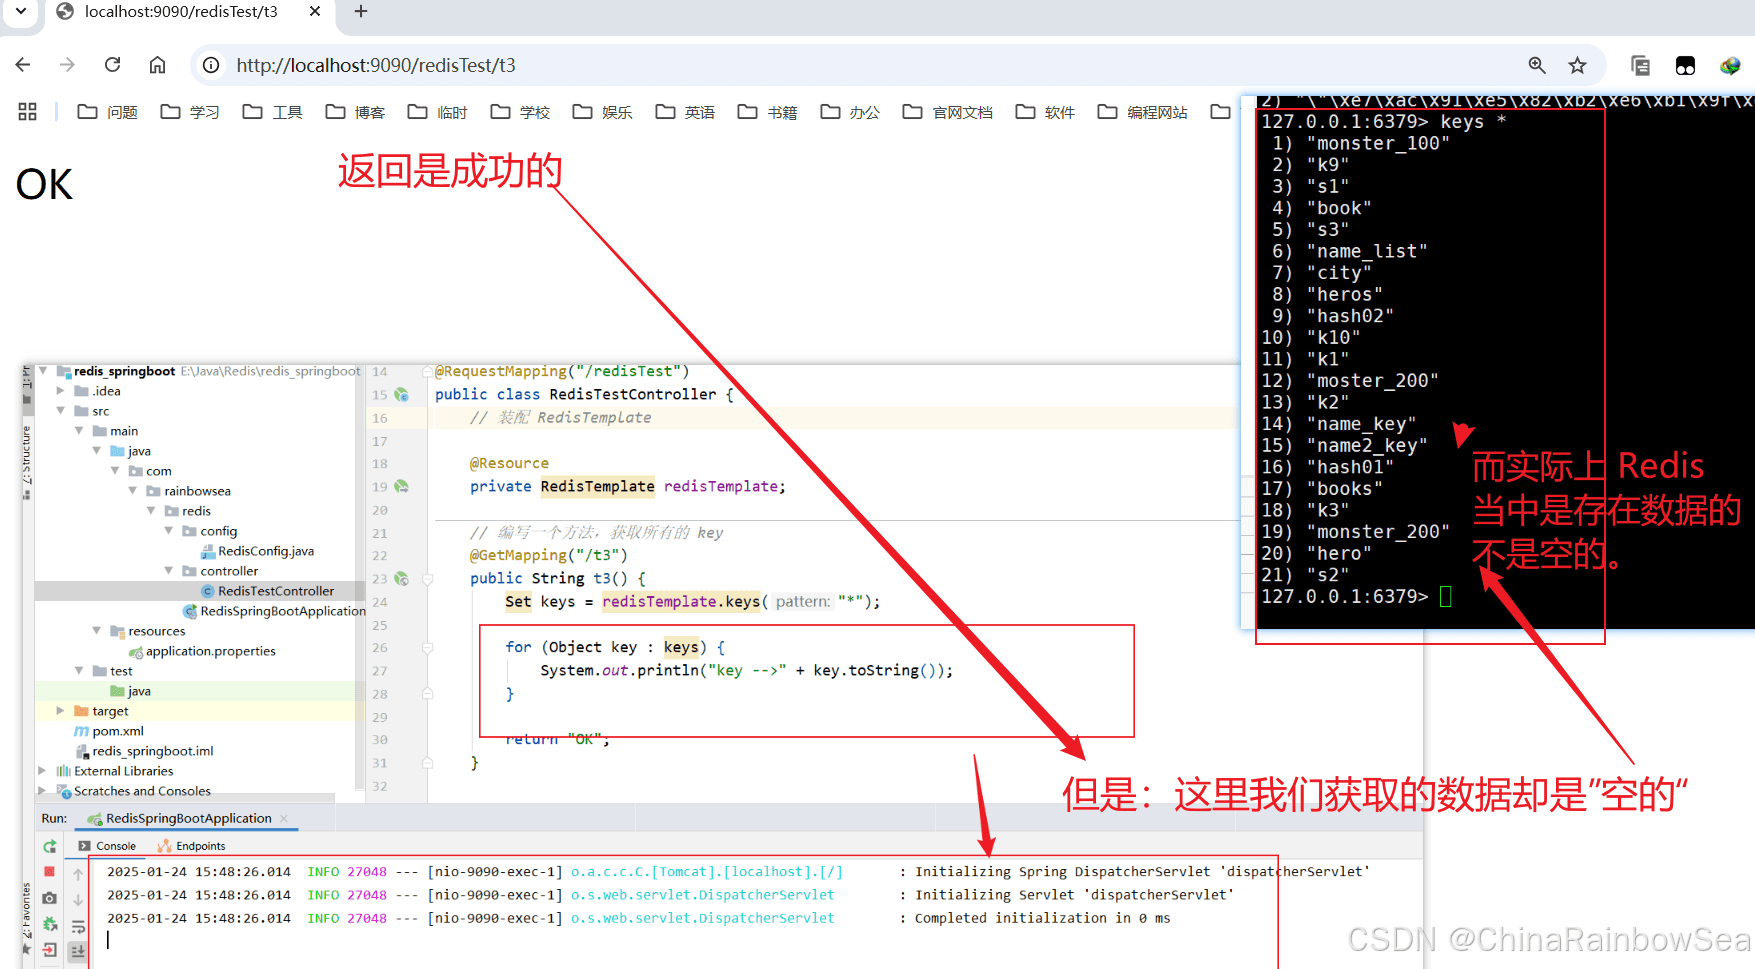
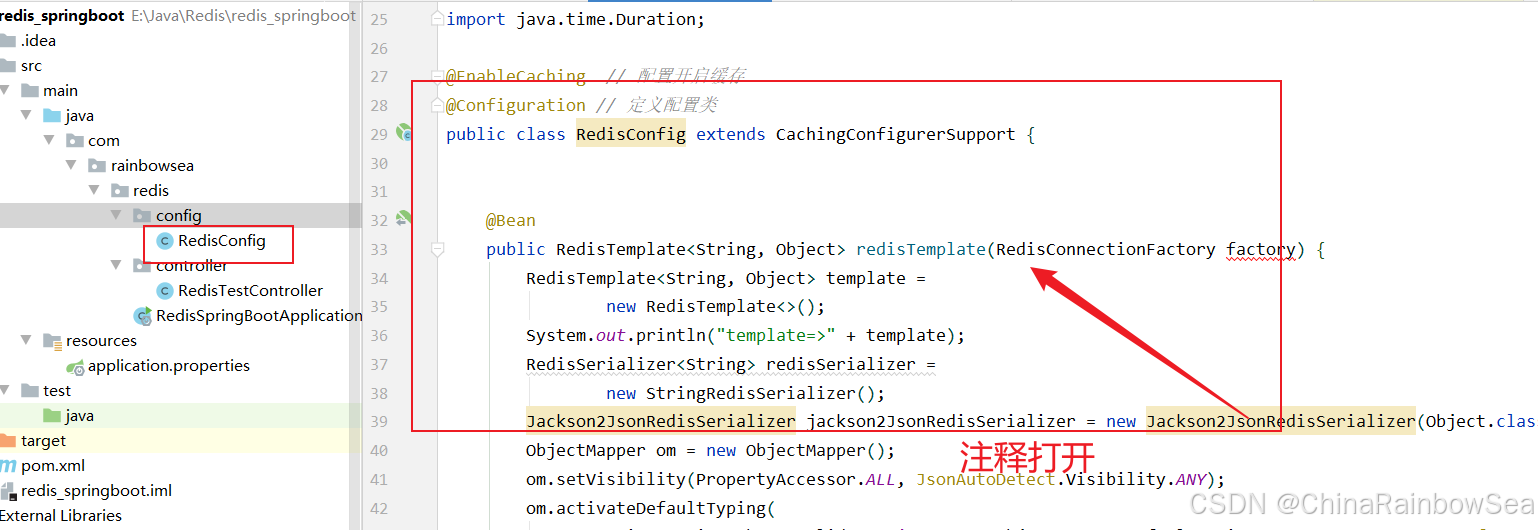
**当我们将我们的配置的 RedisConfig 类打开,不使用 Spring Boot 默认的配置。则不会出现该空的情况。 **
Unrecognized token 'beijing': was expecting ('true', 'false' or 'null')
看报错,是 jason 转换异常,实际上是因为 redisTemplate 在做数据存储的时候会把存储的内容序列化,所以,redisTemplate 读取的时候也会反序列化,而在 redis 客户端 set 的时候并不会做序列化,因此 set 的进去的值在用 redisTemplate 读的时候就会报类 型转换异常了。
演示:
我们在 Redis 命令行客户端(不通过Java程序的方式),创建 一个 k100的字符串。
然后,我们再通过Java程序获取到该(Redis命令行客户端)所创建的 k100 字符串的数据。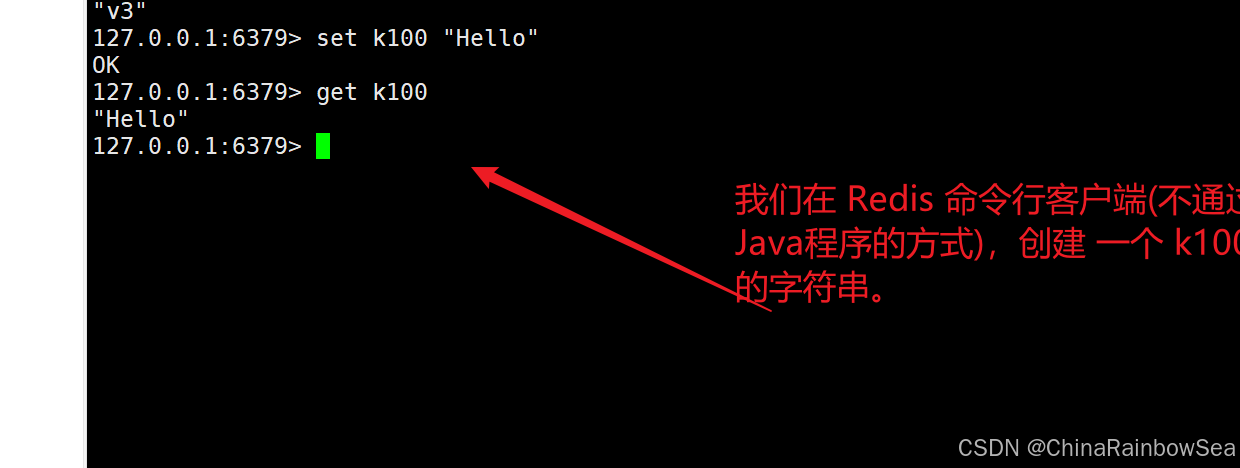
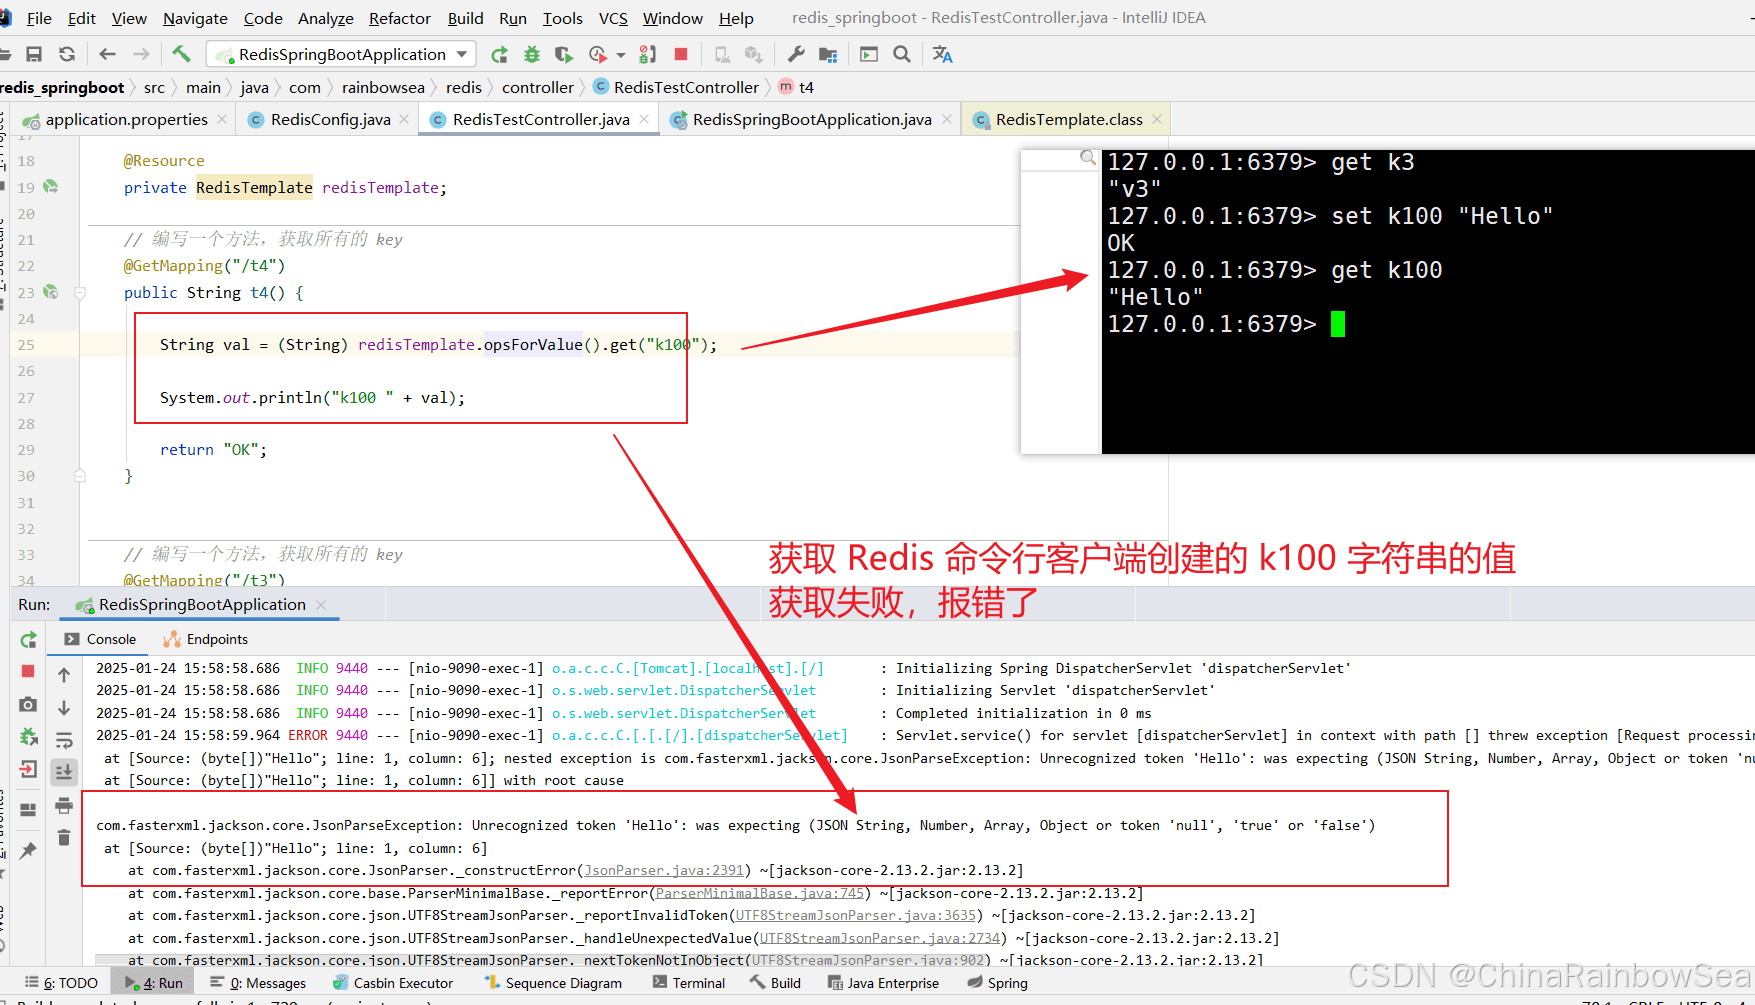
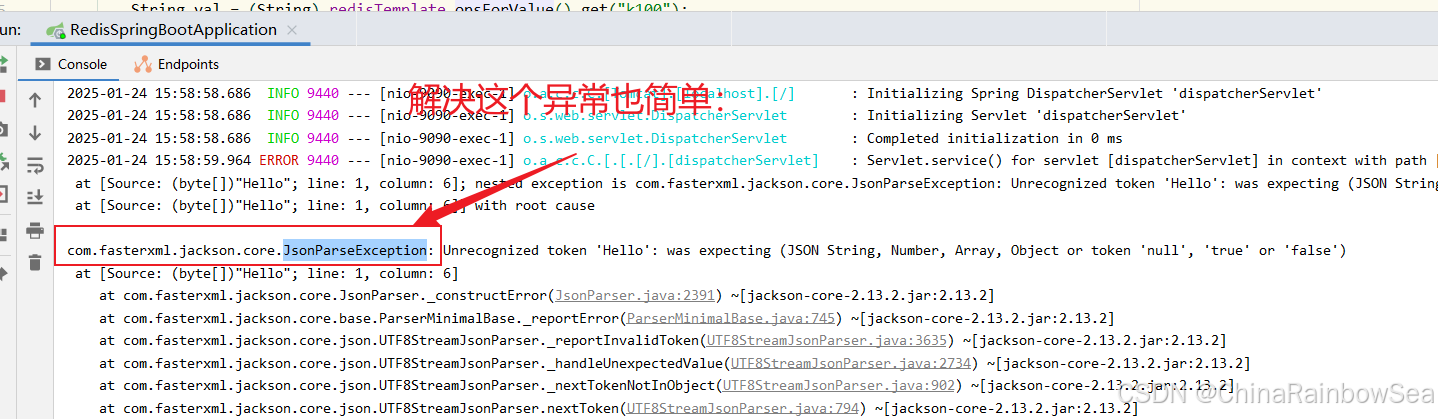
解决这个
com.fasterxml.jackson.core.JsonParseException也简单,既然我们 Resi 命令行客户端(创建的 对象信息/值)不会被序列化,那我们就不用 Redis 命令行客户端创建对象了,直接就是。我们想用Java程序当中反序化的功能:我们就用 Java程序创建对象/值,同时也用Java程序获取对象的数据。存和取都保持一致,都是在Java程序当中即可(因为Java程序创建的对象会自行序列化的)。这里就不演示了,因为我们上述的所有操作都是:Java程序连接 Redis 创建对象,也是Java程序获取数据。都是没问题的。
3. 最后:
“在这个最后的篇章中,我要表达我对每一位读者的感激之情。你们的关注和回复是我创作的动力源泉,我从你们身上吸取了无尽的灵感与勇气。我会将你们的鼓励留在心底,继续在其他的领域奋斗。感谢你们,我们总会在某个时刻再次相遇。”
到此这篇关于 Spring Boot2 整合连接 Redis的操作方法的文章就介绍到这了,更多相关Spring Boot2 连接 Redis内容请搜索脚本之家以前的文章或继续浏览下面的相关文章希望大家以后多多支持脚本之家!
您可能感兴趣的文章:
- SpringBoot实现自定义Redis的连接的流程步骤
- SpringBoot无法连接redis的解决方案
- springBoot连接远程Redis连接失败的问题解决
- 关于SpringBoot集成Lettuce连接Redis的方法和案例
- springboot连接不上redis的三种解决办法
- springboot连接redis并动态切换database的实现方法
- springboot 如何使用jedis连接Redis数据库
- springboot连接Redis的教程详解
- springboot2整合redis使用lettuce连接池的方法(解决lettuce连接池无效问题)
- 基于SpringBoot2.0默认使用Redis连接池的配置操作
- Springboot2.X集成redis集群(Lettuce)连接的方法