
Spring 定时任务@Scheduled 注解四大参数用法解析
作者:Yeats_Liao
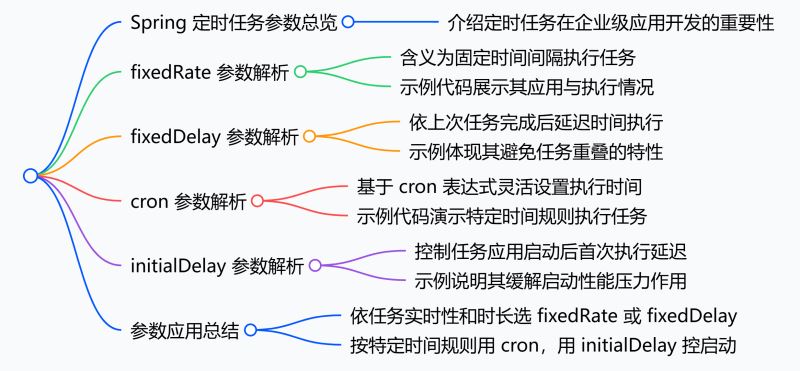
本文主要介绍了在 Spring 框架中使用@Scheduled注解实现定时任务的方法,重点讲解了fixedRate、fixedDelay、cron和initialDelay这四个参数的用法,并通过实例代码进行了详细说明。
1. fixedRate 参数
参数含义
fixedRate指定任务固定时间间隔执行。如设为 3000 毫秒(3 秒),第一次任务启动后,后续任务每隔 3 秒尝试启动,不考虑前次任务是否完成。
示例代码
创建一个简单的 Spring Boot 项目,并在主类上添加@SpringBootApplication注解以启用 Spring Boot 自动配置。
import org.springframework.boot.SpringApplication;
import org.springframework.boot.autoconfigure.SpringBootApplication;
import org.springframework.scheduling.annotation.EnableScheduling;
@SpringBootApplication
@EnableScheduling // 启用定时任务功能
public class ScheduledDemoApplication {
    public static void main(String[] args) {
        SpringApplication.run(ScheduledDemoApplication.class, args);
    }
}创建一个定时任务类,doTask方法被@Scheduled注解修饰,fixedRate设置为 3000 毫秒。在方法内部,我们首先打印出执行次数和当前时间,然后通过Thread.sleep模拟任务执行耗时 5 秒。运行应用程序后,你会发现尽管任务执行时间超过了 3 秒,但每隔 3 秒就会有一次新的任务尝试启动,导致任务会重叠执行。
import org.springframework.scheduling.annotation.Scheduled;
import org.springframework.stereotype.Component;
@Component
public class FixedRateTask {
    private int count = 0;
    @Scheduled(fixedRate = 3000)
    public void doTask() {
        System.out.println("FixedRateTask - 执行次数: " + (++count) + ",当前时间: " + System.currentTimeMillis());
        try {
            // 模拟任务执行耗时 5 秒
            Thread.sleep(5000);
        } catch (InterruptedException e) {
            e.printStackTrace();
        }
    }
}
2. fixedDelay 参数
参数含义
与fixedRate不同,fixedDelay参数关注的是上一次任务执行完成后的延迟时间。也就是说,只有当上一次任务彻底结束后,才会开始计算固定的延迟时间,之后才启动下一次任务。例如,设置fixedDelay = 3000毫秒,那么在上一次任务完成后,会等待 3 秒才开始下一次任务。
示例代码
创建一个FixedDelayTask类,doTask方法的fixedDelay设置为 3000 毫秒,任务模拟执行耗时 2 秒。运行后可以看到,每次任务执行完成后,会等待 3 秒才开始下一次任务,任务不会重叠执行。
import org.springframework.scheduling.annotation.Scheduled;
import org.springframework.stereotype.Component;
@Component
public class FixedDelayTask {
    private int count = 0;
    @Scheduled(fixedDelay = 3000)
    public void doTask() {
        System.out.println("FixedDelayTask - 执行次数: " + (++count) + ",当前时间: " + System.currentTimeMillis());
        try {
            // 模拟任务执行耗时 2 秒
            Thread.sleep(2000);
        } catch (InterruptedException e) {
            e.printStackTrace();
        }
    }
}
3. cron 参数
参数含义
cron参数提供了一种高度灵活的定时任务执行时间设置方式。它基于 cron 表达式,该表达式由 6 个或 7 个字段组成,分别对应秒、分钟、小时、日、月、星期(星期可以用数字 0 - 6 表示,其中 0 或 7 代表星期日)以及可选的年。通过合理组合这些字段的值,可以精确地定义任务在何时执行。
示例代码
创建一个CronTask类,cron表达式"0 0/5 * * * *"表示每隔 5 分钟执行一次任务。例如,任务可能在 10:00:00、10:05:00、10:10:00 等时间点执行。:
import org.springframework.scheduling.annotation.Scheduled;
import org.springframework.stereotype.Component;
@Component
public class CronTask {
    @Scheduled(cron = "0 0/5 * * * *")
    public void doTask() {
        System.out.println("CronTask - 执行时间: " + System.currentTimeMillis());
    }
}
4. initialDelay 参数
参数含义
initialDelay参数用于指定定时任务在应用启动后首次执行的延迟时间。它可以与fixedRate、fixedDelay或cron等参数结合使用,以便在应用启动后等待一段时间再开始执行定时任务。
示例代码
创建一个InitialDelayTask类,、fixedRate设置为 3000 毫秒,initialDelay设置为 5000 毫秒。这意味着应用启动后,会先等待 5 秒,然后才开始按照每 3 秒的固定间隔执行任务。
import org.springframework.scheduling.annotation.Scheduled;
import org.springframework.stereotype.Component;
@Component
public class InitialDelayTask {
    private int count = 0;
    @Scheduled(fixedRate = 3000, initialDelay = 5000)
    public void doTask() {
        System.out.println("InitialDelayTask - 执行次数: " + (++count) + ",当前时间: " + System.currentTimeMillis());
    }
}
5. 总结
- 对于一些对实时性要求较高且执行时间较短的任务,可以考虑使用
fixedRate; - 对于执行时间较长且不希望任务重叠的任务,
fixedDelay可能更为合适; - 对于需要在特定时间点或按照复杂时间规则执行的任务,
cron表达式则是不二之选。 initialDelay参数可以帮助我们更好地控制任务的启动时间,避免在应用启动初期因大量任务同时启动而带来的性能压力。
到此这篇关于Spring 定时任务@Scheduled 注解四大参数解析的文章就介绍到这了,更多相关Spring 定时任务@Scheduled 注解内容请搜索脚本之家以前的文章或继续浏览下面的相关文章希望大家以后多多支持脚本之家!