
若依前后端打成一个JAR包部署的完整步骤
作者:噫吁嚱!!!
这篇文章主要介绍了如何将若依前后端分离项目打包成jar,不使用nginx转发,前端修改了路由模式和环境变量配置,后端增加了依赖、配置了Thymeleaf和访问路径,需要的朋友可以参考下
客户需要将项目前后端作为一个整体打包成jar,不使用nginx方式转发。使用框架是若依前后端分离,后端springboot,前端vue,目的就是把vue打入jar。
一、前端修改
- ruoyi-ui/src/router/index.js文件 ,将 mode: ‘history’ 改成 mode: ‘hash’
export default new Router({
  mode: 'hash',
  scrollBehavior: () => ({ y: 0 }),
  routes: constantRoutes
})
2、修改ruoyi-ui/.env.production文件
说明:VUE_APP_BASE_API = '/prod-api'是原来,我这前后端加了访问路径如VUE_APP_BASE_API = '/ReportApi'
#VUE_APP_BASE_API = '/prod-api'
VUE_APP_BASE_API = '/ReportApi'
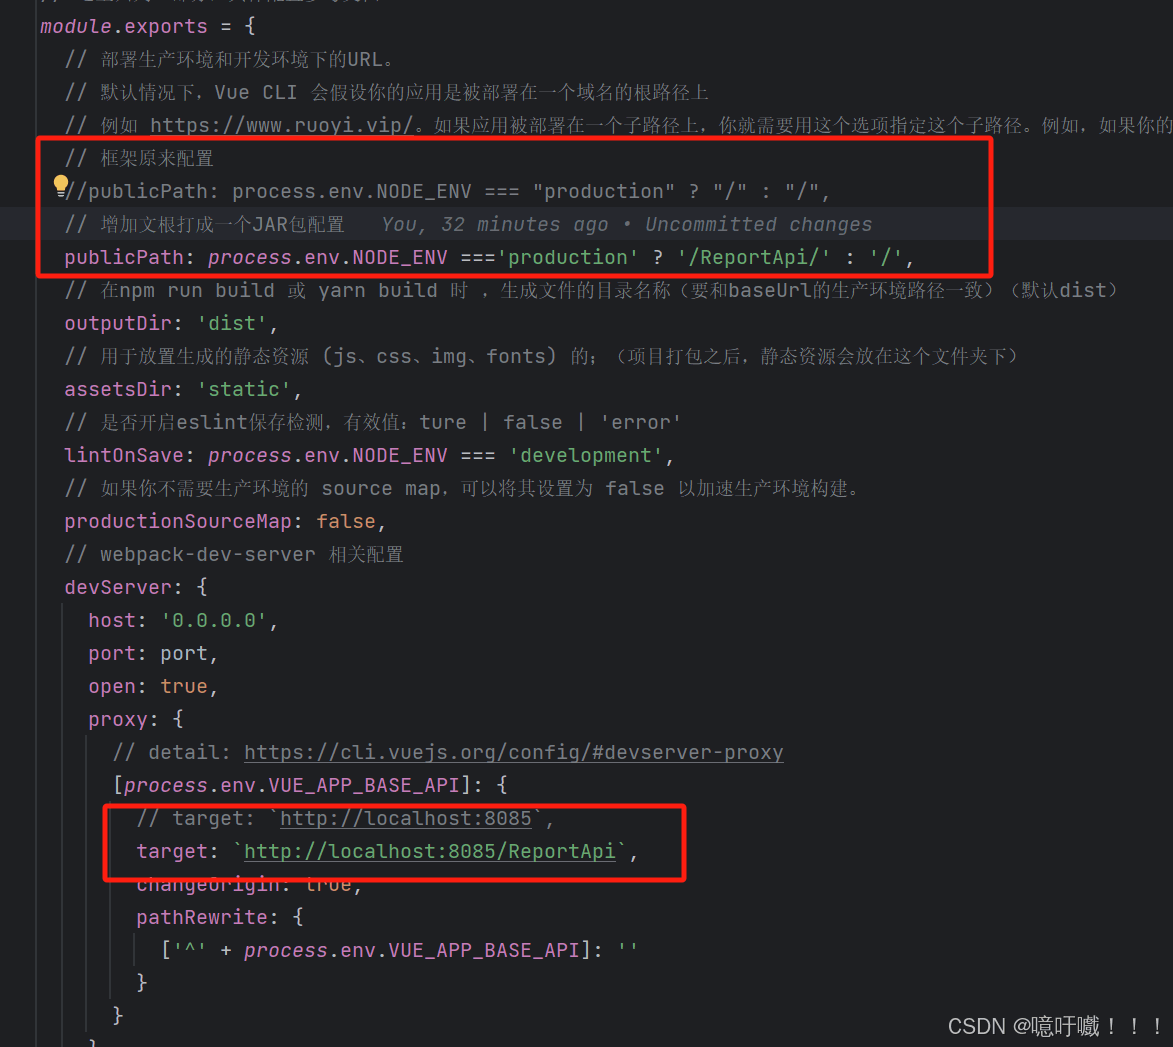
3、修改vue.config.js
二、后端修改
1、ruoyi-admin pom文件加入以下依赖
 <dependency>
            <groupId>org.springframework.boot</groupId>
            <artifactId>spring-boot-starter-thymeleaf</artifactId>
        </dependency>
2、增加配置文件 (dev和local可以都改),增加thymeleaf配置和访问路径配置

  #前后端打成一个JAR包配置
  thymeleaf:
    prefix: classpath:/dist/
    mode: HTML
    encoding: utf-8
    cache: false
3、修改ResourcesConfig文件内容,新增以下部分addViewControllers
    @Override
    public void addViewControllers(ViewControllerRegistry registry) {
        registry.addViewController("/index").setViewName("index.html");
        registry.addViewController("/").setViewName("index.html");
        registry.setOrder(Ordered.HIGHEST_PRECEDENCE);
    }
4、修改ResourcesConfig文件内容,替换addResourceHandlers内容如下:
@Override
public void addResourceHandlers(ResourceHandlerRegistry registry) {
    /** 本地文件上传路径 */
    registry.addResourceHandler(Constants.RESOURCE_PREFIX + "/**").addResourceLocations("file:" + RuoYiConfig.getProfile() + "/");
    /** 页面静态化 */
    registry.addResourceHandler("/static/**").addResourceLocations("classpath:/dist/static/");
    /** swagger配置 */
    registry.addResourceHandler("swagger-ui.html").addResourceLocations("classpath:/META-INF/resources/");
    registry.addResourceHandler("doc.html").addResourceLocations("classpath:/META-INF/resources/");
    registry.addResourceHandler("/webjars/**").addResourceLocations("classpath:/META-INF/resources/webjars/");
}
5、根据情况配置访问权限修改ruoyi-framework项目中的SecurityConfig.java类,配置静态资源访问权限
@Override
protected void configure(HttpSecurity httpSecurity) throws Exception
{
// 注解标记允许匿名访问的url
ExpressionUrlAuthorizationConfigurer<HttpSecurity>.ExpressionInterceptUrlRegistry registry = httpSecurity.authorizeRequests();
permitAllUrl.getUrls().forEach(url -> registry.antMatchers(url).permitAll());
httpSecurity
// CSRF禁用,因为不使用session
.csrf().disable()
// 禁用HTTP响应标头
.headers().cacheControl().disable().and()
// 认证失败处理类
.exceptionHandling().authenticationEntryPoint(unauthorizedHandler).and()
// 基于token,所以不需要session
.sessionManagement().sessionCreationPolicy(SessionCreationPolicy.STATELESS).and()
// 过滤请求
.authorizeRequests()
// 对于登录login 注册register 验证码captchaImage 允许匿名访问
.antMatchers("/login", "/register", "/captchaImage").permitAll()
// 静态资源,可匿名访问
.antMatchers(HttpMethod.GET, "/**/**","/**","/index","/", "/*.html", "/**/*.html", "/**/*.css", "/**/*.js", "/profile/**").permitAll()
.antMatchers("/swagger-ui.html", "/swagger-resources/**", "/webjars/**", "/*/api-docs", "/druid/**").permitAll()
.antMatchers("/test/**","/aicccms/**","/ICD/**").permitAll()
// 除上面外的所有请求全部需要鉴权认证
.anyRequest().authenticated()
.and()
.headers().frameOptions().disable();
// 添加Logout filter
httpSecurity.logout().logoutUrl("/logout").logoutSuccessHandler(logoutSuccessHandler);
// 添加JWT filter
httpSecurity.addFilterBefore(authenticationTokenFilter, UsernamePasswordAuthenticationFilter.class);
// 添加CORS filter
httpSecurity.addFilterBefore(corsFilter, JwtAuthenticationTokenFilter.class);
httpSecurity.addFilterBefore(corsFilter, LogoutFilter.class);
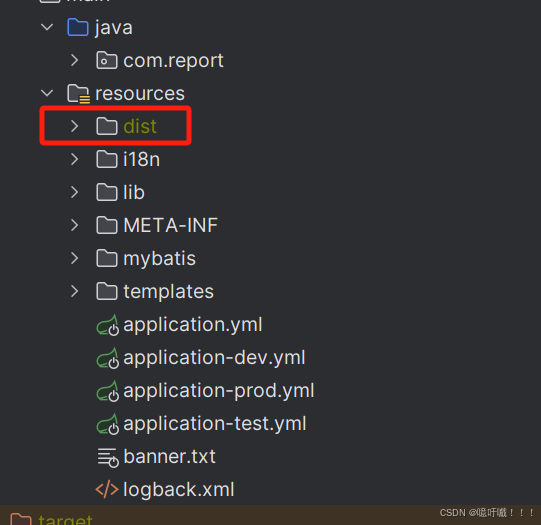
}6、将前端dist移动到resources目录下
总结
到此这篇关于若依前后端打成一个JAR包部署的文章就介绍到这了,更多相关若依前后端打JAR包部署内容请搜索脚本之家以前的文章或继续浏览下面的相关文章希望大家以后多多支持脚本之家!