
SpringBoot使用外置的Servlet容器的方法步骤
作者:isolusion
SpringBoot 是一个非常流行的 Java 开发框架,它提供了一个简单而强大的方式来创建基于 Servlet 容器的 Web 应用程序,本文将介绍 SpringBoot 中如何使用 Servlet 容器,需要的朋友可以参考下
嵌入式Servlet容器:应用打成可执行的jar
优点:简单、便携
缺点:默认不支持JSP、优化定制比较复杂
外置的Servlet容器:外面安装Tomcat---应用war包的方式打包
一.嵌入式tomcat启动项目步骤:
1.创建一个普通maven项目;(利用idea创建好目录结构)
可以创建一个普通的maven项目

2.将项目修改为springboot的项目结构
在pom文件中添加启动类依赖
<dependencies>
    <dependency>
        <groupId>org.springframework.boot</groupId>
        <artifactId>spring-boot-starter</artifactId>
    </dependency>
</dependencies>
编写启动类
@SpringBootApplication
public class SpringbootTomcatApplication {
    public static void main(String[] args) {
        org.springframework.boot.SpringApplication.run(SpringbootTomcatApplication.class, args);
    }
}
创建配置文件application.yml
配置端口号
server:
  port: 8085
3.创建templates目录,编写前端页面
在pom文件中导入templates视图引擎依赖
<dependency>
    <groupId>org.springframework.boot</groupId>
    <artifactId>spring-boot-starter-thymeleaf</artifactId>
</dependency>
编写前端页面
<!DOCTYPE html>
<html lang="en"  xmlns:th="http://www.thymeleaf.org">
<head>
    <meta charset="UTF-8">
    <title>Title</title>
</head>
<body>
  <h1>success</h1>
</body>
</html>
4.创建controller层,编写controller代码
@Controller
@RequestMapping("/user")
public class SuccessController {

    @RequestMapping("/success")
    public String success(){
        System.out.println("1111111111111111111");
        return "success";
    }
}
在pom文件中导入web依赖,否则@RequestMapping注解无法识别
<dependency>
    <groupId>org.springframework.boot</groupId>
    <artifactId>spring-boot-starter-web</artifactId>
</dependency>
此时就可以成功启动了
注意,此时是内置的tomcat启动的
接下来演示如何修改使用外置tomcat启动项目:
二.外置tomcat启动项目:
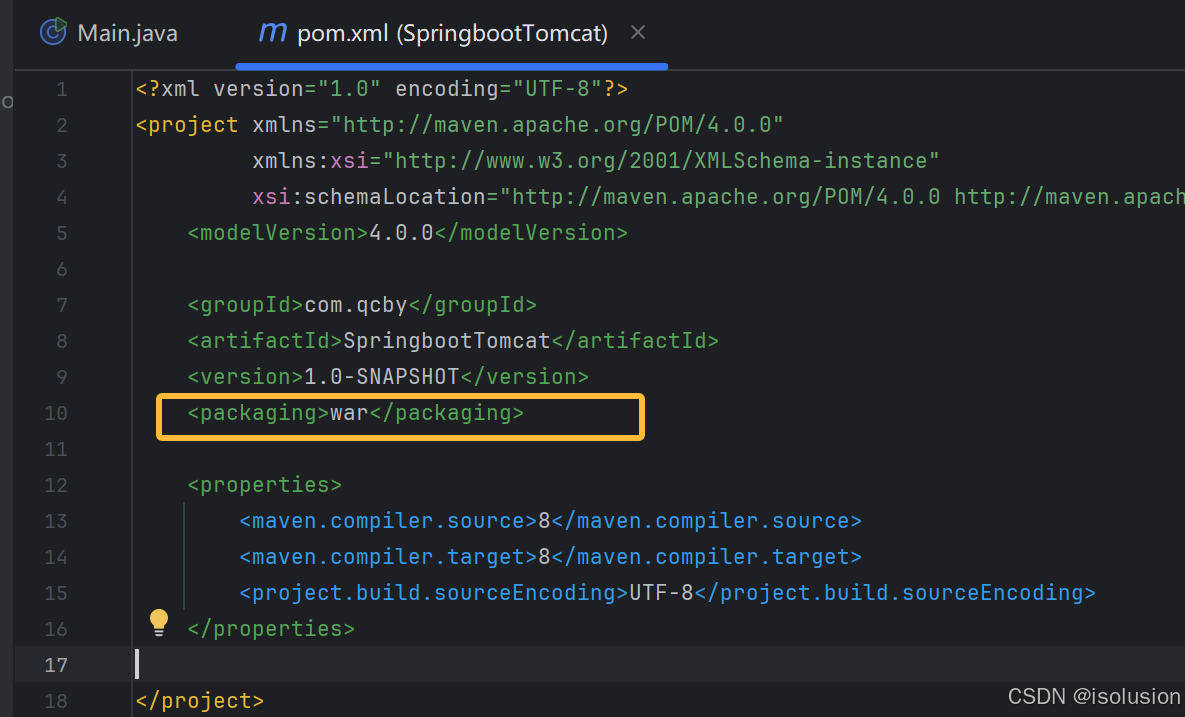
1.必须创建一个war项目;(利用idea创建好目录结构)
然后在pom文件中指定打包方式为war包
2.导入外部Tomcat依赖并指定为provided;
<dependency>
    <groupId>org.springframework.boot</groupId>
    <artifactId>spring-boot-starter-tomcat</artifactId>
    <scope>provided</scope>
</dependency>
3.修改项目结构
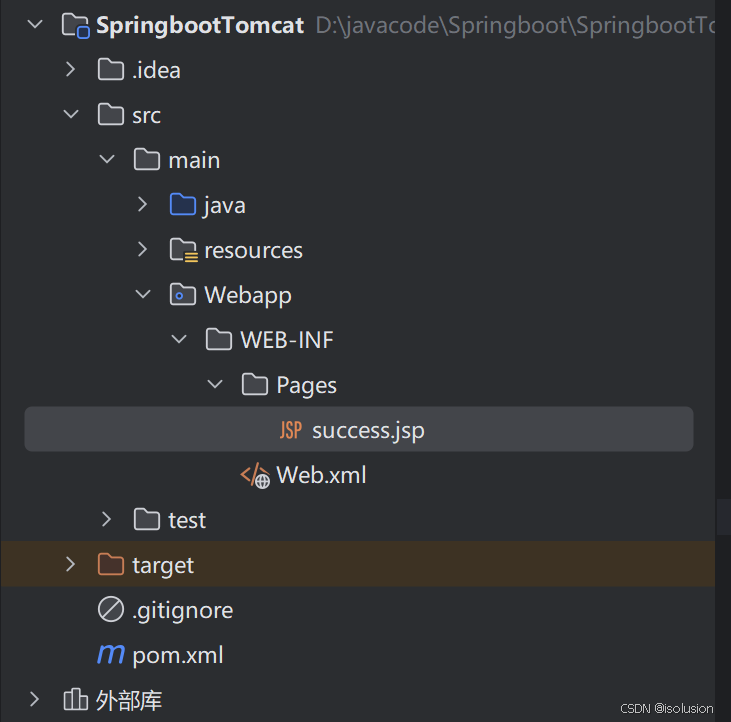
创建Webapp/WEB-INF/Pages/success.jsp前端页面
创建Webapp/WEB-INF/Web.xml配置文件
success.jsp
<%@ page contentType="text/html;charset=UTF-8" language="java" %>
<html>
<head>
    <title>success</title>
</head>
<body>
<h1>外置tomcat的使用</h1>
</body>
</html>
Web.xml
<?xml version="1.0" encoding="UTF-8"?>
<web-app xmlns="http://xmlns.jcp.org/xml/ns/javaee"
         xmlns:xsi="http://www.w3.org/2001/XMLSchema-instance"
         xsi:schemaLocation="http://xmlns.jcp.org/xml/ns/javaee http://xmlns.jcp.org/xml/ns/javaee/web-app_3_1.xsd"
         version="3.1">

</web-app>
修改项目结构
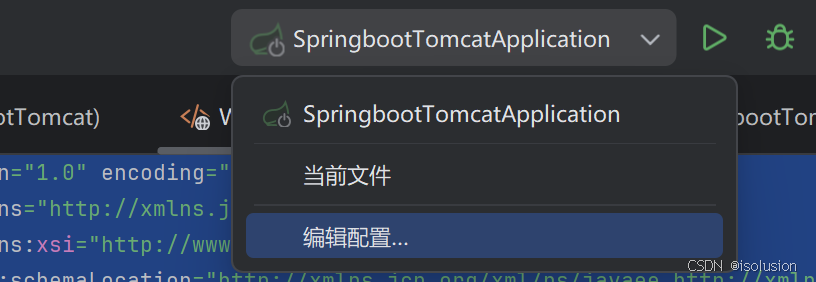
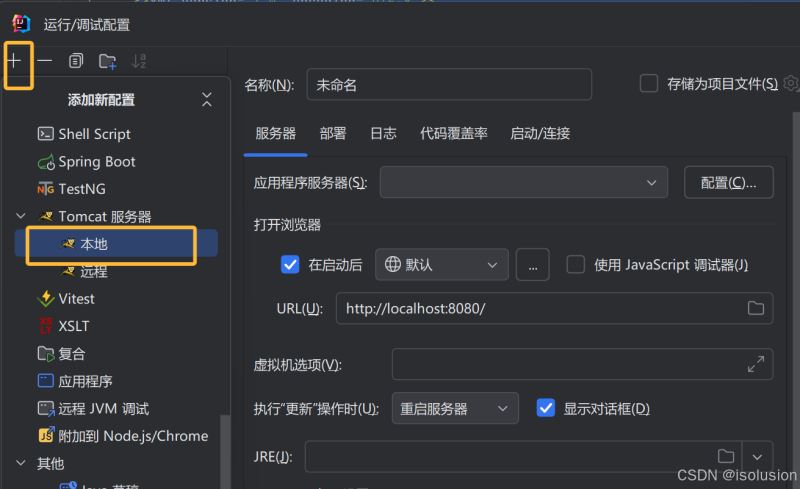
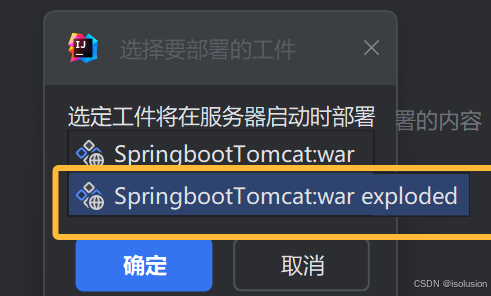
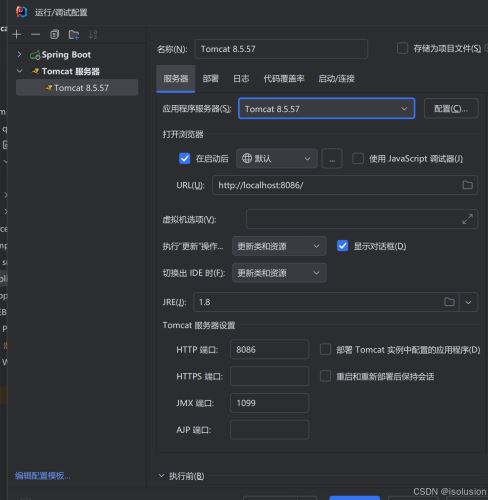
4.配置tomcat

5.必须编写一个SpringBootServletInitializer的子类,并调用configure方法
public class ServletInitializer extends SpringBootServletInitializer {
    @Override
    protected SpringApplicationBuilder configure(SpringApplicationBuilder application) {
//传入SpringBoot应用的主程序
        return application.sources(SpringBootApplication.class);
    }
}
编写controller层代码
在yml配置文件编写前缀后缀
spring:
  mvc:
    view:
      prefix: /WEB-INF/Pages/
      suffix: .jsp
这样就不会访问到你之前写的success.html页面了
而是访问刚刚写的success.jsp页面
此时启动就可以了
原理
jar包:执行SpringBoot主类的main方法,启动ioc容器,创建嵌入式的Servlet容器;
war包:启动服务器,服务器启动SpringBoot应用【SpringBootServletInitializer】,启动ioc容器;
以上就是SpringBoot使用外置的Servlet容器的方法步骤的详细内容,更多关于SpringBoot使用Servlet容器的资料请关注脚本之家其它相关文章!