SpringBoot整合Redis哨兵模式的实现示例
作者:-代号9527
Redis哨兵模式是Redis高可用方案的一种实现方式,通过哨兵来自动实现故障转移,从而保证高可用,本文主要介绍了SpringBoot整合Redis哨兵模式的实现示例,具有一定的参考价值,感兴趣的可以了解一下
1、Redis哨兵复习

Redis哨兵主要有三点作用:
监控:不断检查master和slave是否正常运行通知:当被监控的主从服务器发生问题时,向其他哨兵和客户端发送通知自动故障转移:断开master和slave的连接,选取一个slave做为master,将其他slave连接到新的maser,并导致客户端新的maser地址
关于Redis哨兵模式的搭建和详解,看这篇Redis哨兵模式
2、整合
- 在pom.xml文件中添加以下依赖:
<dependencies>
    <!-- Redis依赖 -->
    <dependency>
        <groupId>org.springframework.boot</groupId>
        <artifactId>spring-boot-starter-data-redis</artifactId>
    </dependency>
</dependencies>
- 在application.properties文件中添加以下Redis配置:
# Redis连接配置
spring.redis.sentinel.master=mymaster
spring.redis.sentinel.nodes=host1:port1,host2:port2,host3:port3

# spring.redis.sentinel.master的值为你的Redis主节点名称
# spring.redis.sentinel.nodes的值为你的Redis哨兵节点列表。
- 如果项目的配置文件用的yaml文件,则Redis配置的格式用下面这个
# 单哨兵
spring:
  redis:
    sentinel:
      master: mymaster
      nodes: 192.168.43.243:26379
    lettuce:
      pool:
        max-idle: 10
        max-active: 20
        min-idle: 0
        max-wait: 10000ms
# 多哨兵,则nodes用数组格式,也就是横线
spring:
  redis:
    sentinel:
      master: your-redis-master  # 指定Redis的主节点名称
      nodes:  # 指定一个或多个哨兵节点的地址和端口号
        - host: your-sentinel1-host
          port: your-sentinel1-port
        - host: your-sentinel2-host
          port: your-sentinel2-port
        - host: your-sentinel3-host
          port: your-sentinel3-port
    password: your-redis-password
    # 在哨兵模式中,Redis哨兵节点的配置通常与主节点保持一致,因为哨兵节点不存储数据,它们只负责监控节点的可用性。
    # 所以你不需要在哨兵节点的配置中指定用户名和密码,只需要在主节点的配置中指定密码即可
关于连接池的参数:
- max-active:连接池中最大活跃连接数(默认值为8)。当连接数达到最大活跃连接数时,新的请求将会等待,直到有可用的连接为止。
- max-idle:连接池中最大空闲连接数(默认值为8)。当空闲连接数超过最大空闲连接数时,多余的空闲连接将被释放。
- min-idle:连接池中最小空闲连接数(默认值为0)。连接池中保持的最小空闲连接数,当请求连接时,如果空闲连接数不足,则会创建新的连接。
- max-wait:连接池中获取连接的最大等待时间(默认-1,表示无限等待)。当连接池中的连接都被占用且达到最大活跃连接数时,新的请求会等待一段时间,如果超过最大等待时间,则会抛出异常。
- test-on-create:在创建新的连接时,是否进行连接的测试验证(默认值为false)。如果设置为true,则在创建连接的时候会执行一次测试命令,确保连接可用。
- test-on-borrow:在从连接池中借用连接时,是否进行连接的测试验证(默认值为false)。如果设置为true,则在从连接池中获取连接的时候会执行一次测试命令,确保连接可用。
- test-on-return:在归还连接到连接池时,是否进行连接的测试验证(默认值为false)。如果设置为true,则在归还连接到连接池的时候会执行一次测试命令,确保连接可用。
- test-while-idle:在连接空闲一段时间后,是否进行连接的测试验证(默认值为true)。如果设置为true,则连接空闲一段时间后会执行一次测试命令,确保连接可用。
最后,如果报错
"NOAUTH HELLO must be called with the client already HELLO"
表明Redis连接需要进行认证,但是在发起 HELLO 命令之前没有进行认证。可以单独加下哨兵的密码:
spring.redis.sentinel.password=code9527
3、简单举例
- 使用RedisTemplate或者使用注解的方式来访问Redis。以下是使用RedisTemplate的示例:
import org.springframework.beans.factory.annotation.Autowired;
import org.springframework.data.redis.core.RedisTemplate;
import org.springframework.stereotype.Service;

@Service
public class UserService {

    @Autowired
    private RedisTemplate redisTemplate;

    public void saveUser(String username, String password) {
        redisTemplate.opsForHash().put("users", username, password);
    }

    public String findUser(String username) {
        return (String) redisTemplate.opsForHash().get("users", username);
    }

}

//RedisTemplate是通过自动装配注入的,可以直接使用来操作Redis
- 创建一个Controller类来处理请求并调用UserService中的方法
import org.springframework.beans.factory.annotation.Autowired;
import org.springframework.web.bind.annotation.GetMapping;
import org.springframework.web.bind.annotation.PathVariable;
import org.springframework.web.bind.annotation.RestController;

@RestController
public class UserController {

    @Autowired
    private UserService userService;

	@PostMapping("/user/addRedis")
	public void addUserToRedis(String username,String password){
		userService.saveUser(username,password);
	}

    @GetMapping("/user/{username}")
    public String getUser(@PathVariable String username) {
        return userService.findUser(username);
    }


}
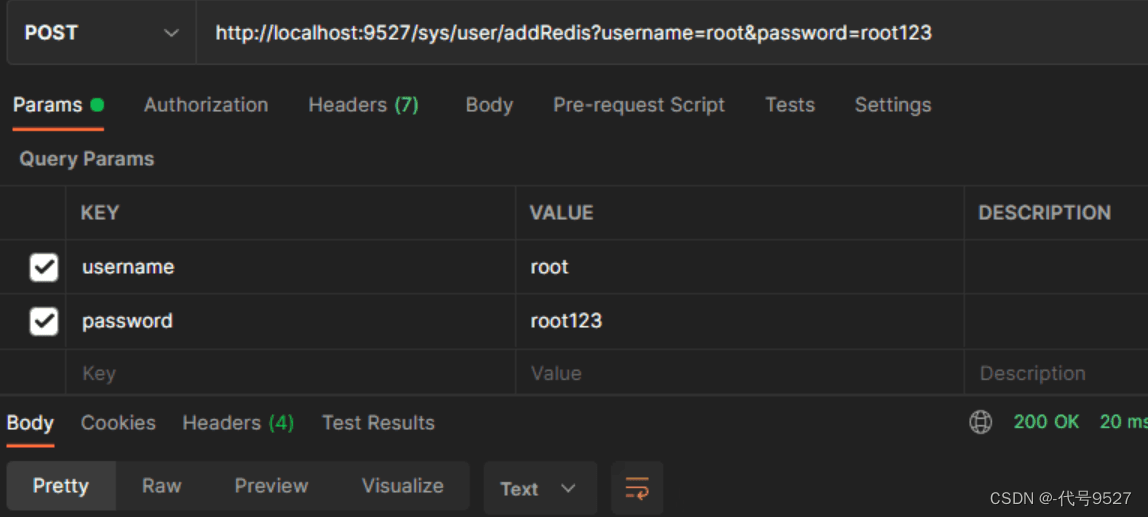
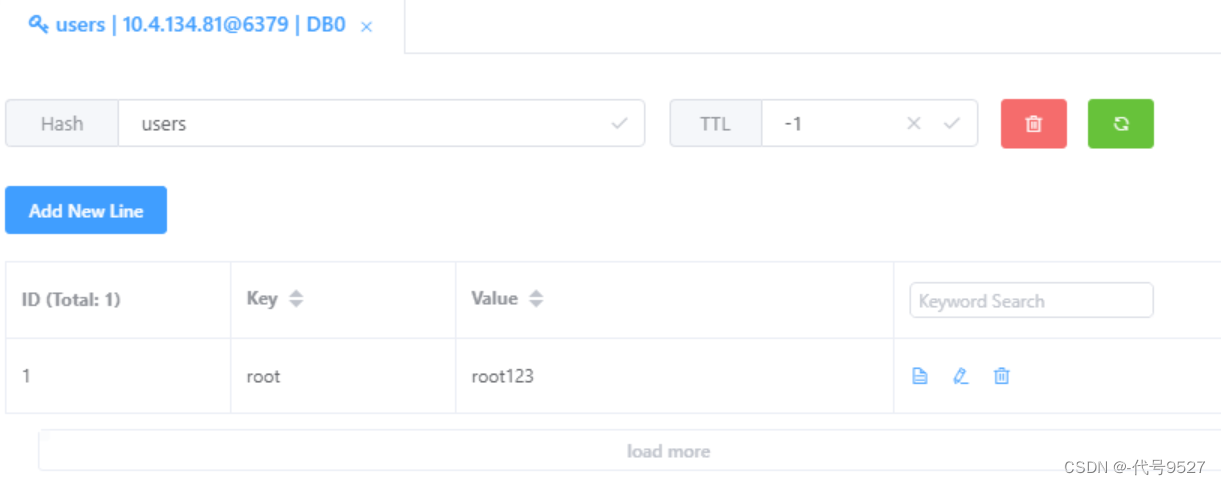
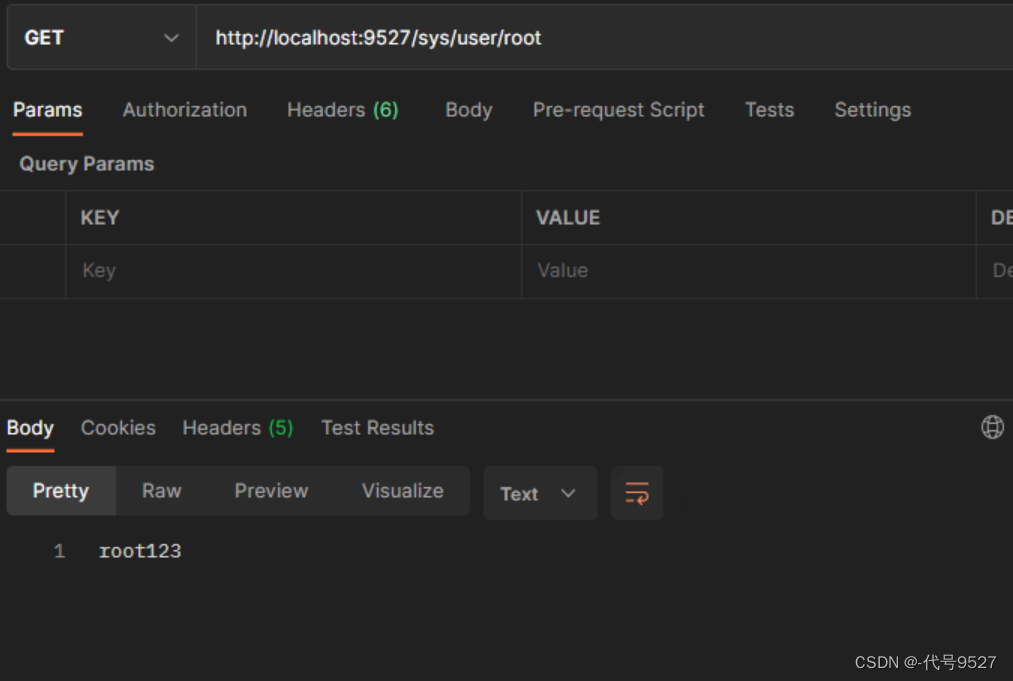
测试一下:

添加成功:

查询一下:

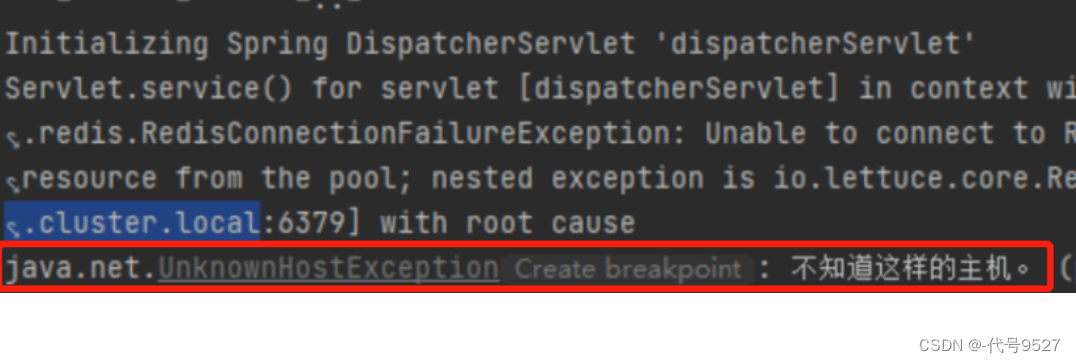
最后记录下一个我遇到的问题,哨兵拿到master的host时,host是个域名,我本地IDEA启动时不能解析成IP,报错:

可以先通过修改操作系统的Hosts文件来实现模拟域名和IP的关系:
C:\Windows\System32\drivers\etc

在文件末尾添加一行,格式为 "<IP地址> <域名>"
例如: "127.0.0.1 mydomain.com".
到此这篇关于SpringBoot整合Redis哨兵模式的实现示例的文章就介绍到这了,更多相关SpringBoot Redis哨兵 内容请搜索脚本之家以前的文章或继续浏览下面的相关文章希望大家以后多多支持脚本之家!
