C#面向切面编程之AspectCore用法详解
作者:rjcql
AspectCore 是Lemon名下的一个国产Aop框架,提供了一个全新的轻量级和模块化的Aop解决方案,下面我们就来深入了解下AspectCore在C#中的具体使用吧
写在前面
AspectCore 是Lemon名下的一个国产Aop框架,提供了一个全新的轻量级和模块化的Aop解决方案。面向切面也可以叫做代码拦截,分为静态和动态两种模式,AspectCore 可以实现动态代理,支持程序运行时在内存中“临时”生成 AOP 动态代理类。
老规矩从 Nuget 安装 AspectCore.Extensions.DependencyInjection 包。

代码实现
using AspectCore.DynamicProxy;

public class Program
{
    public static void Main(string[] args)
    {
        Console.WriteLine("Start...");
        ProxyGeneratorBuilder proxyGeneratorBuilder = new ProxyGeneratorBuilder();
        using (IProxyGenerator proxyGenerator = proxyGeneratorBuilder.Build())
        {
            Person p = proxyGenerator.CreateClassProxy<Person>();
            Console.WriteLine(p.GetType().BaseType);
            p.Say($"{Environment.NewLine} Hello World!");
        }
        Console.WriteLine("End");
        Console.ReadLine();
    }
}

public class CustomInterceptor : AbstractInterceptorAttribute
{
    public async override Task Invoke(AspectContext context, AspectDelegate next)
    {
        try
        {
            Console.WriteLine("Before service call");
            await next(context);
        }
        catch (Exception)
        {
            Console.WriteLine("Service threw an exception!");
            throw;
        }
        finally
        {
            Console.WriteLine("After service call");
        }
    }
}

public class Person
{
    [CustomInterceptor]
    public virtual void Say(string msg)
    {
        Console.WriteLine("service calling..." + msg);
    }
}
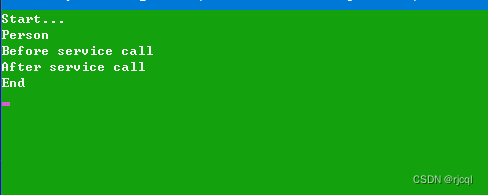
调用示例

如图,代理类将Say方法包裹了起来。
如果修改一下CustomInterceptor 的Invoke方法,可以直接根据条件控制代码的分支跳转。
public class CustomInterceptor : AbstractInterceptorAttribute
{
    public async override Task Invoke(AspectContext context, AspectDelegate next)
    {
        try
        {
            Console.WriteLine("Before service call");
            if (false)
                await next(context);
            else
                await Task.Delay(1000);
        }
        catch (Exception)
        {
            Console.WriteLine("Service threw an exception!");
            throw;
        }
        finally
        {
            Console.WriteLine("After service call");
        }
    }
}
运行代码 Person中的Say方法本体就被跳过了:

到此这篇关于C#面向切面编程之AspectCore用法详解的文章就介绍到这了,更多相关C# AspectCore内容请搜索脚本之家以前的文章或继续浏览下面的相关文章希望大家以后多多支持脚本之家!
