
Java中Caffeine本地缓存项目实例
作者:闪耀的瞬间
这篇文章主要介绍了Java中Caffeine本地缓存项目实例,Caffeine是一个高性能Java 缓存库,使用Java8对Guava缓存重写版本,在Spring Boot 2.0中将取代Guava,使用spring.cache.cache-names属性可以在启动时创建缓存,需要的朋友可以参考下
前言
为什么需要本地缓存?在系统中,有些数据,访问十分频繁(例如数据字典数据、国家标准行政区域数据),往往把这些数据放入分布式缓存中,但为了减少网络传输,加快响应速度,缓存分布式缓存读压力,会把这些数据缓存到本地JVM中,大多是先取本地缓存中,再取分布式缓存中的数据
而Caffeine是一个高性能Java 缓存库,使用Java8对Guava缓存重写版本,在Spring Boot 2.0中将取代Guava。 使用spring.cache.cache-names属性可以在启动时创建缓存
例如,以下application配置创建一个foo和bar缓存,最大数量为500,存活时间为10分钟
spring.cache.cache-names=foo,bar
spring.cache.caffeine.spec=initialCapacity=10,maximumSize=500,expireAfterAccess=600s
还有一种代码实现方式,我在项目中就是使用代码方式,如何使用,请往下看
代码实现
1.引入依赖
<dependency>
	<groupId>org.springframework.boot</groupId>
	<artifactId>spring-boot-starter-cache</artifactId>
</dependency>
<dependency>
	<groupId>com.github.ben-manes.caffeine</groupId>
	<artifactId>caffeine</artifactId>
	<version>2.6.2</version>
</dependency>
2.添加一个CaffeineConfig配置类,开启缓存@EnableCaching
@Configuration
@EnableCaching //开启缓存
public class CaffeineConfig {
    public static final int DEFAULT_MAXSIZE = 10000;
    public static final int DEFAULT_TTL = 600;
    /**
     * 定义cache名称、超时时长(秒)、最大容量
     * 每个cache缺省:10秒超时、最多缓存50000条数据,需要修改可以在构造方法的参数中指定。
     */
    public enum Caches{
        getUserById(600),          //有效期600秒
        listCustomers(7200,1000),  //有效期2个小时 , 最大容量1000
        ;
        Caches() {
        }
        Caches(int ttl) {
            this.ttl = ttl;
        }
        Caches(int ttl, int maxSize) {
            this.ttl = ttl;
            this.maxSize = maxSize;
        }
        private int maxSize=DEFAULT_MAXSIZE;	//最大數量
        private int ttl=DEFAULT_TTL;		//过期时间(秒)
        public int getMaxSize() {
            return maxSize;
        }
        public int getTtl() {
            return ttl;
        }
    }
    /**
     * 创建基于Caffeine的Cache Manager
     * @return
     */
    @Bean
    @Primary
    public CacheManager caffeineCacheManager() {
        SimpleCacheManager cacheManager = new SimpleCacheManager();
        ArrayList<CaffeineCache> caches = new ArrayList<CaffeineCache>();
        for(Caches c : Caches.values()){
            caches.add(new CaffeineCache(c.name(),
                    Caffeine.newBuilder().recordStats()
                            .expireAfterWrite(c.getTtl(), TimeUnit.SECONDS)
                            .maximumSize(c.getMaxSize())
                            .build())
            );
        }
        cacheManager.setCaches(caches);
        return cacheManager;
    }
}
3.创建控制器
创建一个控制器,使用本地缓存,注意@Cacheable,value与上面配置的值对应,key为参数,sync=true表示同步,多个请求会被阻塞
@RestController
@RequestMapping("cache")
public class CacheController {
    @RequestMapping("listCustomers")
    @Cacheable( value = "listCustomers" , key = "#length", sync = true)
    public List<Customer> listCustomers(Long length){
        List<Customer> customers = new ArrayList<>();
        for(int i=1; i <= length ; i ++){
            Customer customer = new Customer(i, "zhuyu"+i, 20 + i, false);
            customers.add(customer);
        }
        return customers;
    }
    // 以第一个参数为key进行缓存
    @Cacheable(value="users", key="#p0")
    public Long find(Long id) {
        return id;
    }
    // 以User中的id值为key进行缓存
    @Cacheable(value="users", key="#user.id")
    public User find(User user) {
         return user;
    }
    // 以User中的id值为key,且 condition 条件满足则缓存
    @Cacheable(value="users", key="#user.id", condition="#user.id%2==0")
    public User find(User user) {
       return user;
    }
}- @CacheEvict 是用来标注清除缓存元素的,可在方法或类上。当标记在一个类上表示其中所有的方法的执行都会触发缓存的清除操作。
- @CacheEvict可以指定的属性有value、key、condition、allEntries和beforeInvocation。其中value、key和condition的语义与@Cacheable对应的属性类似。即value表示清除操作是发生在哪些Cache上的(对应Cache的名称);key表示需要清除的是哪个key,如未指定则会使用默认策略生成的key;condition表示清除操作发生的条件
  // allEntries表示是否需要清除缓存中的所有元素。默认为false,当allEntries为true时,清除所有的元素
  @CacheEvict(value="user", allEntries=true)
  public void delete(Integer id) {
      System.out.println(id);
  }
4.启动项目
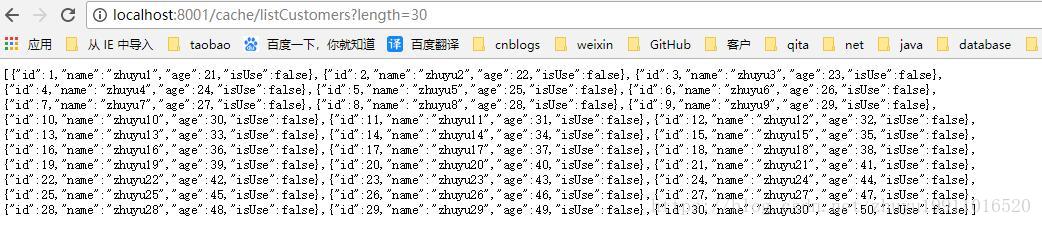
访问上面的方法,效果如下,第一次处理时间为 110ms ,再刷新几次页面只要 1ms,说明后面的请求从本地缓存中获取数据,并返回了

使用本地缓存可以加快页面响应速度,缓存分布式缓存读压力,大量、高并发请求的网站比较适用
Caffeine配置说明
- initialCapacity=[integer]: 初始的缓存空间大小
- maximumSize=[long]: 缓存的最大条数
- maximumWeight=[long]: 缓存的最大权重
- expireAfterAccess=[duration]: 最后一次写入或访问后经过固定时间过期
- expireAfterWrite=[duration]: 最后一次写入后经过固定时间过期
- refreshAfterWrite=[duration]: 创建缓存或者最近一次更新缓存后经过固定的时间间隔,刷新缓存
- recordStats:开发统计功能
注意:
- expireAfterWrite和expireAfterAccess同时存在时,以expireAfterWrite为准。
- maximumSize和maximumWeight不可以同时使用
到此这篇关于Java中Caffeine本地缓存项目实例的文章就介绍到这了,更多相关Caffeine本地缓存内容请搜索脚本之家以前的文章或继续浏览下面的相关文章希望大家以后多多支持脚本之家!