
如何在datagridview中添加button按钮
作者:木子松的猫
这篇文章主要介绍了如何在datagridview中添加button按钮问题,具有很好的参考价值,希望对大家有所帮助,如有错误或未考虑完全的地方,望不吝赐教
在datagridview中添加button按钮
.Net的DataGridView控件中,提供了一种列的类型,叫 DataGridViewButtonColumn ,这种列类型是展示为一个 按钮,可以给button赋予相应的text,并且,此button可以用来做处理事件的判断依据。
DataGridViewButtonColumn,虽然在UI展现上,是一个BUTTON的样子,但是,它的实际形态,并不是传统意义的BUTTON,而是渲染出来的样式,完全是painting的效果而已。
所以,对于传统意义的BUTTON的那一套在这里都失效啦
代码实现
//在datagridview中添加button按钮
            DataGridViewButtonColumn btn = new DataGridViewButtonColumn();
            btn.Name = "btnModify";
            btn.HeaderText = "修改";
            btn.DefaultCellStyle.NullValue = "修改";
            dataGridView1.Columns.Add(btn);
然后在DataGridView的CellContentClick事件中写类似如下代码:
private void dataGridView1_CellContentClick(object sender, DataGridViewCellEventArgs e)
        {
            //点击button按钮事件
            if (dataGridView1.Columns[e.ColumnIndex].Name == "btnModify" && e.RowIndex >= 0)
            {
            //说明点击的列是DataGridViewButtonColumn列
                DataGridViewColumn column = dataGridView1.Columns[e.ColumnIndex];
                IPEntity ipentity = new IPEntity();
                ipentity.ipName = Convert.ToString(dataGridView1.CurrentRow.Cells[0].Value);
                ipentity.ipPart = Convert.ToString(dataGridView1.CurrentRow.Cells[1].Value);
                ipentity.ipStart = Convert.ToString(dataGridView1.CurrentRow.Cells[2].Value);
                ipentity.ipEnd = Convert.ToString(dataGridView1.CurrentRow.Cells[3].Value);
                bool flag = selectIp.UpdateIP(ipentity);
                if (flag)
                {
                    MessageBox.Show("更新成功!");
                }
                else
                {
                    MessageBox.Show("更新失败!");
                }
            }
        }
效果图如下:
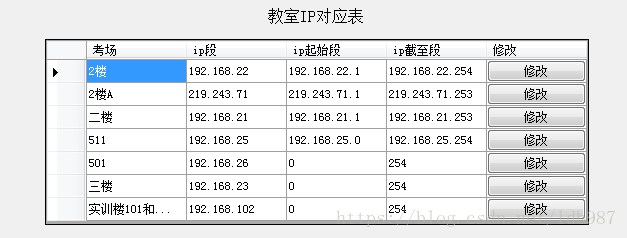
datagridview中按钮不显示文本
向datagridview中添加按钮的方法很简单。
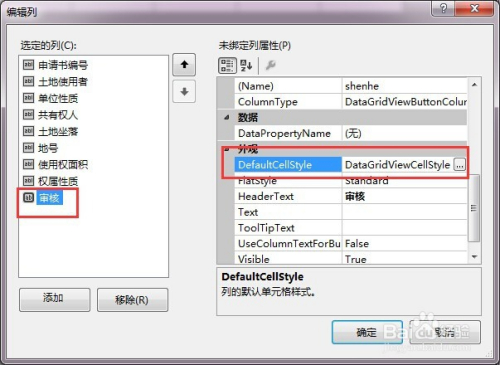
首先,选中datagridview控件,点击右键,选择“编辑列”。在弹出的“编辑列”窗体中选择我们刚刚添加的按钮,找到”DefaultCellStyle“属性,点击打开。
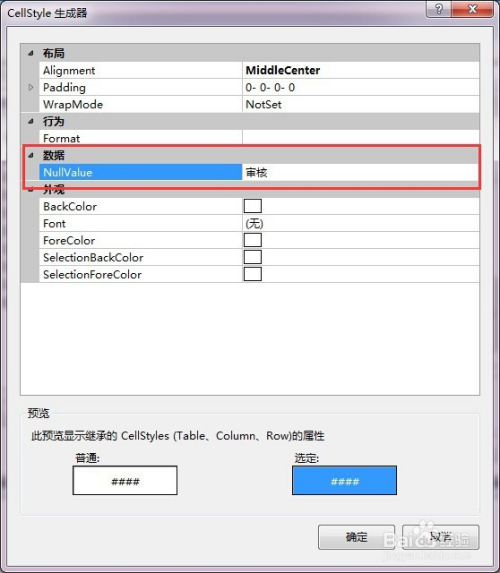
在打开的窗体中,找到NullValue属性,将文本设置为想要实现的内容就可以了。
我们这里输入的是”审核“,然后点击”确定“按钮。
最终的效果如下,
可以很清楚地看到按钮上显示的文本是”审核“了。

总结
以上为个人经验,希望能给大家一个参考,也希望大家多多支持脚本之家。