
SpringBoot中实现代理方式
作者:看山也看水
这篇文章主要介绍了SpringBoot中实现代理方式,具有很好的参考价值,希望对大家有所帮助。如有错误或未考虑完全的地方,望不吝赐教
SpringBoot实现代理
功能
定义一个功能,使指定的方法执行前后输出日志信息。
1. 定义一个注解,添加的方法上具有该功能,或者添加到类上,类下的所有方法都具有该功能
@Target( {ElementType.TYPE, ElementType.METHOD })
@Retention(RetentionPolicy.RUNTIME)
public @interface LogAround {
}
2. 实现PointCut接口,找出标注注解的方法或类
// 这里是直接继承了一个便捷基类,实现 matches 方法
public class LogAroundPointcut extends StaticMethodMatcherPointcut {
	@Override
	public boolean matches(Method method, Class<?> targetClass) {
		return AnnotatedElementUtils.hasAnnotation(targetClass, LogAround.class) ||
				AnnotatedElementUtils.hasAnnotation(method, LogAround.class);
	}
}
3. 实现 Advice,定义增强行为
// 这里继承了 MethodInterceptor,方法拦截。前后打印日志
public class LogAroundInterceptor implements MethodInterceptor {
	@Nullable
	@Override
	public Object invoke(@Nonnull MethodInvocation invocation) throws Throwable {
		System.out.println("before method invoke log....");
		Method method = invocation.getMethod();
		Object[] args = invocation.getArguments();
		Object target = invocation.getThis();
		Object invoke = method.invoke(target, args);
		System.out.println("after method invoke log....");
		return invoke;
	}
}
4. 定义一个 Advisor ,把这两个组合起来,并添加到 Spring 中
@Component
public class LogAroundPointcutAdvisor extends AbstractPointcutAdvisor {
@Override
public Pointcut getPointcut() {
return new LogAroundPointcut();
}
@Override
public Advice getAdvice() {
return new LogAroundInterceptor();
}
@Override
public boolean isPerInstance() {
return false;
}
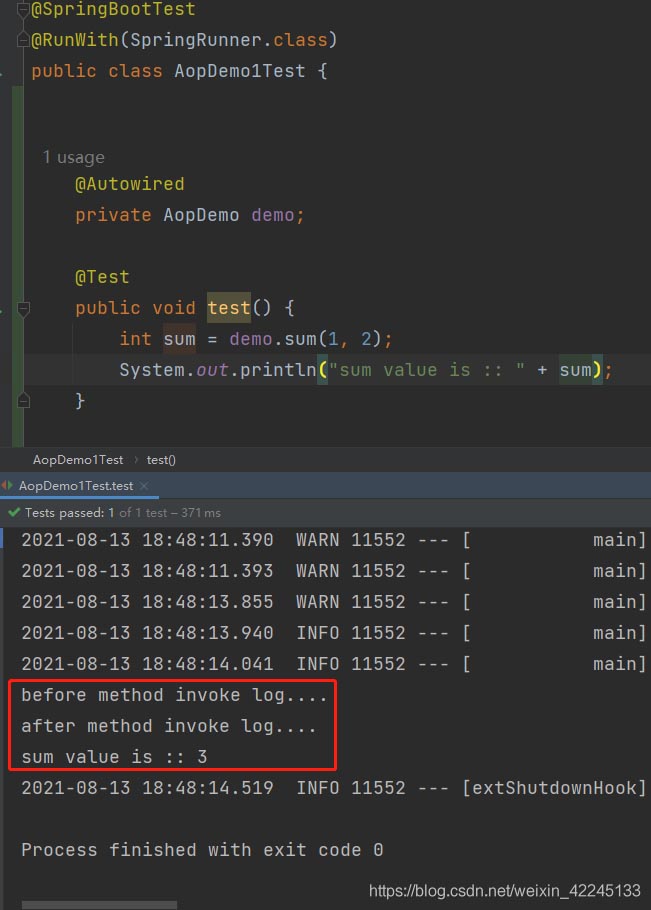
}5. 测试bean
@Component
public class AopDemo {
	@LogAround
	public static int sum(int i1, int i2) {
		return i1 + i2;
	}
}
6. 测试结果
前后有打印日志,代理成功
SpringBoot实现反向代理
背景:在前后端分离的项目中,有一天后端项目因为某些原因不能暴露在公网地址,此时为了修改最少,利用反向代理技术进行实现。
这种不是解决方案,曲线救国。
1. 引入依赖
  <dependency>
     <groupId>org.mitre.dsmiley.httpproxy</groupId>
       <artifactId>smiley-http-proxy-servlet</artifactId>
        <version>1.12</version>
</dependency>
2. 配置文件
将本地项目的 /baidu/* 下的请求转发至https://baidu.com
/baidu/* 前面一定要加 /
proxy:
  baidu:
    url: /baidu/*
    target_url: https://baidu.com
3. 配置代理
package athena.gateway.app.banshi;
import org.mitre.dsmiley.httpproxy.ProxyServlet;
import org.springframework.beans.factory.annotation.Value;
import org.springframework.boot.web.servlet.ServletRegistrationBean;
import org.springframework.context.annotation.Bean;
import org.springframework.context.annotation.Configuration;
@Configuration
public class SolrProxyServletConfiguration {
    @Value("${proxy.baidu.url}")
    private String url;
    @Value("${proxy.baidu.target_url}")
    private String targetUrl;
    @Bean
    public ServletRegistrationBean servletRegistrationBean() {
        ServletRegistrationBean servletRegistrationBean = new ServletRegistrationBean(new ProxyServlet(), url);
        servletRegistrationBean.setName("百度");
        servletRegistrationBean.addInitParameter("targetUri", targetUrl);
        servletRegistrationBean.addInitParameter(ProxyServlet.P_LOG, String.valueOf(true));
        return servletRegistrationBean;
    }
}
总结
以上为个人经验,希望能给大家一个参考,也希望大家多多支持脚本之家。