
elasticsearch 8.2.3 安装及springboot简单使用
作者:阳光倾洒
这篇文章主要介绍了elasticsearch 8.2.3 安装及springboot简单使用,本文通过示例代码给大家介绍的非常详细,对大家的学习或工作具有一定的参考借鉴价值,需要的朋友可以参考下
一、下载安装
官网下载地址https://www.elastic.co/cn/downloads/elasticsearch

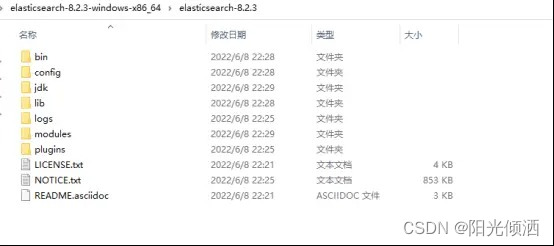
解压
elasticsearch-8.2.3-windows-x86_64
修改配置
elasticsearch-8.2.3\config\elasticsearch.yml
# ======================== Elasticsearch Configuration =========================
#
# NOTE: Elasticsearch comes with reasonable defaults for most settings.
#       Before you set out to tweak and tune the configuration, make sure you
#       understand what are you trying to accomplish and the consequences.
#
# The primary way of configuring a node is via this file. This template lists
# the most important settings you may want to configure for a production cluster.
#
# Please consult the documentation for further information on configuration options:
# https://www.elastic.co/guide/en/elasticsearch/reference/index.html
#
# ---------------------------------- Cluster -----------------------------------
#
# Use a descriptive name for your cluster:
#
#cluster.name: my-application
#
# ------------------------------------ Node ------------------------------------
#
# Use a descriptive name for the node:
#
#node.name: node-1
#
# Add custom attributes to the node:
#
#node.attr.rack: r1
#
# ----------------------------------- Paths ------------------------------------
#
# Path to directory where to store the data (separate multiple locations by comma):
#
#path.data: /path/to/data
#
# Path to log files:
#
#path.logs: /path/to/logs
#
# ----------------------------------- Memory -----------------------------------
#
# Lock the memory on startup:
#
#bootstrap.memory_lock: true
#
# Make sure that the heap size is set to about half the memory available
# on the system and that the owner of the process is allowed to use this
# limit.
#
# Elasticsearch performs poorly when the system is swapping the memory.
#
# ---------------------------------- Network -----------------------------------
#
# By default Elasticsearch is only accessible on localhost. Set a different
# address here to expose this node on the network:
#
#network.host: 192.168.0.1
#
# By default Elasticsearch listens for HTTP traffic on the first free port it
# finds starting at 9200. Set a specific HTTP port here:
#
#http.port: 9200
#
# For more information, consult the network module documentation.
#
# --------------------------------- Discovery ----------------------------------
#
# Pass an initial list of hosts to perform discovery when this node is started:
# The default list of hosts is ["127.0.0.1", "[::1]"]
#
#discovery.seed_hosts: ["host1", "host2"]
#
# Bootstrap the cluster using an initial set of master-eligible nodes:
#
#cluster.initial_master_nodes: ["node-1", "node-2"]
#
# For more information, consult the discovery and cluster formation module documentation.
#
# --------------------------------- Readiness ----------------------------------
#
# Enable an unauthenticated TCP readiness endpoint on localhost
#
#readiness.port: 9399
#
# ---------------------------------- Various -----------------------------------
#
# Allow wildcard deletion of indices:
#
#action.destructive_requires_name: false
#----------------------- BEGIN SECURITY AUTO CONFIGURATION -----------------------
#
# The following settings, TLS certificates, and keys have been automatically
# generated to configure Elasticsearch security features on 21-06-2022 06:14:38
#
# --------------------------------------------------------------------------------
# Enable security features
#xpack.security.enabled: true
#xpack.security.enrollment.enabled: true
# Enable encryption for HTTP API client connections, such as Kibana, Logstash, and Agents
#xpack.security.http.ssl:
#  enabled: true
#  keystore.path: certs/http.p12
# Enable encryption and mutual authentication between cluster nodes
#xpack.security.transport.ssl:
  #enabled: true
  #verification_mode: certificate
  #keystore.path: certs/transport.p12
  #truststore.path: certs/transport.p12
# Create a new cluster with the current node only
# Additional nodes can still join the cluster later
#cluster.initial_master_nodes: ["DESKTOP-22BJ4SG"]
# Allow HTTP API connections from anywhere
# Connections are encrypted and require user authentication
http.host: 0.0.0.0
# Allow other nodes to join the cluster from anywhere
# Connections are encrypted and mutually authenticated
#transport.host: 0.0.0.0
# 集群的名字
cluster.name: es-cluster
# 节点名字
node.name: es_node1
# ES的监听地址
network.host: 0.0.0.0
#设置对外服务的http端口,默认为9200
http.port: 9200
#设置索引数据的存储路径
path.data: D:/99-tools/elasticsearch-8.2.3-windows-x86_64/elasticsearch-8.2.3/data
#设置日志文件的存储路径
path.logs: D:/99-tools/elasticsearch-8.2.3-windows-x86_64/elasticsearch-8.2.3/logs
# 关闭http访问限制
xpack.security.enabled: false
# 增加新的参数,head插件可以访问es
http.cors.enabled: true
http.cors.allow-origin: "*"
# Enable security features
#xpack.security.enabled: false
xpack.security.enrollment.enabled: true
# Enable encryption for HTTP API client connections, such as Kibana, Logstash, and Agents
xpack.security.http.ssl:
  enabled: false
  keystore.path: certs/http.p12
# Enable encryption and mutual authentication between cluster nodes
xpack.security.transport.ssl:
  enabled: true
  verification_mode: certificate
  keystore.path: certs/transport.p12
  truststore.path: certs/transport.p12
# Create a new cluster with the current node only
# Additional nodes can still join the cluster later
cluster.initial_master_nodes: ["es_node1"]  #注意,这个要与node.name填写一致
#屏蔽自动下载geopip
ingest.geoip.downloader.enabled: false
启动服务
双击elasticsearch-8.2.3\bin\elasticsearch.bat 运行
9300:Java程序访问的端口
9200:浏览器、HTTP访问的端口
http://localhost:9200/

二、客户端elasticsearch-head安装
elasticsearch-head是一款专门针对于Elasticsearch的客户端工具
下载源码https://github.com/mobz/elasticsearch-head](https://github.com/mobz/elasticsearch-head
加压后,在elasticsearch-head目录下执行命令
需要先安装nodejs,下载地址:http://nodejs.cn/download/
npm install
npm run start
安装成功
http://localhost:9100/

三、springboot 集成
依赖
        <dependency>
            <groupId>com.fasterxml.jackson.core</groupId>
            <artifactId>jackson-databind</artifactId>
            <version>2.13.2</version>
        </dependency>
        <dependency>
            <groupId>org.glassfish</groupId>
            <artifactId>jakarta.json</artifactId>
            <version>2.0.1</version>
        </dependency>
        <!-- https://mvnrepository.com/artifact/co.elastic.clients/elasticsearch-java -->
        <dependency>
            <groupId>co.elastic.clients</groupId>
            <artifactId>elasticsearch-java</artifactId>
            <version>8.2.3</version>
        </dependency>
配置
import co.elastic.clients.elasticsearch.ElasticsearchClient;
import co.elastic.clients.json.jackson.JacksonJsonpMapper;
import co.elastic.clients.transport.ElasticsearchTransport;
import co.elastic.clients.transport.rest_client.RestClientTransport;
import org.apache.http.HttpHost;
import org.elasticsearch.client.RestClient;
import org.springframework.beans.factory.annotation.Value;
import org.springframework.context.annotation.Bean;
import org.springframework.context.annotation.Configuration;
@Configuration
public class ElasticSearchConfig {
    @Value("${elasticsearch.host-name}")
    private String hostName;
    @Value("${elasticsearch.port}")
    private int port;
    @Bean
    public ElasticsearchClient elasticsearchClient(){
        RestClient client = RestClient.builder(new HttpHost(hostName, port,"http")).build();
        ElasticsearchTransport transport = new RestClientTransport(client,new JacksonJsonpMapper());
        return new ElasticsearchClient(transport);
    }
}
index操作类
import co.elastic.clients.elasticsearch.ElasticsearchClient;
import co.elastic.clients.elasticsearch.indices.CreateIndexResponse;
import co.elastic.clients.elasticsearch.indices.DeleteIndexResponse;
import co.elastic.clients.elasticsearch.indices.GetIndexResponse;
import co.elastic.clients.transport.endpoints.BooleanResponse;
import org.springframework.beans.factory.annotation.Autowired;
import org.springframework.stereotype.Service;
import java.io.IOException;
@Service
public class EsGpsIndexService {
    @Autowired
    private ElasticsearchClient client;
    public final static String INDEX_NAME = "gps";
    /**
     * 增加index
     * @throws IOException
     */
    public boolean create() throws IOException {
        CreateIndexResponse indexResponse = client.indices().create(c -> c.index(INDEX_NAME));
        System.out.println(indexResponse.toString());
        return indexResponse.acknowledged();
    }
    /**
     * 查询Index
     * @throws IOException
     */
    public void query() throws IOException {
        GetIndexResponse getIndexResponse = client.indices().get(i -> i.index(INDEX_NAME));
        System.out.println(getIndexResponse.toString());
    }
    /**
     * 判断index是否存在
     * @throws IOException
     */
    public boolean exists() throws IOException {
        BooleanResponse booleanResponse = client.indices().exists(e -> e.index(INDEX_NAME));
        System.out.println(booleanResponse.value());
        return booleanResponse.value();
    }
    /**
     * 删除index
     * @throws IOException
     */
    public void delete() throws IOException {
        DeleteIndexResponse deleteIndexResponse = client.indices().delete(d -> d.index(INDEX_NAME));
        System.out.println(deleteIndexResponse.toString());
    }
}
document 操作类
import co.elastic.clients.elasticsearch.ElasticsearchClient;
import co.elastic.clients.elasticsearch._types.SortOrder;
import co.elastic.clients.elasticsearch._types.query_dsl.QueryBuilders;
import co.elastic.clients.elasticsearch._types.query_dsl.RangeQuery;
import co.elastic.clients.elasticsearch.core.*;
import co.elastic.clients.elasticsearch.core.bulk.BulkOperation;
import co.elastic.clients.elasticsearch.core.search.Hit;
import co.elastic.clients.json.JsonData;
import co.elastic.clients.transport.endpoints.BooleanResponse;
import org.springframework.beans.factory.annotation.Autowired;
import org.springframework.stereotype.Service;
import java.io.IOException;
import java.util.ArrayList;
import java.util.List;
@Service
public class EsGpsDocumentService {
    @Autowired
    private ElasticsearchClient client;
    /**
     * 插入document
     * @throws IOException
     */
    public void add(GpsInfo gps) throws IOException {
        IndexResponse indexResponse = client.index(i -> i
                .index(EsGpsIndexService.INDEX_NAME)
                //设置id
                .id(gps.getId())
                //
                .document(gps));
    }
    /**
     * 更新Document
     * @throws IOException
     */
    public void update(GpsInfo gps) throws IOException {
        UpdateResponse<GpsInfo> updateResponse = client.update(u -> u
                        .index(EsGpsIndexService.INDEX_NAME)
                        .id(gps.getId())
                        .doc(gps)
                , GpsInfo.class);
    }
    /**
     * 判断Document是否存在
     * @throws IOException
     */
    public void exist(String id) throws IOException {
        BooleanResponse indexResponse = client.exists(e -> e.index(EsGpsIndexService.INDEX_NAME).id(id));
        System.out.println(indexResponse.value());
    }
    /**
     * 查询Document
     * @throws IOException
     */
    public void get(String id) throws IOException {
        GetResponse<GpsInfo> getResponse = client.get(g -> g
                        .index(EsGpsIndexService.INDEX_NAME)
                        .id("1")
                , GpsInfo.class
        );
        System.out.println(getResponse.source());
    }
    /**
     * 删除Document
     * @throws IOException
     */
    public void delete(String id) throws IOException {
        DeleteResponse deleteResponse = client.delete(d -> d
                .index(EsGpsIndexService.INDEX_NAME)
                .id("1")
        );
        System.out.println(deleteResponse.id());
    }
    /**
     * 批量插入Document
     * @throws IOException
     */
    public void bulk(List<GpsInfo> gpsList) throws IOException {
        List<BulkOperation> bulkOperationArrayList = new ArrayList<>();
        //遍历添加到bulk中
        for(GpsInfo gps : gpsList){
            bulkOperationArrayList.add(BulkOperation.of(o->o.index(i->i.document(gps).id(gps.getId()))));
            //bulkOperationArrayList.add(BulkOperation.of(x->x.create(d->d.document(gps).id(gps.getId()).index(EsGpsIndexService.INDEX_NAME))));
        }
        BulkResponse bulkResponse = client.bulk(b -> b.index(EsGpsIndexService.INDEX_NAME).operations(bulkOperationArrayList));
    }
    /**
     * 查询
     * @throws IOException
     * https://wenku.baidu.com/view/a8954a68862458fb770bf78a6529647d27283439.html
     */
    public void search(String vehicleId,long startTime,long endTime,int page,int pageSize) throws IOException {
        SearchResponse<GpsInfo> search = client.search(s -> s
                .index(EsGpsIndexService.INDEX_NAME)
                .query(q -> q
                        .bool(b -> b
                                .filter(m -> m.term(t -> t.field("vehicleId").value(vehicleId)))
                                .filter(f -> f.range(x-> x.field("gpsTime").gte(JsonData.of(startTime)).lte(JsonData.of(endTime))))
                         ))
                //分页查询,从第0页开始查询20个document
                .from(page)
                .size(pageSize)
                //按时间降序排序
                //.sort(f->f.field(o->o.field("gpsTime").order(SortOrder.Desc)))
                , GpsInfo.class
        );
        for (Hit<GpsInfo> hit : search.hits().hits()) {
            System.out.println(hit.source());
        }
    }
}
实体
import lombok.AllArgsConstructor;
import lombok.Data;
import lombok.NoArgsConstructor;
import java.util.Date;
@Data
@AllArgsConstructor
@NoArgsConstructor
public class GpsInfo {
    private String id;
    private String vehicleId;
    private String deviceId;
    private String location;
    private Long gpsTime;
    private Long createTime;
}
测试例子
@RestController
@RequestMapping("/gps")
public class GpsController {
    @Autowired
    EsGpsIndexService esGpsIndexService;
    @Autowired
    EsGpsDocumentService esGpsDocumentService;
    @GetMapping("/test")
    public String test() throws IOException {
        boolean exist = esGpsIndexService.exists();
        if(!exist){
            esGpsIndexService.create();
        }
        esGpsIndexService.query();
        //
        /*GpsInfo gps = new GpsInfo();
        gps.setId("1");
        gps.setDeviceId("1111");
        gps.setVehicleId("123");
        gps.setLocation("12,33");
        gps.setCreateTime(System.currentTimeMillis());
        gps.setGpsTime(System.currentTimeMillis());
        esGpsDocumentService.add(gps);*/
        /*List<GpsInfo> gpsList =  new ArrayList<>();
        int i= 0;
        GpsInfo gps = null;
        long time = 1656041715000L;
        while (i < 10000){
            gps = new GpsInfo();
            gps.setId(String.valueOf(i*10000));
            gps.setDeviceId("1111");
            gps.setVehicleId("123456");
            gps.setLocation("12233.2232,33.2512235");
            gps.setCreateTime(time);
            gps.setGpsTime(time);
            gpsList.add(gps);
            //
            time += 1000;
            i += 1;
        }
        esGpsDocumentService.bulk(gpsList);*/
        long start = 1656041715000L;
        long end   = 1656041725000L;
        String v = "123456";
        esGpsDocumentService.search(v,start,end,0,20);
        return "elasticSearch test!!!!";
    }
}
到此这篇关于elasticsearch 8.2.3 安装及springboot简单使用的文章就介绍到这了,更多相关elasticsearch 8.2.3 安装内容请搜索脚本之家以前的文章或继续浏览下面的相关文章希望大家以后多多支持脚本之家!