
微信小程序图标的角标实现代码
作者:lanyu96
文章介绍微信小程序中实现图标角标和可拖动悬浮图标的方法,通过view控件定位样式,提供WXML/WXSS代码示例,感兴趣的朋友跟随小编一起看看吧
微信小程序图标的角标实现
先上效果图
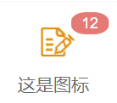
实现原理就是一个view控件设置成类似于图中的样式,然后再固定在图标的右上方,原理比较简单, 下面贴上需要的代码。
wxml:
          <form bindsubmit="这是图标点击事件" report-submit="true">
                <button class="iconBtn" form-type="submit">
                    <view class="remind-num" ">
                        12
                    </view>
                    <image class="icon-img" src="{{这是图标图片的url}}">
                    </image>
                    <view class="icon-text-view">这是图标</view>
                </button>
           </form>
wcss:
iconBtn{
    width: 100%;
    height: 130rpx;
    background: rgba(155, 155, 155, 0);
    border: none;
    display: flex;
    justify-content: center;
    align-items: center;
    flex-direction: column;
}
.iconBtn::after{
    border: none;
}
.remind-num{
	border-radius: 40%;
	position: absolute;
	top: 2rpx;
	right: 2rpx;
	font-size: 20rpx;
	/*padding: 4rpx 15rpx;*/
	/*align-items: center;*/
	text-align: center;
	width: 50rpx;
	line-height: 30rpx;
	height: 30rpx;
	color: var(--white);
	z-index: 100;
	background-color: rgba(221, 81, 76, 0.77);
}
.icon-img{
    margin-top: 10rpx;
    width: 65rpx;
    height: 65rpx;
}
补充:微信小程序:实现可拖动悬浮图标(包括按钮角标的实现)
微信小程序:实现可拖动悬浮图标(包括按钮角标的实现)
微信小程序:实现可拖动悬浮图标
在制作商城类微信小程序的过程中,我们经常会碰到需要增加可拖动悬浮图标的情况,本文简单的介绍一下可拖动悬浮按钮的实现。
运行截图:
主要代码:
var startPoint
Page({
  data: {
    //按钮位置参数
    buttonTop: 0,
    buttonLeft: 0,
    windowHeight: '',
    windowWidth: '',
    //角标显示数字
    corner_data:0,
  },
  onLoad:function(){
    //定义角标数字
    this.setData({
      corner_data:3
    })
    // 获取购物车控件适配参数
    var that =this;
    wx.getSystemInfo({
      success: function (res) {
        console.log(res);
        // 屏幕宽度、高度
        console.log('height=' + res.windowHeight);
        console.log('width=' + res.windowWidth);
        // 高度,宽度 单位为px
        that.setData({
          windowHeight:  res.windowHeight,
          windowWidth:  res.windowWidth,
          buttonTop:res.windowHeight*0.70,//这里定义按钮的初始位置
          buttonLeft:res.windowWidth*0.70,//这里定义按钮的初始位置
        })
      }
    })
  },
  //可拖动悬浮按钮点击事件
  btn_Suspension_click:function(){
    //这里是点击购物车之后将要执行的操作
    wx.showToast({
      title: '点击成功',
      icon:'success',
      duration:1000
    })
  },
  //以下是按钮拖动事件
  buttonStart: function (e) {
    startPoint = e.touches[0]//获取拖动开始点
  },
  buttonMove: function (e) {
    var endPoint = e.touches[e.touches.length - 1]//获取拖动结束点
    //计算在X轴上拖动的距离和在Y轴上拖动的距离
    var translateX = endPoint.clientX - startPoint.clientX
    var translateY = endPoint.clientY - startPoint.clientY
    startPoint = endPoint//重置开始位置
    var buttonTop = this.data.buttonTop + translateY
    var buttonLeft = this.data.buttonLeft + translateX
    //判断是移动否超出屏幕
    if (buttonLeft+50 >= this.data.windowWidth){
      buttonLeft = this.data.windowWidth-50;
    }
    if (buttonLeft<=0){
      buttonLeft=0;
    }
    if (buttonTop<=0){
      buttonTop=0
    }
    if (buttonTop + 50 >= this.data.windowHeight){
      buttonTop = this.data.windowHeight-50;
    }
    this.setData({
      buttonTop: buttonTop,
      buttonLeft: buttonLeft
    })
  },
  buttonEnd: function (e) {
  }
})
wxml:
<!--可拖动按钮控件表-->
<!--buttonStart和buttonEnd一定不能用catch事件,否则按钮点击事件会失效-->
<view class="btn_Suspension" bindtap="btn_Suspension_click" catchtouchmove="buttonMove" bindtouchstart="buttonStart" bindtouchend="buttonEnd" style="top:{{buttonTop}}px;left:{{buttonLeft}}px;">
    <image class="Suspension_logo" src="../images/Suspension.png"></image><!--这里是按钮图标,下载地址会在文章底部说明-->
    <view wx:if="{{corner_data==0}}"></view>
    <view wx:else>
      <view class="cornorMark">
        <text>{{corner_data}}</text>
      </view>
    </view>
  </view>
wxss:
Page{
 background: #f5f5f5;
}
/**可拖动悬浮按钮样式表**/
.btn_Suspension{
  position: fixed;
  height: 100rpx;
  width: 100rpx;
  background-color: rgba(255, 255, 255, 0.755);
  border-radius: 100%;
  display: flex;
  align-items: center;
  justify-content: center;
  z-index: 99999;
  box-shadow: 1px 0px 1px 1px #ede7e7;
}
.Suspension_logo{
  position:absolute;
  height:50%;
  width:50%;
  left:23%;
  top:27%
}
.cornorMark{
  position:absolute;
  background: rgb(242, 109, 38);
  border:1px solid rgb(242, 109, 38);
  border-radius: 100px;
  width:30rpx;
  height:30rpx;
  top:-17rpx;
  right:3rpx;
  color:#fff;
  font-size: 12px;
  text-align: center;
}
.cornorMark text{
  position:absolute;
  width:100%;
  left:0%;
  text-align: center;
  top:-1px;
}
图标素材下载地址:
Iconfont阿里巴巴矢量图标库:https://www.iconfont.cn/
到此这篇关于微信小程序图标的角标实现的文章就介绍到这了,更多相关小程序角标内容请搜索脚本之家以前的文章或继续浏览下面的相关文章希望大家以后多多支持脚本之家!