
Vue如何使用js-audio-recorder插件实现录音功能并将文件转成wav上传
作者:张呵呵490
这篇文章主要给大家介绍了关于Vue如何使用js-audio-recorder插件实现录音功能并将文件转成wav上传的相关资料,文中通过示例代码讲解了弹窗界面、变量控制、录音启动与停止、波形可视化、文件上传及WAV格式获取的完整流程,需要的朋友可以参考下
1.安装js-audio-recorder插件并引入
npm i js-audio-recorder
import Recorder from "js-audio-recorder";   // 录音插件
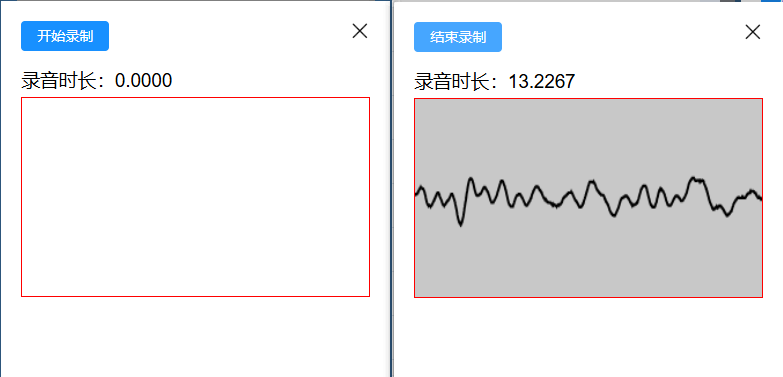
2.页面录音弹窗
<div class="voiceCss" v-if='voiceShow'>
  <div class="voiceButton">
     <el-button class="buttonCss" type="primary">
        <span v-if="voiceObj.type" @click="voiceType('start')">开始录制</span>
        <span v-else @click="voiceType('end')">结束录制</span>
     </el-button>
  </div>
  <div class="voiceCanvas">
     <h3>录音时长:{{ recorder.duration.toFixed(4) }}</h3>
     <div style="width:100%;height:200px;border:1px solid red;margin-top: 5px;">
        <canvas id="canvas" style="width: 100%;height: 100%;"></canvas>
     </div>
  </div>
</div>
3.变量
data() {
    return {
      voiceShow: false,  // 录音弹窗是否显示
      voiceObj:{
        type:true,   // true-开始录音  false-结束录音
        state:true,  // true-恢复录音  false-暂停录音
      },
      recorder: new Recorder({
        sampleBits: 16,    // 采样位数,支持 8 或 16,默认是16
        sampleRate: 16000, // 采样率,支持 11025、16000、22050、24000、44100、48000,根据浏览器默认值,我的chrome是48000
        numChannels: 1,   // 声道,支持 1 或 2, 默认是1
        // compiling: false,(0.x版本中生效,1.x增加中)  // 是否边录边转换,默认是false
     }),
     //波浪图-录音
     drawRecordId:null,
     oCanvas : null,
     ctx : null,
  }
}
4.打开录音面板
voiceFun(){
  // 打开录音弹窗
  this.voiceShow = true;
  // 初始化按钮状态(开始录制/结束录制)
  this.voiceObj = {
    type:true,
    state:true,
  };
  setTimeout(()=>{
  	// 录音波浪元素
    this.oCanvas = document.getElementById('canvas');
    this.ctx = this.oCanvas.getContext("2d");
  },100)
},
5.开始结束录音
voiceType(index){
  if(index=='start'){  // 开始录音
    let that = this;
    Recorder.getPermission().then(
      () => {
        // console.log("开始录音");
        that.recorder.start(); // 开始录音
        that.drawRecord();  //开始绘制图片
        that.voiceObj.type = false;
      },
      (error) => {
        that.$message({
          message: "请先允许该网页使用麦克风",
          type: "info",
        });
        console.log(`${error.name} : ${error.message}`);
      }
    );
  }else if(index=='end') {  // 结束录音
     this.recorder.stop();
     this.voiceObj.type = true;
     // 获取录音文件
     // this.getVoiceWAV();
     // 上传录音文件
     this.uploadvoiceWAV();
  }
},
6.绘制波浪图
drawRecord () {
  // 用requestAnimationFrame稳定60fps绘制
  this.drawRecordId = requestAnimationFrame(this.drawRecord);
  // 实时获取音频大小数据
  let dataArray = this.recorder.getRecordAnalyseData(),
      bufferLength = dataArray.length;
  // 填充背景色
  this.ctx.fillStyle = 'rgb(200, 200, 200)';
  this.ctx.fillRect(0, 0, this.oCanvas.width, this.oCanvas.height);
  // 设定波形绘制颜色
  this.ctx.lineWidth = 2;
  this.ctx.strokeStyle = 'rgb(0, 0, 0)';
  this.ctx.beginPath();
  var sliceWidth = this.oCanvas.width * 1.0 / bufferLength, // 一个点占多少位置,共有bufferLength个点要绘制
  x = 0;          // 绘制点的x轴位置
  for (var i = 0; i < bufferLength; i++) {
    var v = dataArray[i] / 128.0;
    var y = v * this.oCanvas.height / 2;
    if (i === 0) {
      // 第一个点
      this.ctx.moveTo(x, y);
    } else {
      // 剩余的点
      this.ctx.lineTo(x, y);
    }
    // 依次平移,绘制所有点
    x += sliceWidth;
  }
  this.ctx.lineTo(this.oCanvas.width, this.oCanvas.height / 2);
  this.ctx.stroke();
},
7.上传录音文件
uploadvoiceWAV(){
  let dom = document.querySelector(".voiceBox")
  const loading = this.$loading({
    lock: true,
    target: dom,
    text: '请稍等,正在语音转文字',
    spinner: 'el-icon-loading',
    background: 'rgba(0, 0, 0, 0.7)'
  });
  let wavBlob = this.recorder.getWAVBlob();
  // 创建一个formData对象
  var formData = new FormData()
  // 此处获取到blob对象后需要设置fileName满足当前项目上传需求,其它项目可直接传把blob作为file塞入formData
  const newbolb = new Blob([wavBlob], { type: 'audio/wav' })
  //获取当时时间戳作为文件名
  const fileOfBlob = new File([newbolb], new Date().getTime() + '.wav')
  formData.append('file', fileOfBlob)
  uploadWavData(formData).then((response) => {  // uploadWavData替换成自己的接口引入
    loading.close();
    if(response.code==200){
       this.voiceShow = false;
       // 上传成功,并转文字
    }else if(response.code==500){
      this.$message({
        message: response.msg+"请重试",
        type: "error",
      });
    }
  });
},
8.获取录音文件(WAV)
getVoiceWAV(){
  let wavBlob = this.recorder.getWAVBlob();
  console.log(wavBlob);
},
总结
到此这篇关于Vue如何使用js-audio-recorder插件实现录音功能并将文件转成wav上传的文章就介绍到这了,更多相关Vue录音并将文件转成wav上传内容请搜索脚本之家以前的文章或继续浏览下面的相关文章希望大家以后多多支持脚本之家!