
web-view实现app应用与网页的数据交互方式
作者:爱编程的小学究
这篇文章主要介绍了web-view实现app应用与网页的数据交互方式,具有很好的参考价值,希望对大家有所帮助,如有错误或未考虑完全的地方,望不吝赐教
一、网页向app传递数据
1、在网页项目的index.html页面引入uniapp的js文件,引入成功之后就可以在事件里面使用uni.postMessage(网页项目是用vue框架写的)
<!-- uniapp 通信必须有的 -->
  <script type="text/javascript" src="https://unpkg.com/@dcloudio/uni-webview-js@0.0.2/index.js"></script>
  <script type="text/javascript" src="https://js.cdn.aliyun.dcloud.net.cn/dev/uni-app/uni.webview.1.5.2.js"></script>
  <script>
     document.addEventListener('UniAppJSBridgeReady', function() {
      uni.getEnv(function(res) {
          console.log('当前环境:' + JSON.stringify(res));
      });
    });
</script>
2、向app传递数据,可以直接写在点击事件里面
uni.postMessage({
   data: {
       action: 'scanCode'
   }
})
二、app处理接收的数据并向网页传递数据
1、app项目中引入网页
<web-view @message="handleMessage" ref="webview" :src="url"></web-view>
2、handleMessage接收网页传过来的数据
 handleMessage(event) {
     console.log("webView传递过来的消息:" + JSON.stringify(evt.detail.data))
     // #ifdef APP-PLUS
     const currentWebview = this.$parent.$scope.$getAppWebview().children()[0]
     let data = event.detail.data.length>0?event.detail.data[0]:''
     if (data&&data.action == "scanCode") {
          console.log('数据接收成功')
          // 进行处理
     }
     // #endif
 }
3、向网页中传递数据
开发的时候使用this.$scope一直Cannot read property ‘$getAppWebview‘ of undefined,后来查找了很多才找到,组件内要用this.$parent.$scope
如果web-view是放在组件里面的用下面的方法去获取web-view窗口
//如果web-view就在当前页面里面,可以把$parent去掉
const currentWebview = this.$parent.$scope.$getAppWebview().children()[0]
currentWebview.evalJS(`scanCode(${JSON.stringify(_data)})`);
注意:如果页面没有初始化完成,可以加个定时等初始化完成在调用
var currentWebview = this.$scope.$getAppWebview() //此对象相当于html5plus里的plus.webview.currentWebview()。在uni-app里vue页面直接使用plus.webview.currentWebview()无效
setTimeout(function() {
   wv = currentWebview.children()[0]
}, 1000);
三、快速起服务测试
如果你想快速上手的话,可以直接建一个html页面起本地服务
- 1、把index.html放到文件夹下
- 2、打开文件夹 shift+鼠标右键,打开命令行
- 3、下载http-server: npm install http-server -g
- 4、开启本地服务器,输入 http-server 就可以了
- 5、关闭本地服务器,按快捷键 CTRL-C,当显示 ^Chttp-server stopped 的时候,就是关闭成功了

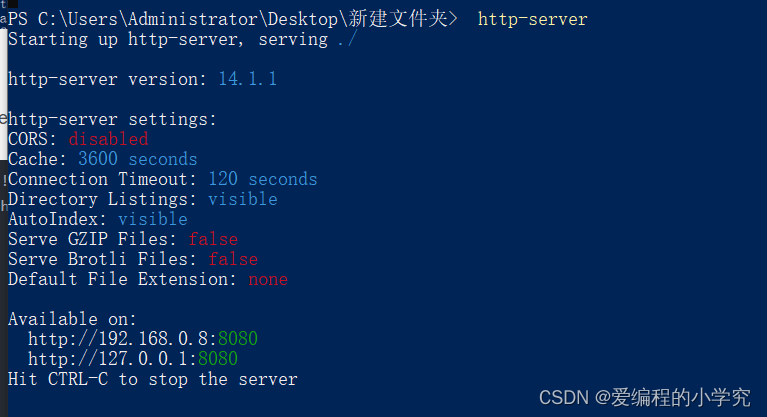
用http://192.168.0.8:8080 作为url引入到web-view里面
<web-view @message="handleMessage" ref="webview" src="http://192.168.0.8:8080 "></web-view>
- index.html
<!DOCTYPE html>
<html>
  <head>
    <meta charset="utf-8" />
    <meta name="viewport" content="width=device-width,initial-scale=1,minimum-scale=1,maximum-scale=1,user-scalable=no" />
    <title>网络网页</title>
    <style type="text/css">
      .btn {
        display: block;
        margin: 20px auto;
        padding: 5px;
        background-color: #007aff;
        border: 0;
        color: #ffffff;
        height: 40px;
        width: 200px;
      }
      .btn-red {
        background-color: #dd524d;
      }
      .post-message-section {
        visibility: hidden;
      }
    </style>
  </head>
  <body>
    <div class="post-message-section">
      <div class="btn-list">
        <button class="btn btn-red" type="button" id="postMessage">postMessage</button>
      </div>
    </div>
    <!-- uni 的 SDK -->
    <!-- uni.webview.1.5.4.js-->
    <script type="text/javascript" src="https://unpkg.com/@dcloudio/uni-webview-js@0.0.3/index.js"></script>
    <script type="text/javascript">
      // 待触发 `UniAppJSBridgeReady` 事件后,即可调用 uni 的 API。
      document.addEventListener('UniAppJSBridgeReady', function() {
        uni.postMessage({
            data: {
                action: 'message'
            }
        });
        uni.getEnv(function(res) {
            console.log('当前环境:' + JSON.stringify(res));
        });
        document.getElementById('postMessage').addEventListener('click', function() {
          uni.postMessage({
            data: {
              action: 'message'
            }
          });
        });
      });
    </script>
  </body>
</html>
总结
以上为个人经验,希望能给大家一个参考,也希望大家多多支持脚本之家。