
在vue3中vue-cropper的初使用示例详解
作者:花之亡灵
一、前言
在学习 Vue-Cropper 之前 先了解一下 Cropper,两者的关系与区别,避免在学习的时候踩坑和把它们搞混淆。
Cropper 是一个基于JavaScript 的图像剪切库,它可以在多种现代浏览器中运行工作。它提供了丰富的配置选项和事件,使得用户可以轻松地图像上传、剪切、旋转、缩放等功能。Cropper的设计目标是提供简单、灵活和强大的图像处理功能。
Cropper 的主要特性:
1、支持多种图片格式,如JPEG、PNG、GIF等。
2、提供多种剪切形状。
3、支持图片旋转。
4、支持多种语言和主体。
5、提供丰富的API和事件,便于自定义和集成。
6、Cropper 不依赖与 Vue.js环境,可以在其它环境中使用。
Vue-Cropper 是一个基于 Vue.js 的图像剪切组件,它是专门为 Vue.js应用程序设计的。Vue-Cropper 封装了 Cropper 库的许多功能,使其更易于在 Vue.js 项目中集成和使用。
Vue-Cropper 的主要特性:
1、简单易用:可以直接作为 vue 组件使用。
2、支持与 vue 的响应式数据绑定。
3、支持多种图像格式和剪切形状。
4、支持图像选装、缩放和翻转。
5、提供了一些 额外的功能,如图片预览、图片上传等。
6、只能在 vue.js 的环境中使用。
二、安装与使用
1、安装
# npm 安装
npm install vue-cropper@next -d --save
# yarn 安装
yarn add vue-cropper@next
2、引入
在组件中引入
import 'vue-cropper/dist/index.css';
import { VueCropper } from 'vue-cropper';
全局引入
在 main.js中
import VueCropper from 'vue-cropper';
import 'vue-cropper/dist/index.css'
const app = createApp(App)
app.use(VueCropper)
app.mount('#app')
3、代码使用
重要: 需要关掉本地的 mock 服务, 不然图片转化会报错。
重要: 需要使用外层容器包裹并设置宽高。
<div style="width: 300px; height: 300px;">
        <vueCropper
          ref="cropper"
          :img="option.img"
          :outputSize="option.size"
          :outputType="option.outputType"
        >
        </vueCropper>
</div>
三、文档
1、props 属性
| 名称 | 功能 | 默认值 | 可选值 |
|---|---|---|---|
| img | 裁剪图片的地址 | 空 | url 地址, base64, blob |
| outputSize | 裁剪生成图片的质量 | 1 | 0.1 ~ 1 |
| outputType | 裁剪生成图片的格式 | jpg (jpg 需要传入jpeg) | jpeg, png, webp |
| info | 裁剪框的大小信息 | true | true, false |
| canScale | 图片是否允许滚轮缩放 | true | true, false |
| autoCrop | 是否默认生成截图框 | false | true, false |
| autoCropWidth | 默认生成截图框宽度 | 容器的 80% | 0 ~ max |
| autoCropHeight | 默认生成截图框高度 | 容器的 80% | 0 ~ max |
| fixed | 是否开启截图框宽高固定比例 | false | true, false |
| fixedNumber | 截图框的宽高比例, 开启fixed生效 | [1, 1] | [ 宽度 , 高度 ] |
| full | 是否输出原图比例的截图 | false | true, false |
| fixedBox | 固定截图框大小 | 不允许改变 | false |
| canMove | 上传图片是否可以移动 | true | true, false |
| canMoveBox | 截图框能否拖动 | true | true, false |
| original | 上传图片按照原始比例渲染 | false | true, false |
| centerBox | 截图框是否被限制在图片里面 | false | true, false |
| high | 是否按照设备的dpr 输出等比例图片 | true | true, false |
| infoTrue | true 为展示真实输出图片宽高 false 展示看到的截图框宽高 | false | true, false |
| maxImgSize | 限制图片最大宽度和高度 | 2000 | 0 ~ max |
| enlarge | 图片根据截图框输出比例倍数 | 1 | 0 ~ max(建议不要太大不然会卡死的呢) |
| mode | 图片默认渲染方式 | contain | contain , cover, 100px, 100% auto |
| limitMinSize | 裁剪框限制最小区域 | 10 | Number, Array, String |
| fillColor | 导出时背景颜色填充 | 空 | #ffffff, white |
2、回调函数
@realTime实时预览事件@imgMoving图片移动回调函数@cropMoving截图框移动回调函数@imgLoad图片加载的回调, 返回结果success,error
// 实时预览事件
const realTime = (data) => {
    previews.value = data;
};
3、内置方法和属性
在vue2中通过 this.$refs.cropper 调用,这里的this 表示当前实例,在vue3中,等同于下面的 proxy,或者cropper。
import { getCurrentInstance } from "vue";
const { proxy } = getCurrentInstance();
// cropper 是使用 ref 绑定到 vueCropper组将上的 const cropper = ref(null);
即在 vue3中,可以使用 proxy.$refs.cropper 或 cropper.value.调用。
属性
| 属性 | 说明 |
|---|---|
this.$refs.cropper.cropW / cropper.value.cropW | 截图框宽度 |
this.$refs.cropper.cropH / cropper.value.cropH | 截图框高度 |
方法
| 方法 | 说明 |
|---|---|
| this.$refs.cropper.startCrop() | 开始截图 |
| this.$refs.cropper.stopCrop() | 停止截图 |
| this.$refs.cropper.clearCrop() | 清除截图 |
| this.$refs.cropper.changeScale() | 修改图片大小 正数为变大 负数变小 |
| this.$refs.cropper.getImgAxis() | 获取图片基于容器的坐标点 |
| his.$refs.cropper.getCropAxis() | 获取截图框基于容器的坐标点 |
| this.$refs.cropper.goAutoCrop | 自动生成截图框函数 |
| this.$refs.cropper.rotateRight() | 向右边旋转90度 |
| this.$refs.cropper.rotateLeft() | 向左边旋转90度 |
获取截图数据
重点:在 vue-cropper中没有getCroppedCanvas(),没有任何带 canvas的函数方法,getCroppedCanvas()函数 cropper 中的。
// 获取 base64
cropper.value.getCropData((data) => {
        console.log(data);
});
// 获取 blob
cropper.value.getCropBlob(((data ) => {
console.log(data);
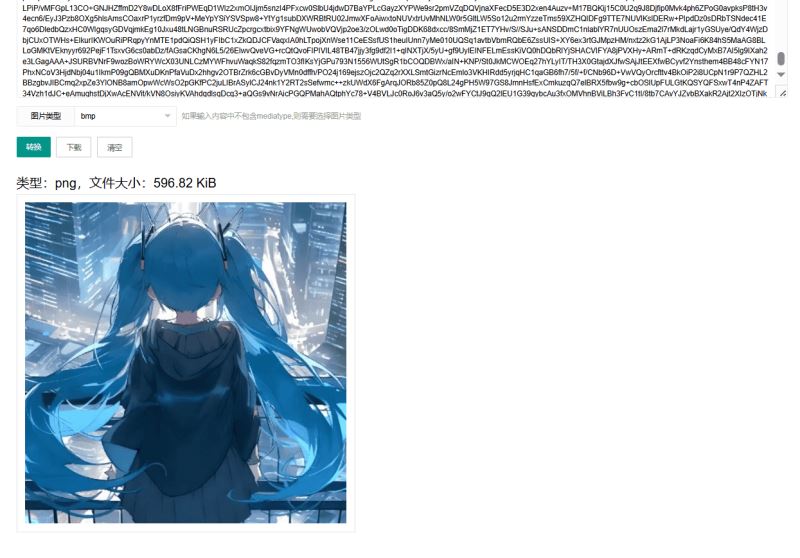
});四、用例
1、效果
样式
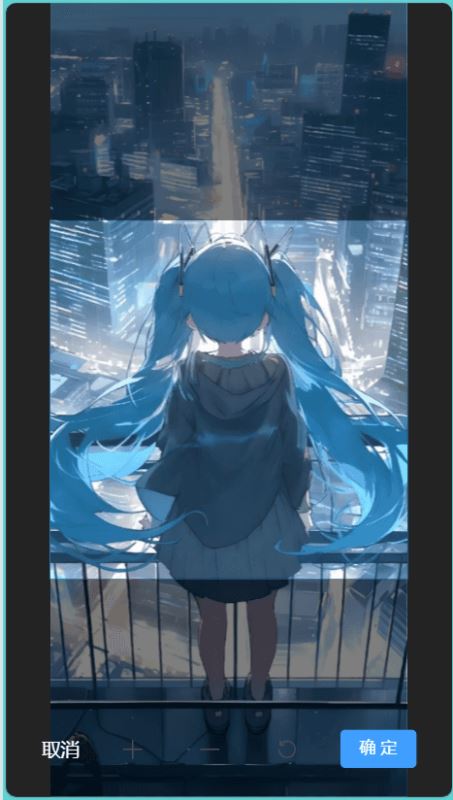
截切后的base64数据转图片
2、代码
<!-- 图片裁剪组件
    图片剪切使用 vue-cropper 工具剪切图片,读取图片后将图片转换成Base64格式,使用 getCropData函数获取剪切后的Base64格式的图片数据,
    getCropData函数是一个异步函数,不能在 data回调中直接使用 emit钩子,需要定义Promise,并在getCropData的回调函数中调用resolve来解析Promise,
    然后等待getCropData执行完成,才会继续往下执行,再通过 emit钩子将剪切后的图片数据传递到父组件。父组件再将Base64格式图片转换成file格式,
    上传到服务器。
 -->
<template>
    <div class="custom-dialog" :model-value="dialogVisibleCorpper" @opened="openDialog" :before-close="beforeClose">
        <div class="dialog">
            <div class="container">
                <div class="cropper-container">
                    <div class="cropper-box">
                        <div class="cropper-content" ref="cropperBox">
                            <vue-cropper id="imag" ref="cropper" :img="options.img" :outputType="options.outputType"
                                :autoCropHeight="options.autoCropHeight" :autoCropWidth="options.autoCropWidth"
                                :autoCrop="options.autoCrop" :aspectRation="options.aspectRation"
                                :infoTrue="options.infoTrue" :viewMode="options.viewMode" :dragMode="options.dragMode"
                                :guides="options.guides" :initialAspectRatio="options.initialAspectRatio"
                                :background="options.background" :cropBoxMovable="options.cropBoxMovable"
                                :cropBoxResizable="options.cropBoxResizable" :fixedBox="options.fixedBox"
                                :centerBox="options.centerBox" :original="options.original"
                                :canMoveBox="options.canMoveBox" :fixedNumber="options.fixedNumber" :mode="options.mode"
                                :enlarge="options.enlarge" :fixed="options.fixed" :info="options.info"
                                :fillColor="options.fillColor" @realTime="realTime" v-if="showCropper" />
                        </div>
                    </div>
                </div>
                <div class="btn-container">
                    <div class="item-btn">
                        <el-upload action="#" :http-request="() => { }" :before-upload="beforeUpload"
                            :show-file-list="false" style="display: none;">
                            <el-button></el-button>
                        </el-upload>
                        <div class="closeDialog" @click.stop="beforeClose">取消</div>
                    </div>
                    <div class="item-btn">
                        <el-icon class="btn" @click.stop="changeScale(1)">
                            <Plus />
                        </el-icon>
                    </div>
                    <div class="item-btn">
                        <el-icon class="btn" @click.stop="changeScale(-1)">
                            <Minus />
                        </el-icon>
                    </div>
                    <div class="item-btn">
                        <el-icon class="btn" @click.stop="rotateLeft()">
                            <RefreshLeft />
                        </el-icon>
                    </div>
                    <div class="item-btn">
                        <el-button type="primary" @click.stop="determine">确 定</el-button>
                    </div>
                </div>
            </div>
        </div>
    </div>
</template>
<script setup>
import { getCurrentInstance, ref, reactive, onMounted } from "vue";
import 'vue-cropper/dist/index.css';
import { VueCropper } from 'vue-cropper';
const { proxy } = getCurrentInstance();
const props = defineProps({
    dialogVisibleCorpper: {
        type: Boolean,
        default: false,
    },
});
// 使用 defineEmits 来声明组件可以抛出的事件
const emit = defineEmits(["update:dialogVisibleCorpper", "getImagValue"]);
const cropper = ref(null);
const cropperBox = ref(null);
const showCropper = ref(true);
const options = reactive({
    img: null, // 裁剪图片的地址
    autoCropWidth: 300, // 默认生成截图框宽度 默认容器的 80%
    autoCropHeight: 300, // 默认生成截图框高度 默认容器的 80%
    viewMode: 1, // 0-3,控制裁剪框的显示模式
    dragMode: "none", // 图片拖动模式
    guides: false, // 是否显示裁剪框内的虚线
    background: false, // 是否显示容器的网格背景
    initialAspectRatio: 1, // 裁剪框的宽高比(可选)
    aspectRation: 1, // 裁剪框的宽高比(可选)
    cropBoxMovable: false, // 截图框是否可拖动
    cropBoxResizable: false, // 截图框是否可调整大小
    outputType: "png", // 裁剪生成图片的格式 jpeg, png, webp
    autoCrop: true, // 是否默认生成截图框
    fixedBox: true, // 固定截图框大小 true:表示不能改变大小 false:表示可以改变大小
    canMoveBox: false, // 截图框不能拖动 true:表示可以拖动 false:表示不能拖动
    aspectRation: 1, // 裁剪框的宽高比(可选)
    fixedNumber: [1, 1], // 截图框的宽高比例
    enlarge: 1, // 图片根据截图框输出比例倍数
    fixed: true, // 是否开启截图框宽高固定比例
    centerBox: true, // 截图框是否限制在图片里(只有在自动生成截图框时才能生效)
    info: false, // 剪切框的大小信息
    original: false, // 上传图片按照原始比例渲染
    infoTrue: true, //
    mode: "cover auto", // 图片默认渲染方式
    fillColor: "#fff", // 裁剪框的背景色
});
const previews = ref(null);
// 打开裁剪弹窗
const openDialog = () => {
    showCropper.value = true;
};
// 修改图片大小 正数为变大 负数变小
const changeScale = (num) => {
    num = num || 1;
    proxy.$refs.cropper.changeScale(num);
};
// 向左边旋转90度
const rotateLeft = () => {
    proxy.$refs.cropper.rotateLeft();
};
// 选择图片
const beforeUpload = (rawFile) => {
    if (rawFile.type.indexOf("image/") == -1) {
        ElMessage.error("请上传图片文件!");
        return false;
    }
    if (rawFile.size / 1024 / 1024 > 5) {
        ElMessage.error("文件大小不能超过5MB!");
        return false;
    }
    const reader = new FileReader();
    reader.readAsDataURL(rawFile);
    reader.onload = () => {
        // 图片在这里
        options.img = reader.result;
    };
};
// 实时预览事件
const realTime = (data) => {
    previews.value = data;
};
// 关闭弹窗
const beforeClose = () => {
    options.img = null;
    previews.value = "";
    // 使用 emit 来更新父组件的 dialogVisibleCorpper 值
    emit("update:dialogVisibleCorpper", false);
};
// 提交图片
const determine = async () => {
    try {
        // getCropData是异步函数,需要定义Promise,并在getCropData的回调函数中调用resolve来解析Promise,
        // 然后等待getCropData执行完成,才会继续往下执行
        const imgBase64 = await new Promise((resolve) => {
            cropper.value.getCropData((data) => {
                resolve(data);
            });
        });
        emit("getImagValue", imgBase64);
    } catch (err) {
        ElMessage({
            message: 'err',
            type: 'error',
            plain: true,
        });
    }
    beforeClose();
};
onMounted(() => {
    // 在进入页面时,自动触发点 el-upload 的击事件
    const btn = document.querySelector(".el-button");
    if (btn) {
        btn.click();
    }
});
</script>
<style scoped>
.custom-dialog {
    width: 100%;
    height: 100vh;
    background-color: rgb(35, 35, 35);
}
.dialog {
    width: 80%;
    /* width: 100%; */
    height: 100vh;
    margin: 0 auto;
    padding: 0;
}
.container {
    width: 100%;
    height: 100vh;
    margin: 0;
    padding: 0;
}
.cropper-container {
    width: 100%;
    height: 100%;
    margin: 0;
    padding: 0;
}
.btn-container {
    margin: 0 auto;
    height: 40px;
    margin: 0;
    padding: 0;
    display: flex;
    justify-content: space-between;
    align-items: center;
    position: absolute;
    bottom: 20px;
    left: 30px;
    right: 30px;
    z-index: 1000;
}
.cropper-box {
    width: 100%;
    height: 100%;
    display: flex;
    justify-content: center;
    align-items: center;
}
.cropper-content {
    /* width: 100%;
    Aspect-ratio: 1/1; */
    width: 100%;
    height: 100%;
    margin: 0 auto;
    /* overflow: hidden; */
}
.closeDialog {
    color: white;
}
.btn {
    height: 40px;
    width: 40px;
    line-height: 40px;
    font-size: 20px;
    font-weight: 700;
    color: rgb(77, 77, 77);
}
</style>参考文档:Vue-Cropper 文档
到此这篇关于在vue3中vue-cropper的初使用的文章就介绍到这了,更多相关vue3 vue-cropper使用内容请搜索脚本之家以前的文章或继续浏览下面的相关文章希望大家以后多多支持脚本之家!