一文详解Vue3组件通信轻松玩转复杂数据流
作者:Code_Cracke
在大型Vue项目中,组件通信如同神经网络般贯穿整个应用,这篇文章将为大家详细介绍一下Vue3中的组件通信方式,有需要的小伙伴可以了解下
一、组件通信为何如此重要?
在大型Vue项目中,组件通信如同神经网络般贯穿整个应用。良好的通信机制能:
- 实现组件解耦
- 提升代码可维护性
- 构建清晰数据流
- 支撑复杂业务场景
二、父子组件通信:核心通信模式详解
2.1 Props向下传递(类型安全的典范)
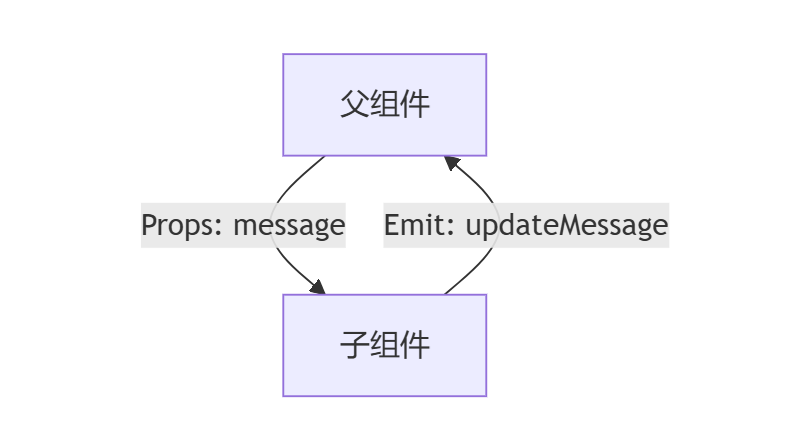
<!-- 子组件 Child.vue -->
<script setup>
const props = defineProps({
  // 基础类型验证
  message: {
    type: String,
    required: true,
    default: '默认值'
  },
  // 复杂类型验证
  config: {
    type: Object,
    default: () => ({ theme: 'dark' })
  }
})
</script>

<template>
  <div>{{ message }}</div>
</template>
使用要点:
- 严格类型校验避免运行时错误
- 通过default设置智能默认值
- 使用TypeScript时可获得更强的类型推导
2.2 自定义事件向上传递(含事件命名规范)
<!-- 父组件 Parent.vue -->
<template>
  <Child @update:count="handleCountChange" />
</template>

<script setup>
const handleCountChange = (newVal) => {
  console.log('Received:', newVal)
}
</script>
开发技巧:
- 采用
update:propName的命名规范 - 事件参数不超过3个时推荐对象传参
- 配合TypeScript进行类型声明
- 避免过度使用事件总线替代原生事件
三、兄弟组件通信的三种高阶方案
3.1 父组件中转(适合强关联组件)
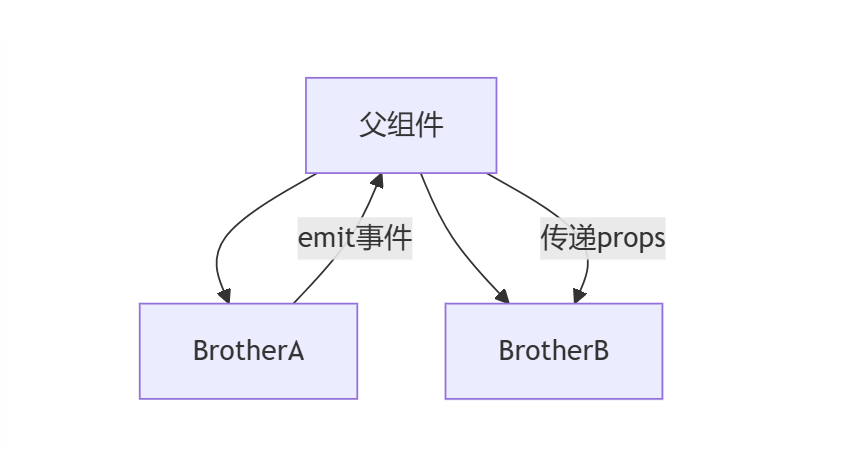
<!-- 父组件 -->
<template>
  <BrotherA @data-change="handleDataChange" />
  <BrotherB :shared-data="sharedData" />
</template>

<script setup>
import { ref } from 'vue'
const sharedData = ref()

const handleDataChange = (data) => {
  sharedData.value = data
}
</script>
适用场景:
- 简单数据共享
- 需要维护单一数据源
- 兄弟组件层级较浅时
3.2 mitt事件总线(轻量级解耦方案)
// eventBus.js
import mitt from 'mitt'
export const emitter = mitt()
<!-- 组件A -->
<script setup>
import { emitter } from './eventBus.js'
const sendData = () => {
  emitter.emit('brother-event', { id: 1 })
}
</script>
<!-- 组件B -->
<script setup>
import { onMounted } from 'vue'
import { emitter } from './eventBus.js'

onMounted(() => {
  emitter.on('brother-event', (data) => {
    console.log('Received:', data)
  })
})
</script>
注意事项:
⚠️ 及时移除事件监听
⚠️ 避免事件命名冲突
⚠️ 不适合高频事件场景
四、跨层级通信:4种进阶方案深度解析
4.1 provide/inject(响应性穿透)
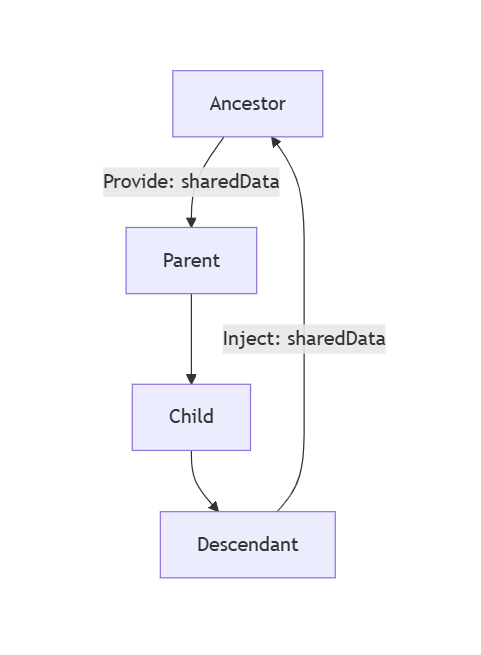
<!-- 祖先组件 -->
<script setup>
import { provide, ref } from 'vue'

const theme = ref('dark')
provide('Theme', theme)
</script>
<!-- 后代组件 -->
<script setup>
import { inject } from 'vue'

const theme = inject('Theme', 'light') // 默认值
</script>
应用场景:
- 主题切换
- 多语言支持
- 全局配置
性能优化:
- 使用Symbol作为注入key避免命名冲突
- 配合reactive使用保持响应性
4.2 attrs穿透(属性透传)
<!-- 父组件 -->
<template>
  <ChildComponent :style="{ color: 'red' }" @custom-event="handler" />
</template>
<!-- 子组件 -->
<script setup>
const props = defineProps({
  // 可以接收到所有非props属性
})
const emit = defineEmits(['custom-event'])
</script>

<template>
  <GrandChild v-bind="$attrs" @click="$emit('custom-event')" />
</template>
4.3 插槽内容通信(作用域插槽)
<!-- 父组件 -->
<template>
  <ChildComponent v-slot="{ data }">
    <div>{{ data.value }}</div>
  </ChildComponent>
</template>
<!-- 子组件 -->
<script setup>
const data = ref({ value: 42 })
</script>

<template>
  <slot :data="data"></slot>
</template>
4.4 Pinia状态管理(推荐复杂场景)
在后续文章中会详细介绍
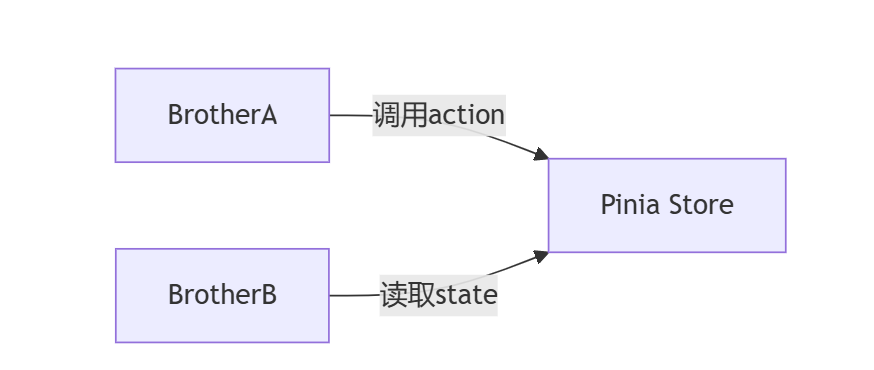
// stores/counter.js
import { defineStore } from 'pinia'

export const useCounterStore = defineStore('counter', {
  state: () => ({ count: 0 }),
  actions: {
    increment() {
      this.count++
    }
  }
})
<!-- 任意组件 -->
<script setup>
import { useCounterStore } from '@/stores/counter'
const counter = useCounterStore()
</script>
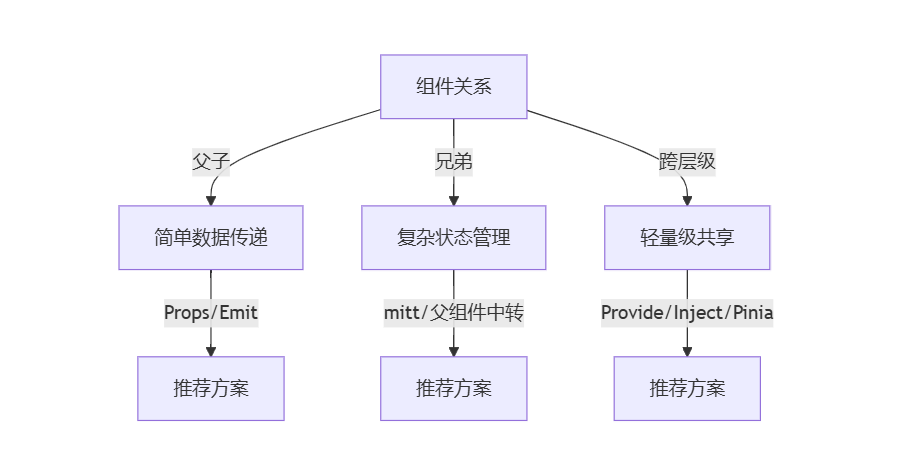
五、通信方案选型决策树
六、性能优化与常见陷阱
1. props深度监听优化
watch(() => props.config, (newVal) => {
  // 处理逻辑
}, { deep: true })
2. 事件总线内存泄漏预防
// 组件卸载时移除监听
onUnmounted(() => {
  emitter.off('event-name', handler)
})
3. 避免不必要的响应性丢失
// 错误示例
provide('key', reactive({ count: 0 }))

// 正确示例
const state = reactive({ count: 0 })
provide('key', state)
七、总结与建议
| 场景类型 | 推荐方案 | 复杂度 |
|---|---|---|
| 简单父子通信 | Props/Events | ★☆☆ |
| 跨层级共享 | provide/inject | ★★☆ |
| 全局状态管理 | Pinia | ★★★ |
| 非关系组件通信 | mitt事件总线 | ★★☆ |
以上就是一文详解Vue3组件通信轻松玩转复杂数据流的详细内容,更多关于Vue3组件通信的资料请关注脚本之家其它相关文章!
