
手把手教你将vue前端和python脚本使用electron打包成桌面应用程序
作者:西南李一二
1-
npm run dist
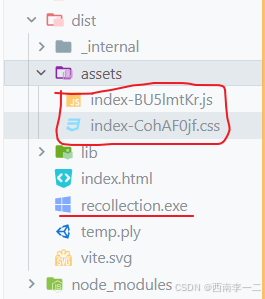
把vue项目打包 会出现一个dist文件夹
dist\
-index.html中要注意正确引用静态文件的路径:
assets\index-… & index-…
<!doctype html>
<html lang="en">
  <head>
    <meta charset="UTF-8" />
    <link rel="icon" type="image/svg+xml" href="/vite.svg" rel="external nofollow"  />
    <meta name="viewport" content="width=device-width, initial-scale=1.0" />
    <title>demo1121</title>
	//这里不要引用错
    <script type="module" crossorigin src="./assets/index-BU5lmtKr.js"></script>
    <link rel="stylesheet" crossorigin href="./assets/index-CohAF0jf.css" rel="external nofollow" >
  </head>
  <body>
    <div id="app"></div>
  </body>
</html>
2-
打包我的python脚本:
为了确保 PyInstaller 能够包含所有的依赖文件和资源文件,可以创建一个 PyInstaller 规范文件(.spec)。 Python 脚本名为 recollection.py,可以使用以下命令生成一个基本的规范文件:
pyinstaller --name=recollection --onefile recollection.py
这将生成一个 recollection.spec 文件,可以在其中进行必要的配置。
block_cipher = None

a = Analysis(
    ['recollection.py'],
    pathex=['.'],
    binaries=[],
    //这里是我的脚本要用到的一个依赖文件
    datas=[(r'./stereo_calibration.npz', '.')],
    //这里是我要引入的包
    hiddenimports=[
        'asyncio',
        'websockets',
        'cv2',
        'numpy',
        'open3d',
        'os',
        'serial',
        'math',
        'sys',
        'json',
    ],
    hookspath=[],
    runtime_hooks=[],
    excludes=[],
    win_no_prefer_redirects=False,
    win_private_assemblies=False,
    cipher=block_cipher,
)

pyz = PYZ(a.pure, a.zipped_data,
    cipher=block_cipher,
)

exe = EXE(
    pyz,
    a.scripts,
    [],
    exclude_binaries=True,
    name='recollection',
    debug=False,
    strip=False,
    upx=True,
    console=True,
)

coll = COLLECT(
    exe,
    a.binaries,
    a.zipfiles,
    a.datas,
    strip=False,
    upx=True,
    name='recollection',
)
pyinstaller --name=recollection --onefile recollection.py后
会在pyhton脚本所在文件夹下生成一个dist目录:
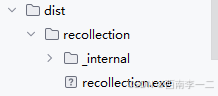
_internal 文件夹:
这个文件夹包含了
PyInstaller运行时所需要的一些内部库和模块。PyInstaller在打包过程中会将 Python 解释器、依赖的库、以及你的应用程序代码打包在一起,_internal文件夹中存放的就是这些内部使用的模块和库。具体来说,
_internal文件夹可能包含以下内容:
- Python 解释器的核心部分(如
pyiboot01_bootstrap等)。 PyInstaller自身的一些辅助模块和库。- 其他用于启动和运行你的应用程序的必要文件。
- Python 解释器的核心部分(如
exe 文件:
- 打包生成的可执行文件,通常是
.exe格式(在 Windows 系统上)。双击这个.exe文件即可运行你的应用程序,不需要 Python 解释器或其他依赖的第三方库。 - 这个
.exe文件本质上是一个包装器,它会加载_internal文件夹中的内容并启动你的应用程序。
- 打包生成的可执行文件,通常是
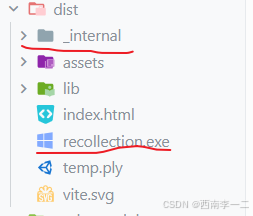
总结来说,_internal 文件夹是 PyInstaller 生成的一个内部文件夹,包含了所有运行你的应用程序所需的内部模块和库。这个文件夹在运行生成的可执行文件时会被自动加载和使用。用户在运行 .exe 文件时,通常不需要手动干预 _internal 文件夹中的内容。
_internal文件夹和recollection.exe复制到vue项目的dist目录下
3-
根目录下编写main.cjs
使用electron打包
const { app, BrowserWindow, ipcMain } = require('electron');
const path = require('path');
const url = require('url');
const { spawn } = require('child_process');
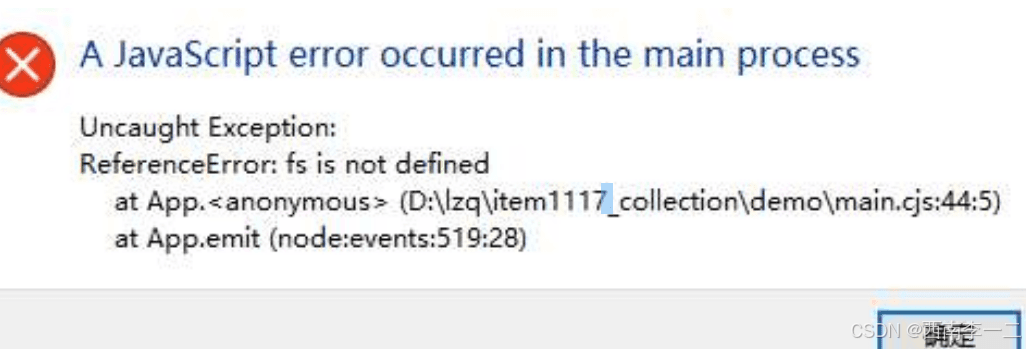
const fs = require('fs');
let mainWindow;
let pythonProcess;
function createWindow() {
// 创建浏览器窗口
mainWindow = new BrowserWindow({
width: 800,
height: 600,
webPreferences: {
nodeIntegration: true,
contextIsolation: false,
enableRemoteModule: true,
},
});
// 加载 Vue 项目的 index.html 文件
mainWindow.loadURL(
url.format({
pathname: path.join(__dirname, 'dist', 'index.html'),
protocol: 'file:',
slashes: true,
})
);
// 打开开发者工具
mainWindow.webContents.openDevTools();
// 窗口关闭时的事件
mainWindow.on('closed', function () {
mainWindow = null;
});
}
// 当 Electron 完成初始化并准备创建浏览器窗口时调用此方法
app.on('ready', function () {
createWindow();
// 打印 Python 可执行文件路径和 _internal 文件夹路径
const pythonExePath = path.join(__dirname, 'dist', 'recollection.exe');
console.log(`Python executable path: ${pythonExePath}`);
const internalPath = path.join(__dirname, 'dist', '_internal');
console.log(`Internal directory path: ${internalPath}`);
// 确保 _internal 文件夹被包含在打包目录中
if (!fs.existsSync(internalPath)) {
console.error('_internal 文件夹不存在');
}
// 启动 Python 可执行文件
pythonProcess = spawn(pythonExePath, [], {
cwd: path.join(__dirname, 'dist') // 设置工作目录为 `dist` 文件夹
});
// 监听 Python 进程的输出
pythonProcess.stdout.on('data', (data) => {
console.log(`Python stdout: ${data.toString()}`);
});
pythonProcess.stderr.on('data', (data) => {
console.error(`Python stderr: ${data.toString()}`);
});
pythonProcess.on('close', (code) => {
console.log(`Python process exited with code $[code]`);
});
// 监听应用程序关闭事件,确保 Python 进程也被关闭
app.on('will-quit', () => {
if (pythonProcess) {
pythonProcess.kill();
}
});
});
// 当所有窗口都关闭时退出应用
app.on('window-all-closed', function () {
if (process.platform !== 'darwin') {
app.quit();
}
});
app.on('activate', function () {
if (mainWindow === null) {
createWindow();
}
});
根目录下的package.json配置如下:
{
  "name": "demo",
  "private": true,
  "version": "0.0.0",
  "type": "module",
  "main": "main.cjs",
  "scripts": {
    "dev": "vite",
    "build": "vite build",
    "preview": "vite preview",
    "start": "electron .",
    "pack": "electron-builder --dir",
    "dist": "electron-builder"
  },
  "dependencies": {
    "@element-plus/icons-vue": "^2.3.1",
    "axios": "^1.7.7",
    "chart.js": "^4.4.6",
    "cors": "^2.8.5",
    "echarts": "^5.5.1",
    "element-plus": "^2.8.6",
    "hls.js": "^1.5.17",
    "less": "^4.2.0",
    "mathjs": "^13.2.2",
    "socket.io-client": "^4.8.1",
    "three": "^0.170.0",
    "vue": "^3.5.12",
    "vue-router": "^4.4.5"
  },
  "devDependencies": {
    "@types/three": "^0.169.0",
    "@vitejs/plugin-vue": "^5.1.4",
    "electron": "^33.2.0",
    "electron-builder": "^22.14.13",
    "vite": "^5.4.9"
  },
"build": {
    "appId": "com.example.demo",
    "productName": "DemoApp_v2",
    "directories": {
        "output": "build"
    },
    "files": [
        "dist/**/*",
        "main.cjs"
    ],
    "asar": false
}
}
asar选false,不然可能运行会报错:
终端打包:
npm run pack
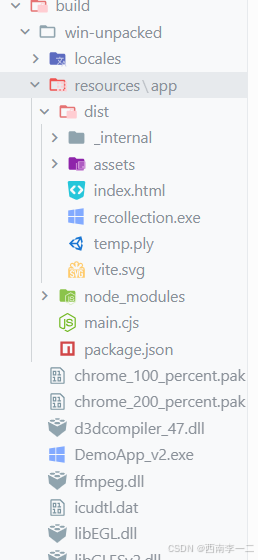
确保打包后的目录结构如下所示:
build/
└── win-unpacked/
    └── resources/
        └── app/
            └── dist/
                └── recollection.exe
                └── _internal/
                    └── ...
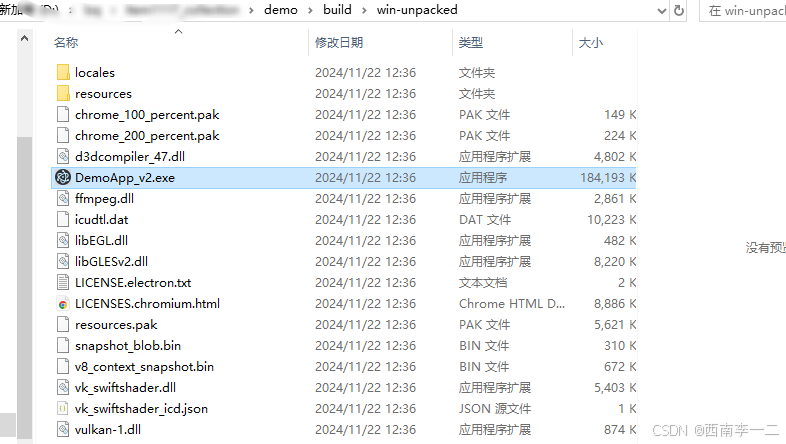
结果
总结
到此这篇关于将vue前端和python脚本使用electron打包成桌面应用程序的文章就介绍到这了,更多相关vue和python打包成桌面应用程序内容请搜索脚本之家以前的文章或继续浏览下面的相关文章希望大家以后多多支持脚本之家!