
Vue命令式组件的编写与应用小结
作者:不会写代码 只会CV
1.引言
大家好!今天我们来聊聊Vue.js中的一个有趣话题——命令式组件。你有没有觉得,有时候我们在Vue模板里写组件,就像是在玩搭积木,每个积木都有固定的形状和位置?虽然这样很直观,但有时候我们可能需要更多的自由度来发挥创意。
这就是命令式组件登场的时候了。它们就像是你的个人DJ,在你需要的时候播放你想要的音乐。不需要预先在模板中定义,你可以直接在JavaScript中调用它们,就像是调用一个函数一样简单。这种方式不仅让组件的使用变得更加灵活,还能让你的代码看起来更加干净利落。
在这篇文章中,我会带你了解命令式组件的基本概念,并通过一些简单的示例来展示它们是如何工作的。我们将一起看看,如何用几行代码就能让组件听从你的指挥,以及这样做能为你的Vue项目带来哪些好处。
准备好了吗?让我们开始这段轻松愉快的学习旅程,探索Vue命令式组件的魅力吧!
2.传统的组件
(假设我们现在需要编写一个MessageBox组件)
在传统的组件定义中,我们通常需要这么几步:
- 接收父组件的属性值
- 接收自定义事件
- 组件的结构布局,样式
- 给组件绑定不要的事件
最后在使用组件的时候,我们还得在父组件中,在模板中渲染出来,如果有时候我们嘚控制子组件的显示与否,还得添加控制的字段,总之就是有一些情况下很麻烦。
下这样一个MessageBox组件

这是部分代码:
MessageBox.vue
<template>
  <div class="message-box" v-if="show">
    <div class="inner">
      <div :class="['header', type]">
        <h1>{{ title }}</h1>
      </div>
      <div class="content">
        <p>
          {{ content }}
        </p>
        <button @click="closeMessageBox" :class="['btn', type]">{{ btntext }}</button>
      </div>
    </div>
  </div>
</template>
<script setup>
const props = defineProps({
  title: {
    type: String,
    default: 'Title'
  },
  btntext: {
    type: String,
    default: '确定'
  },
  content: {
    type: String,
    default: 'Content'
  },
  show: {
    type: Boolean,
    default: false
  },
  type: {
    type: String,
    default: 'primary',
    validate: (val) => ['primary', 'success', 'warning', 'error'].includes(val)
  }
})
const emits = defineEmits(['handler-visible'])
const closeMessageBox = () => {
  emits('handler-visible', false)
}
</script>
<style lang="scss" scoped>
.message-box {
  width: 100vw;
  height: 100vh;
  position: fixed;
  top: 0;
  left: 0;
  background-color: rgba(0, 0, 0, .5);
  .inner {
    width: 300px;
    height: 200px;
    background-color: #fff;
    border-radius: 5px;
    position: absolute;
    top: 50%;
    left: 50%;
    overflow: hidden;
    transform: translate(-50%, -50%);
    .content {
      margin-top: 20px;
      .btn {
        //去除样式
        border: none;
        outline: none;
        padding: 6px 15px;
        border-radius: 5px;
        //靠右下角
        position: absolute;
        right: 10px;
        bottom: 10px;
      }
    }
    .header {
      height: 38px;
      line-height: 38px;
      padding: 0 10px;
    }
    .primary {
      background-color: skyblue;
      color: #fff;
    }
    .success {
      background-color: green;
      color: #fff;
    }
    .warning {
      background-color: yellow;
      color: #fff;
    }
    .error {
      background-color: red;
      color: #fff;
    }
  }
}
</style>
使用的时候得渲染出来
<template>
  <div>
    <MessageBox title="标题" type="primary" btntext="close" @handler-visible="setVisible" :show="isVisible">
      This is a messagebox
    </MessageBox>
    <button @click="setVisible">显示MessageBox</button>
  </div>
</template>
<script setup>
import { ref } from 'vue';
import MessageBox from '../components/MessageBox.vue';
const isVisible = ref(false);
const setVisible = () => {
  isVisible.value = true;
}
</script>
3.命令式组件
如果遇到很多这种组件,就会感觉很麻烦,又得定义属性,又得设置自定义事件的回调函数,子组件还得接收。
这时候命令式组件的优势就体现出来了,他能让我们像调用函数的api一样,很轻松的就能实现组件的渲染。
在父组件中的代码就可以精简成这样:
<template>
  <div>
    <button @click="setVisible">显示MessageBox</button>
  </div>
</template>
<script setup>
import MessageBox from '../components/MessageBox';
console.log(MessageBox);
const setVisible = () => {
  MessageBox.alert({
    title: '标题',
    type: 'primary',
    btntext: 'close',
    content: '这是主要的内容信息'
  }, () => {
    console.log('关闭了')
  })
}
</script>
我们的自定义事件也是没了,显示的控制开关也没了,那么子组件需要做出一些修改,接收一个函数回调,但不过是相当于接收props。
<template>
  <div class="message-box">
    <div class="inner">
      <div :class="['header', type]">
        <h1>{{ title }}</h1>
      </div>
      <div class="content">
        <p>
          {{ content }}
        </p>
        <button @click="close" :class="['btn', type]">{{ btntext }}</button>
      </div>
    </div>
  </div>
</template>
<script setup>
const props = defineProps({
  title: {
    type: String,
    default: 'Title'
  },
  btntext: {
    type: String,
    default: '确定'
  },
  content: {
    type: String,
    default: 'Content'
  },
  type: {
    type: String,
    default: 'primary',
    validate: (val) => ['primary', 'success', 'warning', 'error'].includes(val)
  },
  close: Function
})
// const emits = defineEmits(['handler-visible'])
// const closeMessageBox = () => {
//   emits('handler-visible', false)
// }
</script>
这时候我们需要新添加一个js文件,可以定义在同文件夹目录下,index.js,在组件中引入:import MessageBox from '../components/MessageBox';默认引入的是js文件喔。
index.js文件中,我们要知道,如果我们不在页面模板中使用组件,要将其渲染在页面上,那么肯定得创建一个html页面模板(也可以叫应用实例),将其添加到页面当中去。
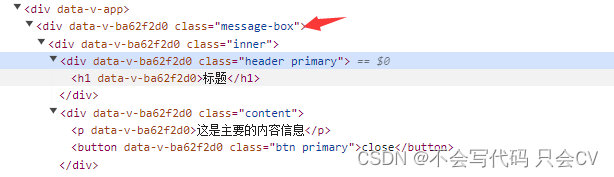
在本例中的MessageBox是打开时会渲染到页面,关闭后,又会从页面中删除。
此时我们必须要用到的就是 Vue 中的:createApp这个API了,我们要创建一个应用实例,将其挂载到某个地方,使其成为Vue的应用实例,这样他才能享用关于Vue的一切,包括props等属性。
import MessageBox from './index.vue'
import { createApp } from 'vue'
MessageBox.alert = (props, callback) => {
  const container = document.createElement('div')
  const messageBox = createApp(MessageBox, { ...props, close })
  open()
  function open() {
    messageBox.mount(container)
    document.body.appendChild(container)
  }
  function close() {
    messageBox.unmount(container)
    document.body.removeChild(container)
    if (typeof callback === 'function') {
      callback()
    }
  }
}
export default MessageBox
在调用时创建应用实例挂载到body上,close函数调用后,卸载掉组件,从body中移除
现在就可以像这样子使用了
<template>
  <div>
    <button @click="setVisible">显示MessageBox</button>
  </div>
</template>
<script setup>
import MessageBox from '../components/MessageBox';
console.log(MessageBox);
const setVisible = () => {
  MessageBox.alert({
    title: '标题',
    type: 'primary',
    btntext: 'close',
    content: '这是主要的内容信息'
  }, () => {
    console.log('关闭了')
  })
}
</script>
在回调函数中,我们还可以进行一些其他的操作,无论是数据的获取,修改等等。
如果关闭了此dom就会从页面中移除并调用回调函数。
我们也可以多定义几个回调函数,具体看需求
4.命令式组件的应用场景
命令式组件在Vue中的使用场景主要体现在需要动态、程序化地控制组件实例的时候。以下是一些典型的使用场景:
- 模态对话框(Modals): 命令式组件非常适合创建模态对话框,如确认框、警告框等。你可以动态地调用一个函数来显示模态框,并传入所需的参数和回调。
- 弹出窗口(Popups): 无论是提示信息、下拉菜单还是其他类型的弹出窗口,命令式组件都允许你通过编程的方式控制它们的显示和隐藏。
- 懒加载组件(Lazy-loaded components): 当组件需要根据某些条件或用户交互才加载时,命令式组件可以确保组件实例仅在需要时才被创建和挂载。
- 全局通知(Global notifications): 全局通知系统,如Toast或Snackbar,通常需要在应用的任何地方通过一个函数调用来触发显示。
- 导航守卫中的确认逻辑: 在Vue Router的导航守卫中,你可能需要在用户尝试导航离开一个页面之前确认他们未保存的更改。命令式组件可以用来创建一个确认对话框。
- 异步操作的反馈: 当执行异步操作(如发送API请求)时,你可能需要显示一个加载指示器或反馈消息。命令式组件可以在异步操作的不同阶段被创建和销毁。
- 条件渲染组件: 如果你的组件需要根据运行时的条件来决定是否渲染,命令式组件可以让你在条件满足时动态创建组件实例。
- 动态组件库(Dynamic component libraries): 当你在开发一个组件库时,命令式组件可以让你的组件更容易地被集成到其他项目中,因为它们不需要在模板中预定义。
- 测试和调试: 在自动化测试或调试时,命令式组件允许你更容易地控制组件的生命周期,从而进行更精确的测试和问题重现。
- 组件编排(Component orchestration): 当你需要在父组件中精确控制多个子组件的交互和生命周期时,命令式组件提供了一种直接的方式来编程化地管理这些交互。
命令式组件的核心优势在于它们提供了更大的控制灵活性,允许开发者根据应用的具体需求和交互逻辑来动态地创建和销毁组件实例。这种方式特别适用于那些不适合在模板中静态声明的组件使用场景。
到此这篇关于Vue命令式组件的编写与应用的文章就介绍到这了,更多相关Vue命令式组件内容请搜索脚本之家以前的文章或继续浏览下面的相关文章希望大家以后多多支持脚本之家!