Vue项目el-upload 上传文件及回显照片和下载文件功能实现
作者:Aohan-z
本次需求是上传多种固定格式的文件,且回显的时候,图片可以正常显示,文件可以进行下载,主要采用element的el-upload组件实现,对Vue项目el-upload 上传文件及回显照片和下载文件功能实现感兴趣的朋友跟随小编一起看看吧
本次需求是上传多种固定格式的文件,且回显的时候,图片可以正常显示,文件可以进行下载
主要采用element的el-upload组件实现
1、文件上传
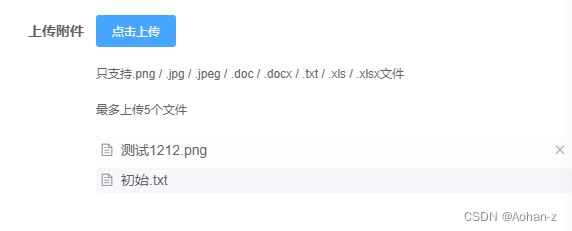
先看下,上传文件效果图
点击上传将文件放到网页,还有一个点击确定的按钮再上传文件到服务器

html
<el-upload
   ref="upload"
   accept=".png,.jpg,.jpeg,.doc,.docx,.txt,.xls,.xlsx"
   action="#"
   multiple
   :limit="5"
   :headers="headers"
   :auto-upload="false"
   :file-list="fileList"
   :on-change="handleChange"
   :on-remove="removeFile"
   :on-exceed="limitCheck"
 >
   <el-button size="small" type="primary">点击上传</el-button>
   <div slot="tip" class="el-upload__tip">
     <p>只支持.png / .jpg / .jpeg / .doc / .docx / .txt / .xls / .xlsx文件</p>
     <p>最多上传5个文件</p>
   </div>
 </el-upload>
1、accept:限制上传的文件类型
2、action: 必选参数,上传的地址,可以暂时设置为"#"
3、multiple: 设置选择文件时可以一次进行多选
4、limit:限制上传的文件的数量
5、auto-upload:是否自动上传,false为手动上传
(因为我需要和表单一起添加到服务器,所以点击上传时只是到页面,后面点击确定才到服务器)
需要注意:当:auto-upload="false"手动上传的时候,:before-upload="beforeUpload"上传前校验失效,两者不可以同时用,可以将校验加在:on-change里面
6、file-list:文件列表
script
记得引入
import axios from 'axios'
data() {
	return {
		// 上传附件
      fileList: [],
      headers: {
        'Content-Type': 'multipart/form-data'
      },
	}
},
methods: {
	// 文件状态改变时的钩子
	handleChange(file, fileList) { // 文件数量改变
      this.fileList = fileList
      const isLt2M = (file.size / 1024 / 1024 < 2)
      if (!isLt2M) {
        this.$message.error('上传头像图片大小不能超过 2MB!')
        this.fileList.pop()
      }
      return isLt2M
    },
    // 文件超出个数限制时的钩子
    limitCheck() {
      this.$message.warning('每次上传限制最多五个文件')
    },
    // 文件删除的钩子
    removeFile(file, fileList) {
      this.fileList = fileList
    },
    // 点击确定按钮 上传文件
    confirm() {
    	var param = new FormData()
    	this.fileList.forEach((val, index) => {
    		param.append('file', val.raw)
    	})
    	// 拿取其他的信息
    	param.append('id', sessionStorage.getItem('id'))
    	...
    	axios(`url......`, {
   			headers: {
              'Authorization': 'Bearer ' + sessionStorage.getItem('token'),
              'Content-Type': 'multipart/form-data'
            },
            method: 'post',
            data: param
          	}).then((res) => {
	            if (res.data.code === 200) {
	              this.$message.success('上传成功')
	            } else {
	              this.$message.error('上传失败')
	            }
          })
    }
}
2、文件回显
文件回显时,只展示上传的内容
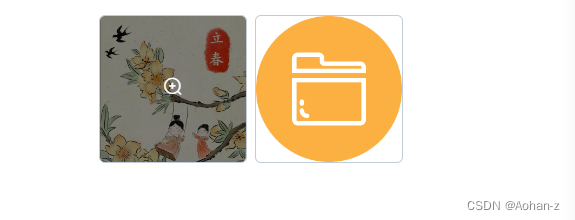
如果上传图片,直接展示缩略图,可进行放大预览操作
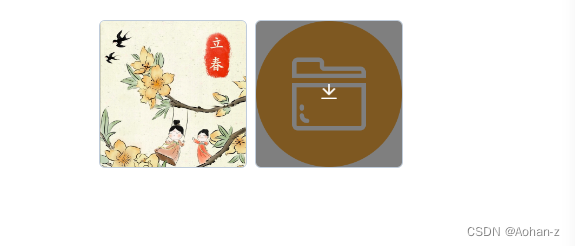
如果上传其他文件,展示固定的图片(图片可自己设置),可在网页进行下载操作


html
<el-upload
   :file-list="fileList"
   action="#"
   list-type="picture-card"
 >
   <div slot="file" slot-scope="{file}">
     <img
       class="el-upload-list__item-thumbnail"
       :src="file.url"
       alt=""
     >
     <span class="el-upload-list__item-actions">
     	// 下载
       <span
         v-if="updataIf(file)"
         class="el-upload-list__item-delete"
         @click="handleDownload(file)"
       >
         <i class="el-icon-download" />
       </span>
       // 放大预览
       <span
         v-else
         class="el-upload-list__item-preview"
         @click="handlePictureCardPreview(file)"
       >
         <i class="el-icon-zoom-in" />
       </span>
     </span>
   </div>
 </el-upload>
 <el-dialog :visible.sync="dialogVisible" :append-to-body="true">
   <img width="100%" height="100%" :src="dialogImageUrl" alt="">
 </el-dialog>
script
记得引入
import axios from 'axios'
data() {
	return {
		dialogImageUrl: '',
	    dialogVisible: false,
	    fileList: []
	}
},
created() {
	this.getDetail()
},
methods: {
	// 判断文件类型,图片预览,文件下载
    updataIf(e) {
      if (e.fileName) {
        if (e.fileName.split('.')[1] === 'png' || e.fileName.split('.')[1] === 'jpeg' || e.fileName.split('.')[1] === 'jpg') {
          return false
        } else {
          return true
        }
      } else {
        if (e.name.split('.')[1] === 'png' || e.name.split('.')[1] === 'jpeg' || e.name.split('.')[1] === 'jpg') {
          return false
        } else {
          return true
        }
      }
    },
	// 获取详情
	getDetail() {
		this.fileList = []
		// 调用查询的接口
		...
		...
		// 调用成功
		if (res.code === 200) {
			var arr = []
			// res.data.fileMap为返回的Object格式的文件数据
			// 因为返回的格式是 {name: url,name: url}
			// 循环转变成需要的数组格式,每个数组元素包含name、url、id
			// [{name: name,url: ulr,id: id},{name: name,url: ulr,id: id}]
			Object.keys(res.data.fileMap).forEach(key => {
			   var obj = {
			     name: '',
			     url: '',
			     id: ''
			   }
			   // 数组元素里面的name就是key
			   obj.name = key
			   // 数组元素里面的url,当时图片的时候直接用url
			   // 当不为图片的时候,显示固定的图片,且传入id(id用于下载文件)
			   if (key.split('.')[1] === 'png' || key.split('.')[1] === 'jpeg' || key.split('.')[1] === 'jpg') {
			     obj.url = 'http://.../file/minio/view/chs/' + res.data.fileMap[key]
			   } else {
			     // 所有文件统一图片
			     obj.url = require('../../../assets/images/fileImg.png')
			     obj.id = res.data.fileMap[key]
			   }
			   arr.push(obj)
			 })
			 // 将组好的格式直接赋值给fileList(文件列表)
			 this.fileList = arr
		}
	},
	// 放大预览
	handlePictureCardPreview(file) {
      this.dialogImageUrl = file.url
      this.dialogVisible = true
    },
    // 文件下载
    handleDownload(file) {
      axios(`url.......`, {
        headers: {
          'Authorization': 'Bearer ' + sessionStorage.getItem('token'),
          'Content-Type': 'application/octet-stream'
        },
        methods: 'get',
        params: {
          id: file.id
        },
        responseType: 'blob'
      }).then((res) => {
        if (res.status === 200) {
          const content = res.data
          const blob = new Blob([content])
          const fileName = file.name
          if ('download' in document.createElement('a')) { // 非IE下载
            const elink = document.createElement('a')// 创建一个a标签通过a标签的点击事件区下载文件
            elink.download = fileName
            elink.style.display = 'none'
            elink.href = URL.createObjectURL(blob)// 使用blob创建一个指向类型数组的URL
            document.body.appendChild(elink)
            elink.click()
            URL.revokeObjectURL(elink.href) // 释放URL 对象
            document.body.removeChild(elink)
          } else { // IE10+下载
            navigator.msSaveBlob(blob, fileName)
          }
        }
      }).catch(res => {
        console.log(res)
      })
    },
}
关于type: “application/octet-stream“ 格式的数据并下载主要参考下面这篇文章 https://www.jb51.net/javascript/3086322zm.htm
style
隐藏el-upload上传
// 隐藏上传
::v-deep .el-upload.el-upload--picture-card{
  display: none;
}
// 隐藏右上角绿色标志
::v-deep .el-upload-list__item-status-label{
  display: none !important;
}
到此这篇关于Vue项目el-upload 上传文件及回显照片和下载文件功能实现的文章就介绍到这了,更多相关Vue el-upload 上传文件内容请搜索脚本之家以前的文章或继续浏览下面的相关文章希望大家以后多多支持脚本之家!
