
Vue实现tab切换的两种方法示例详解
作者:小姚学前端
这篇文章主要介绍了Vue实现tab切换的两种方法,本文通过实例代码给大家介绍的非常详细,对大家的学习或工作具有一定的参考借鉴价值,需要的朋友可以参考下
Vue常见的实现tab切换的两种方法
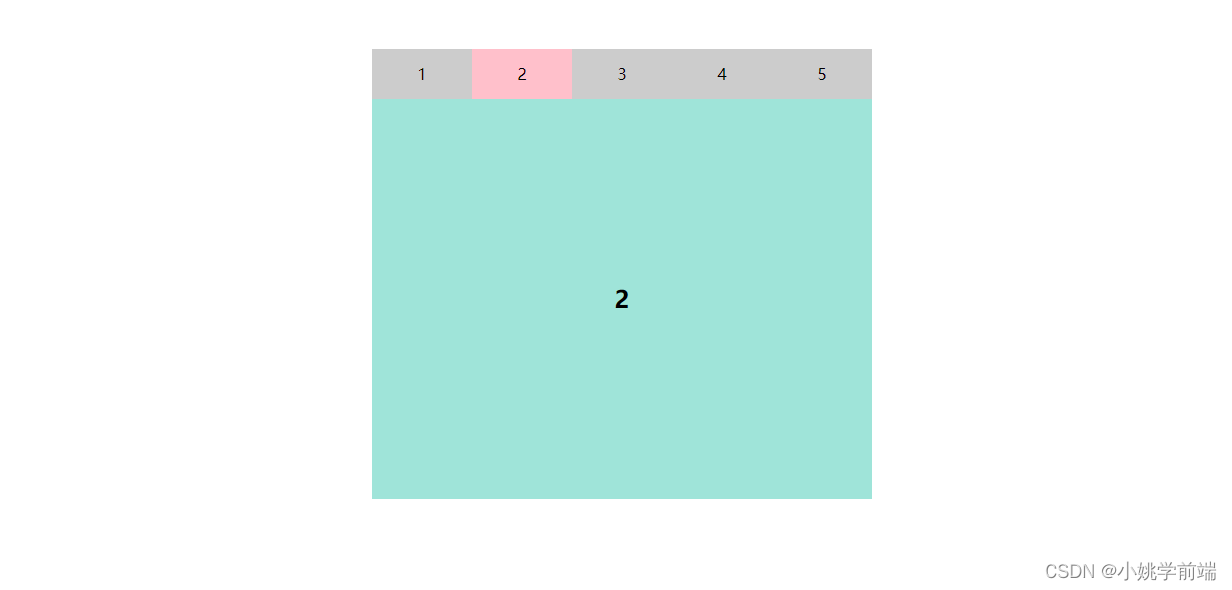
方法一:事件绑定+属性绑定 效果图
完整代码
<!DOCTYPE html>
<html lang="en">
<head>
    <meta charset="UTF-8">
    <meta name="viewport" content="width=device-width, initial-scale=1.0">
    <title>tab</title>
    <style>
        *{
            margin: 0;
            padding: 0;
        }
        h2{
            width: 500px;
            height: 400px;
            background: #9fe4d9;
            text-align: center;
            line-height: 400px;
            display: none;
        }
        #app .kk{
            width: 500px;
            height: 50px;
            display: flex;
            justify-content: space-between;
        }
        #app{
            width: 500px;
            margin: 50px auto;
        }
        span{
            flex: 1;
            text-align: center;
            line-height: 50px;
            background: #ccc;
        }
        .on{
            background: pink;
        }
        #app .onn{
            display: block;
        }
    </style>
</head>
<body>
    <div id="app">
        <div class="kk">
        <span :class =" n==1 && 'on'" @click.self="n=1">1</span>
        <span :class =" n==2 && 'on'" @click.self="n=2">2</span>
        <span :class =" n==3 && 'on'" @click.self="n=3">3</span>
        <span :class =" n==4 && 'on'" @click.self="n=4">4</span>
        <span :class =" n==5 && 'on'" @click.self="n=5">5</span>
        </div>
        <h2 :class =" n==1 && 'onn'">1</h2>
        <h2 :class =" n==2 && 'onn'">2</h2>
        <h2 :class =" n==3 && 'onn'">3</h2>
        <h2 :class =" n==4 && 'onn'">4</h2>
        <h2 :class =" n==5 && 'onn'">5</h2>
    </div>
</body>
</html>
<script type="module">
import {createApp} from './js/vue.esm-browser.js';
createApp({
    data() {
        return {
           n:1
        }
    },
    methods:{
       },
}).mount('#app')
</script>
方法二:属性绑定+ 动态组件 component标签
该组件具有一个is属性,is属性的值 是 要渲染组件的名字,即为is属性的值是哪一个组件名,
component 标签就会渲染哪一个组件
缺点:component 可以动态渲染组件的内容,但是每一个切换,都会重新渲染组件内容,降低渲染效率
使用keep-alive 标签(组件),可以缓存曾经渲染过的组件,从而提高渲染效率
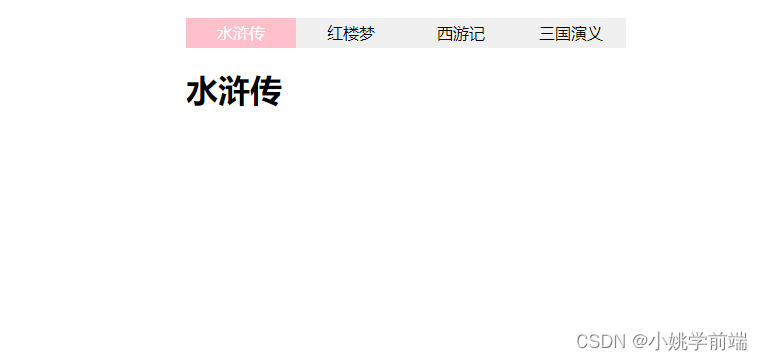
效果图
完整代码
<!DOCTYPE html>
<html lang="en">
<head>
    <meta charset="UTF-8">
    <meta name="viewport" content="width=device-width, initial-scale=1.0">
    <title>动态组件</title>
    <style>
        *{
            margin: 0;
            padding: 0;
        }
        .wp{
            width: 440px;
            height: 30px;
            margin: 20px auto;
            display: flex;
            background: #f0f0f0;
        }
        .wp span{
            flex: 1;
            height: 30px;
            text-align: center;
            line-height: 30px;
            cursor: pointer;
        }
        .wp span.on{
            background: pink;
            color: #fff;
        }
        h1{
            width: 440px;
            margin: 0 auto;
        }
    </style>
</head>
<body>
    <div id="app">
        <div class="wp">
            <span :class="num==1&&'on'" @click="num=1">水浒传</span>
            <span :class="num==2&&'on'" @click="num=2">红楼梦</span>
            <span :class="num==3&&'on'" @click="num=3">西游记</span>
            <span :class="num==4&&'on'" @click="num=4">三国演义</span>
        </div>
        <!--
            动态组件 使用标签 component
            该组件具有一个is属性,is属性的值 是 要渲染组件的名字,即为is属性的值是哪一个组件名,
            component 标签就会渲染哪一个组件
            缺点:component 可以动态渲染组件的内容,但是每一个切换,都会重新渲染组件内容,降低渲染效率
            使用keep-alive 标签(组件),可以缓存曾经渲染过的组件,从而提高渲染效率
         -->
         <keep-alive>
        <component :is="'comp'+num"></component>
         </keep-alive>
    </div>
</body>
</html>
<script type="module">
 import { createApp } from './js/vue.esm-browser.js';
 let comp1={
    template:'<h1>水浒传</h1>'
 }
 let comp2={
    template:'<h1>红楼梦</h1>'
 }
 let comp3={
    template:`
    <h1>西游记</h1>
    <p>{{n}}</p>
    <button @click = "n++">点击++</button>
    `,
    data() {
        return {
            n:100,
        }
    },
 }
 let comp4={
    template:'<h1>三国演义</h1>'
 }
 let aa = {
    template:'<h1>金瓶梅</h1>'
 }
 createApp({
    data() {
        return {
            num:1,
        }
    },
    components:{
        comp1,comp2,comp3,comp4,aa
    }
 }).mount('#app')
</script>
到此这篇关于Vue常见的实现tab切换的两种方法的文章就介绍到这了,更多相关Vue tab切换内容请搜索脚本之家以前的文章或继续浏览下面的相关文章希望大家以后多多支持脚本之家!