html中引入Vue.js的cdn实现简单的文档单页
作者:TANKING
这篇文章主要为大家介绍了html中引入Vue.js的cdn实现简单的文档单页示例详解,有需要的朋友可以借鉴参考下,希望能够有所帮助,祝大家多多进步,早日升职加薪
摘要
平时要编写一篇技术文档、开发文档、博客,都有很多的选择。例如Vuepress,showDoc,甚至使用腾讯文档等这一类的文档工具,都可以写。
html引入vue.js
我现在使用html引入vue.js的方式编写一个单页文档网页。
<!DOCTYPE html>
<html lang="en">
<head>
  <title>单页文档</title>
  <meta charset="UTF-8">
  <meta name="viewport" content="width=device-width, initial-scale=1.0">
  <script src="vue.js"></script>
  <script src="vue-router.min.js"></script>
  <style>
    *{
      padding: 0;
      margin: 0;
      font-family: font-family: -apple-system,BlinkMacSystemFont,"Segoe UI",Roboto,"Helvetica Neue",Arial,"Noto Sans",sans-serif,"Apple Color Emoji","Segoe UI Emoji","Segoe UI Symbol","Noto Color Emoji";
    }
    body {
      margin: 0;
      font-family: Arial, sans-serif;
      background: #fff;
    }
    .header{
      width: 100%;
      height: 55px;
      border-bottom: 1px solid #eee;
      margin: 0 auto;
      background: #fff;
      position: fixed;
      top: 0;
    }
    .container {
      width: 70%;
      margin: 100px auto 0;
      display: flex;
    }
    .sidebar {
      width: 250px;
      flex: 1;
      border-right: 1px solid #eee;
      position: fixed;
      height: 100%;
      overflow-y: auto;
    }
    .menu-item {
      cursor: pointer;
      padding: 12px 20px;
      font-size: 17px;
    }
    .sub-menu-item {
      cursor: pointer;
      padding: 5px 0 5px 40px;
      font-size: 15px;
    }
    .content {
      flex: 2;
      padding: 30px;
      margin-left: 300px;
      background: #F6F8FA;
    }
    .content h1 {
        font-size: 2.5rem;
        font-weight: 500;
        margin: 0 0 12px 0;
        border-bottom: 1px solid #e9e9e9;
        padding-bottom: 10px;
    }
    .content h2 {
        font-size: 1.5rem;
        font-weight: 500;
        margin: 0 0 12px 0;
        border-bottom: 1px solid #e9e9e9;
        padding-bottom: 10px;
    }
    .content h3 {
        font-size: 1.17rem;
        font-weight: 500;
        margin: 0 0 12px 0;
        border-bottom: 1px solid #e9e9e9;
        padding-bottom: 10px;
    }
    .content h4 {
        font-size: 1.33rem;
        font-weight: 500;
        margin: 0 0 12px 0;
        border-bottom: 1px solid #e9e9e9;
        padding-bottom: 10px;
    }
    .content h5 {
        font-size: 0.83rem;
        font-weight: 500;
        margin: 0 0 12px 0;
        border-bottom: 1px solid #e9e9e9;
        padding-bottom: 10px;
    }
    .content p{
      font-size: 1rem;
      color: #2C3E50;
      line-height: 27px;
    }
    .content code{
      color: #476582;
      padding: 0.25rem 0.5rem;
      margin: 0;
      font-size: 0.9em;
      background-color: rgba(27,31,35,.05);
      border-radius: 3px;
    }
    /* 滑动效果 */
    .slide-fade-enter-active {
      transition: all 0.3s ease;
    }
    .slide-fade-leave-active {
      transition: all 0.3s cubic-bezier(1.0, 0.5, 0.8, 1.0);
    }
    .slide-fade-enter, .slide-fade-leave-to {
      transform: translateX(10px);
      opacity: 0;
    }
    /* 渐变淡入淡出 */
    .fade-enter-active, .fade-leave-active {
      transition: opacity 0.5s;
    }
    .fade-enter, .fade-leave-to {
      opacity: 0;
    }
    /*导航选中的样式*/
    .selectedItem {
      color: #42B983;
    }
  </style>
</head>
<body>
  <div id="app">
    <!-- 顶部页头 -->
    <div class="header"></div>
    <div class="container">
      <!-- 导航容器 -->
      <div class="sidebar">
        <ul>
          <li v-for="item in menuItems" :key="item.id">
            <div class="menu-item" @click="handleMenuItemClick(item)" :class="{ 'selectedItem': selectedMenuItemId === item.id }">
              {{ item.name }}
            </div>
            <ul v-if="item.subItems">
              <li class="sub-menu-item" v-for="subItem in item.subItems" :key="subItem.id" @click="changeRoute(subItem.id)" :class="{ 'selectedItem': selectedSubMenuItemId === subItem.id }">
                {{ subItem.name }}
              </li>
            </ul>
          </li>
        </ul>
      </div>
      <!-- 内容容器 -->
      <div class="content">
        <!-- 过渡动画 -->
        <transition name="slide-fade" mode="out-in">
          <router-view :contents="contents" :key="$route.fullPath"></router-view>
        </transition>
      </div>
    </div>
  </div>
  <script>
    // 注册全局的组件
    Vue.component('content-component', {
      props: ['content'],
      template: '<div v-html="content"></div>'
    });
    // 自定义Vue组件,在路由切换时展示不同内容的页面
    const ContentPage = {
      props: ['contents'],
      template: '<content-component :content="contents[selectedContent]"></content-component>',
      computed: {
        selectedContent() {
          return this.$route.params.contentId;
        }
      }
    };
    // 定义Vue Router的路由配置
    const routes = [
      { path: '/', component: { template: '<div>Welcome to the app</div>' } },
      { path: '/:contentId', component: ContentPage, props: true }
    ];
    // 创建Vue Router实例
    const router = new VueRouter({
      routes
    });
    // 创建Vue实例
    new Vue({
      el: '#app',
      router,
      data: {
        menuItems: [
          { id: 'content-1', name: 'Vue 核心基础知识梳理', subItems: [
            { id: 'sub-content-1', name: 'Vue 实例(应用)相关' },
            { id: 'sub-content-2', name: 'Vue 样式相关' },
            { id: 'sub-content-3', name: 'Vue 常见指令' }
          ] },
          { id: 'content-2', name: 'Vue 高级知识梳理', subItems: [
            { id: 'sub-content-666', name: 'Vue 的设计模式' },
            { id: 'sub-content-777', name: 'Vue 生命周期函数' }
          ] }
        ],
        contents: {
          'sub-content-1': '<h1>Vue 实例(应用)相关</h1><p>Vue.createApp() 创建 vue 实例(应用),参数可以决定根组件如何渲染!</p>',
          'sub-content-2': '<h2>Vue 样式相关</h2><p>v-bind:class 的简写形式,为元素绑定动态类名。</p>',
          'sub-content-3': '<h1>Vue 常见指令</h1><p>绑定事件</p><p>① “v-on:”可以简写成@</p><p>② 可以使用“@[变量名]”,绑定动态事件。即,具体绑定哪个事件,由“变量名”决定</p><p>③ 事件处理函数中,可以使用事件对象 event</p><p>④ 事件处理函数中,如果想传递多个参数,可以使用$event 指代事件对象</p>',
          'sub-content-666': '<h1>mvvm设计模式</h1><p>m 代表 model,指代数据</p><p>v 代表 view,指代视图</p><p>vm 代表 viewModel,指代视图数据连接层</p>',
          'sub-content-777': '<h1>Vue 生命周期函数</h1><p>beforeCreate(){}:在实例生成之前,会自动执行该函数</p><p>beforeCreate(){}:在实例生成之前,会自动执行该函数</p><p>created(){}:在实例生成之后,会自动执行该函数</p><p>beforeMount(){}:在组件内容被渲染到页面之前,会自动执行该函数</p><p>mounted(){}:组件内容被渲染到页面后,会自动执行该函数</p><p>beforeUpdate(){}:当 data 中的数据发生变化时会自动执行该函数</p><p>updated(){}:当 data 中的数据发生变化,同时页面完成更新后,会自动执行的函数</p><p>bbeforeUnmount(){} :当 <code>Vue</code> 应用失效时,会自动执行该函数</p><p>unmounted(){}:当 Vue 应用失效后,同时 dom 完全销毁之后,自动执行的函数</p>'
        },
        selectedMenuItemId: null,
        selectedSubMenuItemId: null,
      },
      methods: {
        changeRoute(contentId) {
          if (this.$route.params.contentId !== contentId) {
            this.$router.push('/' + contentId);
            this.selectedSubMenuItemId = contentId; // 设置当前选择的二级导航
            this.selectedMenuItemId = null; // 清空所选的一级导航
          }
        },
        handleMenuItemClick(menuItem) {
          if (menuItem.subItems) {
            menuItem.isExpanded = !menuItem.isExpanded;
            this.selectedMenuItemId = null; // 清空所选的一级导航
          } else {
            this.changeRoute(menuItem.id);
            this.selectedMenuItemId = menuItem.id;  // 设置当前选择的一级导航
          }
        },
      }
    });
  </script>
</body>
</html>同样的,这个单页文档也是一个半成品,你需要引入vue.js的cdn、vue-router.min.js的cdn、以及axios.min.js的cdn,我这里是直接下载到本地了,因为比较快。
获取数据并输出json来渲染文档
通过Json来配置左侧的导航和右侧的内容
这里还没有做请求接口获取数据,后期可以增加一个接口请求,获取数据并输出json来渲染文档。

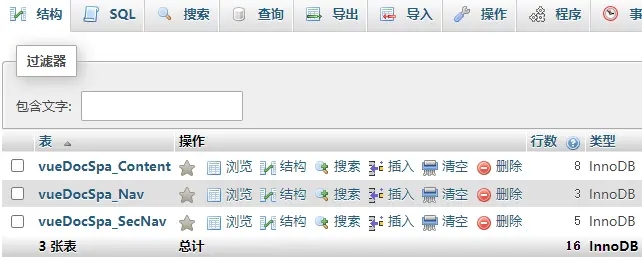
以上代码是本地版,如需包含编辑器,数据库后端等的可以咨询我。
demo http://demo.likeyunba.com/vue-doc-spa/#/
同样的,这就是一个Vue应用,只不过没有通过工程化构建工具去做,而是引入cdn来使用Vue,也有自定义组件、路由管理、transition过渡动画等相关的配置。
以上就是html中引入Vue.js的cdn实现简单的文档单页的详细内容,更多关于html引入Vue.js cdn文档单页的资料请关注脚本之家其它相关文章!
