vue中的v-slot指令使用
作者:shadow fish
定义
在Vue中, v-slot 指令用于定义插槽的模板内容。它用于在父组件中传递内容到子组件中的插槽。 v-slot 指令可以用于 标签或组件标签上,以便在子组件中使用插槽。
语法
使用 v-slot 指令时,可以使用以下两种语法:
1.缩写语法: # 符号表示 v-slot 指令,后面跟插槽名称。
<template #插槽名称>
  <!-- 插槽内容 -->
</template>
2.完整语法: v-slot 指令后面跟着 : ,后面是插槽名称。
<template v-slot:插槽名称>
  <!-- 插槽内容 -->
</template>
使用场景
v-slot 指令的使用场景包括但不限于以下几种:
- 在组件中使用插槽,将父组件中的内容传递给子组件。
- 在子组件中使用具名插槽,根据插槽名称渲染不同的内容。
- 在子组件中使用作用域插槽,将子组件中的数据传递到父组件中进行渲染。
场景一
在组件中使用插槽,将父组件中的内容传递给子组件。
父组件
<template>
  <div>
    <child-component>
      <template v-slot:default>
        <!-- 插槽内容 -->
        <p>This is the content passed from the parent component.</p>
      </template>
    </child-component>
  </div>
</template>
子组件
<template>
  <div>
    <slot></slot>
  </div>
</template>
场景二
在子组件中使用具名插槽,根据插槽名称渲染不同的内容:
父组件
<template>
  <div>
    <child-component>
      <template v-slot:header>
        <!-- 插槽内容 -->
        <h1>Header Content</h1>
      </template>
      <template v-slot:body>
        <!-- 插槽内容 -->
        <p>Body Content</p>
      </template>
    </child-component>
  </div>
</template>
子组件
<template>
  <div>
    <slot name="header"></slot>
    <slot name="body"></slot>
  </div>
</template>
场景三
在子组件中使用作用域插槽,将子组件中的数据传递到父组件中进行渲染:
父组件
<template>
  <div>
    <child-component>
      <template v-slot:default="slotProps">
        <!-- 插槽内容 -->
        <p>{{ slotProps.message }}</p>
      </template>
    </child-component>
  </div>
</template>
子组件
<template>
  <div>
    <slot :message="message"></slot>
  </div>
</template>
<script>
export default {
  data() {
    return {
      message: "Hello from child component!"
    };
  }
};
</script>
在router-view中的应用,拿到router-view中的Component值,同时利用component 标签动态渲染组件
 <router-view v-slot="{ Component, route }">
      <transition appear name="fade-transform" mode="out-in">
        <keep-alive :include="keepAliveName">
          <component :is="Component" v-if="isRouterShow" :key="route.fullPath" />
        </keep-alive>
      </transition>
    </router-view>
tips
如果父组件没有向插槽传入值,则子组件会显示原来的内容,当传入具体的值时,则会覆盖掉插槽内的内容
子组件:
<template>
  <slot name="a1" :content="slot_data"> <h1>child-123</h1> </slot>
</template>
<script lang="ts" setup>
const slot_data = "child-content";
</script>
<style scoped></style>
父组件:
<template>
  <div>
    <h5>slot-test</h5>
    <child>
      <!-- <template #a1="{ content }">
        <div>{{ content }}</div>
      </template> -->
    </child>
  </div>
</template>
<script lang="ts" setup>
import child from "./child.vue";
</script>
<style scoped></style>
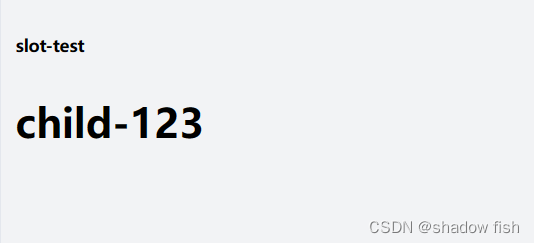
此时注释掉插值代码,结果如图,只会显示原来槽内内容

父组件代码修改如下
<template>
  <div>
    <h5>slot-test</h5>
    <child>
      <template #a1="{ content }">
        <div>{{ content }} 我是父组件</div>
      </template>
    </child>
  </div>
</template>
<script lang="ts" setup>
import child from "./child.vue";
</script>
<style scoped></style>
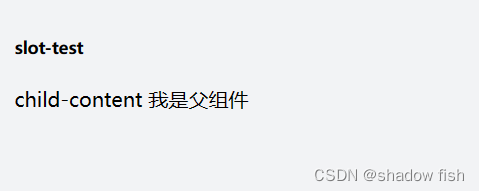
显示内容如图所示,则会覆盖掉原来槽值

在v-slot中,既可以由子组件向父组件传值(slot_data),又可以由父组件向子组件传递html内容,可以看做是‘’双向的‘’在一些场景比如子组件渲染的内容既需要子组件数据又需要父组件数据时可以考虑使用插槽来完成
props同样也可以向子组件传值,在子组件中同一渲染完成,这是之前一直使用的方式,之后可以考虑使用插槽,拿到子组件中的值,又可以向子组件传递内容
只有一个默认插槽时
可以直接这样写,类似于上述router-view的用法子组件:
<template>
  <slot :content="slot_data" :content2="slot_data2"> </slot>
</template>
<script lang="ts" setup>
const slot_data = "child-content";
const slot_data2 = "child-content2";
</script>
父组件:content,content2采用解构赋值直接从slotProps值(默认传递变量的名称)中得到,templete也可以省略,child标签内的所有值都会被传入插槽
<template>
  <div>
    <h5>slot-test</h5>
    <child v-slot="{ content, content2 }">
      <!-- <h1>{{ content }}</h1> -->
      {{ content }}
      {{ content2 }}
      784561
    </child>
  </div>
</template>
<script lang="ts" setup>
import child from "./child.vue";
</script>
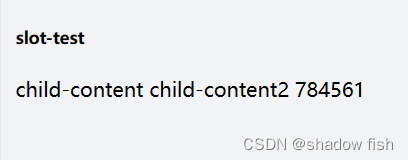
结果如图:

到此这篇关于vue v-slot指令的文章就介绍到这了,更多相关vue v-slot指令内容请搜索脚本之家以前的文章或继续浏览下面的相关文章希望大家以后多多支持脚本之家!
