
MySql中的数据库连接池详解
作者:`moon`晓龙
这篇文章主要介绍了MySql中的数据库连接池方式,具有很好的参考价值,希望对大家有所帮助,如有错误或未考虑完全的地方,望不吝赐教
MySql数据库连接池
1、概念
JDBC数据连接池:在做开发是不会单独写一个连接,都是使用数据库连接池。
2、为什么会出现数据库连接池
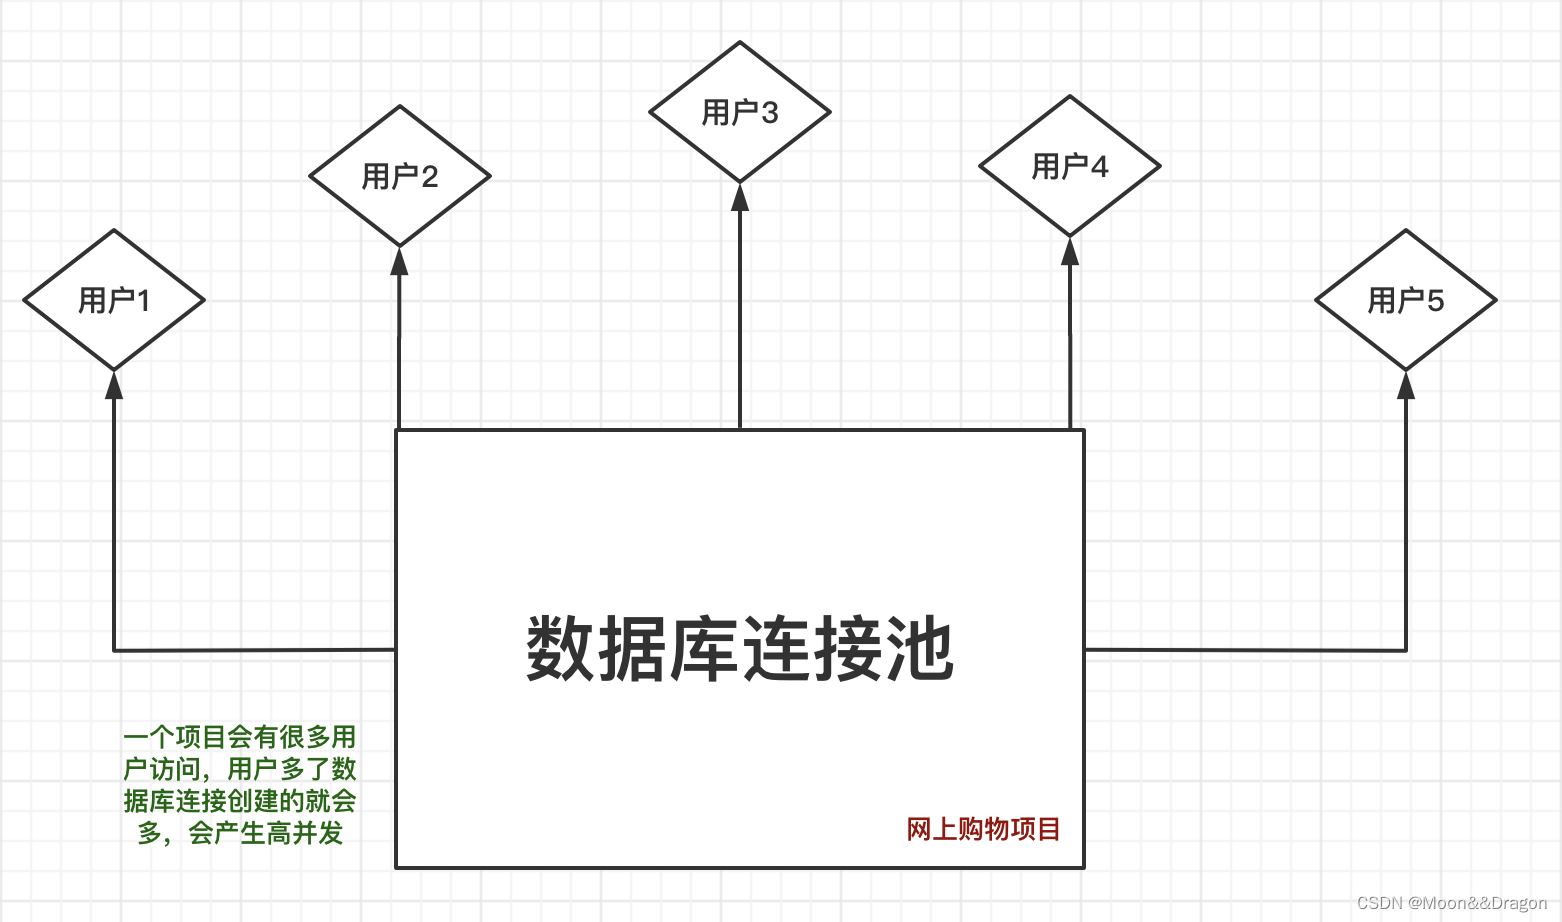
一个项目中,会有很多的用户访问,如果是和之前一样单次连接,那么每次连接数据库都要创建数据库连接对象,来n个用户九创建n个,这样的高并发,服务器受不了。而且用完后关闭连接,浪费资源,如果在关闭的时候出现异常未能关闭连接,就会出现内存泄漏(对象无法回收)
如果没有池化技术,就相当于银行开门,然后业务员服务你一个人,然后关门,下个人来了再开门,这样很浪费资源
使用了数据库连接池之后,我们在开发中就不需要写连接数据库代码了
3、原理
- 和线程池类似,规定了最大的承载量,比如有留出了5个连接对象,那么第六个人就需要排队
- 如果使用完毕去关闭数据库连接对象,不会真的关闭,只是被连接池回收,然后给排队的下一个人使用
- 相当于银行开门,开门以后业务员服务客户,没有客户的时候就等待,然后到点关门,业务员不再工作
4、数据库连接池的提供商
数据库连接池的有很多,比较热门的有:
- DBCP
- 是tomcat自带的,相对于C3P0来说速率较快,但是不稳定
- C3P0
- 速率比较慢,但是非常稳定
- Druid(德鲁伊)
- 是阿里提供,最常用的,它结合了DBCP和C3P0各自的优点
5、DataSource数据源
- 实现接口DataSource就可以编写数据源
- 通过DataSource替换了DriverManager,相当于在各个数据库厂商提供的驱动的基础上,再次进行包装
6、DBCP
- 导入jar包
- java中使用
public class DBCPTest {

	private static DataSource dataSource = null;

	public static void DbcpTest() {
		try {
			// 读取文件配置
			InputStream config = DBCPTest.class.getClassLoader().getResourceAsStream("resources/config.properties");
			Properties prop = new Properties();
			prop.load(config);

			// 创建数据源 工厂模式
			dataSource = BasicDataSourceFactory.createDataSource(prop);

			// 从数据源中获取连接
			Connection connection = dataSource.getConnection();

		} catch (IOException e) {
			// TODO Auto-generated catch block
			e.printStackTrace();
		} catch (Exception e) {
			// TODO Auto-generated catch block
			e.printStackTrace();
		}
	}
}- 配置文件
driverClassName=com.mysql.cj.jdbc.Driver
url=jdbc:mysql://localhost:3306/school?useUnicode=true&characterEncoding=utf8&useSSL=true
username=root
password=19981104
7、C3P0
- 导入jar包
- java中使用
public static void main(String[] args) throws PropertyVetoException, SQLException {
		// 实例化C3P0提供的连接池
		ComboPooledDataSource cpds = new ComboPooledDataSource();
		// 加载当前使用的数据库
		cpds.setDriverClass("com.mysql.cj.jdbc.Driver");
		cpds.setJdbcUrl("jdbc:mysql://localhost:3306/school?useUnicode=true&characterEncoding=utf8&useSSL=true");
		cpds.setUser("root");
		cpds.setPassword("19981104");
		// 通过Datasource数据源获得连接对象
		Connection connection = cpds.getConnection();

		// 设置初始化连接池中的连接对象
		cpds.setInitialPoolSize(2);


    // 也可以通过加载配置文件使用数据库
		// 在实例化时,去加载配置文件
  	// 这里的配置文件名是xml中的named-config的name
		ComboPooledDataSource cpds2 = new ComboPooledDataSource("intergalactoApp");
		Connection connection2 = cpds2.getConnection();
		System.out.println(connection2);
	}
配置XMl
- XML是一个文本标记语言,就是使用标签对组成的语言,进行记录文本信息
- XML文件主要的作用就是标记存储内容的
<?xml version="1.0" encoding="UTF-8"?>
<c3p0-config>
  <!-- 在这下面配置数据库信息 -->
  <named-config name="intergalactoApp">
  	<!-- 配置驱动,url,user和password -->
  	<property name="driverClass">com.mysql.cj.jdbc.Driver</property>
    <property name="jdbcUrl">jdbc:mysql://localhost:3306/school?useSSL=true</property>
    <property name="user">root</property>
    <property name="password">password</property>

    <property name="acquireIncrement">50</property>
    <property name="initialPoolSize">100</property>
    <property name="minPoolSize">50</property>
    <property name="maxPoolSize">1000</property>

    <!-- intergalactoApp adopts a different approach to configuring statement caching -->
    <property name="maxStatements">0</property>
    <property name="maxStatementsPerConnection">5</property>

  </named-config>

</c3p0-config>
8、Druid(德鲁伊)
- 导入jar包
- java中使用
public static void main(String[] agrs) throws Exception {

		DruidDataSource dataSource = new DruidDataSource();
		// 不管是谁想要连接数据库服务器,都需要用户名,密码,url,driver
		// dataSource.setDriverClassName(driverClass);
		// dataSource.setUrl(jdbcUrl);

		// 读取配置文件
		InputStream config = DruidTest.class.getClassLoader().getResourceAsStream("resources/config.properties");
		Properties prop = new Properties();
		prop.load(config);

		// 使用工厂模式 -- 提供了生产数据源对象的工厂
		// 读取Druid读取配置文件
		DataSource dataSource2 = DruidDataSourceFactory.createDataSource(prop);
		// 获得连接对象
		Connection connection = dataSource2.getConnection();

	}
总结
以上为个人经验,希望能给大家一个参考,也希望大家多多支持脚本之家。