overflow:auto的用法详解
天下1281
在开始正文前,我介绍一下overflow和flex布局的某些用法。
overflow:auto;如果内容被修剪,则浏览器会显示滚动条,以便查看其余内容。
flex中的属性
display: flex;
flex-direction: column; 主轴为垂直方向,起点在上沿。
overflow和flex布局搭配使用
代码如下:
<!DOCTYPE html>
<html>
<head>
    <meta charset="utf-8">
    <title>overflow:auto的用法</title>
    <meta name="viewport" content="width=device-width, initial-scale=1, maximum-scale=1, user-scalable=no" />
    <link rel="stylesheet" type="text/css" href="css/reset.css" />

    <style type="text/css">
        html,body{
            width: 100%;
            height: 100%;
        }
        .container{
            width: 100%;
            height: 100%;
            display: flex;
            flex-direction: column;
        }
        .header{
            width: 100%;
            height: 100px;
            background: #f99;
        }
        .content{
            width: 100%;
            height: 100%;
            overflow: auto;
            background: yellow;
            flex: 1;
        }
        .footer{
            width: 100%;
            height: 100px;
            background: #99f;
        }
    </style>
</head>
<body>
    <div class="container">
        <div class="header">

        </div>
        <div class="content">
            <ul>
                <li>111111</li>
                <li>111111</li>
                <li>111111</li>
                <li>111111</li>
                <li>111111</li>
                <li>111111</li>
                <li>111111</li>
                <li>111111</li>
                这里的li要多写一些,这样才会显示效果,我这里为了省篇幅。
            </ul>
        </div>

        <div class="footer">
        </div>
    </div>
</body>
</html>
要实现overflow: auto;这个效果,首先布局,再写样式。
在样式中要在最外边的父盒子container,加入以下样式:
.container{
    width: 100%;
    height: 100%;
    display: flex;
    flex-direction: column;
}
还有就是一定要给html和body给宽度和高度100%;
html,body{
    width: 100%;
    height: 100%;
}
头部和底部都给固定的高度,一般的app的头部和底部都是固定的,像微信聊天记录。
.header{
    width: 100%;
    height: 100px;
    background: #f99;
}
.footer{
    width: 100%;
    height: 100px;
    background: #99f;
}
中间的content给定flex:1,并且加上我们的主角overflow:auto;超出的内容自动裁剪。
.content{
    width: 100%;
    height: 100%;
    overflow: auto;
    background: yellow;
    flex: 1;
    }
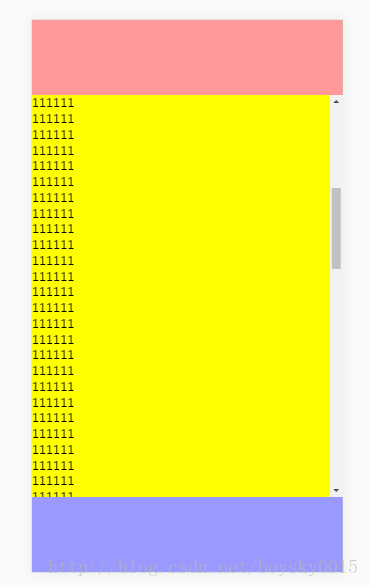
效果图如下:

中间的内容区可以上下滑动,超出的部分自动裁剪了。
万变不离其宗,如果在项目中实现某些功能有困难的话,可以先敲一个小demo,比如上文中这个demo,也许有人说so easy,但让你用react写一个类似微信的聊天窗口的布局时,你该如何实现?
下面这个是我用react写的类似于微信聊天窗口的小项目。

到此这篇关于overflow:auto的用法详解的文章就介绍到这了,更多相关overflow:auto用法内容请搜索脚本之家以前的文章或继续浏览下面的相关文章,希望大家以后多多支持脚本之家!
