
Spring Boot项目中使用OpenAI-Java的示例详解
作者:JoseKe
Spring Boot是由Pivotal团队提供的全新框架,其设计目的是用来简化新Spring应用的初始搭建以及开发过程,这篇文章主要介绍了Spring Boot项目中使用OpenAI-Java的示例详解,需要的朋友可以参考下
前言
Spring Boot是由Pivotal团队提供的全新框架,其设计目的是用来简化新Spring应用的初始搭建以及开发过程。该框架使用了特定的方式来进行配置,从而使开发人员不再需要定义样板化的配置。通过这种方式,Spring Boot致力于在蓬勃发展的快速应用开发领域(rapid application development)成为领导者。
准备工作
1、初始化一个springboot项目
参考地址:https://www.jb51.net/article/232551.htm
2、访问OPENAI官网获取API密钥
地址:https://platform.openai.com/account/api-keys

3、通过OPENA开源的JAVA SDK (OpenAI-Java)访问 API
地址:GitHub - TheoKanning/openai-java: OpenAI GPT-3 Api Client in Java
集成达芬奇模型
1、编写SpringBoot项目中的pom文件
<dependency>
   <groupId>com.theokanning.openai-gpt3-java</groupId>
   <artifactId>client</artifactId>
   <version>0.9.0</version>
</dependency>
2、初始化OpenAiService类
import com.theokanning.openai.OpenAiService;
import org.springframework.beans.factory.annotation.Value;
import org.springframework.context.annotation.Bean;
import org.springframework.context.annotation.Configuration;

import java.time.Duration;

/**
 * openai 配置类
 */
@Configuration
public class OpenAiConfiguration {

    @Value("${open.ai.key}")
    private String openAiKey;
    @Value("${open.ai.request.timeout}")
    private long timeout;

    @Bean
    public OpenAiService openAiService(){
        return new OpenAiService(openAiKey, Duration.ofSeconds(timeout));
    }
}
3、配置密钥、超时时间和使用的模型
#application.properties
server.port=8081
#密钥
open.ai.key=xxxxxxxx
#超时时间
open.ai.request.timeout=100000
#达芬奇模型
open.ai.model=text-davinci-003
3、编写访问业务类
import com.google.common.collect.Maps;
import com.theokanning.openai.OpenAiService;
import com.theokanning.openai.completion.CompletionRequest;
import com.theokanning.openai.completion.CompletionResult;
import lombok.extern.slf4j.Slf4j;
import org.apache.commons.lang3.StringUtils;
import org.springframework.beans.factory.annotation.Autowired;
import org.springframework.beans.factory.annotation.Value;
import org.springframework.stereotype.Service;

import java.util.Arrays;
import java.util.Map;

@Slf4j
@Service
public class OpenAiChatBiz {

    @Value("${open.ai.model}")
    private String openAiModel;
    @Autowired
    private OpenAiService openAiService;
    /**
     * 聊天
     * @param prompt
     * @return
     */
    public String chat(String prompt){
        CompletionRequest completionRequest = CompletionRequest.builder()
                .prompt(prompt)
                .model(openAiModel)
                .echo(true)
                .temperature(0.7)
                .topP(1d)
                .frequencyPenalty(0d)
                .presencePenalty(0d)
                .maxTokens(1000)
                .build();
        CompletionResult completionResult = openAiService.createCompletion(completionRequest);
        String text = completionResult.getChoices().get(0).getText();
        return text;
    }
}
4、编写访问接口
import org.apache.commons.lang3.StringUtils;
import org.springframework.beans.factory.annotation.Autowired;
import org.springframework.web.bind.annotation.RequestMapping;
import org.springframework.web.bind.annotation.RequestMethod;
import org.springframework.web.bind.annotation.RequestParam;
import org.springframework.web.bind.annotation.RestController;
@RestController
public class OpenAiChatApi {
@Autowired
private OpenAiChatBiz openAiChatBiz;
@RequestMapping(path = "/chat/question",method = RequestMethod.GET)
public String openAiChat(@RequestParam("question")String question){
if(StringUtils.isBlank(question)){
return "Please Input";
}
return openAiChatBiz.chat(question);
}
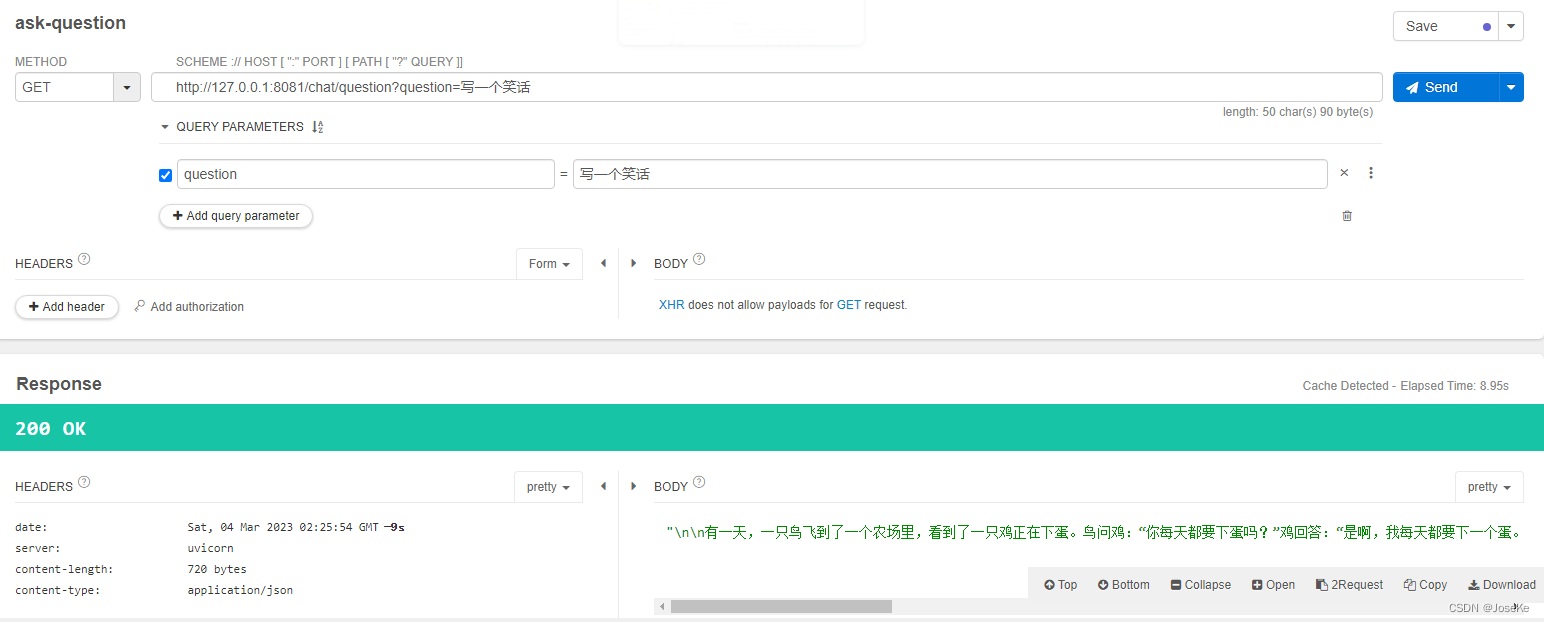
}效果展示
使用google的API Tester插件进行测试
到此这篇关于Spring Boot项目中使用OpenAI-Java的示例详解的文章就介绍到这了,更多相关Spring Boot使用OpenAI-Java内容请搜索脚本之家以前的文章或继续浏览下面的相关文章希望大家以后多多支持脚本之家!
您可能感兴趣的文章:
- SpringBoot启动异常Exception in thread “main“ java.lang.UnsupportedClassVersionError
- Java SpringBoot集成ChatGPT实现AI聊天
- SpringBoot整合Javamail实现邮件发送的详细过程
- Spring AI 入门学习指南
- Spring AI + ollama 本地搭建聊天 AI 功能
- Spring AI + 混元带你实现企业级稳定可部署的AI业务智能体
- Spring AI借助全局参数实现智能数据库操作与个性化待办管理
- Spring AI 使用超详细讲解
- 深入解析Spring AI框架如何在Java应用中实现智能化交互的关键