Element-Plus el-col、el-row快速布局及使用方法
作者:三月
Element UI组件中el-col、el-row布局学习总结
一、简介
el-col:列。是Element UI布局中的核心组件,他的作用的将一行分成24个网格,为了方便我们在不同的设备上适配不同的屏幕大小。我们可以通过指定span属性来确定一行中所占的网格数。
el-row:行。包裹在el-col外层,其中可以有无数个el-col。
    <el-row style="border:1px solid #333;width:300px;height:102px">
      <el-col :span="24">
        <div style="background:red;height:100px"></div>
      </el-col>
    </el-row>
在正常形态下,:span默认为24。假如:span为12,那么就是原本列数的一半。
    <el-row style="border:1px solid #333;width:300px;height:102px">
      <el-col :span="12">
        <div style="background:red;height:100px"></div>
      </el-col>
    </el-row>
二、el-row的属性:
:gutter 调整布局之间的宽度---分栏间隔。(也就是两列之间的间隔距离)
原代码:
    <el-row style="border:1px solid #333;width:300px;height:102px">
      <el-col :span="12">
        <div style="background:red;height:100px"></div>
      </el-col>
      <el-col :span="12">
        <div style="background:yellow;height:100px"></div>
      </el-col>
    </el-row>
如果两个div间需要间隔以示区分。就用:gutter属性。
    <el-row :gutter="20" style="border:1px solid #333;width:300px;height:102px">
      <el-col :span="12">
        <div style="background:red;height:100px"></div>
      </el-col>
      <el-col :span="12">
        <div style="background:yellow;height:100px"></div>
      </el-col>
    </el-row>
然而在网页页面代码中,其代码显示为:

也就是说,:gutter属性其实是设置了div的padding属性。
三、el-col属性
(1):offset 调整方块的位置(每次1格/24格)
    <el-row :gutter="20" style="border:1px solid #333;width:300px;height:102px">
      <el-col :offset="6" :span="12">
        <div style="background:red;height:100px"></div>
      </el-col>
    </el-row>
(2) :push 向右移动格数,值为1-24之间整数
    <el-row style="border:1px solid #333;width:300px;height:102px">
      <el-col :span="12" :push="2">
        <div style="background:red;height:100px"></div>
      </el-col>
    </el-row>
(3):pull 向左移动格数,值为1-24之间整数
    <el-row style="border:1px solid #333;width:300px;height:102px">
      <el-col :span="12" :pull="2">
        <div style="background:red;height:100px"></div>
      </el-col>
    </el-row>
(4)Element UI响应式布局
xs:<768px 响应式栅格数或者属性对象,超小屏,比如手机。例如:{ span: 4, offset: 8 }
sm:≥768px 响应式栅格数或者属性对象,小屏幕,比如平板。例如:{ span: 4, offset: 8 }
md:≥992px 响应式栅格数或者属性对象,中等屏幕,比如桌面显示器。例如:{ span: 4, offset: 8 }
lg:≥1200px 响应式栅格数或者属性对象,大屏幕,比如大桌面显示器。例如:{ span: 4, offset: 8 }
xl:≥1920px 响应式栅格数或者属性对象,超大屏幕显示器,比如2k屏等。例如:{ span: 4, offset: 8 }
<el-col :span="20" :xl="{span:16}"></el-col>三、对齐方式
通过设置type="flex",启动flex布局,通过justify的属性调整排版方式。
justify都属性值:center 居中对齐 start 左对齐 end 右对齐 space-between 空格间距在中间对齐 space-around 左右各占半格空格对齐
    <el-row type="flex" justify="center" style="border:1px solid #333;width:300px;height:102px">
      <el-col :span="12">
        <div style="background:red;height:100px"></div>
      </el-col>
    </el-row>
Element-Plus el-col、el-row快速布局及使用方法
前言
拖拉了一晚, 总结了一些Layout布局工具的使用方法.
一、el-col
本来打算先说row的… 写完看了一遍感觉还是换过来的好(捂脸).
el-col是el-row的子元素.
在el-row添加
style="flex-direction: column;"
可以实现纵向排列el-col, 在需要纵向布局时可以使用, 横向col现在填满默认自动换行, 不需要特别规定;
span
规定一个col占据24份中的多少份.
倒也不是必加的属性…
当el-row中仅有一个el-col时, 该el-col默认占据全部的24份, 填满el-row.
但是如果多个el-col情况下不加, 效果会比较糟糕, 第一个el-col依旧占据第一行的全部24份, 但是其他el-col会被挤到换行(倒也不会挤出el-row), 就像这样:
黄, 蓝, 绿, 分别为第一二三个el-col, 都不传span值.

  <el-row class="dark">
    <el-col class="yellow">
      <sy-author-1></sy-author-1>
    </el-col>
    <!-- 分隔 -->
    <el-col class="blue">
      <div></div>
    </el-col>
    <!-- 分隔 -->
    <el-col class="green" >
      <div></div>
    </el-col>
  </el-row>
* {
transition: 1s;
}
.dark {
background-color: rgb(137, 133, 133);
}
.yellow {
background-color: rgb(176, 170, 80);
}
.green {
background-color: rgb(85, 144, 135);
}
.blue {
background-color: rgb(65, 115, 153);
}就说正常加span的情况下, 页面使用el-row后, 横向距离被等量的分为24份, el-col的span属性决定的是"这个el-col在横向占据24分之几个el-row".

比如这次span分别是8、5、8, 那么剩下3份空间没用上, 也就是右边的灰色部分, 暴露出el-row的颜色.
push & pull
pull和push控制col的横向位移, 以份为单位 最大值24超出无效.
push和pull不会影响“横向被分为24份”这个规则, 比如第一个el-col被:push=“1”, 最后一个el-col被:pull=“1”, 中间的三个el-col还是可以各占8份, 只不过会有重叠的情况.
<el-row class="dark">
  <el-col :span="8" class="yellow" :push="2"> <!-- 左边push两份 -->
    <sy-author-1></sy-author-1>
  </el-col>
    <!-- 分隔 -->
  <el-col class="blue" :span="8">
    <div></div>
  </el-col>
    <!-- 分隔 -->
  <el-col class="green" :span="8" :pull="2"> <!-- 右边pull两份 -->
    <div></div>
  </el-col>
</el-row>
虽然依旧各占8份, 但是蓝盒子被左右两侧遮盖了.

所有el-col没有发生尺寸上的变化.
响应式
提供一个专门的属性, 让使用者规定在该属性对应的分辨率下, col要怎样进行排列.
响应式属性(xs, lg等)接受传入对象类型和数字类型;
对象类型可用于规定offset和span等属性, 针对每个分辨率范围定制一套合适的样式:
| 属性 | 说明 |
|---|---|
| xs | 小于768 |
| sm | 大等于768 |
| md | 大等于992 |
| lg | 大等于1200 |
| xl | 大等于1920 |
来写个栗子看一下, 规定小于768, 大于992, 大于1200时的排列:
这个例子有一些缺陷, 请读完例子下面的部分.
<el-row class="dark">
  <el-col
    :xs="{ span: 22, push: 1, pull: 1 }"
    :md="{ span: 18, push: 3 }"
    :lg="{ span: 8, push: 1 }"
    class="yellow"
  >
    <div></div>
  </el-col>
    <!-- 分隔 -->
  <el-col
    :xs="{ span: 22, pull: 1, push: 1 }"
    :md="{ span: 16, push: 2 }"
    :lg="{ span: 8, push: 0 }"
    class="blue"
  >
    <div></div>
  </el-col>
    <!-- 分隔 -->
  <el-col
    class="green"
    :xs="{ push: 1, pull: 1, span: 22 }"
    :md="{ span: 14, push: 1 }"
    :lg="{ span: 7, pull: 1, push: 0 }"
  >
    <div
    ></div>
  </el-col>
</el-row>
其实写案例的时候还发现了一个问题, 响应式方案里的属性是可以继承的, 这样说倒也不准确…
表现出来就是:
设置了md的push, span后, 如果不设置lg的push, 那么lg方案会采用用md方案的push / pull, 而不是默认的pull / push为0, 这个问题会发生在各组方案之间, 只要有一组方案缺少属性, 它就从上一组方案里拿属性:
<!-- 这里pull无效, 所以没写... -->
<!-- 因为蓝色块出的问题, 所以只放个蓝色块 -->
<el-col
  :md="{ span: 16, push: 2 }"
  :lg="{ span: 8 }"
  class="blue"
>
  <div></div>
</el-col>
然后lg状态就变成这样了, 你可以看到蓝块左侧空出来了一块, 这就是lg方案从md偷的push:2.

这个时候再规定lg的push为0:
<el-col
  :md="{ span: 16, push: 2 }"
  :lg="{ span: 8, push:0 }"
  class="blue"
>
  <div></div>
</el-col>
所以用响应式的时候, 规定方案要把每一项都详细规定好, 避免从其他方案继承到属性, 出现一些奇怪的效果.
pull在响应式方案里有时会失效, 比如我们现在这个例子, 我给了第三个col一个lg状态下的pull:1, 什么效果都没有:

但是在xs方案中, pull:1生效了:

也不是因为没有多余空间可以移动的问题, 事实是有多余空间它也无效…
没能解决这个问题.
offset
我把这个放在最后是因为写案例的时候出现了一点小状况, 我发现我的offset不能生效, 是那种…怎么改都不生效.
然后一次偶然, 我把css里的:
* {
  margin: 0;
  padding: 0;
  }
删了, 然后解决了, 就挺无语的, 可能是el组件里的样式优先级比较低, 被覆盖了吧.
好吧, 那步入正题
offset规定col左侧的间隔份数, 它是真的能把col给挤到下一行的
<el-row class="dark">
  <el-col
    :lg="{ span: 8, push: 0 }"
    class="yellow"
  >
    <div></div>
  </el-col>
    <!-- 分隔 -->
  <el-col
    :lg="{ span: 8, push: 0, pull: 0, offset: 9}"
    class="blue"
  >
    <div></div>
  </el-col>
    <!-- 分隔 -->
  <el-col
    class="green"
    :lg="{ span: 8, pull: 0, push: 0 }"
  >
    <div></div>
  </el-col>
</el-row>
效果:

不要offset来做换行, 用响应式或者在el-row添加
style="flex-direction: column;"
会更好, offset达成的换行, 左侧会有空间, 就像上面动图的蓝块就是offset导致的换行, 不稳定而且难看.
二、el-row
“row” 中文即"排, 行"的意思, el-row组件即创建一行.
使用后自动占据页面横向全部空间, 并且把横向空间不可见的分割为24份.
在el-row添加
style="flex-direction: column;"
可以实现纵向排列el-col, 在需要纵向布局时可以使用, 横向col现在填满默认自动换行, 不需要特别规定;
gutter
官方给的解释是"控制栅格间距", 我理解的是控制el-col之间的横向间距, 其实这有点像justify-content,写在外面控制里面.
但是我写了一个demo来测试的时候, 发现它控制的似乎是el-col的子元素与el-col左边框的间距, 而并非el-col之间的间距.
以下面这段代码为例, 一个el-row里装了三个el-col, 初始gutter为0.
<el-row class="dark" :gutter="0">

  <el-col :span="8" class="yellow">
    <sy-author-1></sy-author-1>
  </el-col>
    <!-- 分隔 -->
  <el-col class="blue" :span="8">
    <div></div>
  </el-col>
    <!-- 分隔 -->
  <el-col class="green" :span="8">
    <div></div>
  </el-col>

</el-row>
现在把gutter增加到80, 可以看到, el-col之间的距离始终是不变的:0, 但是除去最左边的组件, 每个el-col的子元素和它们所在el-col的左边距都增加了.
这次增加是由el-col宽度的双向扩大和子元素向右位移共同完成的:

那么这是对于一个子元素, 如果对于多个同在一行的子元素, 全部子元素的左边距也并不会都增加:

这些子元素更像是被看作一个整体.
justify
el-row中所有el-col的横向对齐方式.
但这是建立在el-row横向还有空间的前提下, 如果el-row横向24份已经塞得满满当当, 那这个属性给什么值都不会有效果的.
| 属性 | 可取值 |
|---|---|
| justify | start / end / center / space-around / space-between / space-evenly |
那还是用第一段代码举例:
<el-row class="dark" justify="center"> <!-- 居中对齐 -->
  <el-col :span="8" class="yellow">
    <sy-author-1></sy-author-1>
  </el-col>
    <!-- 分隔 -->
  <el-col class="blue" :span="5"> <!-- 注意这里改成5了, 我们不能把el-row填满 -->
    <div></div>
    <span>哦哦哦</span>
  </el-col>
    <!-- 分隔 -->
  <el-col class="green" :span="8">
    <div></div>
  </el-col>
</el-row>
那现在可以看到现在el-col都挤到中央了, 其实这个挺像justify-content的.(弹性布局)
他们封装的时候是不是就拿这个直接给justify-content传值的…我猜…

然后space-between情况下:

均匀分布两侧贴边.
在el-col分多行的情况下:justify=“end”:
<el-row class="dark" justify="end">
  <el-col
    :lg="{ span: 8, push: 0 }"
    class="yellow"
  >
    <div></div>
  </el-col>
    <!-- 分隔 -->
  <el-col
    :lg="{ span: 8, push: 0, pull: 0, offset: 9}"
    class="blue"
  >
    <div></div>
  </el-col>
    <!-- 分隔 -->
  <el-col
    class="green"
    :lg="{ span: 8, pull: 0, push: 0 }"
  >
    <div></div>
  </el-col>
</el-row>
效果:

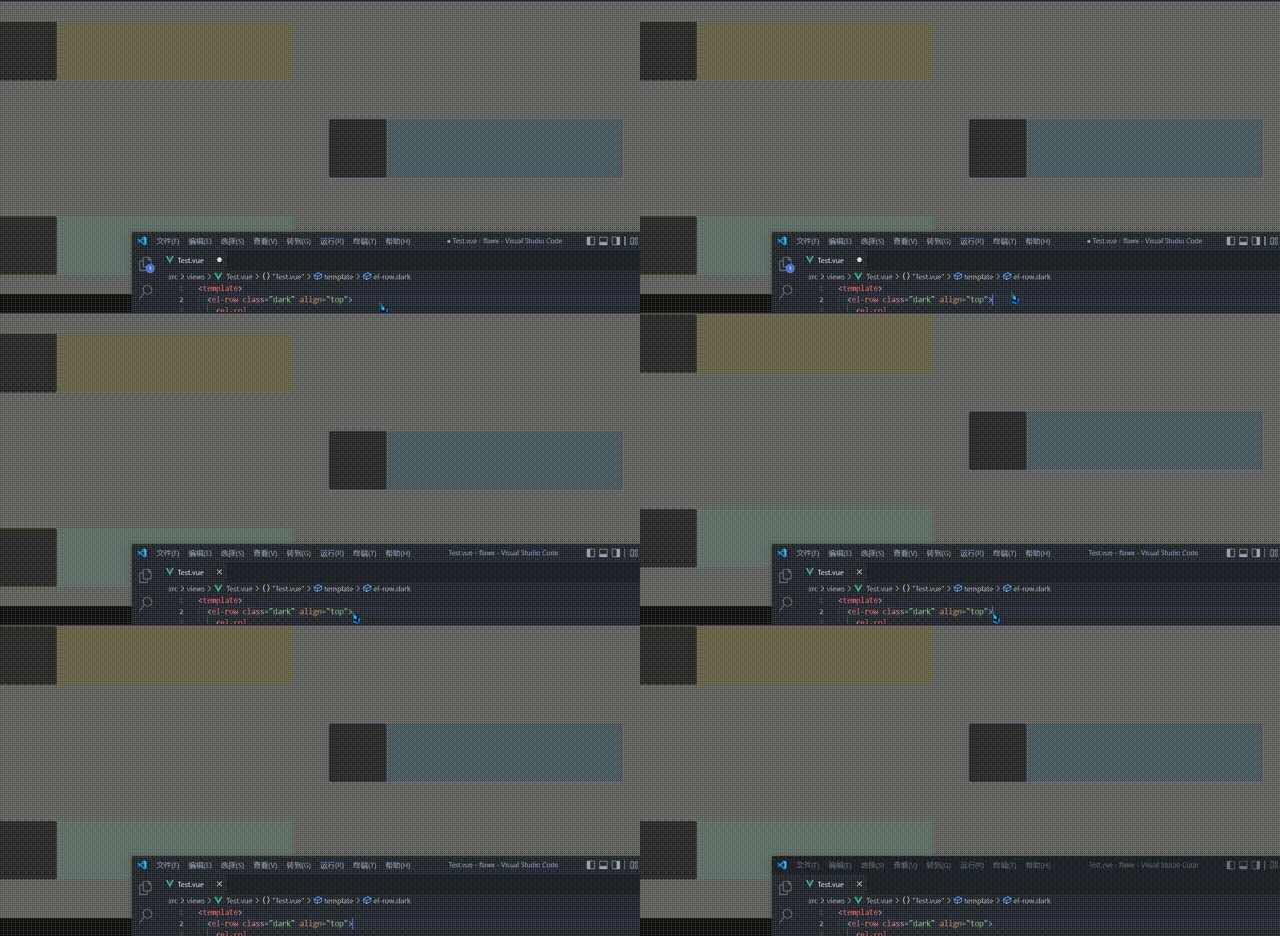
align
el-row中所有el-col的纵向对齐方式, 前提是纵向还有空间, 所以规定el-col的高度应该会是不错的选择, 不然纵向默认填满el-row, 这个属性就彻底失效了.
三个可用值:
| 属性 | 可用值 |
|---|---|
| align | top / middle / bottom |
默认是top, 这个情况下不给el-col高度, el-col也会在纵向占满el-row, 但是另外两个属性…
align="bottom"

align="middle"
align="middle"

多行情况:
<el-row class="dark" align="middle">
  <el-col
    :lg="{ span: 8, push: 0 }"
    class="yellow"
  >
    <div></div>
  </el-col>
    <!-- 分隔 -->
  <el-col
    :lg="{ span: 8, push: 0, pull: 0, offset: 9 }"
    class="blue"
  >
    <div></div>
  </el-col>
    <!-- 分隔 -->
  <el-col
    class="green"
    :lg="{ span: 8, pull: 0, push: 0 }"
  >
    <div></div>
  </el-col>
</el-row>
* {
transition: 1s;
}
.dark {
height: 500px;
background-color: rgb(137, 133, 133);
}
.yellow {
background-color: rgb(176, 170, 80);
height: 100px;
}
.green {
background-color: rgb(85, 144, 135);
height: 100px;
}
.blue {
background-color: rgb(65, 115, 153);
height: 100px;
}
总结
约到一场15日的面试, 但是封校不得不推掉了, 很难受.
到此这篇关于Element-Plus el-col、el-row快速布局及使用方法的文章就介绍到这了,更多相关Element-Plus el-col、el-row布局内容请搜索脚本之家以前的文章或继续浏览下面的相关文章希望大家以后多多支持脚本之家!
