jquery ajax实现文件上传提交的实战步骤
作者:坚毅的小解同志
今天项目中加了一个上传文件的需求,我就搞了一下,下面这篇文章主要给大家介绍了关于jquery ajax实现文件上传提交的相关资料,文中通过实例代码介绍的非常详细,需要的朋友可以参考下
JQuery实现文件上传提交
定义UI结构
 <script src="https://cdn.bootcdn.net/ajax/libs/jquery/3.6.1/jquery.js"></script>
 <input type="file" id="file1">
    <button id="btnUpload">上传文件</button>
     <img src="" alt="" style="width: 200px;" id="img1">
验证是否选择了文件
        $('#btnUpload').on('click', function () {
            let files = $('#file1')[0].files;
            if (files.length <= 0) {
                return alert('请选择文件后在上传')
            }

        })
向FormData中追加文件并发起ajax请求

           //上传文件
            let fd = new FormData();
            fd.append('avator', files[0]);

            //发起jquery  ajax请求
                       $.ajax({
                method: 'post',
                url: 'http://www.liulongbin.top:3006/api/upload/avatar',
                data: fd,
                processData: false,
                contentType: false,
                success: function (res) {
                    alert('上传成功')
                    $('#img1').attr('src', 'http://www.liulongbin.top:3006' + res.url)
                    console.log(res.url);
                }
            })
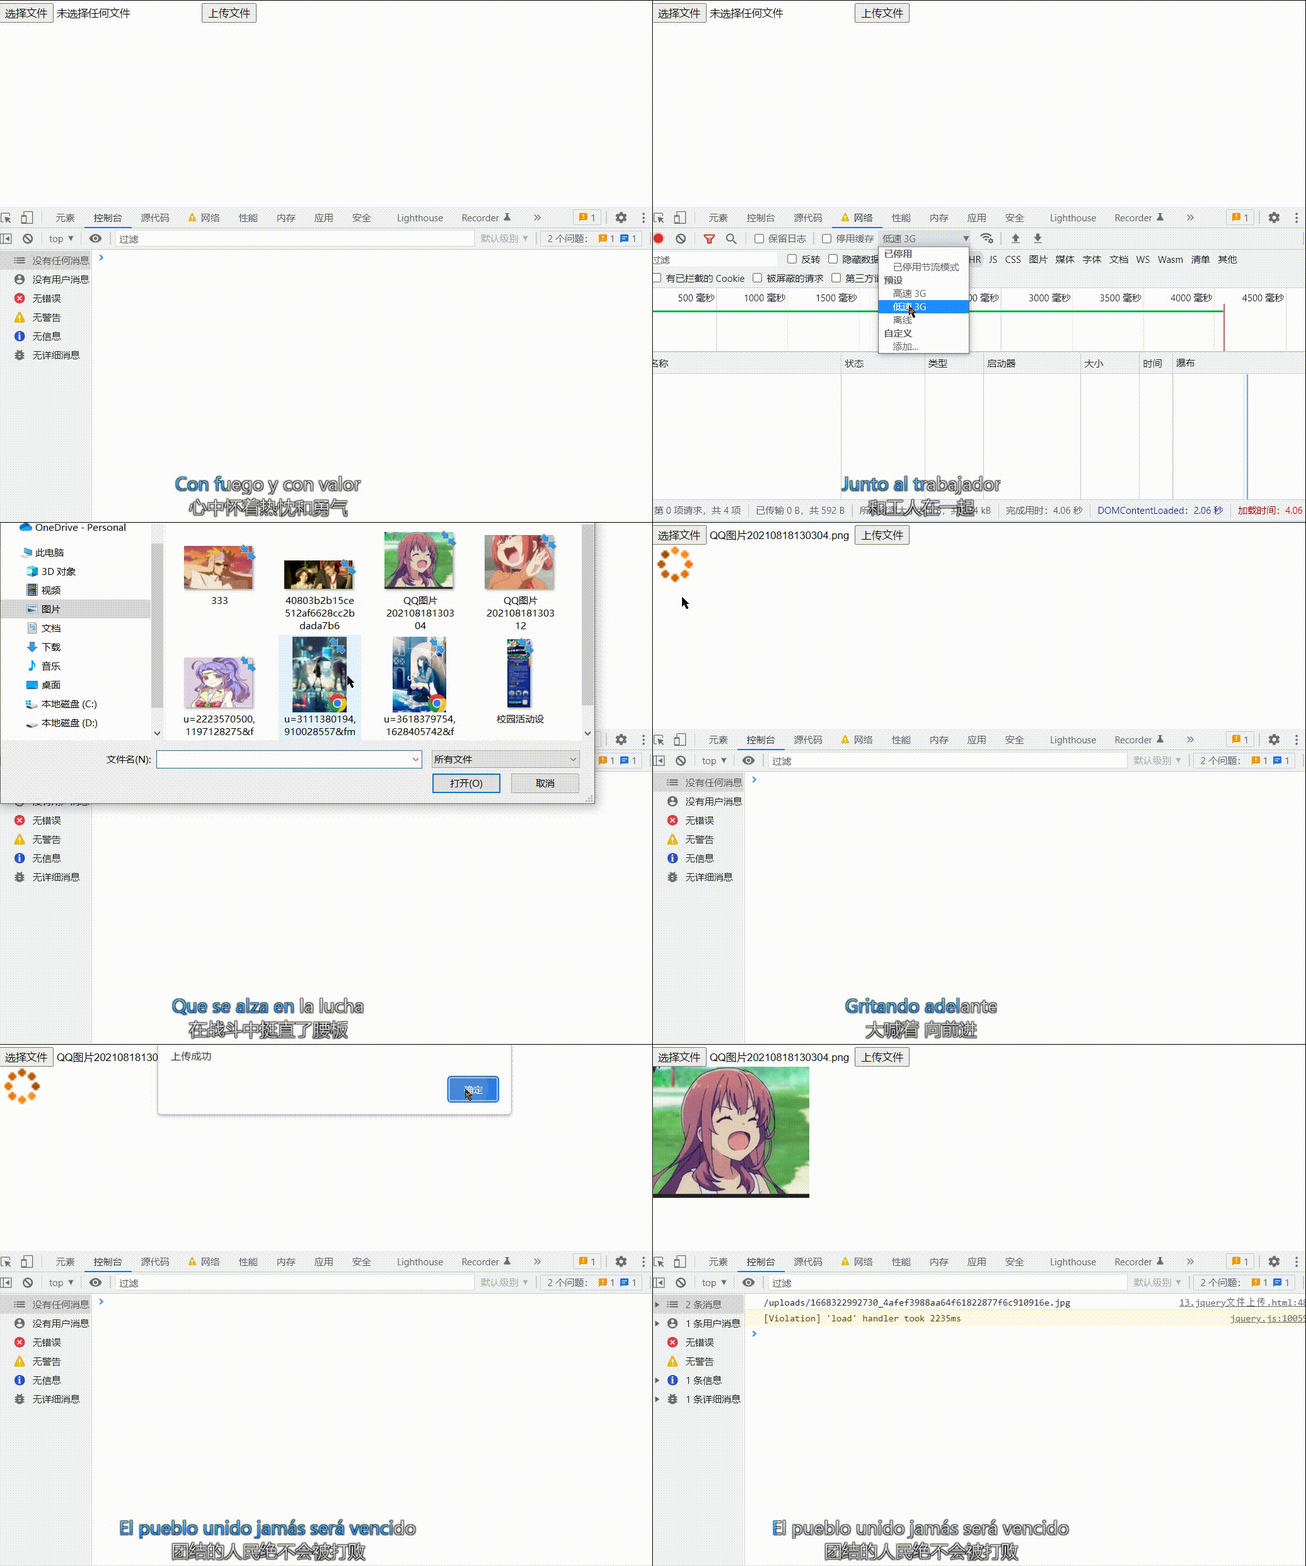
jquery实现loading效果
ajaxStart(callback)
Ajax请求开始时,执行ajaxStart函数,可以在ajaxStart的callback中显示loading效果。
自jqueyr版本1.8起,该方法只能被附加到文档,$(document).ajaxStart()函数会监听文档内所有ajax请求,当ajax请求开始会触发这个函数,ajax结束则会触发ajaxStop
  <img src="./自媒体资源/5-121204193933-51.gif" alt="" style="display: none;" id="loading" width="50px" height="50px">
          $(document).ajaxStart(function () {
            $('#loading').show()
        })
        $(document).ajaxStop(function () {
            $('#loading').hide()
        })
完整代码
<head>
    <meta charset="UTF-8">
    <meta http-equiv="X-UA-Compatible" content="IE=edge">
    <meta name="viewport" content="width=device-width, initial-scale=1.0">
    <title>Document</title>
    <script src="https://cdn.bootcdn.net/ajax/libs/jquery/3.6.1/jquery.js"></script>

</head>

<body>
    <input type="file" id="file1">
    <button id="btnUpload">上传文件</button>
    <br>
      <img src="" alt="" style="width: 200px;" id="img1">
    <img src="./自媒体资源/5-121204193933-51.gif" alt="" style="display: none;" id="loading" width="50px" height="50px">
    <script>
        //监听传输
        $(document).ajaxStart(function () {
            $('#loading').show()
        })
        $(document).ajaxStop(function () {
            $('#loading').hide()
        })

        //建立单击事件
        $('#btnUpload').on('click', function () {
            let files = $('#file1')[0].files;
            if (files.length <= 0) {
                return alert('请选择文件后在上传')
            }
            //上传文件
            let fd = new FormData();
            fd.append('avator', files[0]);

            //发起jquery  ajax请求
            $.ajax({
                method: 'post',
                url: 'http://www.liulongbin.top:3006/api/upload/avatar',
                data: fd,
                processData: false,
                contentType: false,
                success: function (res) {
                    alert('上传成功')
                    $('#img1').attr('src', 'http://www.liulongbin.top:3006' + res.url)
                    console.log(res.url);
                }
            })
        })
    </script>
</body>
补充:Jquery Ajax上传文件并提交表单其它属性
1.前端代码
$('.btn-confirm').click(function () {
            console.log($( '#postForm').serialize());

            var versionNo = $("#versionNo").val();
            var deviceNoStr = $("input[name='deviceNoStr']").val();
            var batchId = $("input[name='batchId']").val();

            var formData = new FormData();
            console.log($('#upfile')[0].files[0]);

            formData.append("upfile",$('#upfile')[0].files[0]);
            formData.append("versionNo", versionNo);
            formData.append("deviceNoStr", deviceNoStr);
            formData.append("batchId", batchId);

            $.ajax({
                url :window.CMS_URL + "/devops/operation/upgrade.shtml",
                dataType:'json',
                type:'POST',
                async: false,
                data: formData,
                processData : false, // 使数据不做处理
                contentType : false, // 不要设置Content-Type请求头
                success: function(data){
                    console.log(data);
                    if (data.status == 'ok') {
                        alert('上传成功!');
                    }

                },
                error:function(response){
                    console.log(response);
                }
            });

        });
<form id= "uploadForm" method= "post" enctype ="multipart/form-data">
            <div class="portlet-body" style="margin: 15px 0;">
                <span class="file-des">程序路径:</span>
                <div class="wrap-upload" style="display: flex">
                    <div class="showFileName"
                    ></div>
                    <a href="javascript:;" class="file btn btn-sm green">上传文件
                        <input type="file" name="upfile" id="upfile" placeholder="请选择文件">
                    </a>
                    <div class="fileerrorTip" style="line-height: 30px;margin-right: 10px"></div>
                </div>
            </div>
            <div class="portlet-body">
                <span class="file-des">版本号:</span>
                <div class="wrap-upload item-inputs" >
                    <input class="form-control" type="text" name="versionNo" id="versionNo" placeholder="版本号" required>
                </div>
            </div>
            <div style="    margin: 0px 100px;padding-top: 20px;">
                <div class="btn btn-sm green control-btn-item btn-confirm" >确认</div>
                <div style="margin-left: 30px;" class="btn btn-sm green control-btn-item" onclick="closePopup()">取消</div>
            </div>

            <input type="hidden" name="deviceNoStr" value="${(devopsParamsQo.deviceNoStr)!''}"/>
            <input type="hidden" name="batchId" value="${(devopsParamsQo.batchId)!''}"/>
        </form>
2.后端代码
 @RequestMapping(value = "/upgrade", method = RequestMethod.POST)
    @ResponseBody
    public ResultVo upgrade(@RequestPart( value = "upfile", required = true) MultipartFile file,
                            @RequestParam(name = "versionNo", required = true) String versionNo,
                            @RequestParam(name = "batchId", required = true) String batchId,
                            @RequestParam(name = "deviceNoStr", required = true) String deviceNoStr) {
        DevopsParamsQo qo = new DevopsParamsQo();
        qo.setDeviceNoStr(deviceNoStr);
        List<DeviceDto> addList = getDeviceDtos(qo);

        // TODO 调用前置
        return ResultVoGenerator.genSuccessResultVo();
    }
总结
到此这篇关于jquery ajax实现文件上传提交的文章就介绍到这了,更多相关jquery ajax文件上传提交内容请搜索脚本之家以前的文章或继续浏览下面的相关文章希望大家以后多多支持脚本之家!
