
SpringBoot中的配置类(@Configuration)
作者:胡安民
这篇文章主要介绍了SpringBoot中的配置类(@Configuration),具有很好的参考价值,希望对大家有所帮助。如有错误或未考虑完全的地方,望不吝赐教
SpringBoot基于java类的配置
java配置主要靠java类和一些注解来达到和xml配置一样的效果,比较常用的注解有:
@Configuration:声明一个类作为配置类,代替xml文件@Bean:声明在方法上,将方法的返回值加入Bean容器,代替标签@Value:属性注入@PropertySource:指定外部属性文件(properties)。@ConfigurationProperties(prefix = “xx”)(指定配置属性的前缀)
提示: @Configuration也附带了@Component的功能。所以理论上内部也可以使用@Autowared功能的
我们接下来用Java类配置来尝试实现连接池配置
第一步
在pom.xml导入
<!--druid 数据连接池 -->
        <dependency>
            <groupId>com.alibaba</groupId>
            <artifactId>druid</artifactId>
            <version>1.1.12</version>
        </dependency>
第二步
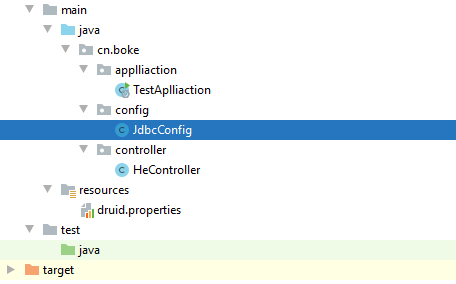
添加druid.properties文件到resources包里
driverClassName=com.mysql.jdbc.Driver
url=jdbc:mysql://127.0.0.1:3306/order?characterEncoding=utf-8
name=root
pass=root
initialSize=1
minIdle=1
maxActive=20
maxWait=3
第三步
创建配置文件 JdbcConfig
package cn.boke.config;
import com.alibaba.druid.pool.DruidDataSource;
import org.springframework.beans.factory.annotation.Value;
import org.springframework.context.annotation.Bean;
import org.springframework.context.annotation.Configuration;
import org.springframework.context.annotation.PropertySource;
import javax.sql.DataSource;
@Configuration  //声明配置类
@PropertySource("classpath:druid.properties")   //导入配置文件
public class JdbcConfig {
    //将配置文件内的 信息 放入变量中
    @Value("${driverClassName}")
    private  String driverClassName;  //JDBC驱动
    @Value("${url}")
    private String url;  //连接地址
    @Value("${name}")
    private  String name;  //数据库用户
    @Value("${pass}")
    private String pass;  //数据库密码
    @Value("${initialSize}")
    private int initialSize;   //初始化连接数量
    @Value("${minIdle}")
    private int minIdle;  //最小连接数量
    @Value("${maxActive}")
    private int maxActive;  //最大连接数量
    @Value("${maxWait}")
    private int maxWait;  //最大等待时间
    @Bean("dataSource")  //将配置信息 存入Spring 容器中 名称为 dataSource
    public DataSource dataSource() {
        DruidDataSource dataSource = new DruidDataSource();
        dataSource.setUrl(url);
        dataSource.setDriverClassName(driverClassName);
        dataSource.setUsername( name);
        dataSource.setPassword(pass);
        dataSource.setInitialSize(initialSize);
        dataSource.setMaxActive(maxActive);
        dataSource.setMaxWait(maxWait);
        return dataSource;
    }
}
第四步测试
连接池内的数据是否 添加成功
打个断点

运行TestAplliaction 这个类的启动引导

然后在游览器中输入 http://localhost:8080/hello
回到IDEA控制台中点击

能在显示的内容中找到 对应的信息 就ok了

A控制台中点击
能在显示的内容中找到 对应的信息 就ok了
SpringBoot自定义配置类
1.方式一
配置类标注:
@ConfigurationProperties注解,可以设置前缀名@Component将该类放入spring容器中
必须设定get/set方法
配置类:
@Component //将该Bean放入spring容器中
@ConfigurationProperties(prefix = "com.example")//指定该类为配置获取类,并指定前缀
public class MyConfig {
    private String name;
    private Integer age;
    //必须设置get set方法
    public String getName() {
        return name;
    }
    public void setName(String name) {
        this.name = name;
    }
    public Integer getAge() {
        return age;
    }
    public void setAge(Integer age) {
        this.age = age;
    }
}
application.properties中配置
com.example.age=20
com.example.name=xxx
使用:
在其他Bean中可以直接注入该Bean
@RestController
public class DemoController {
    @Autowired
    private MyConfig config;
    @GetMapping("/demo2")
    public String m2(){
        return config.getName();
    }
}
2.方式二
配置类:
不使用 @Component 将该类放入spring容器中,而是使用@EnableConfigurationProperties(MyConfig.class)在根配置类中引入
@ConfigurationProperties(prefix = "com.example")//指定该类为配置获取类,并指定前缀
public class MyConfig {
    private String name;
    private Integer age;
    //必须设置get set方法
    public String getName() {
        return name;
    }
    public void setName(String name) {
        this.name = name;
    }
    public Integer getAge() {
        return age;
    }
    public void setAge(Integer age) {
        this.age = age;
    }
}
@SpringBootApplication
@EnableConfigurationProperties(MyConfig.class) //引入自定义配置类
public class DemoApplication {
public static void main(String[] args) {
SpringApplication.run(DemoApplication.class,args);
}
}以上为个人经验,希望能给大家一个参考,也希望大家多多支持脚本之家。