使用sharding-jdbc实现水平分库+水平分表的示例代码
作者:穿条秋裤到处跑
本文主要介绍了使用sharding-jdbc实现水平分库+水平分表,文中通过示例代码介绍的非常详细,具有一定的参考价值,感兴趣的小伙伴们可以参考一下
前面的文章使用sharding-jdbc实现水平分表中详细记录了如何使用sharding-jdbc实现水平分表,即根据相应的策略,将一部分数据存入到表1中,一部分数据存入到表2中,逻辑上为同一张表,分表操作全部交由sharding-jdbc进行处理。
可能根据需要,还需要将一张表的数据拆分存入到多个数据库中,甚至多个数据库的多个表中,使用sharding-jdbc同样可以实现。
重复的篇幅则不再赘述,下面重点记录升级的过程。
分库分表策略:将id为偶数的存入到库1中,奇数存入到库2中,在每个库中,再根据学生的性别分别存到到表1和表2中。
新建两个数据库sharding_db1和sharding_db2,在两个数据库中在分别创建结构相同的两张表,student_1和student_2。
CREATE TABLE `NewTable` (
`ID`  bigint(20) NOT NULL ,
`NAME`  varchar(50) CHARACTER SET utf8mb4 COLLATE utf8mb4_bin NOT NULL ,
`AGE`  int(11) NOT NULL ,
`GENDER`  int(1) NOT NULL ,
PRIMARY KEY (`ID`)
);
相比前面文章中,将gender性别字段设置成了int类型,方便根据性别再进行分表。
修改配置文件
spring.main.allow-bean-definition-overriding=true
# 配置Sharding-JDBC的分片策略
# 配置数据源,给数据源起名g1,g2...此处可配置多数据源
spring.shardingsphere.datasource.names=g1,g2
# 配置数据源具体内容:连接池,驱动,地址,用户名,密码
spring.shardingsphere.datasource.g1.type=com.alibaba.druid.pool.DruidDataSource
spring.shardingsphere.datasource.g1.driver-class-name=com.mysql.cj.jdbc.Driver
spring.shardingsphere.datasource.g1.url=jdbc:mysql://localhost:3306/sharding_db1?characterEncoding=utf-8&useUnicode=true&useSSL=false&serverTimezone=UTC
spring.shardingsphere.datasource.g1.username=root
spring.shardingsphere.datasource.g1.password=123456
spring.shardingsphere.datasource.g2.type=com.alibaba.druid.pool.DruidDataSource
spring.shardingsphere.datasource.g2.driver-class-name=com.mysql.cj.jdbc.Driver
spring.shardingsphere.datasource.g2.url=jdbc:mysql://localhost:3306/sharding_db2?characterEncoding=utf-8&useUnicode=true&useSSL=false&serverTimezone=UTC
spring.shardingsphere.datasource.g2.username=root
spring.shardingsphere.datasource.g2.password=123456
# 配置数据库的分布,表的分布
spring.shardingsphere.sharding.tables.student.actual-data-nodes=g$->{1..2}.student_$->{1..2}
# 指定student表 主键gid 生成策略为 SNOWFLAKE
spring.shardingsphere.sharding.tables.student.key-generator.column=id
spring.shardingsphere.sharding.tables.student.key-generator.type=SNOWFLAKE
# 指定数据库分片策略 约定id值是偶数添加到sharding_db1中,奇数添加到sharding_db2中
spring.shardingsphere.sharding.tables.student.database-strategy.inline.sharding-column=id
spring.shardingsphere.sharding.tables.student.database-strategy.inline.algorithm-expression=g$->{id % 2 + 1}
# 指定表分片策略 约定gender值是0添加到student_1表,如果gender是1添加到student_2表
spring.shardingsphere.sharding.tables.student.table-strategy.inline.sharding-column=gender
spring.shardingsphere.sharding.tables.student.table-strategy.inline.algorithm-expression=student_$->{gender % 2 + 1}
# 打开sql输出日志
spring.shardingsphere.props.sql.show=true
配置多个数据源时,使用逗号隔开,分别配置其属性。除了配置表分片策略,还需配置库分配策略。
测试类
@SpringBootTest
class ShardingJdbcDemoApplicationTests {

    @Autowired
    private StudentMapper studentMapper;

    @Test
    public void test01() {
        for (int i = 0; i < 15; i++) {
            Student student = new Student();
            student.setName("wuwl");
            student.setAge(27);
            student.setGender(i%2);
            studentMapper.insert(student);
        }
    }
}
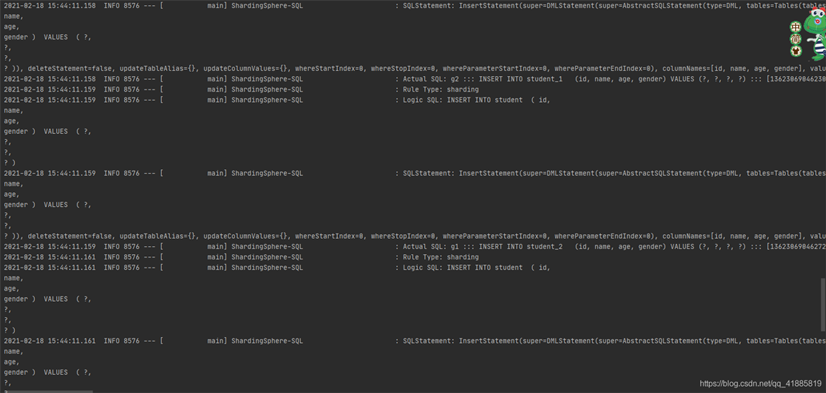
运行效果:

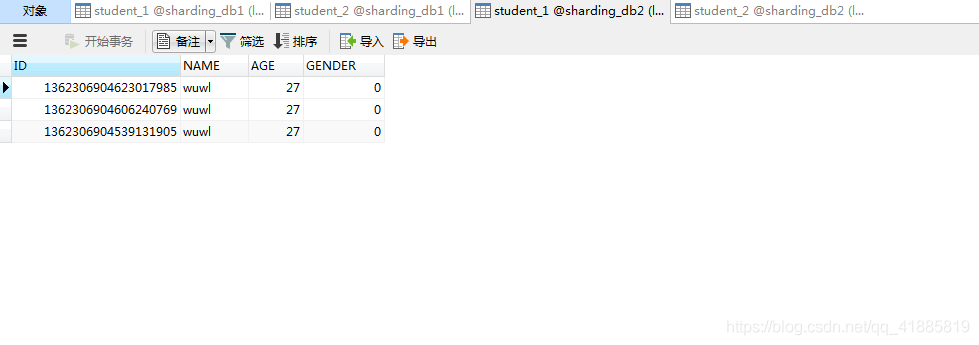
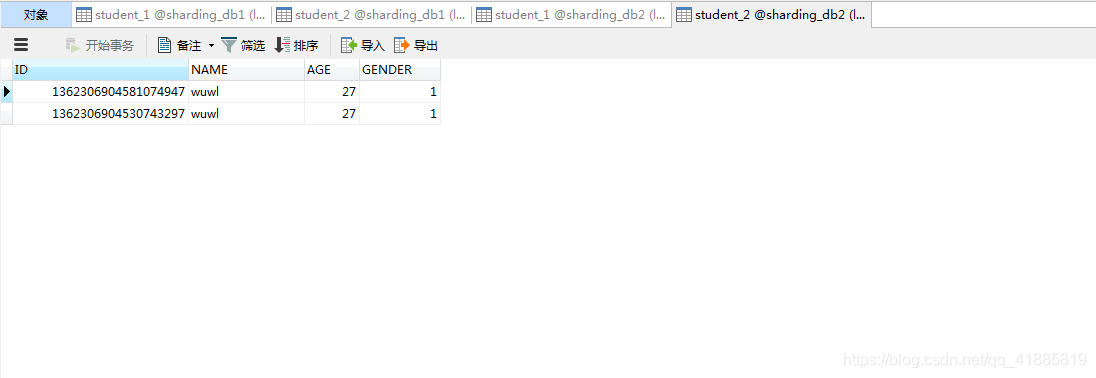
看样子是成功了,查看数据库数据。
sharding_db1.student_1:

sharding_db1.student_2:

sharding_db2.student_1:

sharding_db2.student_2:

到此这篇关于使用sharding-jdbc实现水平分库+水平分表的示例代码的文章就介绍到这了,更多相关sharding-jdbc水平分库水平分表内容请搜索脚本之家以前的文章或继续浏览下面的相关文章希望大家以后多多支持脚本之家!
您可能感兴趣的文章:
- SpringBoot实现分库分表
- Mysql分库分表之后主键处理的几种方法
- Mysql数据库分库分表全面瓦解
- 利用Sharding-Jdbc进行分库分表的操作代码
- SpringBoot整合sharding-jdbc实现自定义分库分表的实践
- SpringBoot整合sharding-jdbc实现分库分表与读写分离的示例
- Java中ShardingSphere分库分表实战
- Spring Boot 集成 Sharding-JDBC + Mybatis-Plus 实现分库分表功能
- Springboot2.x+ShardingSphere实现分库分表的示例代码
- springboot整合shardingjdbc实现分库分表最简单demo
- 使用ShardingSphere-Proxy实现分表分库
