Spring引入外部属性文件配置数据库连接的步骤详解
作者:牛哄哄的柯南
这篇文章主要介绍了Spring引入外部属性文件配置数据库连接的步骤详解,本文给大家介绍的非常详细,对大家的学习或工作具有一定的参考借鉴价值,需要的朋友可以参考下
直接配置数据库的信息
xml配置文件直接配置:
<?xml version="1.0" encoding="UTF-8"?>
<beans xmlns="http://www.springframework.org/schema/beans"
    xmlns:xsi="http://www.w3.org/2001/XMLSchema-instance"
    xmlns:p="http://www.springframework.org/schema/p"
    xmlns:util="http://www.springframework.org/schema/util"
    xmlns:context="http://www.springframework.org/schema/context"
    xsi:schemaLocation="http://www.springframework.org/schema/beans http://www.springframework.org/schema/beans/spring-beans.xsd
              http://www.springframework.org/schema/util http://www.springframework.org/schema/util/spring-util.xsd
              http://www.springframework.org/schema/context http://www.springframework.org/schema/context/spring-context.xsd">

  <!--直接配置连接池-->
  <bean id="dataSource" class="com.alibaba.druid.pool.DruidDataSource">

    <property name="driverClassName" value="com.mysql.jdbc.Driver"></property>
    <property name="url" value="jdbc:mysql://localhost:3306/userDb"></property>
    <property name="username" value="root" ></property>
    <property name="password" value="root" ></property>
  </bean>

</beans>
一般不会这样用,不便于修改,我们看下面的引入外部属性文件配置的方法
引入外部属性文件配置数据库连接
1.引入德鲁伊连接池jar包
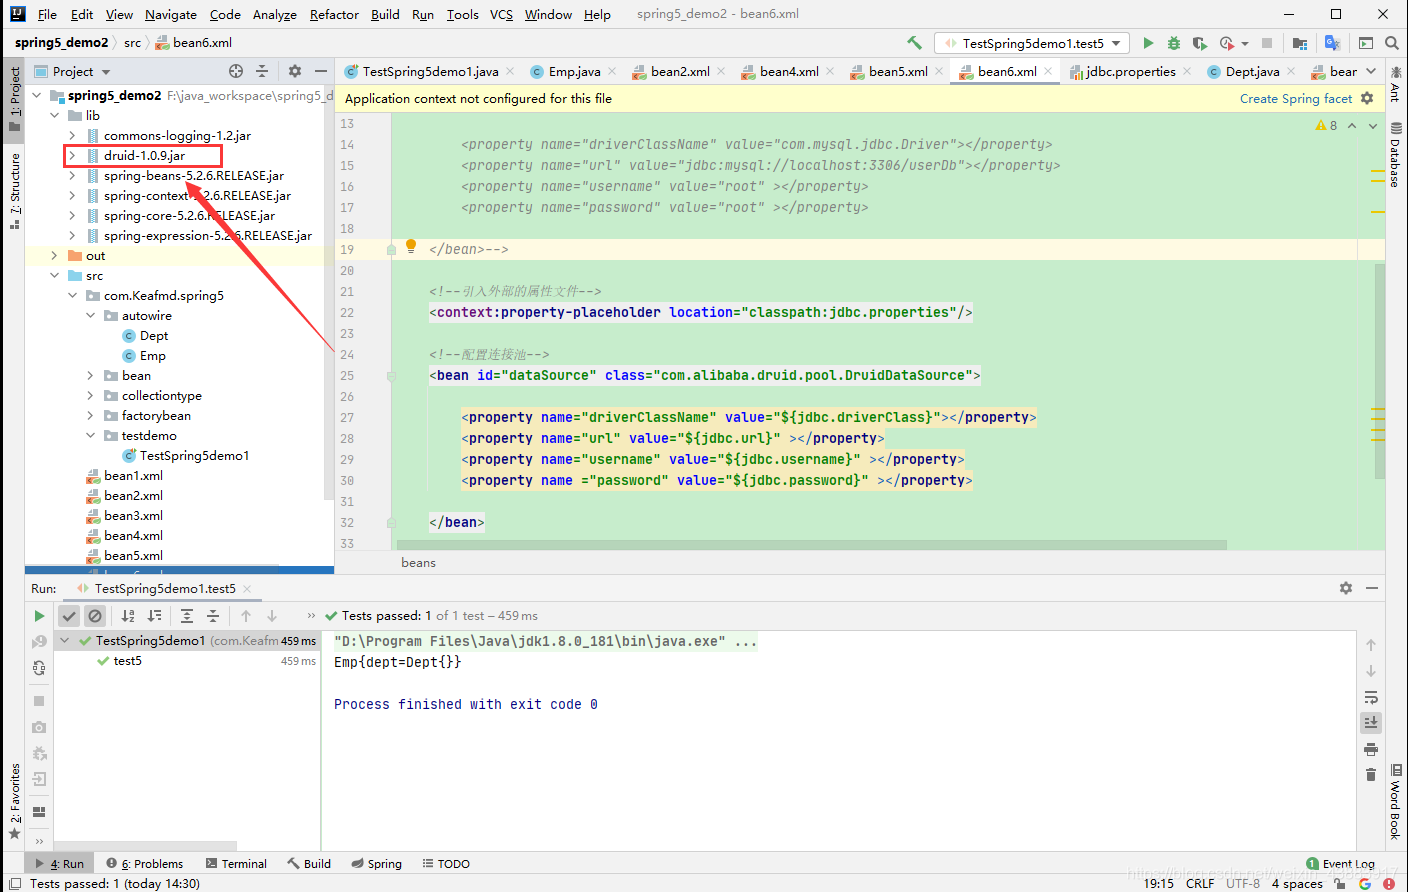
(1)导入进来一个druid-1.0.9.jar,直接复制粘贴到当前目录就可以了。

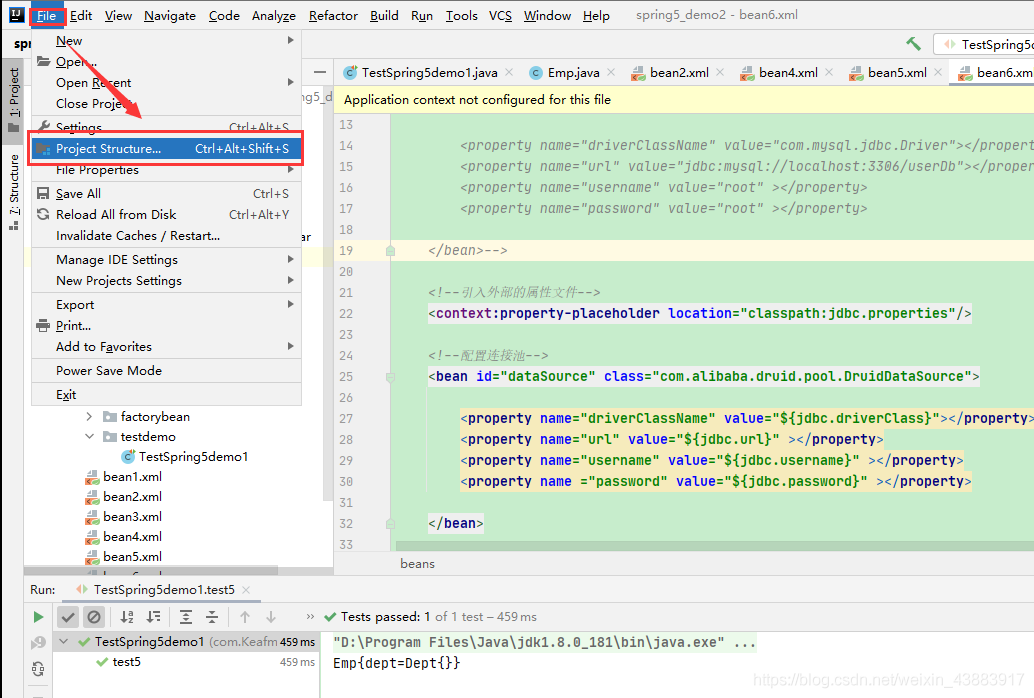
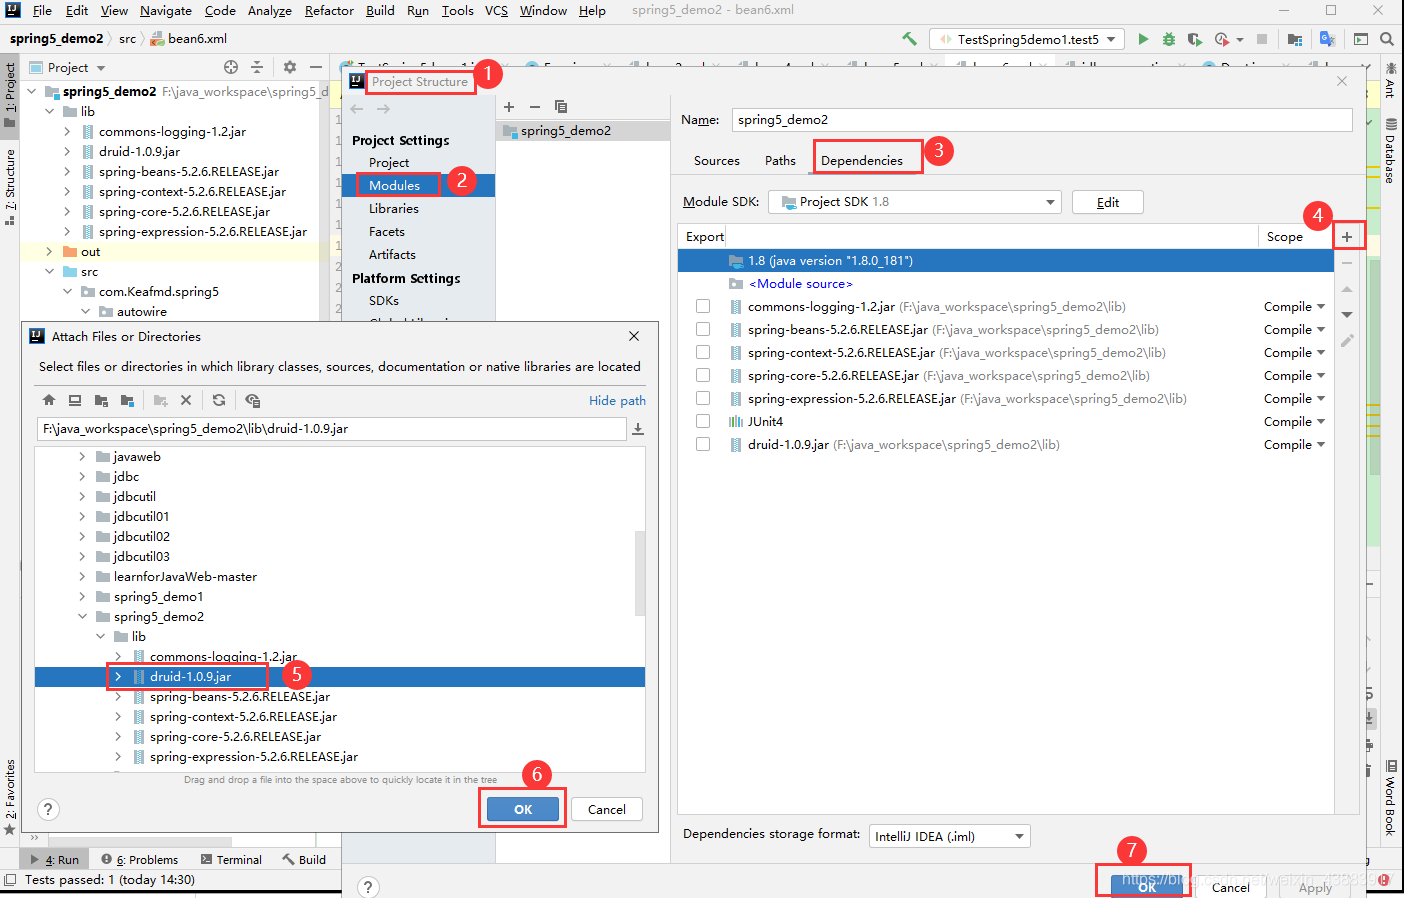
(2)引入到当前项目。


2.配置德鲁伊连接池
(1)新建一个jdbc.properties文件,写数据库的相关信息。
jdbc.properties:
jdbc.driverClass=com.mysql.jdbc.Driver
jdbc.url=jdbc:mysql://127.0.0.1:3306/userDb?characterEncoding=utf8&useUnicode=true&useSSL=false
jdbc.username=root
jdbc.password=root
(2)新建一个配置文件。
bean6.xml:
<?xml version="1.0" encoding="UTF-8"?>
<beans xmlns="http://www.springframework.org/schema/beans"
    xmlns:xsi="http://www.w3.org/2001/XMLSchema-instance"
    xmlns:p="http://www.springframework.org/schema/p"
    xmlns:util="http://www.springframework.org/schema/util"
    xmlns:context="http://www.springframework.org/schema/context"
    xsi:schemaLocation="http://www.springframework.org/schema/beans http://www.springframework.org/schema/beans/spring-beans.xsd
              http://www.springframework.org/schema/util http://www.springframework.org/schema/util/spring-util.xsd
              http://www.springframework.org/schema/context http://www.springframework.org/schema/context/spring-context.xsd">


  <!--引入外部的属性文件-->
  <context:property-placeholder location="classpath:jdbc.properties"/>

  <!--配置连接池-->
  <bean id="dataSource" class="com.alibaba.druid.pool.DruidDataSource">

    <property name="driverClassName" value="${jdbc.driverClass}"></property>
    <property name="url" value="${jdbc.url}" ></property>
    <property name="username" value="${jdbc.username}" ></property>
    <property name ="password" value="${jdbc.password}" ></property>

  </bean>

</beans>
完成以上步骤,就完成了引入外部属性文件配置数据库连接。
到此这篇关于Spring引入外部属性文件配置数据库连接的步骤详解的文章就介绍到这了,更多相关Spring外部属性文件内容请搜索脚本之家以前的文章或继续浏览下面的相关文章希望大家以后多多支持脚本之家!
