Windows10配置VSCode C++环境(超详细,面向小白以及大佬们)
作者:张俊浩
这篇文章主要介绍了Windows10配置VSCode C++环境(超详细,面向小白以及大佬们),文中通过示例代码介绍的非常详细,对大家的学习或者工作具有一定的参考学习价值,需要的朋友们下面随着小编来一起学习学习吧
我看了网上的大佬们配的我是在是看不懂啊?我是一个小白啊?这太难了,这阻挡不了我,想使用这很骚的IDE,于是在不断的摸索下,终于配置成功,小白们也不用慌,这次非常简单。一定可以的。
1.下载 VS Code
下载网址:https://code.visualstudio.com/
2.运行安装程序

一定不要忘记把Path那一条点上。
3.装MinGW
当时我下了半天找不到,这次我放个地址,github放不下这么大的文件,传文件夹的话还得ssh啥的,还不会,将就一下https://www.jb51.net/softs/438773.html
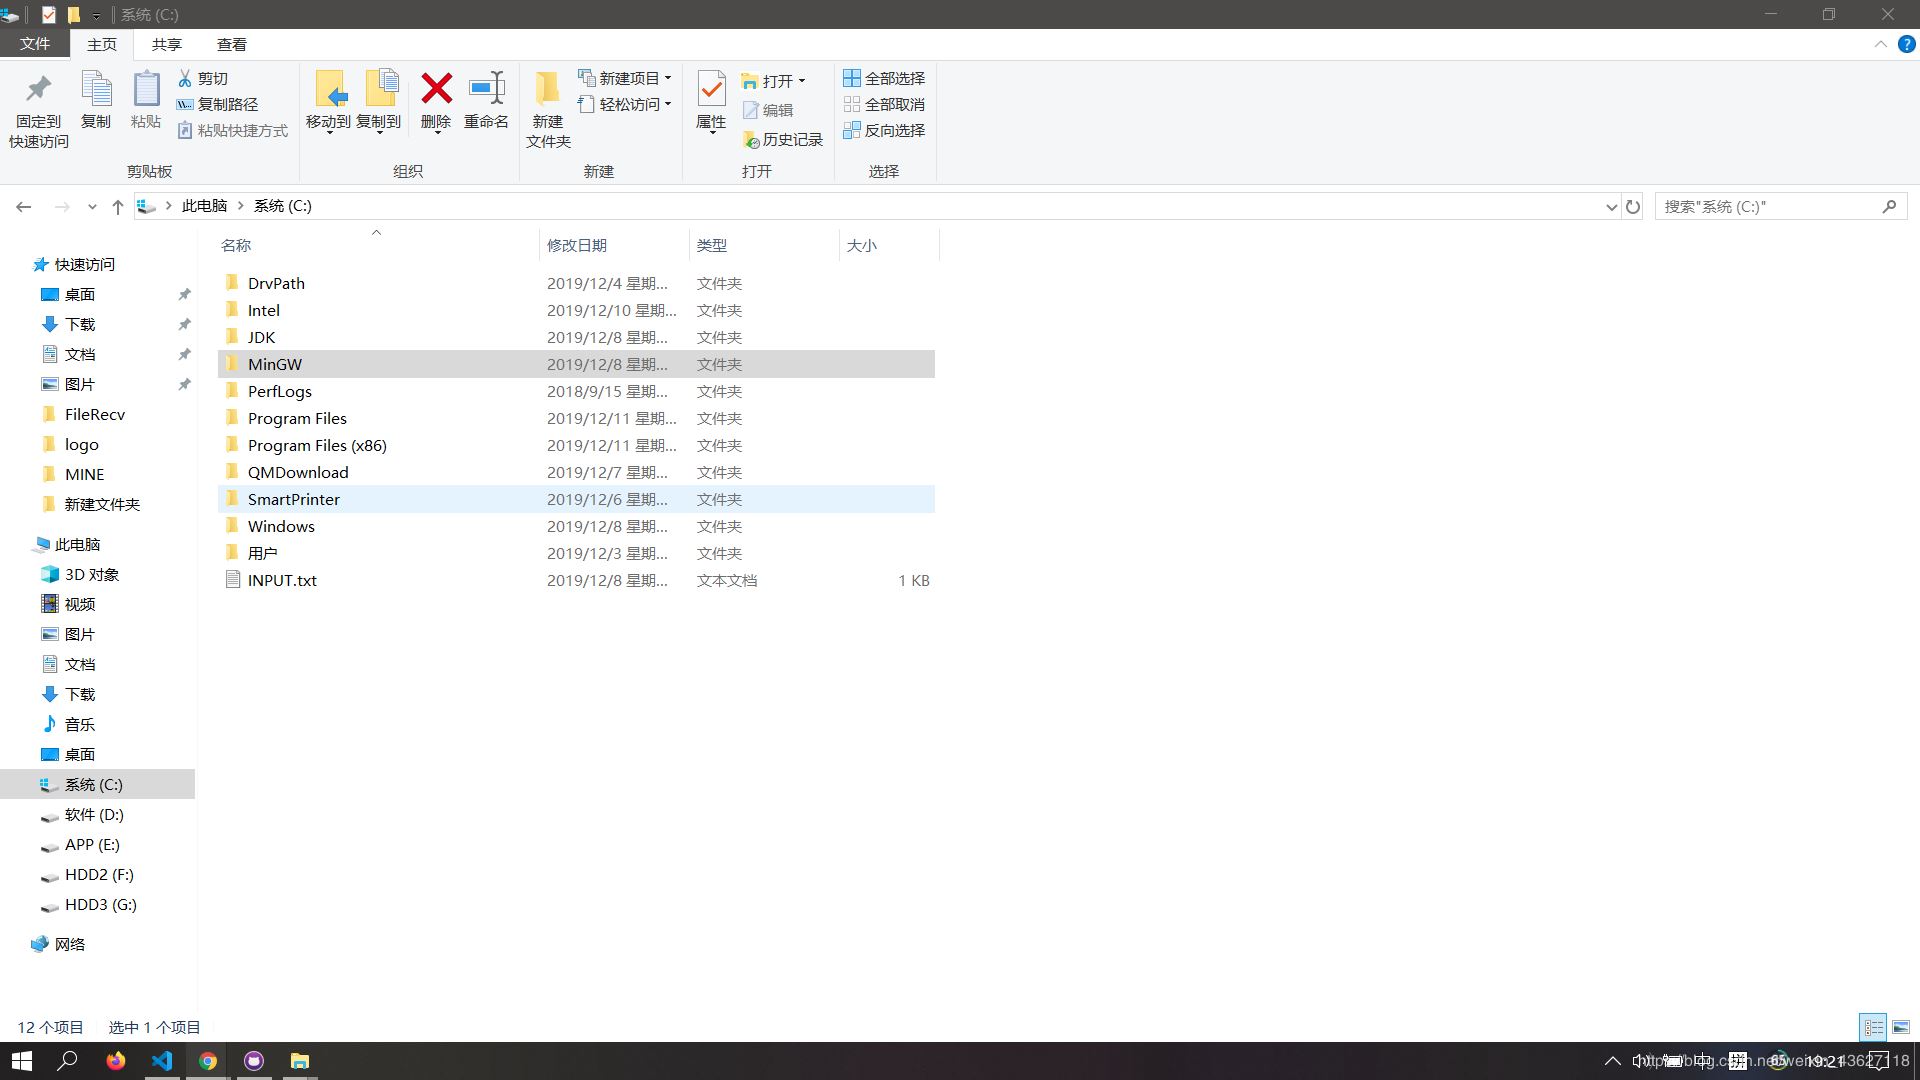
下载完了直接放到C盘根目录下,没多大,只有600M,这样的话,就不用改我配置的路径什么的了!

这样就完事了,然后是配置环境变量。
4.环境变量
会配的直接跳过即可


找到这两个path,用户和系统变量。
点击新建,然后输入 C:\MinGW\bin

这样环境变量就配置完了
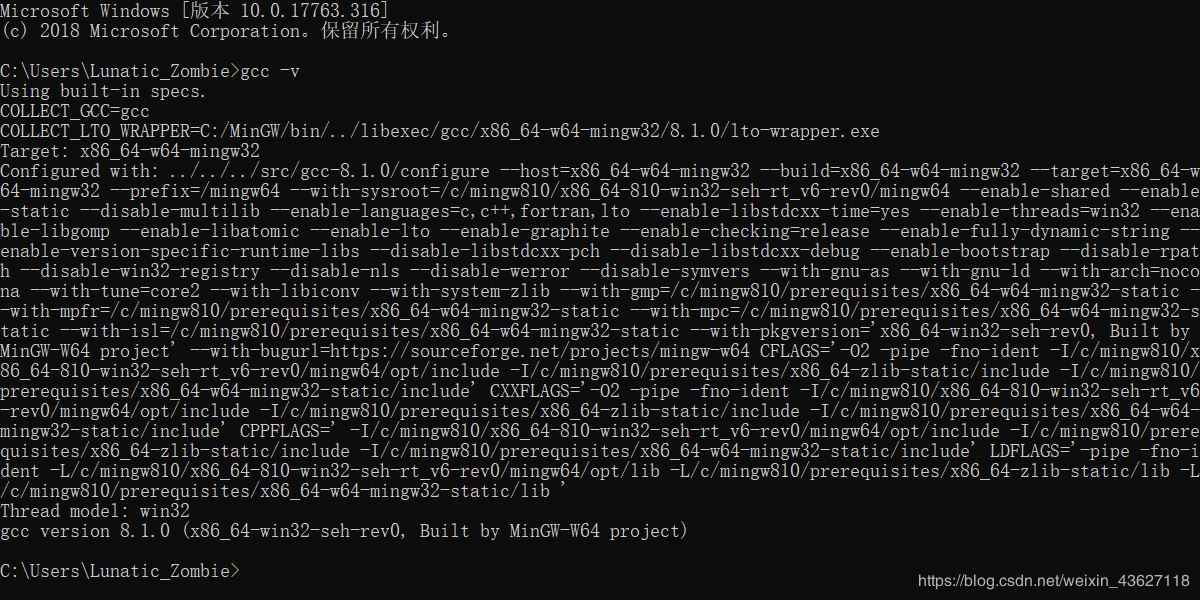
检查 win+R cmd 输入 gcc -v

这样就配完了
5.倒数第二步
下载地址,解压出来 https://github.com/DuYuren/MinGW/tree/vscode
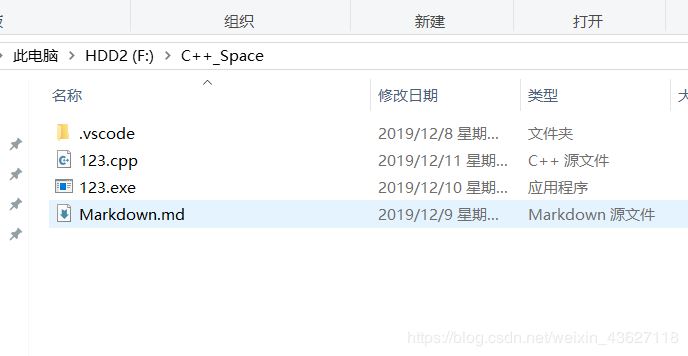
建个文件夹随便什么名字
把我的 .vscode 放里面

6.最后一步

然后在刚才那个文件夹里写个C++文件,就可以编译了,F5呦。
如果纯粹是来找json文件的
大佬们改改位置就能用
c_cpp_properties.json
{
  "configurations": [
    {
      "name": "Win32",
      "includePath": [
        "${workspaceFolder}/**",
        "C:/MinGW/include/*"
      ],
      "defines": [
        "_DEBUG",
        "UNICODE",
        "_UNICODE"
      ],
      "compilerPath": "C:/MinGW/bin/gcc.exe",
      "cStandard": "c11",
      "cppStandard": "c++17",
      "intelliSenseMode": "gcc-x64"
    }
  ],
  "version": 4
}
launch.json
{
  "version": "0.2.0",
  "configurations": [
    {
      "name": "(gdb) Launch",
      "type": "cppdbg",
      "request": "launch",
      "targetArchitecture": "x86",
      "program": "${fileDirname}\\${fileBasenameNoExtension}.exe",
      "miDebuggerPath": "c:\\MinGW\\bin\\gdb.exe",
      "args": [],
      "stopAtEntry": false,
      "cwd": "${fileDirname}",
      "externalConsole": true,
      "preLaunchTask": "g++"
    }
  ]
}
settings.json
{
  "files.associations": {
    "vector": "cpp",
    "random": "cpp",
    "iostream": "cpp",
    "array": "cpp",
    "atomic": "cpp",
    "*.tcc": "cpp",
    "bitset": "cpp",
    "cctype": "cpp",
    "cfenv": "cpp",
    "charconv": "cpp",
    "chrono": "cpp",
    "cinttypes": "cpp",
    "clocale": "cpp",
    "cmath": "cpp",
    "codecvt": "cpp",
    "complex": "cpp",
    "condition_variable": "cpp",
    "csetjmp": "cpp",
    "csignal": "cpp",
    "cstdarg": "cpp",
    "cstddef": "cpp",
    "cstdint": "cpp",
    "cstdio": "cpp",
    "cstdlib": "cpp",
    "cstring": "cpp",
    "ctime": "cpp",
    "cuchar": "cpp",
    "cwchar": "cpp",
    "cwctype": "cpp",
    "deque": "cpp",
    "forward_list": "cpp",
    "list": "cpp",
    "unordered_map": "cpp",
    "unordered_set": "cpp",
    "exception": "cpp",
    "algorithm": "cpp",
    "functional": "cpp",
    "iterator": "cpp",
    "map": "cpp",
    "memory": "cpp",
    "memory_resource": "cpp",
    "numeric": "cpp",
    "optional": "cpp",
    "ratio": "cpp",
    "regex": "cpp",
    "set": "cpp",
    "string": "cpp",
    "string_view": "cpp",
    "system_error": "cpp",
    "tuple": "cpp",
    "type_traits": "cpp",
    "utility": "cpp",
    "fstream": "cpp",
    "future": "cpp",
    "initializer_list": "cpp",
    "iomanip": "cpp",
    "iosfwd": "cpp",
    "istream": "cpp",
    "limits": "cpp",
    "mutex": "cpp",
    "new": "cpp",
    "ostream": "cpp",
    "scoped_allocator": "cpp",
    "shared_mutex": "cpp",
    "sstream": "cpp",
    "stdexcept": "cpp",
    "streambuf": "cpp",
    "thread": "cpp",
    "typeindex": "cpp",
    "typeinfo": "cpp",
    "valarray": "cpp"
  },
  "editor.fontFamily": "Consolas, 'Fira code', monospace",
  "C_Cpp.errorSquiggles": "Disabled"
}
tasks.json
{
 "version": "2.0.0",
 "command": "g++",
 "type": "shell",
 "presentation": {
  "echo": true,
  "reveal": "always",
  "focus": false,
  "panel": "shared",
  "showReuseMessage": true,
  "clear": false
 },
 "args": ["-g", "${file}", "-o", "${fileDirname}\\${fileBasenameNoExtension}.exe"],
 "problemMatcher": {
  "owner": "cpp",
  "fileLocation": ["relative", "${workspaceRoot}"],
  "pattern": {
   "regexp": "^(.*):(\\d+):(\\d+):\\s+(warning|error):\\s+(.*)$",
   "file": 1,
   "line": 2,
   "column": 3,
   "severity": 4,
   "message": 5
  }
 }
}
以上就是本文的全部内容,希望对大家的学习有所帮助,也希望大家多多支持脚本之家。
