iOS 高德地图仿微信发送实时位置
作者:太阳和风与旅行者
这篇文章主要介绍了iOS 高德地图仿微信发送实时位置,小编觉得挺不错的,现在分享给大家,也给大家做个参考。一起跟随小编过来看看吧
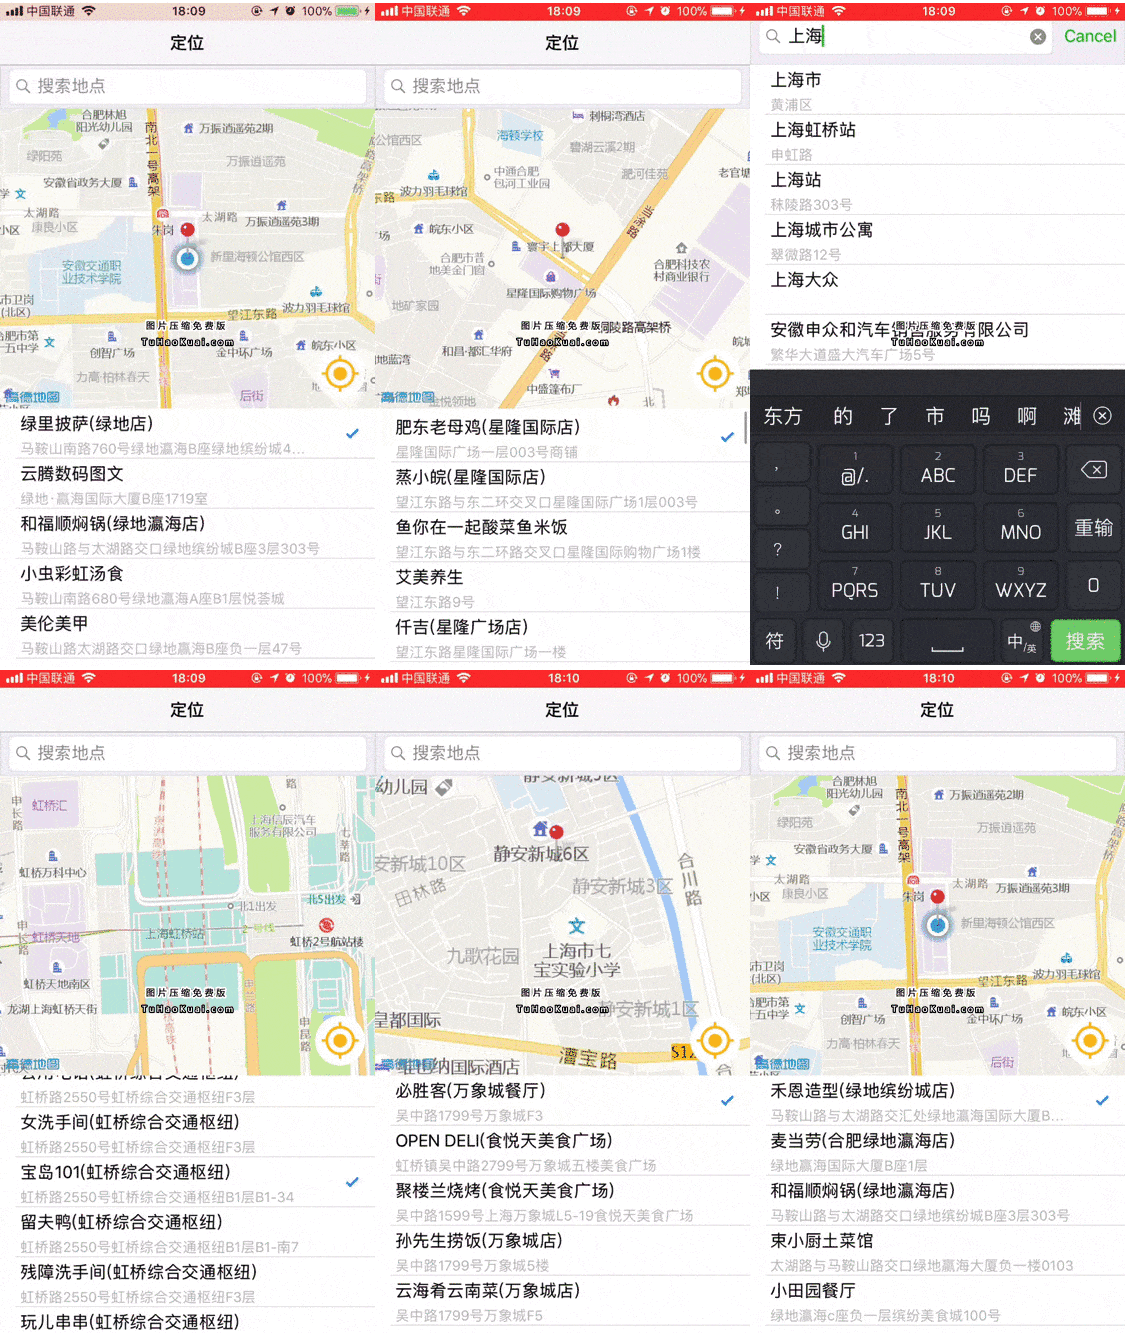
最近项目中要写一个微信那种发送位置的功能。具体功能在于:
- 定位到当前位置
- 可定位当前位置附近的Poi
- 可自行搜索目标位置,并展示附近的poi
- 选择当前位置或者选择目标位置进行发送

一.准备工作
1.首先去高德地图官网下载相关的SDK(如下图):

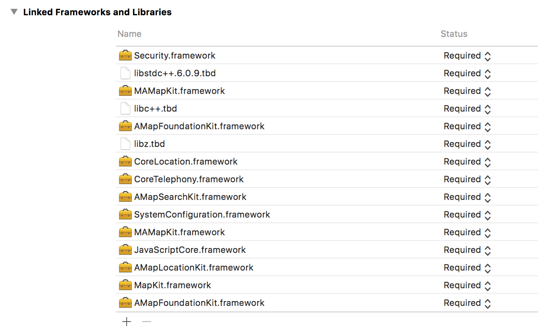
2.按照高德地图官网的步骤继续添加所需要的依赖库

3.根据项目的bundleID前往高德地图API中创建引用并申请相关的key
到这一步前期的准备工作基本差不多了,当然,我这写的不是很具体,详细的引入高德地图SDK还需要耐心按照高德地图官网SDK一步步的去操作
二.代码部分
1.初始化高德地图SDK
在AppleDelegate中引入相关头文件,从高德地图应用管理中找到该应用对用的key值,进行高德地图SDK的初始化操作。直接贴代码部分:
#import "AppDelegate.h"
#import "ViewController.h"
#import <AMapLocationKit/AMapLocationKit.h>
#import <AMapFoundationKit/AMapFoundationKit.h>

static NSString *APIKey = @"a1500980e29b7ca7612a46c19e0d2e3a";
@interface AppDelegate ()

@end
@implementation AppDelegate


- (BOOL)application:(UIApplication *)application didFinishLaunchingWithOptions:(NSDictionary *)launchOptions {
  self.window = [[UIWindow alloc] initWithFrame:[UIScreen mainScreen].bounds];
  [self.window makeKeyAndVisible];
  self.window.rootViewController = [[UINavigationController alloc] initWithRootViewController:[ViewController new]];
  [AMapServices sharedServices].apiKey = APIKey;

  return YES;
}
2.定位到用户当前位置
在你需要定位的类中引入与地图相关的头文件
初始化地图view:
- (void)initMapView{
  self.mapView = [[MAMapView alloc] initWithFrame:CGRectMake(0, 64 + 44, SCREEN_WIDTH, 300)];
  self.mapView.delegate = self;
  self.mapView.mapType = MAMapTypeStandard;
  self.mapView.showsScale = NO;
  self.mapView.showsCompass = NO;
  self.mapView.showsUserLocation = YES;
  [self.view addSubview:self.mapView];

  UIButton *localButton = [UIButton buttonWithType:UIButtonTypeCustom];
  localButton.backgroundColor = [UIColor redColor];
  localButton.frame = CGRectMake(SCREEN_WIDTH - 60, 240, 50, 50);
  [localButton addTarget:self action:@selector(localButtonAction) forControlEvents:UIControlEventTouchUpInside];
  localButton.layer.cornerRadius = 25;
  localButton.clipsToBounds = YES;
  [localButton setImage:[UIImage imageNamed:@"定位"] forState:UIControlStateNormal];
  [self.mapView addSubview:localButton];

}
// 定位SDK

- (void)configLocationManager {
  self.locationManager = [[AMapLocationManager alloc] init];
  [self.locationManager setDelegate:self];
  [self.locationManager setDesiredAccuracy:kCLLocationAccuracyHundredMeters];
  //单次定位超时时间
  [self.locationManager setLocationTimeout:6];
  [self.locationManager setReGeocodeTimeout:3];
}
开启定位操作:
- (void)locateAction {
  [self showHudInView:self.view hint:@"正在定位..."];
  //带逆地理的单次定位
  [self.locationManager requestLocationWithReGeocode:YES completionBlock:^(CLLocation *location, AMapLocationReGeocode *regeocode, NSError *error) {
    if (error) {
      [self showHint:@"定位错误" yOffset:-180];
      NSLog(@"locError:{%ld - %@};",(long)error.code,error.localizedDescription);
      if (error.code == AMapLocationErrorLocateFailed) {
        return ;
      }
    }
    //定位信息
    NSLog(@"location:%@", location);
    if (regeocode)
    {
      [self hideHud];
      self.currentLocationCoordinate = CLLocationCoordinate2DMake(location.coordinate.latitude, location.coordinate.longitude);
      self.city = regeocode.city;
      [self showMapPoint];
      [self setCenterPoint];
      self.request.location = [AMapGeoPoint locationWithLatitude:location.coordinate.latitude longitude:location.coordinate.longitude];
      [self.mapSearch AMapPOIAroundSearch:self.request];
    }
  }];
}
定位成功之后展示大头针到当前位置(如果一直不显示大头针,检查一下自己是否导入了高德地图的资源文件):
- (void)showMapPoint{
  [_mapView setZoomLevel:15.1 animated:YES];
  [_mapView setCenterCoordinate:self.currentLocationCoordinate animated:YES];
}

- (void)setCenterPoint{
  MAPointAnnotation * centerAnnotation = [[MAPointAnnotation alloc] init];//初始化注解对象
  centerAnnotation.coordinate = self.currentLocationCoordinate;//定位经纬度
  centerAnnotation.title = @"";
  centerAnnotation.subtitle = @"";
  [self.mapView addAnnotation:centerAnnotation];//添加注解

}
#pragma mark - MAMapView Delegate
- (MAAnnotationView *)mapView:(MAMapView *)mapView
      viewForAnnotation:(id<MAAnnotation>)annotation {
  if ([annotation isKindOfClass:[MAPointAnnotation class]]) {
    static NSString *pointReuseIndentifier = @"pointReuseIndentifier";
    MAPinAnnotationView*annotationView = (MAPinAnnotationView*)[mapView dequeueReusableAnnotationViewWithIdentifier:pointReuseIndentifier];
    if (annotationView == nil)
    {
      annotationView = [[MAPinAnnotationView alloc] initWithAnnotation:annotation reuseIdentifier:pointReuseIndentifier];
    }
    annotationView.canShowCallout= YES;    //设置气泡可以弹出,默认为NO
    annotationView.animatesDrop = YES;    //设置标注动画显示,默认为NO
    annotationView.draggable = YES;    //设置标注可以拖动,默认为NO
    annotationView.pinColor = MAPinAnnotationColorRed;
    return annotationView;
  }
  return nil;
}
地图的代理方法等:
- (void)mapView:(MAMapView *)mapView regionDidChangeAnimated:(BOOL)animated{
  [self.mapView removeAnnotations:self.mapView.annotations];

  CLLocationCoordinate2D centerCoordinate = mapView.region.center;
  self.currentLocationCoordinate = centerCoordinate;

  MAPointAnnotation * centerAnnotation = [[MAPointAnnotation alloc] init];
  centerAnnotation.coordinate = centerCoordinate;
  centerAnnotation.title = @"";
  centerAnnotation.subtitle = @"";
  [self.mapView addAnnotation:centerAnnotation];
  //主动选择地图上的地点
  if (!self.isSelectedAddress) {
    [self.tableView setContentOffset:CGPointMake(0,0) animated:NO];
    self.selectedIndexPath=[NSIndexPath indexPathForRow:0 inSection:0];
    self.request.location = [AMapGeoPoint locationWithLatitude:centerCoordinate.latitude longitude:centerCoordinate.longitude];
    self.currentPage = 1;
    self.request.page = self.currentPage;
    [self.mapSearch AMapPOIAroundSearch:self.request];
  }
  self.isSelectedAddress = NO;
}
包括主动选择地图上的点然后进行附近的搜索,可自定义搜索的内容,定位成功之后用户可以获取到当前的经纬度地址等一系列信息。详细的代码有点多就不一一贴出来了,需要的同学可以点击下面的github地址去下载体验。
github地址:https://github.com/XuZzzzzzzz/XCLocation
以上就是本文的全部内容,希望对大家的学习有所帮助,也希望大家多多支持脚本之家。
