
平面设计 > Illustrator教程 >
Illustrator CS4鼠绘卡通绿叶子大树
长颈鹿
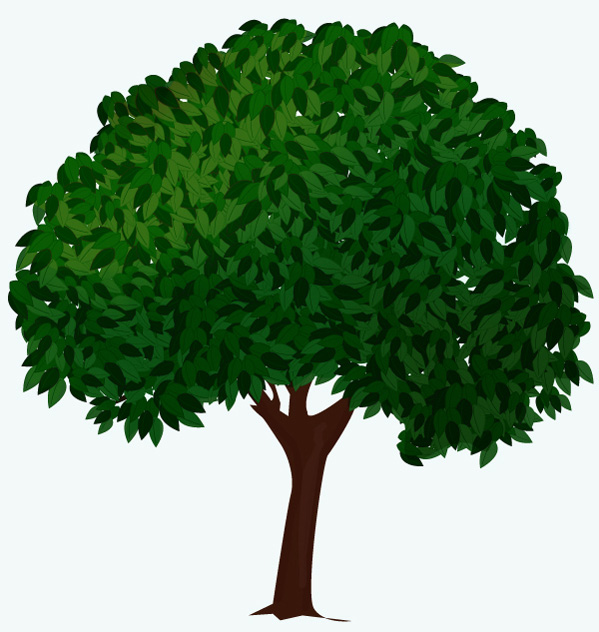
最终效果图预览
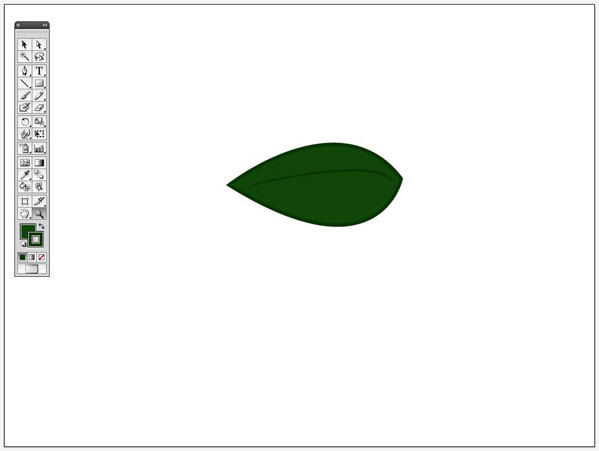
步骤1
首先,我们将创建自定义的笔刷。
选择钢笔工具(P),并画出叶子的形状。填充形状和路径,并调整到深绿色。

步骤2
用钢笔工具(P)创建一个弯曲的线条,用同一种着色描出,穿过整个树叶。
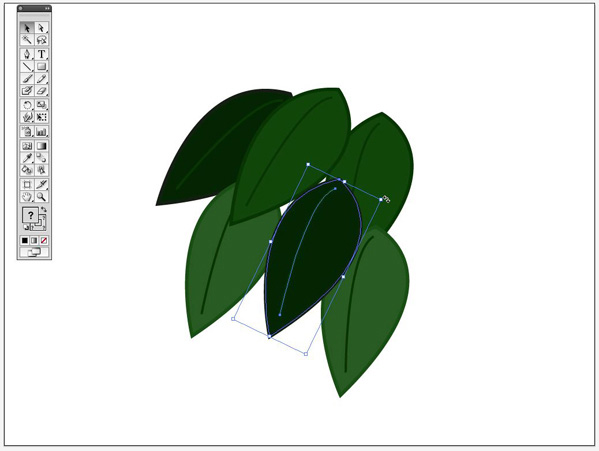
步骤3
制作两片树叶,并改变填充颜色为暗绿和亮绿色,crtl+G进行群组,现在对群组后的树叶进行复制。

步骤4
把树叶向下旋转倾斜,并将他们重叠在一起,并使其在同一方向。
步骤5
双击比例缩放工具。确保“Scale strokes&Effects”选项被选择,按下OK。

步骤6
现在选择所有叶子,并群组(ctrl+G)。

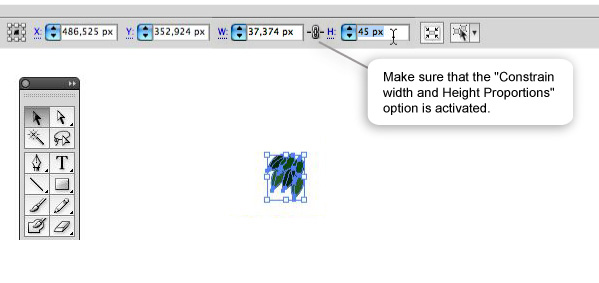
步骤7
仍然选择叶子,设置这个宽度为45px,确保约束宽度和高度比例选项被激活。
步骤8
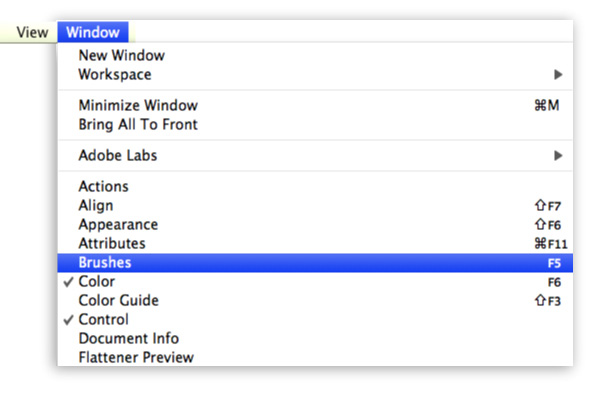
设置并描边为1pt,选择叶子,现在打开那个笔刷窗口,在顶右边的窗口有一个面朝下的小三角,点击它,选择笔刷…

步骤9
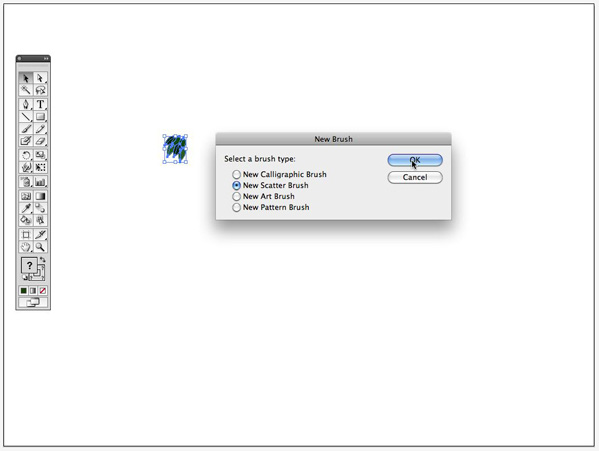
选择散刷(Scatter Brush)。
步骤10
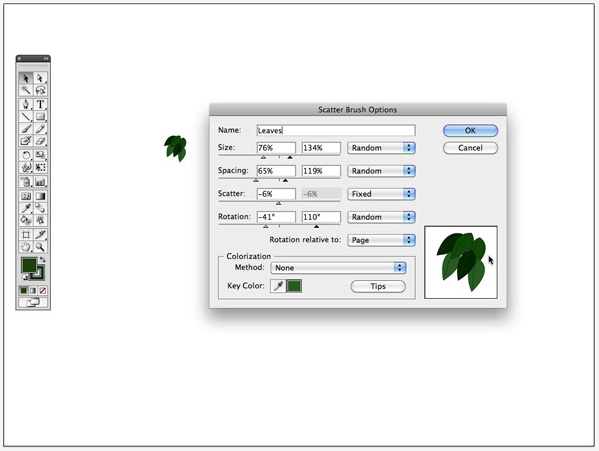
选择:(散刷选项)
Size: Random between 76% – 134%
Spacing: Random between 65% – 119%
Scatter: Fixed – 6%
Rotation: Random between 41° – 110°
步骤11
现在我们来看如何绘制树。
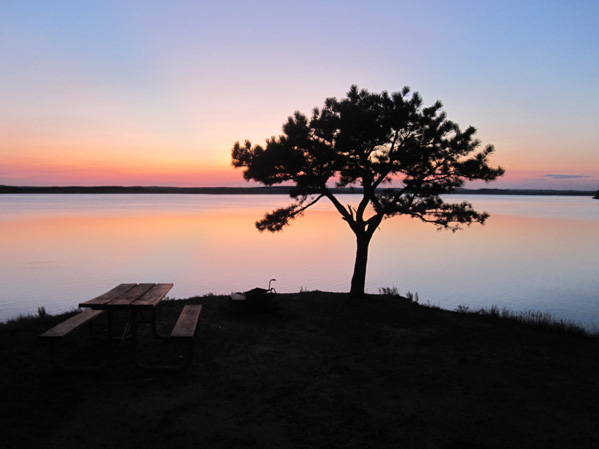
新建一层,命名为“背景图片。”你需要的是一棵用于绘制时借鉴参考的树。我选择使用一个我自己的图片,但你可以使用任何你想用的图片,来描绘这个树杆痕迹。

步骤12
在“背景图片”层置入这张树的图片,并锁定该层。
步骤13
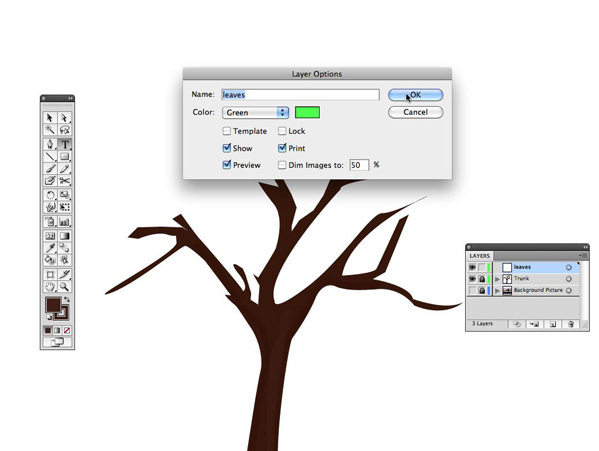
创建一个新层,并取名为“树杆。
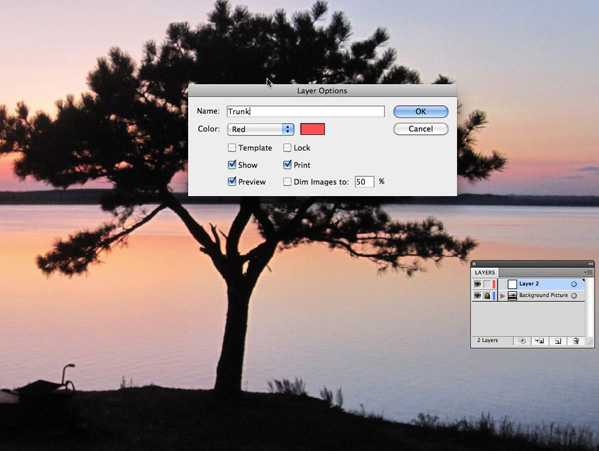
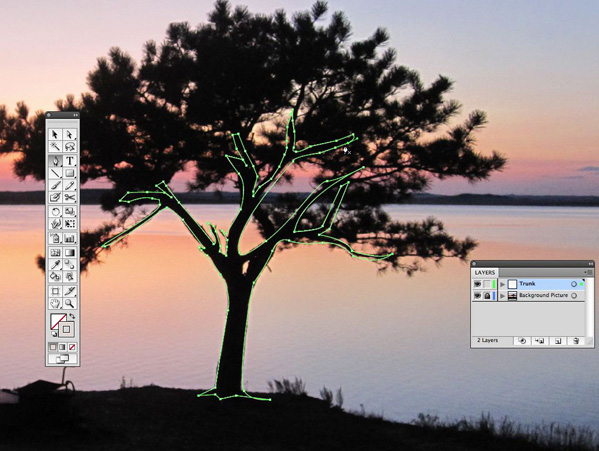
步骤14
选择钢笔工具(P),然后在“树杆”层开始描绘轮廓。
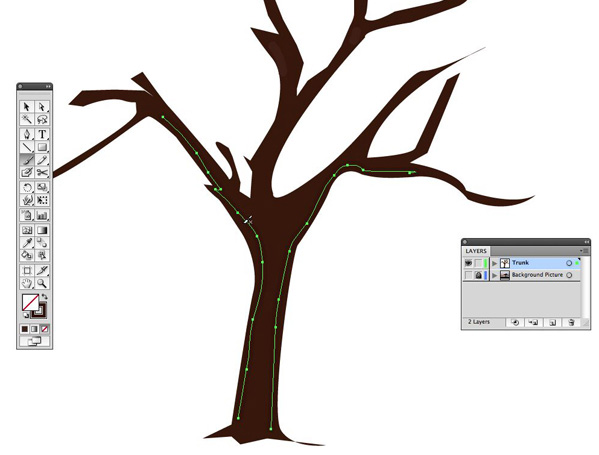
步骤15
隐藏这个“背景图片”层,用暗褐色填充形状,并设置描边为零。

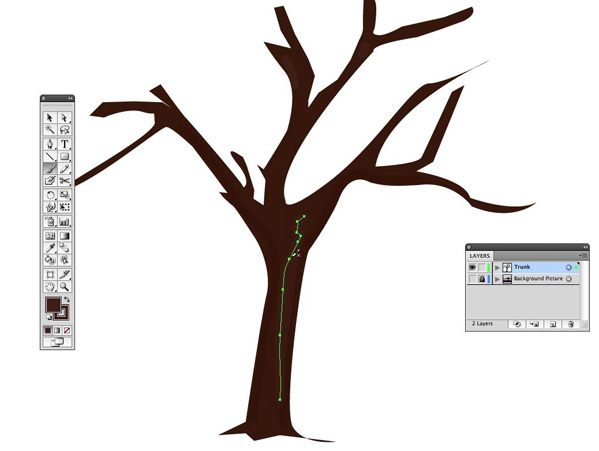
步骤16
现在我们要创造出一些树干上的阴影。(选择笔刷工具(B),和一个圆刷漆厚线里面的躯干的纲要的形状。用暗褐色填充它,给它一45%个透明度。在左边的树干重复同样的操作。随着轮廓的外线在树杆的里侧用一个圆笔刷画出一条粗线。
步骤17
用30%的透明度在树杆的中心选择高亮的褐色置入一条线。
步骤18
选择所有的树杆部分并群组(ctrl+G)它们,然后锁定这个层。

步骤19
我们现在在完成这棵树之前,打算使用创建笔刷。
步骤20
采用笔刷工具(B)。选择你的新叶子笔刷刷托盘。确保填充设置为空。绘制一条置入了树的外线。
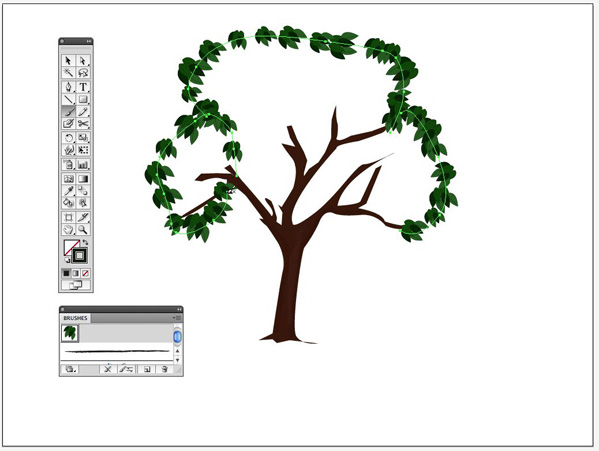
步骤21
仍然选择笔刷工具,在你刚刚绘制的外线里的空白处开始绘制,留下三两个洞,使这棵树更逼真,并且用用额外增加的叶子润饰边缘。
步骤22
现在我们用渐变网格工具来创建一些叶子的阴影和灯光,创建一个层,并命名为”灯光“锁定这个图层。
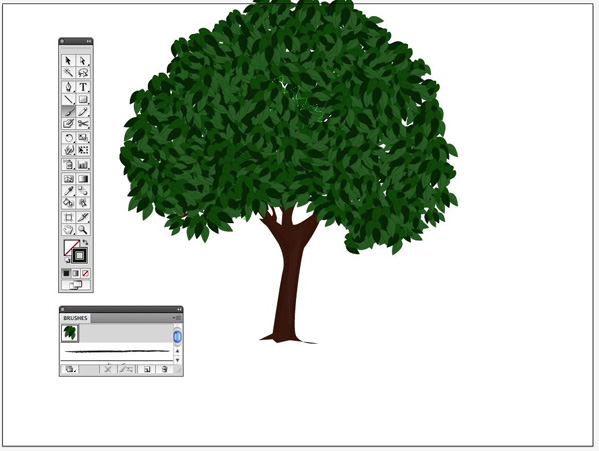
步骤23
填充形状与颜色为一般绿色,设定笔画为零。
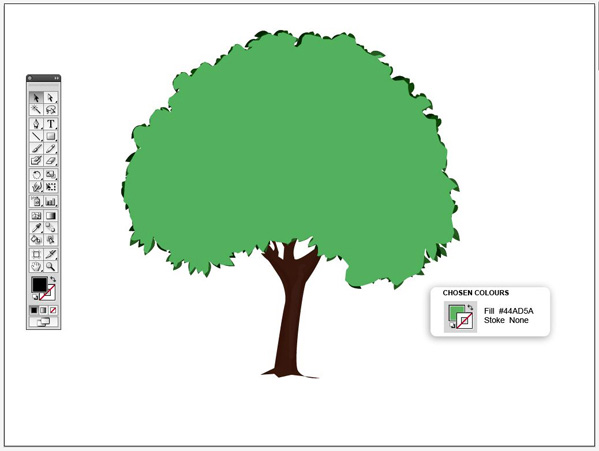
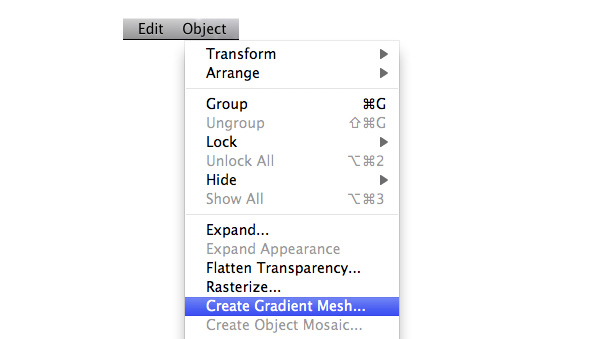
步骤24
仍然选择物体〉渐变网格工具,检查预览框,设定Rows to 4, Columns to 4, Appearance of Flat, and Highlight at 100%,然后按OK。
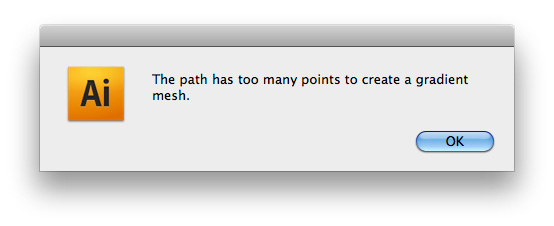
如果你得到一个错误信息,读下面的提示。

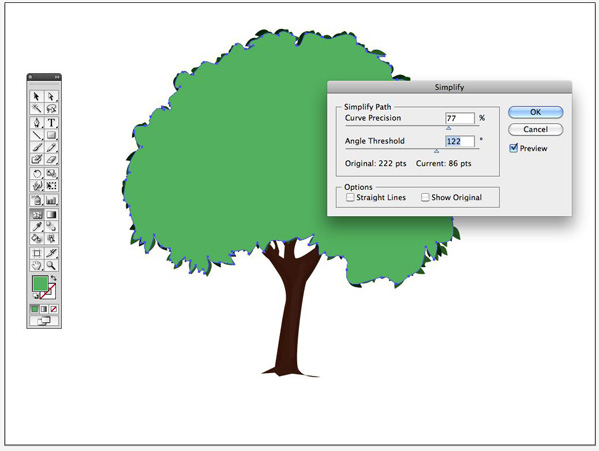
Extra – Skip if You Don’t Get an Error Message
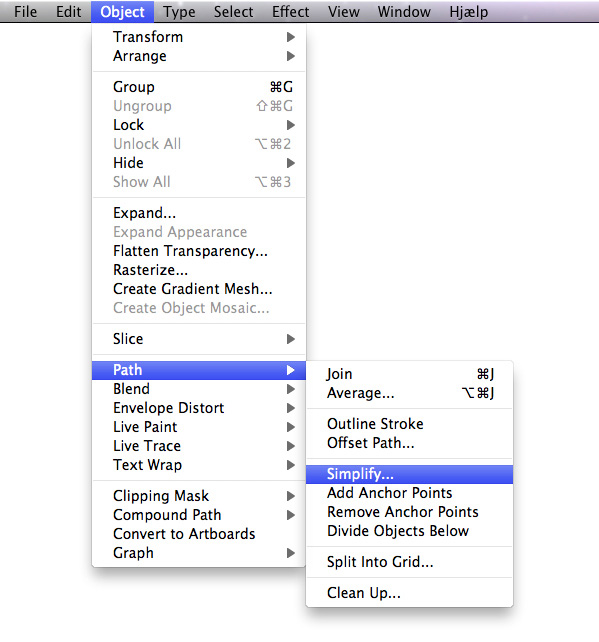
If you get an error message saying that “the path has too many points to create a gradient mesh”, then you can do one of the following:
Redraw the shape without as many points Or go back, select the shape, and go to Object > Path > Simplify. Check the preview box, and bring both the Curve Precision and the Angle Threshold down until the Current pt is under 100. Then you are ready to repeat Step 24.
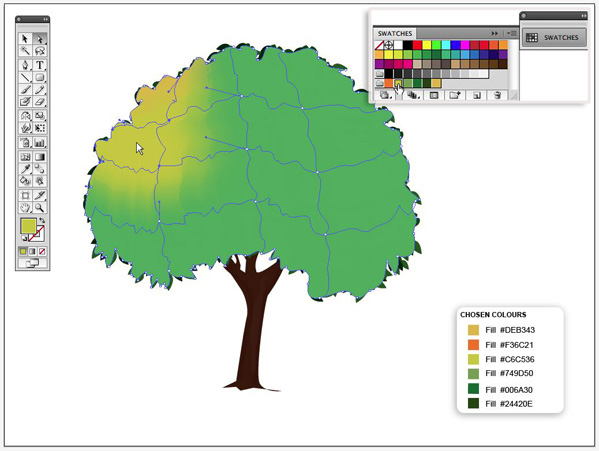
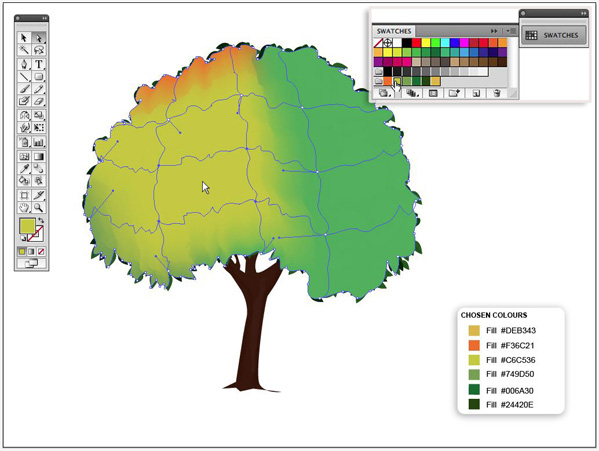
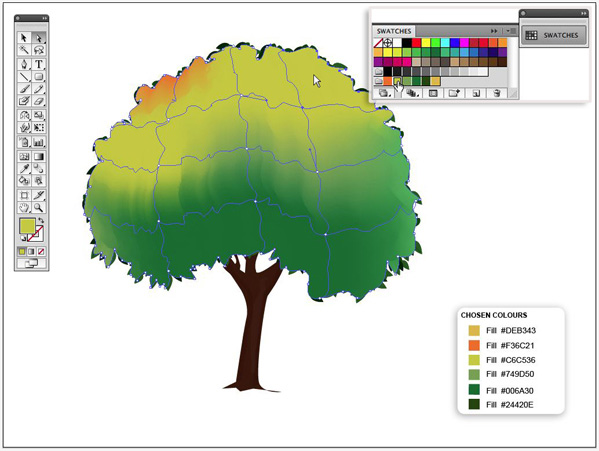
步骤25
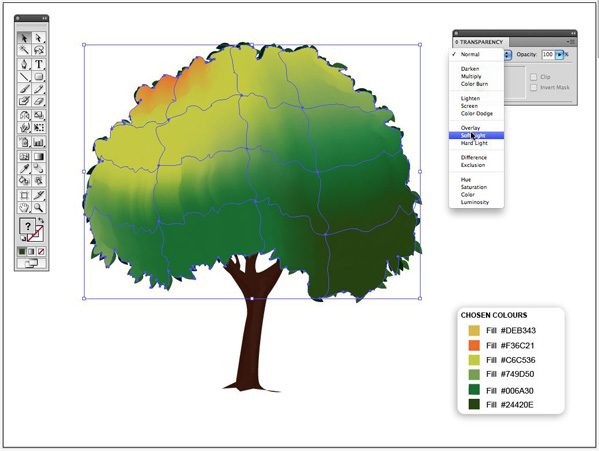
我们现在到着色渐变网格,你可能选择一些基于你的喜好想要的颜色,例如,我将选择树的左边有一些阳光,右边有一些倒影的效果的颜色。
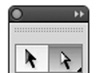
这个渐变网格已经在你的形状里创建了16个选区,用直选工具点击第一个形状的中部。
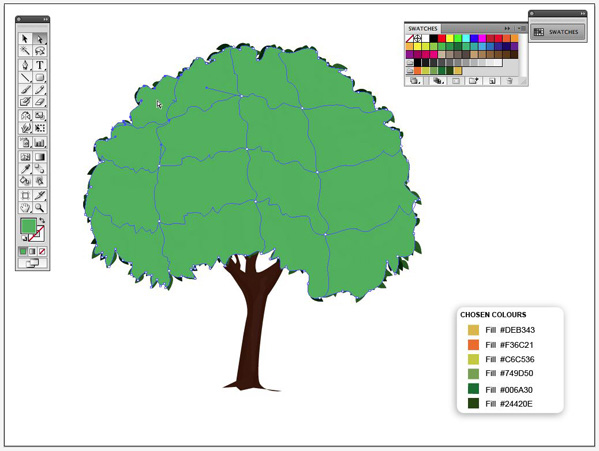
用那个区域选择,选择一个不太明亮的黄颜色。
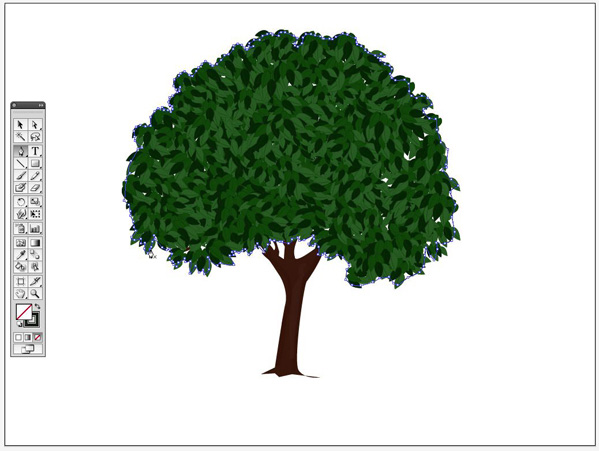
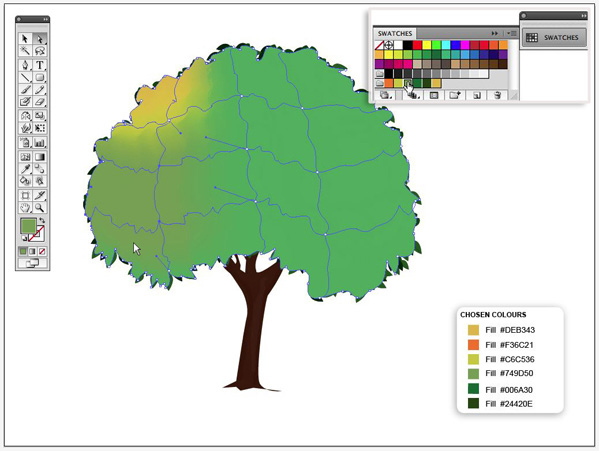
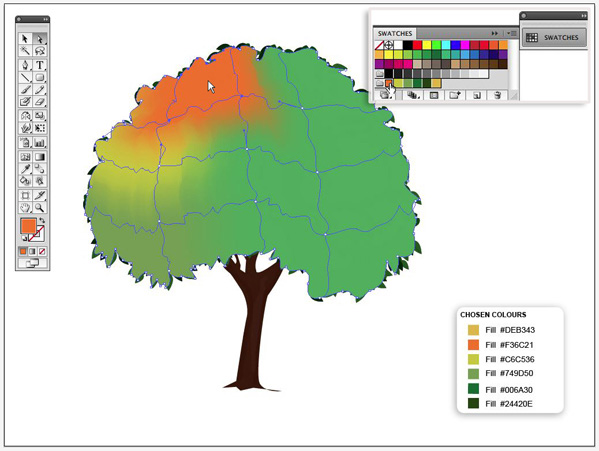
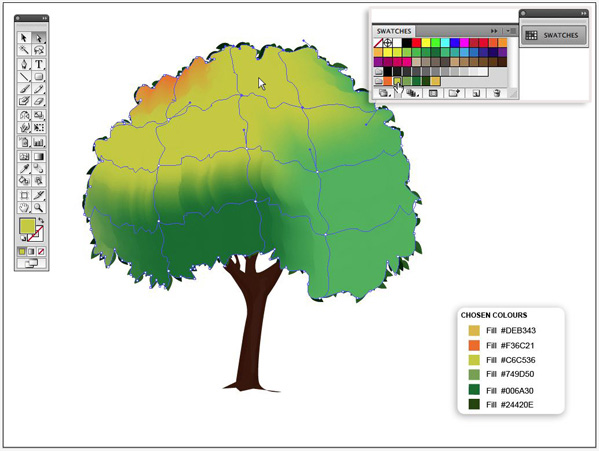
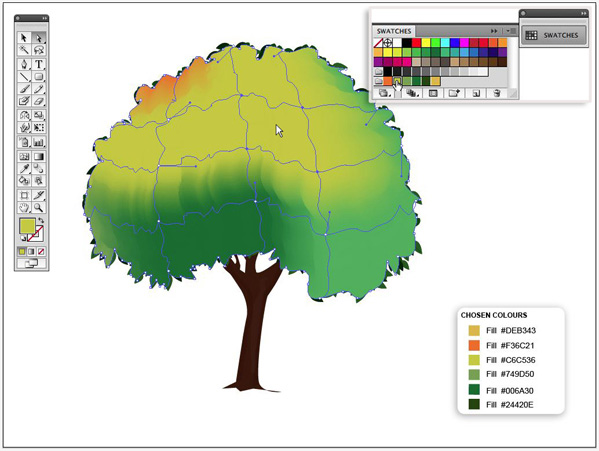
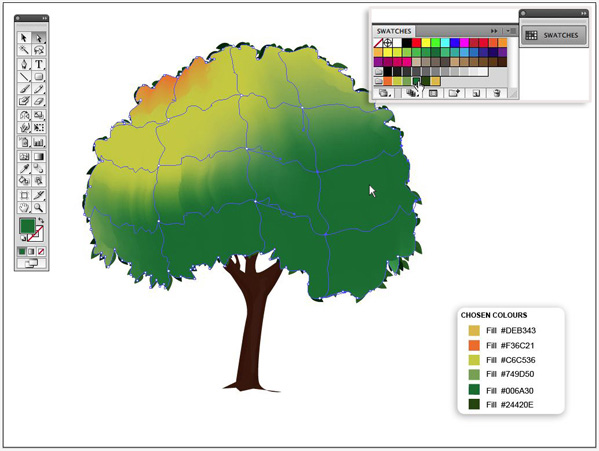
步骤26
选择渐变网格其它的区域,重复上面的步骤,并且给每一个区域适当的颜色。我已经选择在网格右边置入黄绿相间的高亮阴影,和在网格底部的左边置入深绿色。
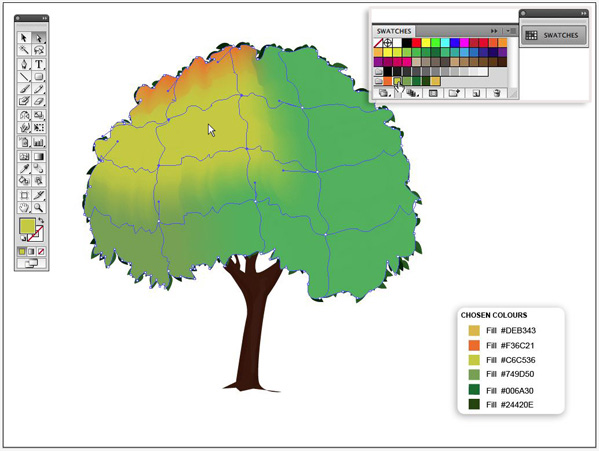

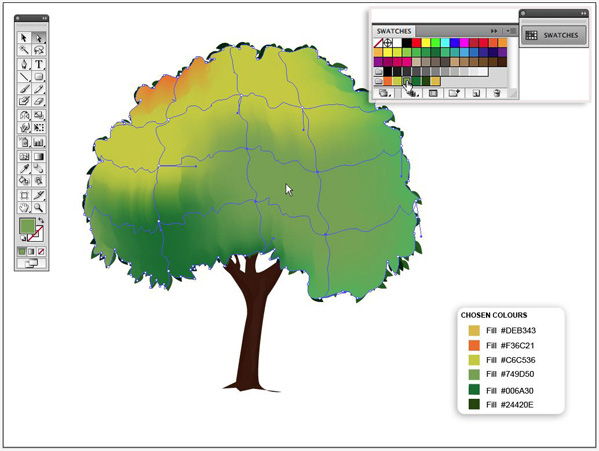


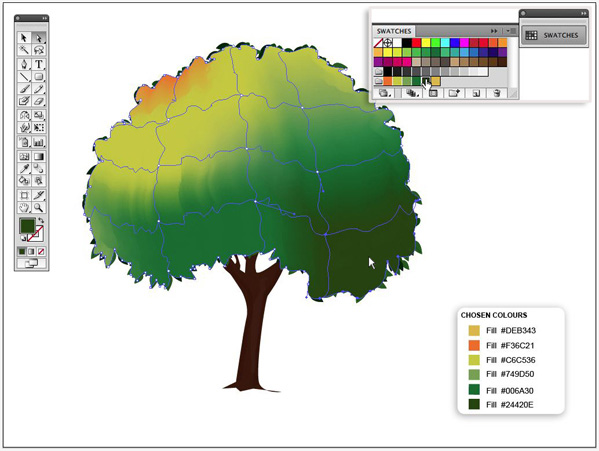
步骤27
用选择工具选择渐变网格的外形。
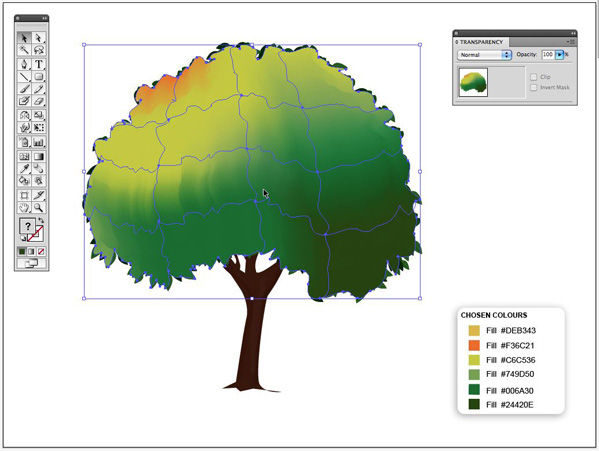
步骤28
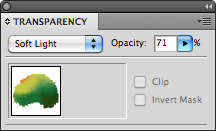
打开opacity window (Window > Transparency(透明度)窗口模式,还是选择“柔和光”选项,不透明度设定为71%。
最后的结果

现在就让这个工具去创建你自己的森林吧。

步骤1
首先,我们将创建自定义的笔刷。
选择钢笔工具(P),并画出叶子的形状。填充形状和路径,并调整到深绿色。

步骤2
用钢笔工具(P)创建一个弯曲的线条,用同一种着色描出,穿过整个树叶。

步骤3
制作两片树叶,并改变填充颜色为暗绿和亮绿色,crtl+G进行群组,现在对群组后的树叶进行复制。

步骤4
把树叶向下旋转倾斜,并将他们重叠在一起,并使其在同一方向。

步骤5
双击比例缩放工具。确保“Scale strokes&Effects”选项被选择,按下OK。

步骤6
现在选择所有叶子,并群组(ctrl+G)。

步骤7
仍然选择叶子,设置这个宽度为45px,确保约束宽度和高度比例选项被激活。

步骤8
设置并描边为1pt,选择叶子,现在打开那个笔刷窗口,在顶右边的窗口有一个面朝下的小三角,点击它,选择笔刷…


步骤9
选择散刷(Scatter Brush)。

步骤10
选择:(散刷选项)
Size: Random between 76% – 134%
Spacing: Random between 65% – 119%
Scatter: Fixed – 6%
Rotation: Random between 41° – 110°

步骤11
现在我们来看如何绘制树。
新建一层,命名为“背景图片。”你需要的是一棵用于绘制时借鉴参考的树。我选择使用一个我自己的图片,但你可以使用任何你想用的图片,来描绘这个树杆痕迹。

步骤12
在“背景图片”层置入这张树的图片,并锁定该层。

步骤13
创建一个新层,并取名为“树杆。

步骤14
选择钢笔工具(P),然后在“树杆”层开始描绘轮廓。

步骤15
隐藏这个“背景图片”层,用暗褐色填充形状,并设置描边为零。

步骤16
现在我们要创造出一些树干上的阴影。(选择笔刷工具(B),和一个圆刷漆厚线里面的躯干的纲要的形状。用暗褐色填充它,给它一45%个透明度。在左边的树干重复同样的操作。随着轮廓的外线在树杆的里侧用一个圆笔刷画出一条粗线。

步骤17
用30%的透明度在树杆的中心选择高亮的褐色置入一条线。

步骤18
选择所有的树杆部分并群组(ctrl+G)它们,然后锁定这个层。

步骤19
我们现在在完成这棵树之前,打算使用创建笔刷。

步骤20
采用笔刷工具(B)。选择你的新叶子笔刷刷托盘。确保填充设置为空。绘制一条置入了树的外线。

步骤21
仍然选择笔刷工具,在你刚刚绘制的外线里的空白处开始绘制,留下三两个洞,使这棵树更逼真,并且用用额外增加的叶子润饰边缘。

步骤22
现在我们用渐变网格工具来创建一些叶子的阴影和灯光,创建一个层,并命名为”灯光“锁定这个图层。

步骤23
填充形状与颜色为一般绿色,设定笔画为零。

步骤24
仍然选择物体〉渐变网格工具,检查预览框,设定Rows to 4, Columns to 4, Appearance of Flat, and Highlight at 100%,然后按OK。
如果你得到一个错误信息,读下面的提示。


Extra – Skip if You Don’t Get an Error Message
If you get an error message saying that “the path has too many points to create a gradient mesh”, then you can do one of the following:
Redraw the shape without as many points Or go back, select the shape, and go to Object > Path > Simplify. Check the preview box, and bring both the Curve Precision and the Angle Threshold down until the Current pt is under 100. Then you are ready to repeat Step 24.


步骤25
我们现在到着色渐变网格,你可能选择一些基于你的喜好想要的颜色,例如,我将选择树的左边有一些阳光,右边有一些倒影的效果的颜色。

这个渐变网格已经在你的形状里创建了16个选区,用直选工具点击第一个形状的中部。

用那个区域选择,选择一个不太明亮的黄颜色。

步骤26
选择渐变网格其它的区域,重复上面的步骤,并且给每一个区域适当的颜色。我已经选择在网格右边置入黄绿相间的高亮阴影,和在网格底部的左边置入深绿色。


步骤27
用选择工具选择渐变网格的外形。

步骤28
打开opacity window (Window > Transparency(透明度)窗口模式,还是选择“柔和光”选项,不透明度设定为71%。


最后的结果

现在就让这个工具去创建你自己的森林吧。